Advertisement
Quick Links
Installation Instructions
Ground Fixed
Cadenza
Page 1 of 3
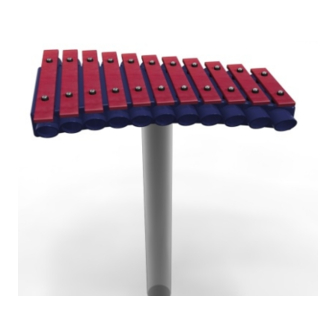
Instrument
Components:
x4
M8 Nyloc Nut
x2
M6x20 Security Screw
x4
2 Part Cover Cap
x1
M6 Saddle Strap
Metric Conversion:
250mm/ 10"
300mm/ 12"
450mm/ 18"
700mm/ 28"
850mm/ 33"
1.5m/ 59"
BS EN 1176
(1.1)
(1.3)
Weight of heaviest part
7kg
(Cadenza)
Ground Fix
Pair Small Red
Beaters X1
Components:
1. Attach the steel legs to the
base of the instrument with
the M8 Nyloc Nuts and 2 part
security caps. (1.1) (See
Assembly Guide)
2. Attach Ground Fixing posts
to legs(1.2) (See Ground Fix
Post Installation Sheet)
3.Excavate 1 hole for the Steel
legs 250mm diameter by 400-
550mm deep depending on
Key stage, in desired location
upon decision from customer.
(1.2)
4. Locate (lower) legs into
holes making sure they are
vertical and level prior to
concreting in place.
5. Once happy with location of
the Instrument, fill holes using
rapid hardening concrete. Be
sure to compact concrete
around legs and leave to dry
according to manufactures
guidelines.
6. Attach the 1 pair of beater
to the saddle strap on the leg.
(1.3)
x2
x4
M10x200 Bolt
M10 Nut
1.5m
1.5m
KS1 – 700mm
KS2 – 850mm
KS1,2
Ground Surface
KS2 - 400mm
KS1 - 550mm
Spares available from
percussionplay.com
or from your
local distributor
Install Instrument
with 1.5m free space
(from widest point)
around it.
14 Kg
Advertisement

Related Manuals for Percussion Play Soprano Quartet


Summary of Contents for Percussion Play Soprano Quartet
- Page 1 Installation Instructions 1. Attach the steel legs to the base of the instrument with the M8 Nyloc Nuts and 2 part security caps. (1.1) (See Install Instrument 1.5m 1.5m Assembly Guide) with 1.5m free space (from widest point) around it. 2.
- Page 2 Assembly Guide PPCADE Tools: TX 30 Driver Bit TX 40 Driver Bit Ground Fixed Cadenza Page 2 of 3 COMPONENTS LIST: 2 Part Cover Cap X4 Thread Lock Solution M8 Nyloc nut X4 Required (Not Supplied) M10 Nut X4 (1.1) Instrument Components: M10x200 Threaded Bar X2...
- Page 3 Ground Fix Post Installation Ground Fixed Cadenza Page 3 of 3 Ex ca v ate a hole with a Inse rt M 10x 200 Threaded Fix M 10x 200 Threaded 250m m dia m e ter tapering bar into pre drilled holes bar in pla ce using M10 do wn to 350m m diameter in G round Fixing Post...
- Page 4 Installation Instructions Install Instrument 1. Unpack ground fixing legs 8. Align holes in side of babel with 1.5m free 3no. drum with bolts on legs. space (from widest point) around it. 2. Lay packaging out on floor 9. Using 8mm Hex Key screw 1.5m 1.5m or assemble on non-abrasive...
- Page 5 Assembly Guide PPBDL-S Tools: Hex T Key TX 40 Driver Bit Thread Lock Solution Required Ground Fixed Babel Drum Page 2 of 3 Remove M10 Nuts before Instrument installing Drum Components: M8x25mm Pin Torx Thread Lock Solution Required Spares available form 22 Kg Ground Fix percussionplay.com...
- Page 6 Ground Fix Installation Insert M10x 200 Threaded Excavate a holes with a bar into pre drilled holes 250mm diameter tapering in Frame of Babel Drum down to 350mm diameter using M10 BZP Nuts and 450mm depth Compact base of hole with Ground Fixed 50mm of aggregate.
- Page 7 Installation Instructions 6. Beaters can be fixed to Install Instrument 1. Carefully lay 2 x legs on a level with 1.5m free space Steel posts with fixings surface and check distance (from widest point) provided around it. between legs is equal. Line up pre drilled holes in the backboards with the holes in legs and ensure the instrument is...
- Page 8 Assembly Guide PPFREC Tools: TX 30 Driver Bit TX 45 Driver Bit COMPONENTS LIST: Ground Fixed Freechimes M10 Nut X8 Alto/ Soprano M10x200 Threaded Bar X4 Page 2 of 4 Saddle Strap X2 M6x20 Pin torx X4 Thread Lock Solution Required (Not Supplied) M10x50 Pin torx X4 M10x70 Pin torx X2...
- Page 9 Ground Fix Post Installation Foundations should not present a hazard. These foundations are recommended Tools: Thread Lock Solution as a guide, for more information on foundation details for various surface see Required (Not Supplied) Part 7 of BS EN 1176. TX 45 Driver Bit Ground Fixed Metric Conversion:...
- Page 10 Ground Fix Installation Foundations should not present a hazard. These foundations are recommended as a guide, for more information on foundation details for various surface see Part 7 of BS EN 1176. Ground Fixed Freechimes Alto/ Soprano Page 4 of 4 (1.1) Carefully lay 2 x legs on a level surface.
- Page 11 Installation Instructions 1. Attach the steel leg to each of the congas with the M10x30 security screws, Install Instrument square washers and PU 1.5m 1.5m with 1.5m free space mounts. (1.1) (See Assembly (from widest point) around it. Guide) Ground Fixed Congas 2.
- Page 12 Assembly Guide PPCONG Tools: TX 45 Driver Bit PPCONG PLAN Ground Fixed Thread Lock Solution Congas Required (Not Supplied) Page 2 of 3 COMPONENTS LIST: (1.1) M10x50 Pin torx X4 Instrument Components: M10x50x3 square washer X4 M10 Nut X4 M10x30 Security Screw M10x200 Threaded Bar X2 M10x50x3 Square washer PU MOUNT 200 X2...
- Page 13 Ground Fix Post Installation Ground Fixed Congas Page 3 of 3 Ex ca v ate a hole with a Inse rt M 10x 200 Threaded Fix M 10x 200 Threaded 250m m dia m e ter tapering bar into pre drilled holes bar in pla ce using M10 do wn to 350m m diameter in G round Fixing Post...
Need help?
Do you have a question about the Soprano Quartet and is the answer not in the manual?
Questions and answers