
Related Manuals for ADB Safegate RELIANCE Series


Summary of Contents for ADB Safegate RELIANCE Series
- Page 1 RELIANCE Inset Light 8” and 12” High-intensity Runway Guard Light, Runway Guard Light L-852G(L), and Stop Bar L-852S(L), (SL-RGL-SB-I) User Manual UM-0197, Rev. 1.0, 2019/11/19...
- Page 3 Where applicable, per FAA EB67 (applicable edition), ADB SAFEGATE L858(L) Airfield Guidance Signs are warranted against electrical defects in design or manufacture of the LED or LED specific circuitry for a period of 4 years. ADB SAFEGATE LED light fixtures (with the exception of obstruction lighting) are warranted against mechanical and physical defects in design or manufacture for a period of 12 months from date of installation;...
- Page 4 This manual could contain technical inaccuracies or typographical errors. ADB SAFEGATE BVBA reserves the right to revise this manual from time to time in the contents thereof without obligation of ADB SAFEGATE BVBA to notify any person of such revision or change. Details and values given in this manual are average values and have been compiled with care. They are not binding, however, and ADB SAFEGATE BVBA disclaims any liability for damages or detriments suffered as a result of reliance on the information given herein or the use of products, processes or equipment to which this manual refers.
-
Page 5: Table Of Contents
5.9.5 Soft ON/OFF........................................26 5.9.6 Sequenced flashing..................................... 27 5.10 Runway Guard Light system description...............................27 5.11 Stop Bar system description....................................27 6.0 Maintenance................................... 29 6.1 Workshop Maintenance......................................29 6.2 Basic maintenance program....................................30 UM-0197, Rev. 1.0, 2019/11/19 Copyright ADB Safegate, All Rights Reserved ©... - Page 6 6.2.3 Check the light fixture for water-tightness............................38 6.2.4 Reset the Fail Open converter 2.3................................39 6.2.5 Reset the Fail Open converter 48010921 and 48011111......................40 7.0 SUPPORT....................................41 7.1 ADB SAFEGATE website......................................41 7.2 Recycling............................................41 7.2.1 Local authority recycling....................................41 7.2.2 ADB SAFEGATE recycling...................................41 8.0 Spare parts....................................43...
-
Page 7: Safety
1.0 Safety Introduction to Safety This section contains general safety instructions for installing and using ADB SAFEGATE equipment. Some safety instructions may not apply to the equipment in this manual. Task- and equipment-specific warnings are included in other sections of this manual where appropriate. -
Page 8: Introduction To Safety
Using this equipment in ways other than described in this manual may result in personal injury, death or property and equipment damage. Use this equipment only as described in this manual. Failure to follow this instruction can result in serious injury or equipment damage Copyright ADB Safegate, All Rights Reserved ©... -
Page 9: Material Handling Precautions: Storage
Note To minimize the risk of errors, the ADB SAFEGATE Sales Representative will have information on which gasket goes with which base. This information is also provided in the product Data sheets, the User Manuals and the Spare Part Lists. -
Page 10: Operation Safety
• Allow only qualified personnel to make repairs. Repair or replace the malfunctioning component according to instructions provided in its manual. Failure to follow these instructions can result in death or equipment damage Copyright ADB Safegate, All Rights Reserved ©... -
Page 11: Material Handling Precautions, Esd
• Allow only qualified personnel to perform maintenance, troubleshooting, and repair tasks. • Only persons who are properly trained and familiar with ADB SAFEGATE equipment are permitted to service this equipment. • An open airfield current circuit is capable of generating >5000 Vac and may appear OFF to a meter. - Page 12 RELIANCE Inset Light Safety Copyright ADB Safegate, All Rights Reserved ©...
-
Page 13: About This Manual
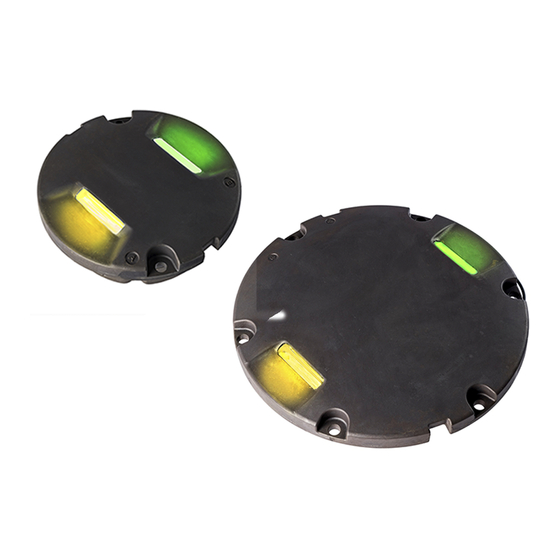
It is very important to read this document before any work is started. This manual covers the following 8" and 12" RELIANCE fixtures: • High intensity Runway Guard Lights, Runway Guard Lights L-852G(L) • Stop Bar Lights L-852S(L) UM-0197, Rev. 1.0, 2019/11/19 Copyright ADB Safegate, All Rights Reserved ©... - Page 14 RELIANCE Inset Light About this Manual Copyright ADB Safegate, All Rights Reserved ©...
-
Page 15: Introduction
• RELIANCE IQ – a RELIANCE with additional and integrated intelligence (IQ) in a built in converter for individual monitoring and control, based on RELIANCE Intelligent Lighting, ADB SAFEGATE's Individual Light Control and Monitor System (ILCMS). • RELIANCE IQ0 – RELIANCE IQ light fixture with disabled IQ (ILCMS) functionality. Non-MON light fixture with possibility to activate IQ at a later stage. -
Page 16: Dimensions Of The 8" Light Fixture
RELIANCE Inset Light Introduction 3.4 Dimensions of the 8" light fixture 6.35 8-inch Copyright ADB Safegate, All Rights Reserved ©... -
Page 17: Dimensions Of The 12" Light Fixture
The RELIANCE fail open is not to be connected to transformers larger than 100W. A correct calibration of the CCR is important to achieve an accurate fail open response. UM-0197, Rev. 1.0, 2019/11/19 Copyright ADB Safegate, All Rights Reserved ©... -
Page 18: Light Fixture Load
The same dimensioning method must be used for a CCR, as the transformer kVA-size marked on a CCR is normally calculated at 6.6A, not at 2A. There are also more constraints to consider such as spare capacity. For more information, contact Safegate for a complete CCR dimensioning procedure. Copyright ADB Safegate, All Rights Reserved ©... -
Page 19: Transformer Calculation Examples
Cable area Total load Transformer L-852S(L) Stop Bar 2.5 mm 4 mm RELIANCE <50m 50-100m <50m 50-100m RELIANCE IQ <50m 50-100m <50m 50-100m RELIANCE IQ (2A) <50m 50-100m <50m 50-100m UM-0197, Rev. 1.0, 2019/11/19 Copyright ADB Safegate, All Rights Reserved ©... - Page 20 RELIANCE Inset Light Introduction Copyright ADB Safegate, All Rights Reserved ©...
-
Page 21: Installation
Light bases shall be installed with care to assure vertical & azimuth alignment of fixture. • Provide 60-90 cm / 2"-3" cable slack within light base to allow transformer servicing. UM-0197, Rev. 1.0, 2019/11/19 Copyright ADB Safegate, All Rights Reserved ©... - Page 22 2. Disconnect the secondary supply connector. 3. Remove and check the O-ring gasket. Note It is recommended to change the gasket, lock nuts or bolts each time the light fixture is removed or dismounted from the base. Copyright ADB Safegate, All Rights Reserved ©...
-
Page 23: Installation And Removal Of The 12" Light Fixture
7. In order to bond the light fixture to ground, use the supplied screw (Torx M4x6 mm, Torque 2.5Nm) to attach the braided ground strap to the grounding point on the light fixture. The grounding point is indicated by a grounding symbol and located on the bottom side. UM-0197, Rev. 1.0, 2019/11/19 Copyright ADB Safegate, All Rights Reserved ©... - Page 24 Make sure to know what base the light fixture will be installed in, in order to chose the correct gasket, bolts and nuts. Failure to follow these cautions can result in equipment damage or aircraft FOD. Copyright ADB Safegate, All Rights Reserved ©...
-
Page 25: Operation
Communications to/from a RELIANCE IQ light fixture uses a unique power line communication technique developed by ADB SAFEGATE where the communication signals are superimposed on the series circuit current. -
Page 26: Programming Reliance Iq
1. Make sure the voltage selector is in the appropriate position: 120 or 240 V. 2. Connect the LPC unit to the SCM unit using the cables supplied. Connections are made at the rear of each unit. Copyright ADB Safegate, All Rights Reserved ©... - Page 27 2. Make sure the Remote button (2) on the LPC is NOT pressed in (off) before you start programming. 3. Turn on the Power button (3). Figure 3: Back of the LPC and RELIANCE IQ product UM-0197, Rev. 1.0, 2019/11/19 Copyright ADB Safegate, All Rights Reserved ©...
-
Page 28: Software Programming
3. Enter Username and Password, for example guest and adbsafegate, then click OK. 4. Chose the text file with the required airport and light to use, then click Open. 5. If required, select to use the correct COM-port. Copyright ADB Safegate, All Rights Reserved ©... - Page 29 6. Set the connection to LPU. Note If an RS232 Error window appears, click OK. 7. Check the LPU tab (default) appears in the upper area of the window. UM-0197, Rev. 1.0, 2019/11/19 Copyright ADB Safegate, All Rights Reserved ©...
- Page 30 10. From the LPU Manager tab, enter the PID number in the text field, manually or by using a bar code reader. Note The number corresponds to the product information number found on the bottom of the RELIANCE IQ, as in the previous step. Copyright ADB Safegate, All Rights Reserved ©...
- Page 31 16. Turn off the SCM, LPC for at least 30 seconds to fully power down the RELIANCE IQ or when no more RELIANCE IQ products are to be configured. 17. Turn on the LPC to power up the RELIANCE IQ, for example an RGL set to flash as default, should flash. UM-0197, Rev. 1.0, 2019/11/19 Copyright ADB Safegate, All Rights Reserved ©...
-
Page 32: Connection In A Series Circuit
CCR tripping either because of over- or under- current. The physical delay is programmable on an individual level in 10ms increments. There is no response time impact when SoftON/SoftOFF is enabled. Copyright ADB Safegate, All Rights Reserved ©... -
Page 33: Sequenced Flashing
For a controlled stopbar the RELIANCE IQ fixture shall be used and by using a NCU the system reports back to the tower the status and failures (for example critical adjacent failures) to the tower. UM-0197, Rev. 1.0, 2019/11/19 Copyright ADB Safegate, All Rights Reserved ©... - Page 34 RELIANCE Inset Light Operation Elevated stopbar lights could be cooperated in the same circuits as the inset stopbar lights. Figure 5: Components in an uncontrolled stopbar system Figure 6: Components in a controlled stopbar system Copyright ADB Safegate, All Rights Reserved ©...
-
Page 35: Maintenance
Spare parts are available, if required. For more information, see www.adbsafegate.com and the Spare Parts List document, or contact ADB SAFEGATE for assistance. CAUTION Use of incorrect combination of gaskets, bolts and nuts can create severe damages to the product installation and create multiple safety risks. -
Page 36: Basic Maintenance Program
2. Lift up the housing and disconnect the LED board cable connector from the LED boards in the top cover, see Figure Note Open the light fixture cautiously, be careful not to damage the LED-board cables. Copyright ADB Safegate, All Rights Reserved ©... - Page 37 4. Put the light fixture on a surface with the top cover facing down, see Figure UM-0197, Rev. 1.0, 2019/11/19 Copyright ADB Safegate, All Rights Reserved ©...
- Page 38 5. Tighten the four screws using a torque limiting spanner 4 mm Allen key to a torque of 8 Nm (equivalent to 0.8 kg m or 8 g.cm), see Figure Figure 12: Fixture facing down Figure 13: Tighten screws 6. Check the light fixture for water-tightness. For more information, see Check the light fixture for water-tightness. Copyright ADB Safegate, All Rights Reserved ©...
- Page 39 Figure 15: Tighten screws 3. Connect the LED-cable(s) to the LED-board(s), note the cable orientation in the picture, see Figure Figure 16: LED board 4. Assemble the light fixture. UM-0197, Rev. 1.0, 2019/11/19 Copyright ADB Safegate, All Rights Reserved ©...
-
Page 40: Workshop Maintenance 12" Fixture
2. Lift up the housing and disconnect the LED board cable connector from the LED boards in the top cover, see Figure Note Open the light fixture cautiously, be careful not to damage the LED-board cables. Copyright ADB Safegate, All Rights Reserved ©... - Page 41 Figure 23: Converter with 1 connector Figure 24: Converter with 2 connectors 4. Put the light fixture on a surface with the top cover facing down, see Figure UM-0197, Rev. 1.0, 2019/11/19 Copyright ADB Safegate, All Rights Reserved ©...
- Page 42 1. Attach the new LED board holder , including screws. The screws on the LED holder shall be tightened gently in sequence, following number 1-4, see Figure 2. Tighten the same screws to a torque of 4.5 Nm, following number 5-8, see Figure Figure 27: Tighten screws Copyright ADB Safegate, All Rights Reserved ©...
- Page 43 Connect the split LED cable to LED channel B on the converter and the standard LED cable to LED channel A on the converter. UM-0197, Rev. 1.0, 2019/11/19 Copyright ADB Safegate, All Rights Reserved ©...
-
Page 44: Check The Light Fixture For Water-Tightness
Figure 29: Converter with 1 connector Figure 30: Converter with 2 connectors 3. Assemble the light fixture. 6.2.3 Check the light fixture for water-tightness If maintenance is carried out in a workshop, check the water-tightness of the light. Copyright ADB Safegate, All Rights Reserved ©... -
Page 45: Reset The Fail Open Converter 2.3
3. Close the light fixture and connect it to a CCR. 4. Energize the light fixture until there is a steady light, then turn the CCR off and unplug the light fixture. UM-0197, Rev. 1.0, 2019/11/19 Copyright ADB Safegate, All Rights Reserved ©... -
Page 46: Reset The Fail Open Converter 48010921 And 48011111
If both A and B channel needs a reset, replace all 4 fuse resistors. 4. Dispose the old fuse resistor. 5. Place the legs of the new fuse resistors in the sockets. 6. Assemble the light fixture and perform a functional test. Copyright ADB Safegate, All Rights Reserved ©... -
Page 47: Support
7.2.1 Local authority recycling The disposal of ADB SAFEGATE products is to be made at an applicable collection point for the recycling of electrical and electronic equipment. The correct disposal of equipment prevents any potential negative consequences for the environment and human health, which could otherwise be caused by inappropriate waste handling. - Page 48 Main Unit Serial Number. ADB SAFEGATE will continue to monitor and update according for any future requirements for EU directives as and when EU member states implement new regulations and or amendments. It is our aim to maintain our compliance plan and assist our customers.
-
Page 49: Spare Parts
8.0 Spare parts Spare parts are available for RELIANCE and RELIANCE IQ Inset Light Fixtures. For more information, see www.adbsafegate.com and the Spare Parts List document, or contact ADB SAFEGATE for assistance. UM-0197, Rev. 1.0, 2019/11/19 Copyright ADB Safegate, All Rights Reserved... - Page 50 RELIANCE Inset Light Spare parts Copyright ADB Safegate, All Rights Reserved ©...
- Page 51 UM-0197, Rev. 1.0, 2019/11/19 Copyright ADB Safegate, All Rights Reserved ©...
Need help?
Do you have a question about the RELIANCE Series and is the answer not in the manual?
Questions and answers