Advertisement

EREL / ERES
User Manual
AM.03.120e, Rev. 3.4, 2019/03/29

Advertisement

Table of Contents
loading
Need help?

Need help?

Do you have a question about the ERES and is the answer not in the manual?

Questions and answers

Summary of Contents for ADB Safegate ERES

  • Page 1 EREL / ERES User Manual AM.03.120e, Rev. 3.4, 2019/03/29...
  • Page 3 Where applicable, per FAA EB67 (applicable edition), ADB SAFEGATE L858(L) Airfield Guidance Signs are warranted against electrical defects in design or manufacture of the LED or LED specific circuitry for a period of 4 years. ADB SAFEGATE LED light fixtures (with the exception of obstruction lighting) are warranted against mechanical and physical defects in design or manufacture for a period of 12 months from date of installation;...
  • Page 4 This manual could contain technical inaccuracies or typographical errors. ADB SAFEGATE BVBA reserves the right to revise this manual from time to time in the contents thereof without obligation of ADB SAFEGATE BVBA to notify any person of such revision or change. Details and values given in this manual are average values and have been compiled with care. They are not binding, however, and ADB SAFEGATE BVBA disclaims any liability for damages or detriments suffered as a result of reliance on the information given herein or the use of products, processes or equipment to which this manual refers.
  • Page 5: Table Of Contents

    1.1.2 Intended Use........................................2 1.1.3 Material Handling Precautions: Storage..............................3 1.1.4 Arc Flash and Electric Shock Hazard................................3 2.0 EREL / ERES ....................................5 2.1 Abbreviations and terms ......................................5 2.2 
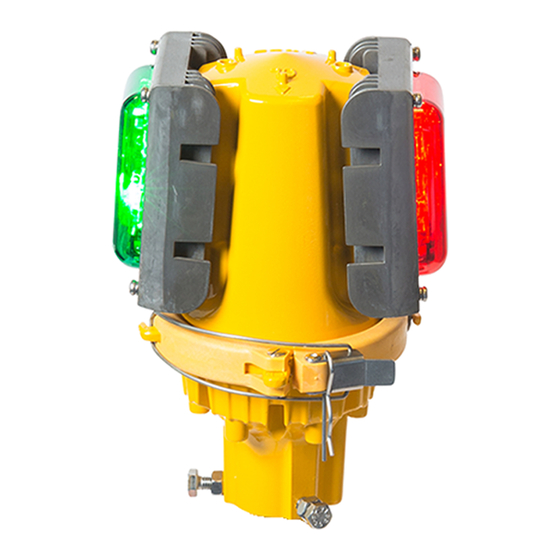
LED Elevated Runway Edge, Threshold/End, Threshold and End Light....................5 2.3 IQ function load (option)......................................8 2.4 2A system............................................
  • Page 6 EREL / ERES TABLE OF CONTENTS 6.2 Components..........................................39 6.3 Screws and torques........................................41 6.4 Options and accessories......................................42 Copyright ADB Safegate, All Rights Reserved ©...
  • Page 7: Safety

    1.0 Safety Introduction to Safety This section contains general safety instructions for installing and using ADB SAFEGATE equipment. Some safety instructions may not apply to the equipment in this manual. Task- and equipment-specific warnings are included in other sections of this manual where appropriate.
  • Page 8: Introduction To Safety

    Using this equipment in ways other than described in this manual may result in personal injury, death or property and equipment damage. Use this equipment only as described in this manual. Failure to follow this instruction can result in serious injury or equipment damage Copyright ADB Safegate, All Rights Reserved ©...
  • Page 9: Material Handling Precautions: Storage

    • Allow only qualified personnel to perform maintenance, troubleshooting, and repair tasks. • Only persons who are properly trained and familiar with ADB SAFEGATE equipment are permitted to service this equipment. • An open airfield current circuit is capable of generating >5000 Vac and may appear OFF to a meter.
  • Page 10 EREL / ERES Safety Copyright ADB Safegate, All Rights Reserved ©...
  • Page 11: Erel / Eres

    • install • carry out maintenance • carry out troubleshooting on the Elevated Runway Edge Light, type EREL/ ERES, in the manual referred to as the fixture. 2.1 Abbreviations and terms Term or abbreviation Description Centre Line EREL Elevated Runway Edge light, synthetic lens...
  • Page 12 Options for either glass or UV-resistant polycarbonate outer lens. • Leveling and aiming in azimuth of the fixture are easily performed with the dedicated aiming device. • Three screws allow a 4° leveling adjustment of the fixture after installation. Copyright ADB Safegate, All Rights Reserved ©...
  • Page 13 Figure 1: Photometry - Runway Edge 60 meters (white light) Additional photometric performance data and curves can be found in the Product Center on our website (www.adbsafegate.com) under the “Photometric Data” tab or by contacting your local ADB SAFEGATE representative. Dimensions and Weight Diameter and height: 166 ×...
  • Page 14: Iq Function Load (Option)

    The same dimensioning method must be used for a CCR, as the transformer kVA-size marked on a CCR is normally calculated at 6.6A, not at 2A. There are also more constraints to consider such as spare capacity. For more information, contact ADB SAFEGATE for a complete CCR dimensioning procedure. 2.5 Identification on the fixture A: Arrow.
  • Page 15: Frangible Coupling

    In the latter case, only the centerline fixture has no toe-in on the green side. Positions displaced from the runway centerline shall be installed according to the scheme below. AM.03.120e, Rev. 3.4, 2019/03/29 Copyright ADB Safegate, All Rights Reserved ©...
  • Page 16: Monitoring (Option)

    This heater melts ice similar to traditional incandescent fixtures. The heater goes on only when the temperature drops below 0 degrees Celcius, to reduce the energy consumption. The arctic kit is available on both glass and polycarbonate options. Copyright ADB Safegate, All Rights Reserved ©...
  • Page 17: Install Or Replace The Fixture

    Warning • Only install the fixture on mounting supports: • That ADB SAFEGATE has approved • That are installed according to the Instruction Manual of the mounting support • Failure to do so can result in a highly dangerous situation of FOD, with potentially lethal consequences •...
  • Page 18: Intended Use

    Failure to follow this instruction can result in serious injury or equipment damage 3.3.2 Preparation 1. Make sure that the fixture is completely assembled. 2. Make sure that the fixture is operationally tested. Copyright ADB Safegate, All Rights Reserved ©...
  • Page 19: Installation

    The direction of installation is dependent on the position of the reference mark you have chosen. Install the alignment tool in the desired direction on top of the fixture. AM.03.120e, Rev. 3.4, 2019/03/29 Copyright ADB Safegate, All Rights Reserved ©...
  • Page 20: Levelling And Alignment

    3. Examine again if the fixture is level. Note Do not tighten the screws on the stem until the adjustment is finished. Finish 1. Tighten the alignment screws (A) gradually. See § Screws and torques (torque). Copyright ADB Safegate, All Rights Reserved ©...
  • Page 21: Examination Of The Alignment

    3. Examine the spirit levels (B) and (C). 4. If the alignment is not correct or if the fixture is not level, align or level the fixture. See § Levelling and alignment AM.03.120e, Rev. 3.4, 2019/03/29 Copyright ADB Safegate, All Rights Reserved ©...
  • Page 22: Finish

    1. Loosen the nuts (A) and the screws (B). 2. Loosen the frangible coupling (C). Note Do not turn the body support. 3. Disconnect the plug (D). 4. If the fixture has is a separate earth ground wire, disconnect it. Copyright ADB Safegate, All Rights Reserved ©...
  • Page 23: Maintenance

    - Install the dry optical cover. For failed fixture - Replace the complete optical head. See Maintenance. - and replace the faulty component in the workshop. See § Troubleshooting guide. AM.03.120e, Rev. 3.4, 2019/03/29 Copyright ADB Safegate, All Rights Reserved ©...
  • Page 24: Part Replacement

    Cable lead, Earthing wire and cable strain relief bushing. See § Part replacement - cable lead, Earthing wire and cable bushing • Frangible coupling. See § Part replacement - frangible coupling or column Copyright ADB Safegate, All Rights Reserved ©...
  • Page 25: Part Replacement - Complete Optical Head

    4. Disconnect the cable leads and the earthing wire, if it is connected (D). Warning Before you disconnect the wires, earth the complete optical head. 5. Remove the body gasket (E). 6. Dispose of the body gasket. AM.03.120e, Rev. 3.4, 2019/03/29 Copyright ADB Safegate, All Rights Reserved ©...
  • Page 26 The body support clip must tighten the optical head to avoid risk of FOD caused by a loose head assembly. 5. Install the safety pins (H): IV. 6. Verify that the light turns on when powered. CAUTION Do not damage the cable lead. Copyright ADB Safegate, All Rights Reserved ©...
  • Page 27: Part Replacement - Optical Cover

    Make sure that the bulges of the optical cover gasket fit smoothly into the grooves of the cooling block and the grooves of the optical cover. The optical cover gasket is not symmetrical. AM.03.120e, Rev. 3.4, 2019/03/29 Copyright ADB Safegate, All Rights Reserved ©...
  • Page 28 If the fixture or the new clip has been supplied with a spacer (and always for fixtures with glass covers), do not forget to re-install the spacer between the cover and the clip. 2. Make sure that the smaller side of the spacer is on top. Copyright ADB Safegate, All Rights Reserved ©...
  • Page 29: Part Replacement - Optical Kit

    1. Remove the complete optical head. See § Part replacement - complete optical head 2. Put the complete optical head on a clean surface. 3. Make sure that the complete optical head is earthed. AM.03.120e, Rev. 3.4, 2019/03/29 Copyright ADB Safegate, All Rights Reserved ©...
  • Page 30 2. Remove the LED MCPCB (B). 3. Dispose of the LED MCPCB. Install - Step 1 1. Read the instructions supplied with the parts for the correct installation of the new parts on the cooling block. Copyright ADB Safegate, All Rights Reserved ©...
  • Page 31: Part Replacement - Arctic Kit (Arctic Kit Option)

    Part replacement - optical cover 4.3.5 Part replacement - arctic kit (arctic kit option) Parts: See § Exploded view. • Arctic kit, including spacers and screws • Optical cover gasket • Body gasket AM.03.120e, Rev. 3.4, 2019/03/29 Copyright ADB Safegate, All Rights Reserved ©...
  • Page 32 1. Apply adhesive on the first three threads of the threaded holes of the cooling block. Use adhesive D. See § Options and accessories. 2. Install the new spacers (A). 3. Install the new PCB of the arctic kit (B). Copyright ADB Safegate, All Rights Reserved ©...
  • Page 33: Part Replacement - Body

    Part replacement - optical cover 5. Remove the optical kit. See § Part replacement - optical kit 6. Remove the cooling block. See § Part replacement - cooling block. AM.03.120e, Rev. 3.4, 2019/03/29 Copyright ADB Safegate, All Rights Reserved ©...
  • Page 34: Part Replacement - Cooling Block

    1. Remove the cooling block screws (A) and washers (B). 2. Dispose of the cooling block screws and washers. 3. Remove the cooling block (C). 4. Remove the cooling block gasket (D). 5. Dispose of the cooling block gasket. Copyright ADB Safegate, All Rights Reserved ©...
  • Page 35: Part Replacement - Body Support Assembly

    3. Remove the body support assembly (B). 4. If necessary, remove the cable lead, the Earthing wire and de cable strain relief bushing. See § Part replacement - cable lead, Earthing wire and cable bushing AM.03.120e, Rev. 3.4, 2019/03/29 Copyright ADB Safegate, All Rights Reserved ©...
  • Page 36: Part Replacement - Cable Lead, Earthing Wire And Cable Bushing

    4.3.9 Part replacement - cable lead, Earthing wire and cable bushing Parts: See § Exploded view. • Body gasket • Cable lead • Earthing cable • Cable strain relief bushing Tools: • Pliers • Screwdriver, Torx T20 Copyright ADB Safegate, All Rights Reserved ©...
  • Page 37 2. Put the cable lead and the Earthing cable in the cable strain relief bushing (D): I. 3. Install the Earthing cable on the screw for the Earthing cable (E). 4. Install the screw for the Earthing cable. See § Screws and torques (torque). AM.03.120e, Rev. 3.4, 2019/03/29 Copyright ADB Safegate, All Rights Reserved ©...
  • Page 38: Part Replacement - Frangible Coupling Or Column

    2. Install the column. 3. Tighten the screw (A) and the nut (B). See § Screws and torques (torque). 4. Install but do not tighten the alignment screws (C) and the nuts (D). Copyright ADB Safegate, All Rights Reserved ©...
  • Page 39: Repair A Faulty Light (Monitoring Option)

    2. Replace both optical kits. See § Part replacement - optical kit 3. Replace the fuse resistor. See § Part replacement - fuse resistor (monitoring option). 4. Connect the LED MCPCBs. AM.03.120e, Rev. 3.4, 2019/03/29 Copyright ADB Safegate, All Rights Reserved ©...
  • Page 40: Part Replacement - Fuse Resistor (Monitoring Option)

    Part replacement - complete optical head b. Perform an operation test. See § Fixture operation test c. If the fixture does not come on, contact ADB SAFEGATE Assemble 1. Reinstall the complete optical head. See § Part replacement - complete optical head 4.3.12 Part replacement - fuse resistor (monitoring option)
  • Page 41: Fixture Operation Test

    4. Turn OFF the constant current generator. 5. If the fixture did not work or has switched off before the end of the test time, see § Troubleshooting guide. AM.03.120e, Rev. 3.4, 2019/03/29 Copyright ADB Safegate, All Rights Reserved ©...
  • Page 42 EREL / ERES Maintenance Copyright ADB Safegate, All Rights Reserved ©...
  • Page 43: Troubleshooting

    - Check the electrical connection between the LED MCPCB and the body. The body assembly has a malfunction Replace the body. See § Part replacement - arctic kit (arctic kit option) AM.03.120e, Rev. 3.4, 2019/03/29 Copyright ADB Safegate, All Rights Reserved ©...
  • Page 44 The optical cover is defective. Replace the optical cover. See § Part replacement - optical cover The LED MCPCB has a malfunction. Replace the optical kit. See § Part replacement - optical kit Copyright ADB Safegate, All Rights Reserved ©...
  • Page 45: Technical Data

    Components Versions Articlenumber Body - no arctic kit Without monitoring option 4072.60.780 With monitoring option 4072.60.790 Body - with arctic kit Without monitoring option 4072.60.800 With monitoring option 4072.60.810 AM.03.120e, Rev. 3.4, 2019/03/29 Copyright ADB Safegate, All Rights Reserved ©...
  • Page 46 30” OAH light (not for 2” 11 TPI) 4072.60.380 Optical kit See the table ‘Optical components’ below Dummy LED board (for the blank side of unidirectional lights) (not shown in exploded view) 1590.03.790P Flat washer M4 Inox - DIN125 7283.04.230 Copyright ADB Safegate, All Rights Reserved ©...
  • Page 47: Screws And Torques

    8 (2 on each side) Arctic kit screws Plastic screw M4x25 4 (2 on each side) Screw to connect the frangible coupling to the Hex screw 1/4” x 5/8” A4-20UNC column AM.03.120e, Rev. 3.4, 2019/03/29 Copyright ADB Safegate, All Rights Reserved ©...
  • Page 48: Options And Accessories

    You can buy these parts separately. Details Article number Alignment tool 1408.35.130 Snow rod (note: the light must be equipped with the optional bracket - see § 4072.28.670 Fixture code schema. Loctite 243 7870.05.160 Permabond A130 7870.00.800 Copyright ADB Safegate, All Rights Reserved ©...
  • Page 49 AM.03.120e, Rev. 3.4, 2019/03/29 Copyright ADB Safegate, All Rights Reserved ©...

This manual is also suitable for:

Erel

Table of Contents