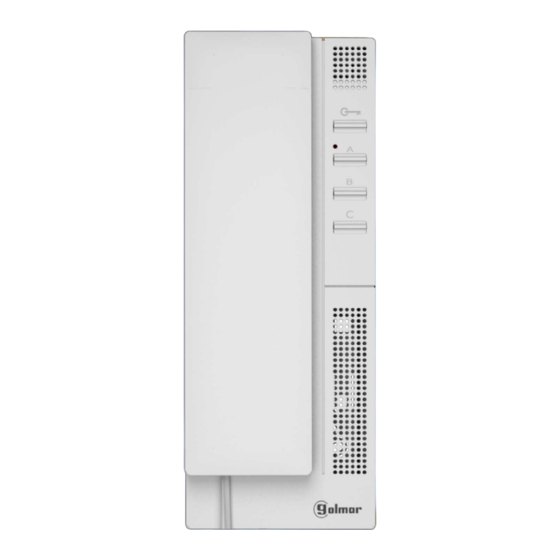
golmar T-540 PLUS SE User Manual
Telephone user manual plus digital system
Hide thumbs
Also See for T-540 PLUS SE:
- Quick manual (4 pages) ,
- Quick manual (11 pages) ,
- Quick manual (2 pages)
Summary of Contents for golmar T-540 PLUS SE
- Page 1 TECHNOLOGY T-540 PLUS SE TELEPHONE PLUS DIGITAL SYSTEM Code 50122199 REV.0318 -540 PLUS SE...
-
Page 2: Table Of Contents
T-540 PLUS SE TELEPHONE INTRODUCTION First of all, we thank and congratulate you for purchasing this product manufactured by Golmar. Our commitment to achieving the satisfaction of customers like you is manifested through our ISO-9001 certification and the manufacture of products like the one you have just purchased. -
Page 3: Characteristics
T-540 PLUS SE TELEPHONE CHARACTERISTICS Telephone for Plus installation. Telephone with 4 common wire installation. Function and advanced programming access buttons (to customise telephone functions). Totally private conversation. Auto switch-on function. “ Doctor mode function (automatic door opening, see p. 8). -
Page 4: Status Led
T-540 PLUS SE TELEPHONE DESCRIPTION OF THE TELEPHONES Description of the T-540 Plus SE telephone Telephone handset. Speaker grille Microphone hole. Subjection hole. Telephone cord connectors. Function / programming buttons. Telephone status LED: Standby: LED illuminated red. Call: LED illuminated green (master telephone). -
Page 5: Function Buttons
T-540 PLUS SE TELEPHONE DESCRIPTION OF THE TELEPHONES Function button: One short press for 1 second, with the telephone in standby and the handset on the hook, activates ringtone volume mode, with a tone indicating the volume selected. Then each 1 second press (before 5 seconds elapse) selects a ringtone volume level and so on (in carousel mode) with the following selections (maximum, medium, minimum and no volume “night mode”. -
Page 6: Fixing The Telephone
T-540 PLUS SE TELEPHONE INSTALLING THE TELEPHONES Fixing the telephone to the wall: It is necessary to open the telephone for wiring and fixing purposes. To open the telephone, insert a flat screwdriver into the slots and gently pry open as shown in the drawing. - Page 7 T-540 PLUS SE TELEPHONE PROGRAMMING THE TELEPHONES Programming T-540 Plus SE telephones: Locate the SW2 DIP switch situated on the top left-hand side of the back of the EL632/PLUS module and set number 2 to ON. The door panel will reproduce a sound to advise that the system has entered into programming mode.
-
Page 8: Programming Of The Telephone
T-540 PLUS SE TELEPHONE PROGRAMMING THE TELEPHONES Description of the SW1 DIP switch: The SW1 DIP switch is located in the central part of the circuit, accessible by opening the telephone. It enables the telephone to be configured as master/slave and an address to be assigned to it. -
Page 9: Men 2
Intercom with Plus telephones / monitors: Intercom with Plus SE telephones / monitors (default setting). If an apartment has T-540 Plus telephones, Tekna Plus monitors and T-540 Plus SE telephones, the T-540 Plus SE telephones must be configured in Intercom with Plus telephones / monitors mode, as T-540 Plus telephones and “... -
Page 10: Adjusting The Door Panel Call Time
T-540 PLUS SE TELEPHONE PROGRAMMING THE TELEPHONES Continued from previous page 45 seconds (default setting) Adjusting the door panel call time: “ ” To adjust the door panel call time: Each press on button “ ” selects a door panel call duration (1: 30 seconds, 2): 45 seconds, 3): 60 seconds, and 4: 90 seconds), which is indicated with blinks (1 to 4 blinks) of the status LED and in the following order: 1, 2, 3 and 4 repeats. -
Page 11: Optional Connections
T-540 PLUS SE TELEPHONE OPTIONAL CONNECTIONS Auxiliary device activation with T-540 Plus SE telephones: Auxiliary device activation requires the use of an SAR-12/24 relay unit. If the feature is shared by all telephones, connect their A1 terminals; if, however, each telephone has its own feature, use an SAR-12/24 relay for each one and do not connect their A1 terminals. -
Page 12: Intercom Within The Same Apartment
Button for receiving calls from the apartment front door: The T-540 Plus SE telephone features as standard the ability to receive calls from the apartment front door. This feature precludes the need to use the bell by positioning a switch between terminals HZ— and — of the “... -
Page 13: Cleaning The Telephone
T-540 PLUS SE TELEPHONE CLEANING THE TELEPHONE Do not use solvents, detergents or cleaning products that contain acids, vinegar or abrasive components. Use a soft, damp cloth (not wet) that does leave lint behind. Always wipe the telephone in the same direction, from top to bottom. -
Page 14: Wiring Diagram
T-540 PLUS SE TELEPHONE WIRING DIAGRAM Audio door entry system: T-540 Plus SE T-540 Plus SE T-540 Plus SE T-540 Plus SE M =Master. Access panel *Place this power supply as close as possible to the first telephone. FA-Plus/C or FA-Plus... -
Page 15: Not S
T-540 PLUS SE TELEPHONE NOT S:... - Page 16 C/ Silici, 13 08940- Cornellá de Llobregat SPAIN Golmar se reserva el derecho a cualquier modificación sin previo aviso. Golmar se réserve le droit de toute modification sans préavis. Golmar reserves the right to make any modifications without prior notice.


Need help?
Do you have a question about the T-540 PLUS SE and is the answer not in the manual?
Questions and answers