
Related Manuals for Fayat Group BOMAG BW 900-50


Summary of Contents for Fayat Group BOMAG BW 900-50
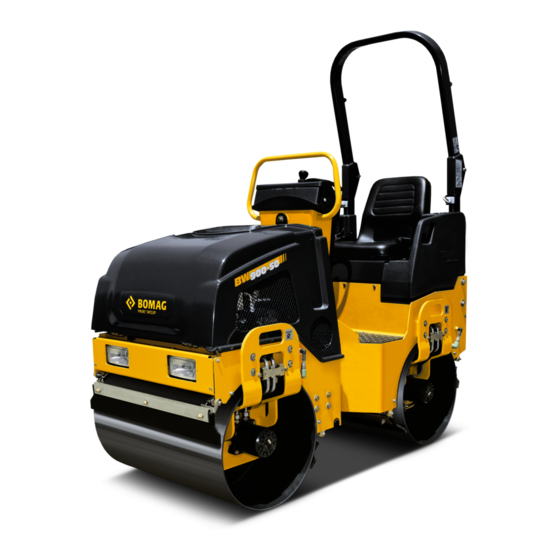
- Page 1 Service - Manual www.discount-equipment.com BW 900-50 S/N 861 834 07 ..> Tandem Vibratory Roller Catalogue number. 12/2012 008 921 86...
- Page 2 Discount-Equipment.com is your online resource for quality parts & equipment. Florida: 561-964-4949 Outside Florida TOLL FREE: 877-690-3101 Need parts? Click on this link: http://www.discount-equipment.com/category/5443-parts/ choose one of the options to help get the right parts and equipment you are looking for.
-
Page 4: Table Of Contents
Table of Contents General 1.1 Introduction 1.2 Safety regulations 1.3 General repair instructions 1.4 Tightening torques Technical data 2.1 Technical data Maintenance 3.1 General notes on maintenance 3.2 Fuels and lubricants 3.3 Table of fuels and lubricants 3.4 Running-in instructions 3.5 Maintenance table Overall view of machine 4.1 Overview... - Page 5 Table of Contents 7.10 Vibration circuit 7.11 Steering circuit 7.12 Checking the hydraulic oil level 7.13 Changing the hydraulic oil 7.14 Checking the hydraulic oil filter element 7.15 Change the hydraulic oil filter Tests and adjustments 8.1 Special tools 8.2 Checking the rotation speeds 8.3 Pressure tests in the travel circuit 8.4 Adjusting the neutral positions of the travel pump 8.5 Travel pump high pressure test...
-
Page 6: General
1 General 008 921 86 BOMAG... -
Page 7: Introduction
Introduction 1.1 Introduction This manual addresses the professionally qualified personnel or the after sales service of BOMAG, and should be of help and assistance in correct and effi- cient repair and maintenance work. This manual describes the disassembly, dismantling, assembly, installation and repair of components and assemblies. -
Page 8: Safety Regulations
Safety regulations Important notes Block the articulated joint with the articulation lock. Safety regulations Use protective clothes like hard hat, safety boots These safety regulations must be read and ap- and gloves. plied by every person involved in the repair /main- tenance of this machine. - Page 9 Safety regulations Start the extraction fan before starting work and Operation of high-voltage systems guide with the progressing work as required. Always isolate the burner when laying it down (re- Note move possible electrode residues). The rules and statutory regulations valid in the corre- Protect cables from being damaged, use cables sponding do apply in addition to the notes given here.
- Page 10 Safety regulations Fire extinguishers charged with FOAM, CO Environment or POWDER must be available wherever fuel is It is strictly prohibited to drain off oil into the soil, stored, filled in, drained off, or where work on fuel the sewer system or into natural waters. Old oil systems is performed.
- Page 11 Safety regulations Engine The installation and use of non-genuine spare parts or non-genuine accessories may therefore have an adverse effect on the specific characteristics of the Danger machine and thereby impair the active and/or pas- Do not work on the fuel system while the engine is sive driving safety.
-
Page 12: General Repair Instructions
General repair instructions General Electrics General repair instructions Before removing or disassembling parts, assem- General blies, components or hoses mark these parts for Due to the fast technical development electric and easier assembly. electronic vehicle systems become more intelligent Before assembling and installing parts, assemblies and more comprehensive day by day, and can hardly or components oil or grease all movable parts or be dispensed with in hydraulic and mechanical vehicle... - Page 13 General repair instructions Plug-in connectors on control units are only dust Battery and water tight if the mating connector is plugged Rules for the handling of batteries on! Control units must be protected against spray water, until the mating connector is finally plugged When removing a battery always disconnect the mi- nus pole before the plus pole.
- Page 14 General repair instructions Generator Starter motor Before removing the generator you must disconnect So-called jump starting (using an additional external the ground cable from the minus pole of the battery battery) without the battery connected is dangerous. while the ignition is switched off. Do not disconnect When disconnecting the cables from the poles high in- the generator while the engine is running, because ductivities (arcs, voltage peaks) may occur and de-...
- Page 15 General repair instructions Hydraulic system Perform measurements at operating temperature of the hydraulic oil (approx. 40 ¯C). After changing a component perform a high and Caution charge pressure test, if necessary check the speed Repair work on hydraulic elements shall only per- of the exciter shaft.
- Page 16 General repair instructions Fuel hoses Gaskets and mating surfaces Leaking sealing faces can mostly be traced back to in- correct assembly of seals and gaskets. Before assembling a new seal or gasket make sure that the sealing surface is free of pitting, flutes, cor- rosion or other damage.
- Page 17 General repair instructions able, you should use a plastic tube or adhesive tape Feather keys and keyways to prevent the sealing lip from being damaged. Lubricate the outer rim (arrow 3 (Fig. 2)) of the seal Caution and press it flat on the housing seat. Feather keys may only be reused if they are free of damage.
- Page 18 General repair instructions Ball and roller bearings Check shaft and bearing housing for discolouration or other signs of movement between ball or roller bearing and seats. Caution Make sure that shaft and housing are free of burrs Ball and roller bearings may only be reused if they before assembling the ball or roller bearing.
- Page 19 General repair instructions Screws and nuts Strength classes, metric screws The strength classes (from 3.6 to 12.9) are specified Tightening torque for all strength classes from a nominal diameter of 5mm. The corresponding identification can be found where allowed for by the shape of the screw. Caution Tighten nuts or screws with the tightening tor- ques specified in the following tables of tighten-...
- Page 20 General repair instructions Strength classes of metric nuts Identification in clock system Nuts are differentiated by three load groups. Each load group has a special designation system for the strength class assigned, so that the load group can be clearly identified. Nuts for screw joints with full load capability (4, 5, 6, 8, 10, 12) Fig.
- Page 21 General repair instructions Identification of UNF-threads Cotter pins Fig. 11 In places where cotter pins are used, these must be reassembled. Cotter pins must generally be renewed after disassembly. Cotter pins must be assembled as shown in the illus- tration, unless specified differently. Fig.
-
Page 22: Tightening Torques
Tightening torques The values specified in the table apply for screws: Tightening torques black oiled with surface protection A4C with surface protection DACROMET Note DACROMET is a surface protection that mainly consists of zinc and aluminium in a chromium oxide matrix. DAC- ROMETIZATION provides excellent corrosion protection for metal surfaces by applying a mineral coating with metallic-silver appearance. - Page 23 Tightening torques Tightening torques for screws treated with anti-seizure paste OKS 240 (copper paste) Tightening torques Nm Screw dimension 10.9 12.9 M16 x 1.5 M18 x 1.5 M20 x 1.5 M22 x 1.5 M24 x 2 1036 1184 1520 M27 X 2 1263 1536 1136...
- Page 24 Tightening torques The values specified in the table apply for screws: black oiled with surface protection A4C with surface protection DACROMET Note The difference between Withworth and UNF/UNC threads is the fact that UNF and UNC threads have 60° flanks, as the metric ISO-thread, whereas Withworth has a flank of only 55°.
- Page 25 Tightening torques Tightening torques for screws with UNF thread, UNF Unified National Fine Thread Series, American Unified Fine Thread Tightening torques Nm Screw dimension 10.9 12.9 1“ - 12 1300 1600 1 1/8“ - 12 1350 1900 2300 1 1/4“ - 12 1900 2700 3200...
-
Page 26: Technical Data
2 Technical data 008 921 86 BOMAG... - Page 27 Technical data Technical data Fig. 12 Dimensions in inches (mm) 37.8 17.7 22.0 90.2 77.4 0.31 35.4 BW 900-50 (1223) (961) (450) (560) (1727) (2290) (250) (1967) (31) (900) BW 900-50 Weights Operating weight (CECE) lbs (kg) 2639 (1197) Mean Axle load lbs (kg) 1320 (599) Mean static linear load...
- Page 28 Technical data BW 900-50 Drive system hydrostatic Driven axles front + rear brakes Service brake hydrostatic Parking brake mechanical Steering Type of steering Oscill.-articul. Steering operation hydrostatic Inner track radius in (mm) 64,8 (1647) Steering angle ± ° Steering operation ±...
- Page 29 Technical data System Gear pump Max. displacement /rev Starting pressure Operating pressure (soil dependent) 50 to 100 Vibration motor System Gear motor Displacement /rev Perm. leak oil rate l/min Steering valve Type OSPM 80 ON Manufacturer Sauer-Danfoss System Rotary spool valve BOMAG 008 921 86...
-
Page 30: Maintenance
3 Maintenance 008 921 86 BOMAG... -
Page 31: General Notes On Maintenance
General notes on maintenance 3.1 General notes on maintenance Do not draw off fuel from near the bottom of the drum. When performing maintenance work always comply The rest in the drum is not suitable for the engine with the appropriate safety regulations. and should only be used for cleaning purposes. -
Page 32: Fuels And Lubricants
Fuels and lubricants 3.2 Fuels and lubricants Methanol must also contain co-solvents and corrosion inhibitors. Using fuels with higher ethanol or methanol contents Engine oil exceeding the values specified above may cause starting difficulties and/or performance problems. Quality Damage may also occur to metal, rubber or plastic The oil is an essential factor for the performance and parts in the fuel system. -
Page 33: Table Of Fuels And Lubricants
Table of fuels and lubricants 3.3 Table of fuels and lubricants Assembly Fuel or lubricant Quantity Summer Winter Attention Observe the level marks motor - Engine oil Engine oil API SJ or higher approx. 0.5 gal (approx. 1.9 l) SAE 5W-30 (-4 °F to +86 °F) (-20 °C to +30 °C) SAE 10W-30 (5 °F to +86 °F) (-15 °C to +30 °C) -
Page 34: Running-In Instructions
Running-in instructions 3.4 Running-in instructions The following maintenance work must be per- formed when running in new machines or over- hauled engines: Caution Up to approx. 250 operating hours check the en- gine oil level twice every day. Depending on the load the engine is subjected to, the oil consumption will drop to the normal level after approx. -
Page 35: Maintenance Table
Maintenance table 3.5 Maintenance table Maintenance work Comment Check the engine oil level Dipstick mark Check the fuel level Check the hydraulic oil level Inspection glass Checking the hydraulic oil filter element Contamination indicator 5.10 Check the water level Water level gauge 5.11 Clean the scrapers 5.12... -
Page 36: Overall View Of Machine
4 Overall view of machine 008 921 86 BOMAG... -
Page 37: Overview
Overview Fig. 1 BOMAG 008 921 86... - Page 38 Overview Vibration valve (Y22) 12 Parking brake Hydraulic oil tank 13 Sprinkling pump (M02) Battery (G01) with main battery fuse (F00) 14 Steering valve Petrol engine 15 Oscillating articulated joint Air filter 16 Steering cylinder Fuel pre-cleaner 17 Charge oil filter Instruments 18 Drum drive motor, front Central electrics with fuses...
-
Page 39: Electrics
5 Electrics 008 921 86 BOMAG... -
Page 40: Starting With Jump Wires
Starting with jump wires 5.1 Starting with jump wires 5.2 Engine oil pressure monitor- With an oil pressure below 0.5 bar the engine is shut down. Fig. 2 Caution A wrong connection will cause severe damage in Fig. 1 Oil pressure switch the electric system. -
Page 41: Proximity Switches
Proximity switches 5.3 Proximity switches cillator is thus dampened and the resulting change in current consumption is evaluated. PNP circuitry Fig. 3 PNP circuitry On sensors with PNP-circuitry the output stage con- tains a PNP-transistor, which switches the load against the positive operating voltage. The load is connected between the output and the negative oper- ating voltage. - Page 42 Proximity switches tances are 2 or 4 mm. The maximum amperage is 300 The LED (Fig. 5) lights up, when the initiator has de- tected metal in its stray field. Fig. 6 Circuit diagram, making contact The circuit diagram (Fig. 6) shows a proximity switch with normally open contact.
-
Page 43: Central Electrics
Central electrics Fig. 1 K136, Timer relay seat contact (5 sec. delayed re- lease) K05, Relay start current K96, Relay engine oil pressure K69, Relay engine shut down K31, Relay start current K26, Relay backup warning device K23, Relay water sprinkling pump K29, Relay vibration K04, Step relay vibration This module is an electronic stepper relay. -
Page 44: Control Elements
Control elements HOURS 1 2 3 4 5 -D.W- 834063 Fig. 2 12 S13 Vibration push button 13 Travel lever 1 S53 Rotary switch for working lights 14 Throttle lever 2 H08 Charge control lamp 15 Parking brake lever 3 P00 Operating hour meter 4 H38 Fuel level warning lamp 5 S05 Rotary switch for sprinkling system 6 S00 Ignition switch... -
Page 45: Fuses
Fuses 5.6 Fuses Fig. 3 No. 1 = Fuse box Note The fuse box is located behind the steering column covering. Danger Fire hazard! Do not use fuses with higher ampere ratings and do not repair fuses with a piece of wire. (5) 25A = (F148) Fuse control MESX (potential 15) (6) 15A = (F41) Flashing beacon (7) 15A = (F06) Water sprinkling system... -
Page 46: Engine
6 Engine 008 921 86 BOMAG... -
Page 47: Engine Overview
Engine overview 6.1 Engine overview Note The engine is equipped with an electric fuel shut-down Tandem vibratory rollers type BW900-50 are powered solenoid (Y58), which interrupts the fuel supply to the by air cooled Honda petrol engines series GX630. main carburettor nozzle when energized. This engine is a four-stroke two-cylinder engine with suspended valves. - Page 48 Engine overview Fig. 2 Push rod Valve cover Plunger Rocker arm Camshaft Exhaust valve Spark plug Combustion chamber 008 921 86 BOMAG...
-
Page 49: Checking The Engine Oil Level
Checking the engine oil level 6.2 Checking the engine oil level 6.3 Changing engine oil and oil fil- Caution The machine must be in horizontal position. Danger Danger of scalding! For quality of oil refer to the "table of fuels and lu- bricants". -
Page 50: Change The Fuel Pre-Filter
Change the fuel pre-filter Clean the sealing face on the filter carrier (3) from 6.4 Change the fuel pre-filter any dirt. Slightly oil the rubber seal (4) on the new filter car- Danger tridge. Fire hazard! Turn the new filter cartridge on by hand, until the When working on the fuel system do not use open seal contacts. -
Page 51: Cleaning The Cooling Air Intake Openings
Cleaning the cooling air intake openings 6.5 Cleaning the cooling air intake 6.6 Check, clean the air filter, re- openings place if necessary Caution Caution Dirt in the cooling air intake openings reduces the A dirty oil filter obstructs the air flow to the carbu- cooling effect. - Page 52 Check, clean the air filter, replace if necessary Caution Do not use compressed air to blow out the air filter housing. Fig. 12 Place the foam rubber element (6) (Fig. 12) on the paper element (4). Reinstall the assembled air filter. Make sure that the Fig.
-
Page 53: Clean, Check The Spark Plugs, Replace If Necessary
Clean, check the spark plugs, replace if necessary 6.7 Clean, check the spark plugs, Check the electrode gap with a feeler gauge, if nec- essary adjust the gap to0.03 - 0.032 in (0.7 - 0.8 replace if necessary mm). Turn the spark plug carefully in by hand. Danger Tighten the spark plug with a spark plug spanner, Danger of burning! -
Page 54: Checking, Adjusting The Valve Clearance
Checking, adjusting the valve clearance 6.8 Checking, adjusting the valve clearance Caution We recommend to have this work carried out by trained personnel or our after sales service. Check and adjust only when the engine is cold. Adjusting values intake valves: 0.0031 in ±... -
Page 55: Check, Adjust The Idle Speed
Check, adjust the idle speed 6.9 Check, adjust the idle speed 6.10 Checking fuel lines and clamps Caution We recommend to have this work carried out by Danger trained personnel or our after sales service. Danger of burning! Check and adjust only at operating temperature of Perform inspection work only after the engine has the engine. -
Page 56: Engine Conservation
6.11 Engine conservation 6.11 Engine conservation Caution A machine with conserved engine must be clearly marked by attaching a clear warning label. Note Depending on weather conditions these conservation measures will protect the machine for approx. 6 to 12 months. Before taking the machine back into service you must drain off the conservation oil and replace it with engine oil (see table of fuels and lubricants) according to API-... -
Page 57: Carburettor Check Sheet
6.12 Carburettor Check Sheet 6.12 Carburettor Check Sheet BOMAG 008 921 86... -
Page 58: Engine Problems
6.13 Engine problems 6.13 Engine problems Fault Possible cause Remedy Engine does not Fuel tank empty Fill fuel tank start Fuel filter clogged Change the filter Fuel lines leaking Check all line connections for leaks and tighten the fittings Emergency stop switch locked Unlock the emergency stop switch Driver not seated (seat contact switch) Occupy the driver's seat when starting. -
Page 59: Hydraulics
7 Hydraulics 008 921 86 BOMAG... -
Page 60: Hydraulic Circuit
Hydraulic circuit 7.1 Hydraulic circuit Open circuit Fig. 1 Open circuit Open in this case means that the suction line of a pump) (Fig. 1) normally is situated below the fluid level, the surface of which is in open contact with atmospheric pressure. Reliable equalization of pressure between the air in the hydraulic oil tank and the ambient air ensures problem free suction of the pump. - Page 61 Hydraulic circuit Closed circuit Filter Cooler (option) Fig. 2 Closed circuit One talks about a closed hydraulic system, when the hydraulic oil flows from the consumer (3) (Fig. 2) directly back to the pump (2). The closed circuit consists of a high and a low pressure side, depending on the load direction (take-off moment on the consumer).
-
Page 62: Pump Overview
Pump overview 7.2 Pump overview The travel pump is directly driven by the crankshaft of the engine via an elastic coupling, the pump speed is therefore identical with the engine speed. The steering/charge/vibration pump is a directly driven gear pump, which is connected with the travel pump via a coupling. -
Page 63: Travel Pump, Pmvo 13S
Travel pump, PMVO 13S Axial piston variable displacement pump PMVO 13S1M Travel pump, PMVO 13S Control, mechanical The variable displacement axial piston pump generates, controls and regulates a volumetric pressure fluid flow. It has been designed for mobile applications, e.g. in construction equipment. Caution The variable displacement axial piston pump must be filled with pressure fluid and purged during start- up and operation. - Page 64 Travel pump, PMVO 13S Hydraulic diagram Fig. 3 Designation Designation mechanical control Work connection High pressure relief valves Work connection Charge pressure relief valve Motor Pressure test port, pressure A Pressure test port, pressure B Control pressure inlet Ventilation Pressure port for charge circuit Leak oil Leak oil Port for control pressures, pressure in front of...
- Page 65 Travel pump, PMVO 13S The boost check valves are integrated in the high pressure relief valves. These valves open to the low pressure side and let cool and filtered oil flow from the charge oil circuit into the closed hydraulic circuit, in order to com- pensate leaks and flushing quantities.
- Page 66 Travel pump, PMVO 13S Description of function Fig. 5 Drive shaft Through drive Piston Valve plate Piston area Top dead centre TDC Piston stroke Bottom dead centre BTC Slipping disc Control slots in suction side of swash plate (for sense of rotation shown) Adjusting angle Control slot on pressure side Cylinder...
-
Page 67: Troubleshooting Axial Piston Pumps
Troubleshooting axial piston pumps 7.4 Troubleshooting axial piston pumps The following table should be of help when performing troubleshooting This table is by no means complete. In practice you may encounter problems that have not been listed here. Procedure Always proceed systematically, even under time pressure. Indiscriminate, ill-considered disassembly and changing of settings can lead to a situation in which the original cause of a fault can no longer be detected. - Page 68 Troubleshooting axial piston pumps Fault Possible cause Remedy No or insufficient volumetric flow Faulty mechanical drive (e.g. defec- Check and repair the drive. tive coupling). Drive speed too low. Consult the service department. Insufficient suction conditions, e.g. Completely purge the axial piston air in the suction line, inadequate di- unit, fill the suction line with pres- ameter of the suction line, excessive...
- Page 69 Troubleshooting axial piston pumps Fault Possible cause Remedy No or insufficient pressure Faulty mechanical drive (e.g. defec- Check and repair the drive. tive coupling). Poor drive power. Consult the service department. Insufficient suction conditions, e.g. Completely purge the axial piston air in the suction line, inadequate di- unit, fill the suction line with pres- ameter of the suction line, excessive...
-
Page 70: Travel Motor Tg405
Travel motor TG405 Torque motor TG405, gerotor motor Travel motor TG405 Gerotor motors are slow running hydraulic motors with high torque. With a given oil flow and a given pressure the displacement of the motor (nominal size of motor) determines both the speed and the torque. - Page 71 Travel motor TG405 Notes on repair Fig. 7 Note 1) 61 to 75 Nm tightening torque alternately on 7 screws. 2) Insert commutator completely with new seal. The flat side of the seal faces towards the outside. 3) Before assembling the drive shaft thoroughly grease the space between the dashed lines. 008 921 86 BOMAG...
-
Page 72: External Gear Motors
External gear motors Outer gear motors non-reversible External gear motors Fig. 8 Gear motor In their design gear motors are quite similar to gear pumps. The only difference is the slightly different axial pres- sure field. The pressure fluid flowing into the gear motor works on the gears. It generates a torque, which is then transferred by the output shaft. -
Page 73: External Gear Pumps
External gear pumps External gear pumps External gear pumps External gear pumps mainly consist of the friction bearing mounted gear pair and the housing with front and rear covers. The drive shaft, which is sealed with a radial seal, protrudes from the front cover. The bearing forces are absorbed by friction bearings. - Page 74 External gear pumps Fig. 11 Cover Gear (driven) Seals and gaskets Shaft Housing Flange Gear (driving) Bearing plate Displacement chamber Bearing plate BOMAG 008 921 86...
-
Page 75: Steering Valve
Steering valve OSP steering valve Steering valve The OSP steering unit works hydrostatically, i.e. there is no mechanical connection between the steering wheel and the wheels to be steered (articulated joint, drum, etc.). The mechanical link is replaced by hydraulic piping and hoses between the steering unit and the steering cylinder(s). -
Page 76: Travel Circuit
Travel circuit 7.9 Travel circuit The travel circuit is a closed hydraulic circuit, it consists mainly of the travel pump PMVO13S with the integrated safety elements, the travel motors and the check valve. The travel pump has the function of supplying the travel circuit with hydraulic oil. The travel motors are connected in series and drive the drum . - Page 77 Travel circuit Fig. 2 008 921 86 BOMAG...
- Page 78 Travel circuit Designation Designation Vibration valve (Y22) with pressure test port 6 Charge oil filter with pressure test port Hydraulic oil tank Rear drum drive motor Steering valve Front drum drive motor Check valve 1 bar Steering/charge/vibration pump Travel pump Pressure test ports Brake Hydrostatic braking...
-
Page 79: Vibration Circuit
7.10 Vibration circuit 7.10 Vibration circuit The vibration drive is an open hydraulic circuit. Fig. 1 AD-machine Designation Designation Hydraulic oil tank Pressure test port Steering/charge/vibration pump Vibration motor Vibration valve (Y22) with pressure test port Vibration drive The vibration pump delivers the hydraulic oil from the tank to the vibration valve (Y22). When the vibration is switched on, hydraulic oil flows to the vibration motor. - Page 80 7.10 Vibration circuit Fig. 2 1 Exciter shaft 2 Rubber buffer 3 Vibration motor 4 Weights BOMAG 008 921 86...
-
Page 81: Steering Circuit
7.11 Steering circuit 7.11 Steering circuit The steering circuit is an open hydraulic circuit. Fig. 1 Designation Designation Vibration valve (Y22) with pressure test port 6 Charge oil filter with pressure test port Hydraulic oil tank Rear drum drive motor Steering valve Front drum drive motor Check valve 1 bar... - Page 82 7.11 Steering circuit to the charge ports for the travel circuit. When turning the steering wheel the distributor valve guides the oil flow to the piston or piston rod side of the steering cylinder. A metering pump inside the steering unit measures the exact oil quantity required for the steering wheel rotation and feeds it to the steering cylinder.
-
Page 83: Checking The Hydraulic Oil Level
7.12 Checking the hydraulic oil level 7.12 Checking the hydraulic oil lev- Caution If, during the daily inspection of the oil level the hydraulic oil level is found to have dropped, check all lines, hoses and components for leaks. In hydraulic systems filled with Panolin HLP Synth. -
Page 84: Changing The Hydraulic Oil
7.13 Changing the hydraulic oil 7.13 Changing the hydraulic oil Note See also the notes on the hydraulic system in the chapter "General notes on maintenance". Danger Danger of scalding! When draining off hot hydraulic oil! Caution Fig. 3 The hydraulic oil must also be changed after ma- Remove the cap from the hydraulic oil tank (Fig. -
Page 85: Checking The Hydraulic Oil Filter Element
7.14 Checking the hydraulic oil filter element 7.14 Checking the hydraulic oil fil- Caution ter element The breather filter for the hydraulic oil tank is inte- grated in the filler cap, you must therefore replace the complete filler cap. Caution Close the tank with a new cover. -
Page 86: Change The Hydraulic Oil Filter
7.15 Change the hydraulic oil filter 7.15 Change the hydraulic oil filter Danger Danger of scalding! Danger of scalding by hot oil when unscrewing the oil filter. Caution If the filter has to be changed together with the hy- draulic oil, the filter must only be changed after the oil change and after the test run. - Page 87 8 Tests and adjustments 008 921 86 BOMAG...
-
Page 88: Special Tools
Special tools 8.1 Special tools 1. Vibration Reed frequency meter BOMAG part-no.: 300 120 80 Fig. 1 2. Hydraulic test case BOMAG part-no.: 007 610 03 Fig. 2 3. Electric test case BOMAG part-no.: 057 505 70 Fig. 3 4. Gear pump testing device BOMAG part-no.: 007 610 05 Fig. - Page 89 Special tools 5. Vacuum pump for hydraulic oil tank BOMAG part-no.: 007 610 04 (12V) Fig. 5 008 921 86 BOMAG...
-
Page 90: Checking The Rotation Speeds
Checking the rotation speeds 8.2 Checking the rotation speeds Special tools Vibration reed frequency meter Caution Perform measurements at operating tempera- ture of the hydraulic oil (40 °C). 1. Drive the drum of the machine on an elastic base (rubber buffers) (Fig. 1) and block the rear drum additionally with suitable chocks. - Page 91 Checking the rotation speeds Check the engine speed 1. Measure the speed, rest the tester on your thumb (Fig. 4). Nominal value high idle speed See technical data. 2. Switch the vibration on . Setpoint nominal speed See technical data. Evaluation of test If the nominal value is not reached, perform trou- ble shooting for the petrol engine.
- Page 92 Checking the rotation speeds Checking the exciter shaft speed 1. Switch the vibration on at max. engine speed. 2. Measure the speed of the vibrator shaft by letting the tester rest on your thumb (Fig. 5). Nominal value See technical data. Evaluation of test If the nominal value is not reached, perform trou- ble shooting on the engine or in the vibration sys-...
-
Page 93: Pressure Tests In The Travel Circuit
Pressure tests in the travel circuit 8.3 Pressure tests in the travel circuit Special tools Hydraulic test case Caution Perform measurements at operating tempera- ture of the hydraulic oil (40 °C). 1. Block the drums with suitable chocks (Fig. 1). Fig. - Page 94 Pressure tests in the travel circuit Evaluation of test If the nominal value is not reached, check the steering/charge pump. 6. Move the travel lever quickly forward and back- ward, read the pressure gauges. Nominal value See technical data. Evaluation of test If the charge pressure drops below the nominal value during the high pressure test, check the in- dividual components.
-
Page 95: Adjusting The Neutral Positions Of The Travel Pump
Adjusting the neutral positions of the travel pump 8.4 Adjusting the neutral positions of the travel pump Special tools Hydraulic test case Caution Perform measurements at operating tempera- ture of the hydraulic oil (40 °C). 1. Raise the machine (Fig. 1), so that both drums can turn freely. -
Page 96: Travel Pump High Pressure Test
Travel pump high pressure test 8.5 Travel pump high pressure test Special tools Hydraulic test case Caution Perform measurements at operating tempera- ture of the hydraulic oil (40 °C). 1. Block the drums with suitable chocks (Fig. 1). Fig. 1 2. - Page 97 Travel pump high pressure test Caution Run the following pressure test for max. 3 seconds. 5. Move the travel lever quickly to both travel direc- tions (Fig. 4)and read the high pressure gauges. Nominal value approx. 320 bar Evaluation of test If the nominal value is reached to one travel direc- tion only, check the high pressure relief valves.
-
Page 98: Pressure Tests In The Vibration Circuit
Pressure tests in the vibration circuit 8.6 Pressure tests in the vibration circuit Special tools Hydraulic test case Caution Perform measurements at operating tempera- ture of the hydraulic oil (40 °C). 1. Drive the front drum of the machine on an elastic base (rubber buffers) (Fig. -
Page 99: Vibration Pump High Pressure Test
Vibration pump high pressure test 8.7 Vibration pump high pressure test Special tools Hydraulic test case Caution Perform measurements at operating tempera- ture of the hydraulic oil (40 °C). 1. Block the drums with suitable chocks (Fig. 1). Fig. 1 2. -
Page 100: Checking The Leakage Rate Of The Vibration Motor
Checking the leakage rate of the vibration motor 8.8 Checking the leakage rate of the vibra- tion motor Caution Perform measurements at operating tempera- ture of the hydraulic oil (40 °C). 1. Drive the front drum of the machine on an elastic base (rubber buffers) (Fig. -
Page 101: Pressure Test In Steering Circuit
Pressure test in steering circuit 8.9 Pressure test in steering circuit Caution Perform measurements at operating tempera- ture of the hydraulic oil (40 °C). 1. Pull up the parking brake lever. (Fig. 1). Fig. 1 2. Connect a 600 bar pressure gauge to the steering pressure test port (Fig. - Page 102 Pressure test in steering circuit 6. Disconnect the hydraulic hoses (Fig. 4) from ports L and R on the steering cylinder and close them with plugs. 7. Repeat the pressure test. Nominal value approx. 10 bar Evaluation of test If the nominal value is reached, replace the steer- ing cylinder.
- Page 103 9 Flushing and bleeding 008 921 86 BOMAG...
-
Page 104: Special Tools For Flushing
Special tools for flushing 9.1 Special tools for flushing Note The following list informs about special tools for flushing. You should choose the corresponding tool for the work to be carried out. 11. Filling and filtering unit BOMAG part-no.: 058 240 22 Fig. - Page 105 Special tools for flushing 22. Flanged plate 1“ - 25S BOMAG part-no.: 007 160 18 23. O-ring BOMAG part-no. 062 202 22 Fig. 5 24. Reducing fitting 18L - 15L BOMAG part-no.: 055 422 92 Fig. 6 25. Reducing fitting 25S - 20S BOMAG part-no.: 055 422 98 Fig.
- Page 106 Special tools for flushing 27. Connecting socket 15L BOMAG part-no.: 055 426 55 Fig. 9 28. Connecting socket 18L BOMAG part-no.: 055 426 06 Fig. 10 29. Connecting socket 16S BOMAG part-no.: 055 459 43 Fig. 11 30. Connecting fitting 20S BOMAG part-no.: 055 459 44 Fig.
- Page 107 Special tools for flushing 31. Connecting fitting 25S BOMAG part-no.: 055 459 45 Fig. 13 32. Angular fitting 18L BOMAG part-no.: 055 421 26 Fig. 14 33. Elbow fitting 16L BOMAG part-no.: 055 421 36 Fig. 15 34. Elbow 20S BOMAG part-no.: 055 421 37 Fig.
- Page 108 Special tools for flushing 35. Elbow 25S BOMAG part-no.: 055 421 38 Fig. 17 36. Pipe connection 16S - 16S BOMAG part-no.: 493 301 01 Fig. 18 37. Connecting hose 15L BOMAG part-no.: 055 510 09 Fig. 19 BOMAG 008 921 86...
-
Page 109: Flushing - General
Flushing - general 9.2 Flushing - general Solid particles in the circuit will very quickly cause damage to machine components. Changing a component Caution Always flush the complete oil circuit after you have replaced a component. Chips (abrasion) in the oil Fig. - Page 110 Flushing - general Before flushing Bleeding Change the filter element Fig. 3 Always bleed closed hydraulic circuits if Fig. 1 lines had been removed or connected. Clean the hydraulic tank Servicing the flushing filter kit Fig. 4 Fig. 2 Replace the filter element of the flushing fil- ter when the red control pin of the contami- nation indicator is pressed out during the Caution...
-
Page 111: Flushing Schematic For Travel System
Flushing schematic for travel system 9.3 Flushing schematic for travel system Travel pump Flushing hose 25S - 20S (tool) Bulkhead fitting (tool) Flushing filter with filter element 1μ (tool) Elbow union (tool) Hose connection, travel pump B - drum drive mo- tor, front Screw socket 1"... -
Page 112: Flushing The Travel System
Flushing the travel system 9.4 Flushing the travel system Environment Environmental damage Any hydraulic oil must be caught and dis- posed of in an environmentally friendly man- ner. Replacing the hydraulic oil filter element Cleaning the hydraulic oil tank Note Observe the chapter "Flushing - General"... - Page 113 Flushing the travel system Bleeding the travel circuit Note Bleed the travel circuit, see chapter "Bleeding the travel circuit" . Fig. 2 Flushing the hoses 4. Block the drums with suitable chocks. Fig. 3 Note Keep circulating the complete tank content with the filling and filtering unit throughout the entire flushing process.
- Page 114 Flushing the travel system Flushing the drum drive motors Danger Danger of accident! The drums must be able to rotate freely. 9. Jack or lift up the machine. Fig. 6 Note Keep circulating the complete tank content with the filling and filtering unit throughout the entire flushing process.
- Page 115 Flushing the travel system Function test 15. Check the hydraulic oil level in the tank, fill up if necessary. 16. Check all connections for leaks with the engine running (visual inspection). 17. Perform a test drive, load the travel system in for- ward and reverse, e.g.
-
Page 116: Bleeding The Travel Circuit
Bleeding the travel circuit 9.5 Bleeding the travel circuit Environment Catch hydraulic oil and dispose of environ- mentally. 1. Secure the drums with chocks . Fig. 1 2. Actuate the emergency stop switch. Danger The engine should not start. Fig. 2 3. - Page 117 Bleeding the travel circuit 8. Unlock the emergency stop switch Fig. 4 9. Connect a 60 bar pressure gauge (Fig. 5) to the charge pressure test port and run the engine max. 15 seconds at idle speed. 10. Pause for approx. 30 seconds and keep repeat- ing this procedure, until the gauge shows a con- stant charge pressure reading.
- Page 118 10 Drum 008 921 86 BOMAG...
-
Page 119: Special Tools
10.1 Special tools 10.1 Special tools 1. Bell to change the rubber buffers Fig. 1 BOMAG 008 921 86... -
Page 120: Repair Overview Vibrating Drum
10.2 Repair overview vibrating drum Fig. 1 BOMAG 008 921 86... - Page 121 10.2 Repair overview vibrating drum Drum Exciter shaft Vibration motor Clutch Rubber buffer Vibration bearings 008 921 86 BOMAG...
-
Page 122: Removing And Installing The Vibrating Drum
10.3 Removing and installing the vibrating drum 10.3 Removing and installing the vibrating drum Removing the drum Environment Environmental damage Any hydraulic oil must be caught and dis- posed of in an environmentally friendly man- ner. Danger Danger of squashing 1. - Page 123 10.3 Removing and installing the vibrating drum Installing the drum 12. Examine all rubber buffers 1 (Fig. 4) for wear, re- place if necessary. Note Tighten the rubber buffers with 211 Nm. Install the drum in reverse order, for this purpose move the drum with attached travel motor and support legs parallel into the frame.
-
Page 124: Dismantling The Vibrating Drum
10.4 Dismantling the vibrating drum 10.4 Dismantling the vibrating drum 1. Remove the drum. Removing the travel motor Danger Secure the drum against unintended rolling. 2. Attach the lifting tackle to the support leg 2 (Fig. 3. Unscrew the nuts (1), remove the washers and take off the support leg with travel motor and drive disc. - Page 125 10.4 Dismantling the vibrating drum 7. Check the rubber buffers 1 (Fig. 4), unscrew and replace if necessary. Fig. 4 Dismantling the travel bearing on the vibration drive side 1. Use a suitable rubber buffer mounting bell to un- screw the rubber buffers 1 (Fig. 5). Fig.
- Page 126 10.4 Dismantling the vibrating drum 3. Remove circlip 1 (Fig. 7). Fig. 7 4. Press flange 1 (Fig. 8)off the bearing flange with forcing screws (2). Fig. 8 5. Knock ball bearing 1 (Fig. 9) out of the flange. Fig. 9 6.
- Page 127 10.4 Dismantling the vibrating drum 7. Remove coupling element 1 (Fig. 11). Fig. 11 Removing / dismantling the exciter shaft 8. Unscrew fastening screws 1 (Fig. 12). 9. Force the bearing flange off the drum using forc- ing screws (2). Fig.
- Page 128 10.4 Dismantling the vibrating drum 11. Remove cylinder roller bearing 1 (Fig. 14) from the bearing flange. Fig. 14 12. Pull coupling hub 1 (Fig. 15) off the exciter shaft. Fig. 15 13. Pull inner bearing race 1 (Fig. 16) off both sides of the exciter shaft.
- Page 129 10.4 Dismantling the vibrating drum 16. Force the bearing cover off the drum using forc- ing screws 1 (Fig. 18). Fig. 18 17. Remove cylinder roller bearing 1 (Fig. 19) from the bearing cover. Fig. 19 008 921 86 BOMAG...
-
Page 130: Asembling The Vibrating Drum
10.5 Asembling the vibrating drum 10.5 Asembling the vibrating drum Assembling / installing the exciter shaft 1. Cool the new cylinder roller bearing 1 (Fig. 1) down to -25°C and press it into the bearing flange until it bottoms, fill with high pressure grease. Note Fill approx. - Page 131 10.5 Asembling the vibrating drum 4. Install the seal ring 2 (Fig. 4) on both ends of the exciter shaft. Note Lubricate the bearing seat areas. Danger Danger of burning! Wear protective gloves 5. Heat the inner bearing races (1) up to approx. 80°C and slide them on the exciter shaft from both ends.
- Page 132 10.5 Asembling the vibrating drum Measuring the end float 9. Push the exciter shaft into the bearing flange against the stop (Fig. 8). 10. Measure the distance between coupling and front face of bearing flange . 11. Pull the exciter shaft out against the stop. 12.
- Page 133 10.5 Asembling the vibrating drum 3. Press ball bearing 1 (Fig. 11) into the flange until it bottoms. Fig. 11 4. Knock flange 1 (Fig. 12) onto the bearing flange using a drift punch. Fig. 12 5. Insert circlip 1 (Fig. 13) into the groove in the bearing flange and check the correct fit.
- Page 134 10.5 Asembling the vibrating drum 8. Tighten all rubber buffers 1 (Fig. 15) with a match- ing rubber buffer mounting bell. Tightening torque for rubber buffers: 211 Nm Fig. 15 Installing the travel motor 9. Tighten all rubber buffers 1 (Fig. 16) with a match- ing rubber buffer mounting bell.
- Page 135 10.5 Asembling the vibrating drum 13. Attach the support leg 2 (Fig. 1) with travel motor and drive disc to the drum. Tightening torques for rubber buffers (1): 211 Nm Fig. 19 008 921 86 BOMAG...
- Page 136 11 Oscillating articulated joint 008 921 86 BOMAG...
-
Page 137: Repair Overview Oscillating Articulated Joint
11.1 Repair overview oscillating articulated joint 11.1 Repair overview oscillating articulated joint Housing Bearing housing Bearing block, top Bearing journal Bearing block, bottom Rocker bearings for steering cylinder Note When tightening the bearing housing (4) move the bearing housing slightly to and fro to ensure a uniform wear pattern of the individual bearing rollers. - Page 138 11.1 Repair overview oscillating articulated joint Bearing journal Taper roller bearing Bearing block, top Hinge bearing Bearing block, bottom Taper roller bearing Bearing housing 008 921 86 BOMAG...
-
Page 139: Removing And Installing The Oscillating Articulated Joint
11.2 Removing and installing the oscillating articulated joint 11.2 Removing and installing the oscillat- ing articulated joint 1. Engage the articulation lock (Fig. 1). Fig. 1 2. Block the drums with suitable chocks (Fig. 2). 3. Safely support front and rear frames. Danger Danger of accident! Block front and rear drums with wedges... - Page 140 11.2 Removing and installing the oscillating articulated joint 5. Attach lifting tackle to the articulated joint. 6. Remove the split pin form the steering cylinder bearing bolt 1 (Fig. 4) and knock out the bolt. 7. Take off supporting discs (2). 8.
-
Page 141: Repairing The Oscillating Articulated Joint
11.3 Repairing the oscillating articulated joint 11.3 Repairing the oscillating articulated joint Dismantling the oscillating articulated joint 1. Pull bearing blocks 1 (Fig. 4) off both sides. Fig. 1 2. Remove supporting discs 1 (Fig. 2), shims (2) and seal rings (3) from both sides. Fig. - Page 142 11.3 Repairing the oscillating articulated joint 4. Unscrew hexagon nut 1 (Fig. 4). Note Hexagon nut secured with LOCTITE. Fig. 4 5. Pull bearing housing 1 (Fig. 5) off bearing journal (2). Fig. 5 6. Take disc 1 (Fig. 6) out of the bearing housing and remove O-ring (2).
- Page 143 11.3 Repairing the oscillating articulated joint 9. Remove outer bearing race 1 (Fig. 8). Fig. 8 10. Turn the bearing housing upside down and take out seal ring 1 (Fig. 9). Fig. 9 11. Knock the outer bearing race 1 (Fig. 10) out of the bearing housing.
- Page 144 11.3 Repairing the oscillating articulated joint Assembling the oscillating articulated joint 1. Press taper roller bearing 1 (Fig. 1) onto the bear- ing journal. Fig. 1 2. Press outer bearing race 1 (Fig. 2) into the bear- ing housing and fill to 2/3 with lithium saponified high pressure grease.
- Page 145 11.3 Repairing the oscillating articulated joint 5. Insert a new seal ring 1 (Fig. 4) into the bearing housing. Fig. 4 6. Mount bearing housing 1 (Fig. 5) to bearing jour- nal (2). Fig. 5 7. Knock taper roller bearing 1 (Fig. 6) into the bear- ing housing.
- Page 146 11.3 Repairing the oscillating articulated joint 11. Cover the thread on the bearing journal with LOCTITE and tighten hexagon nut 1 (Fig. 8) with 300 Nm. Note When tightening the hexagon nut (1) move the bearing housing to and fro to ensure a uniform wear pattern of the individual bearing rollers.
- Page 147 12 Suppliers documentation 008 921 86 BOMAG...
- Page 148 BOMAG 008 921 86...
-
Page 149: Steering Valve
12.1 Steering valve 008 921 86 BOMAG... - Page 150 12.1 Steering valve Service Steering unit type OSPM All standard versions service manual HN.21.TA.93 is new 02-2007 008 921 86 BOMAG...
- Page 151 12.1 Steering valve Exploded view BOMAG 008 921 86...
- Page 152 12.1 Steering valve Item Dimension Comments Number per unit Dust seal ring 26 x 19 x 4 Integrated column Housing spool and sleeve (not sold separately) Ball ø3/16” ON with check valve in P-port, item 37 Ball stop PB with check valve in P-port, item 37 ON + PB, without check valve in P-port 21,9 x 17,5 x 3,1 Shaft seal...
- Page 153 12.1 Steering valve Item Dimension Comments Number per unit Spring for relief valve 45 - 55 bar 54 - 70 bar 65 - 85 bar 80 - 100 bar seals Item Dimension Comments Number per unit Dust seal 26 x 19 x 4 Integrated column 21,9 x 17,5 x 3,1 Shaft seal...
- Page 154 12.1 Steering valve Tools A Holdeværktøj, Best.nr. SJ150L9001-01 A Holding tool, code no. SJ150L9001-01 A Haltewerkzeug, Artikelnr. SJ150L9001-01 A Outil de maintien, n° de commande SJ150L9001-01 B Montageværktøj for akselpakning ø17,5 Best. nr. SJ150L4011 - 01 B Assembly tool for shaft seal ø17.5, code no. code no. SJ150L4011 - 01 B Montagewerkzeug für Wellendichtung ø17,5, Artikelnr.
- Page 155 12.1 Steering valve Dismantling Item Part to remove Action Column Er der ratstamme på OSPM, anbringes enheden på holdeværktøjet på de 4 styrestifter med ratstammen opad. Demonter ratstammen. If there is a steering column on OSPM, place the unit in the holding tool, on the four locating pins with steering column upwards.
- Page 156 12.1 Steering valve Dismantling Item Part to remove Action 17, 18 Gear wheel set Hold hånden under tandsættet, så tandhjulet ikke falder ud. Fjern O-ringene. Hold a hand under the gearwheel set to keep the gearwheel from falling out. Remove O-rings. Die Hand unter dem Zahnradsatz halten, damit das Zahnrad nicht heraus- fällt.
- Page 157 12.1 Steering valve Dismantling Item Part to remove Action Bearing Fjern lejet fra akseltappen. Den ydre løbeskive kan til tider klæbe fast i huset. Hvis skiven ikke kommer ud med akslen, vil den komme ud, når akselpakningen item 5 trykkes ud. Remove bearing from shaft end.
- Page 158 12.1 Steering valve Rensning, kontrol, udskiftning Alle dele rengøres omhyggeligt. og smøring Kontroller omhyggeligt alle dele og skift dem ud hvis nødvendigt. Alle pakningsdele udskiftes i forbindelse med reparation. Smør alle enkeltdele ind i hydraulikolie og indfedt gummidele med vaseline før samling . Cleaning, inspection, replace- Clean all parts carefully.
- Page 159 12.1 Steering valve Assembly Item Part to mount Action Housing Placer OSPM huset horisontalt i holdeværktøjet, med hullet for udgangs- akslen ind i værktøjet. Bemærk, at styrestiften i værktøjet kommer på plads i OSPM-huset. Place the OSPM housing horizontally in the holding tool, with the hole for the output shaft facing the tool.
- Page 160 12.1 Steering valve Assembly Item Part to mount Action Spring retaining Centrer fjedrene i glidesættet og før ringen ned over ydre glider. ring Bemærk: Ringen skal kunne rotere uhindret af fjedrene. Center the springs in the spool/sleeve set and guide the ring down over the sleeve.
- Page 161 12.1 Steering valve Assembly Item Part to mount Action Stadig med hus og glidersæt siddende i værktøjet løftes det hele op i verti- kal position. Stiften i glidersættet skal nu pege på P-porten i huset, enten “klokken 6 eller 12”. With housing and spool set remaining in the tool, lift the whole unit into vertical position.
- Page 162 12.1 Steering valve Assembly Item Part to mount Action Gear wheel Når tandhjulet sættes på plads, skal det vende rigtigt inden det får indgreb med kardanakslen. Stiften i glidersættet (item 11) skal flugte med tand- bunden i stjernen (se skitse) When fitting the gearwheel, it must be oriented correctly so that it engages with the cardan shaft.
- Page 163 12.1 Steering valve Assembly Item Part to mount Action Hvis OSPM skal have monteret trykbegrænsningsventil, løftes den ud af værktøjet og placeres på de 4 styrestifter med akseltappen opad. If the OSPM must be mounted with a pressure relief valve, lift it out of the tool and place it on the four pins with the axle journals upwards Wenn die OSPM mit einem Druckbegrenzungsventil montiert werden muß, die Einheit aus dem Werkzeug heben und mit dem Wellenende nach oben...
- Page 164 12.1 Steering valve Assembly Item Part to mount Action Dust seal Støvtætningsring sættes ned over akslen og presses på plads i huset med montageværktøj SJ 150L0396 - 01 NB: Støvtætningsringen monteres efter afprøvningen for at kunne se evt. utæthed ved akselpakningen. Guide the dust seal rins down over the shaft end press into place in the housing with assembly tool.
- Page 165 13 Circuit diagrams 008 921 86 BOMAG...
- Page 166 BOMAG 008 921 86...
-
Page 167: Hydraulic Diagram
13.1 Hydraulic diagram 138 008 921 86 BOMAG... - Page 168 13.1 Hydraulic diagram 138 008 921 86 BOMAG...
- Page 169 13.1 Hydraulic diagram 138 BOMAG 008 921 86...
- Page 170 13.1 Hydraulic diagram 138 008 921 86 BOMAG...
- Page 171 13.1 Hydraulic diagram 138 BOMAG 008 921 86...
- Page 172 13.1 Hydraulic diagram 138 008 921 86 BOMAG...
- Page 173 13.1 Hydraulic diagram 138 BOMAG 008 921 86...
- Page 174 13.1 Hydraulic diagram 138 008 921 86 BOMAG...
-
Page 175: Wiring Diagram
13.2 Wiring diagram 78 008 921 86 BOMAG... - Page 176 13.2 Wiring diagram 78 008 921 86 BOMAG...
- Page 177 13.2 Wiring diagram 78 BOMAG 008 921 86...
- Page 178 13.2 Wiring diagram 78 008 921 86 BOMAG...
- Page 179 13.2 Wiring diagram 78 BOMAG 008 921 86...
- Page 180 13.2 Wiring diagram 78 008 921 86 BOMAG...
- Page 181 13.2 Wiring diagram 78 BOMAG 008 921 86...
- Page 182 13.2 Wiring diagram 78 008 921 86 BOMAG...
- Page 183 13.2 Wiring diagram 78 BOMAG 008 921 86...
- Page 184 13.2 Wiring diagram 78 008 921 86 BOMAG...
- Page 185 Discount-Equipment.com is your online resource for quality parts & equipment. Florida: 561-964-4949 Outside Florida TOLL FREE: 877-690-3101 Need parts? Click on this link: http://www.discount-equipment.com/category/5443-parts/ choose one of the options to help get the right parts and equipment you are looking for.
Need help?
Do you have a question about the BOMAG BW 900-50 and is the answer not in the manual?
Questions and answers