Advertisement
Quick Links
Advertisement

Related Manuals for RTA Techni Mobili RTA - 3520


Summary of Contents for RTA Techni Mobili RTA - 3520
- Page 1 MODEL RTA - 3520 Thanks for purchasing one of our products. Please read carefully the assembly instructions before the installation. Please save this manual for future reference. Complete video assembly demonstration is available at: www.rtaproducts.com/assembly-videos.htm MODEL RTA-3520...
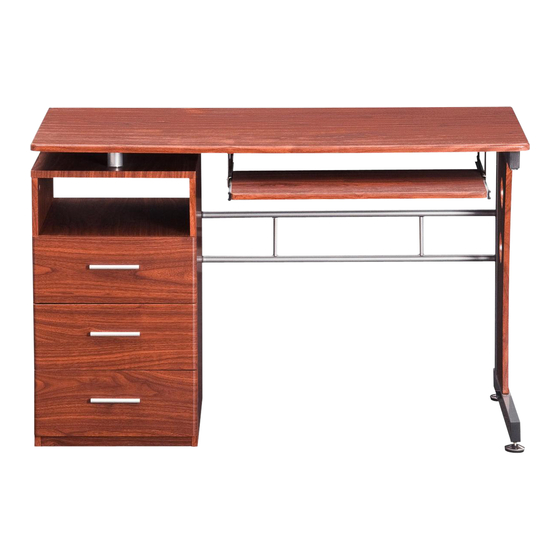
- Page 2 RTA-3520 DIMENSIONS Product Size: 47.5"W x 23"D x 30"H MAXIMUM WEIGHT CAPACITIES DO NOT exceed this limit Please use care and good judgement when placing objects on wood surface...
-
Page 3: Parts List
RTA-3520 PARTS LIST Top Panel Left Panel Middle Panel Studs Horizontal Panel Bottom Panel Back Panel Front Base Panel Side Structure Back Structure Main Panel Right Panel Right Left X 1 SET Slider Base Keyboard Slider Keyboard Panel Support Tubes... -
Page 4: Screws List
RTA-3520 Drawer Right Panel Drawer Bottom Panel Drawer Left Panel Drawer Front Panel X 3SET Right Left Right Left Drawer Back Panel Drawer Slider Handle SCREWS LIST PART QTY. ITEM PART QTY. ITEM 3X15 MM 6X60 MM 4X35 MM 6X40 MM... - Page 5 RTA-3520...
- Page 6 RTA-3520...
-
Page 7: Assembly Steps
RTA-3520 Complete video assembly demonstration is available at: www.rtaproducts.com/assembly-videos.htm ASSEMBLY STEPS: SCREWS 3X15 MM 12PCS 3PCS 3PCS Right Left Grab all the flat shaped Drawer Sliders (22) and set aside the “L” shaped ones. With the Left & Middle Panels (1&2) oriented as illustrated, assemble the flat sliders (22) to the holes on their inside faces. - Page 8 RTA-3520 Detailed instructions on PAGE 5 Screw the Bolts (B) to the corresponding holes on the inside face of Middle Panel (2), then assemble the Middle Panel (2) to the Horizontal Panel (5), Bottom Panel (6) and Front Base Panel (8) by turning all the corresponding cam locks.
- Page 9 RTA-3520 SCREWS 6X35 MM 2PCS 6X25 MM Use Screws (D & E) to assemble the Back Structure (11) between the Middle Panel (2) and Side Structure (9). 2PCS 4PCS 4PCS Left Right Use Screws (G) to fix the Keyboard Slider (15) to Use Screws (F) to affix the Slider Bases (14) to the Slider Bases (14) as illustrated.
- Page 10 RTA-3520 P.10 Place the plastic washer (L) in between the Top Panel (4) and Support Tubes (16), and assemble the Main Panel (12) using screws (D) on the LEFT and (I) on the RIGHT. SCREWS 6X60 MM 2PCS 2PCS 6X35 MM...
- Page 11 RTA-3520 P.11 Assemble the Drawer Back Panel (21) between the Drawer Left & Right Panels (17&18) using Screws (J) as shown. SCREWS 4X35 MM 4PCS SCREWS Place the drawer upside-down. Grab the “L” shaped sliders (22) 3X15 MM and assemble them to the drawer using Screws (A), with wheels facing towards the back of the drawer.
Need help?
Do you have a question about the Techni Mobili RTA - 3520 and is the answer not in the manual?
Questions and answers