Table of Contents
Advertisement
Read the operating instructions prior to
commissioning
Operating instructions
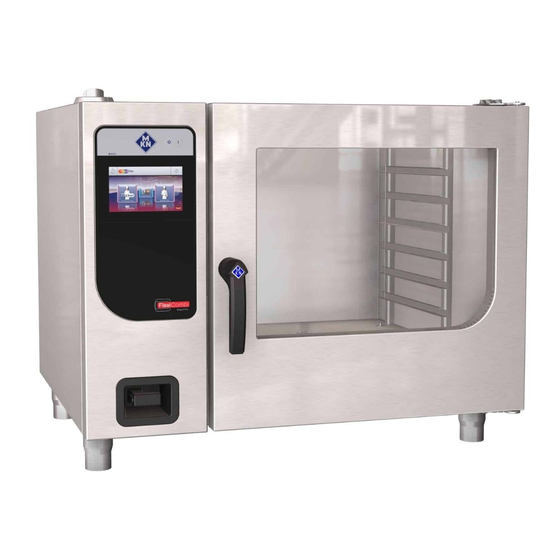
Combisteamer
Unit
FlexiCombi MagicPilot
Model
Type of energy
FKECOD615T
Electric
FKECOD621T
FKECOD1015T
FKECOD1021T
FKECOD2015T
FKECOD2021T
10013865-0ABBE-B
Version
WaveClean
Door with hygiene glazing
(optional)
4-point core temperature sensor
(optional)
Sous-vide core temperature
sensor (optional)
Software version 1.65
en-GB
Advertisement
Table of Contents


Need help?
Do you have a question about the FlexiCombi MagicPilot Series and is the answer not in the manual?
Questions and answers
how to applying acid on MKN oven when cleaning?
@Emmanuel Rutambuka
To apply acid (decalcifier) when cleaning an MKN MagicPilot Series oven:
1. Ensure the cooking zone temperature is below 40 °C.
2. Use a manual spray gun filled with a special decalcifier.
3. Spray the decalcifier manually onto the areas with calcium deposits.
Follow all safety precautions, such as wearing protective gloves and ensuring the unit is cool and disconnected from the power supply.
This answer is automatically generated
Temperature fail
A temperature fail error in the MKN MagicPilot Series means that a temperature sensor is defective. Specific error messages (e.g., 694, 695, 696, 697, 699, 700, 728, 729) indicate which sensor is affected, such as the internal core, top, or bottom cooking zone sensor. When this occurs, another sensor may temporarily take over its function, but cooking results may differ. The recommended action is to insert the internal core temperature sensor into its holder if not already, or contact customer service for assistance.
This answer is automatically generated