MKN FlexiChef Operating Instructions Manual
Hide thumbs
Also See for FlexiChef:
- Operating instructions manual (64 pages) ,
- Operating instructions manual (92 pages)
Table of Contents
Advertisement
Advertisement
Table of Contents

Related Manuals for MKN FlexiChef


Summary of Contents for MKN FlexiChef
- Page 1 Read the operating instructions prior to commissioning Operating instructions FlexiChef Unit Type of energy Version Model FlexiChef Electric Tiltable FCEKMP1... Deep frying FCEKMP3... Pressure cooking FlexiChef Team FCEKMP2... Cleaning Software version 1.8.34.7 4426201-20ABBE-A en-GB...
- Page 2 Operating and display elements a "ON OFF" button c Touchscreen b Equipment version symbol d Back button Operating instructions...
- Page 3 Fax +49 5331 89-280 Internet www.mkn.com Copyright All rights to text, graphics and pictures in this documentation are held by MKN Maschinenfabrik Kurt Neubauer GmbH & Co. KG. Distribution or duplication is only permitted with the prior written consent of MKN.
-
Page 4: Table Of Contents
Directory of contents 1 Introduction ................. 7 1.1 About this manual ................ 7 1.1.1 Explanation of signs .................. 8 1.2 Intended use .................. 9 1.3 Warranty .................... 9 2 Safety information ............ 10 3 Description of the unit ............. 14 3.1 Overview of the unit ............... 14 3.2 Features .................. 15 3.2.1 Operating modes ... - Page 5 Directory of contents 4.4.5 Exporting the HACCP log ................ 37 4.5 Equipment functions .............. 37 4.5.1 Opening the Equipment function menu ........... 38 4.5.2 Opening and closing the lid .............. 38 4.5.3 Tilting or tilting back the pan .............. 40 4.5.4 Opening and closing the water inlet ............ 42 4.5.5 Opening and closing the drain ..............
- Page 6 Directory of contents 5.6 Cleaning the seal ................ 99 5.7 Cleaning the pan manually ............ 99 5.8 Cleaning the pan automatically with SpaceClean (optional) .. 100 5.8.1 Inserting the cleaning lance .............. 101 5.8.2 Starting automatic cleaning .............. 102 5.8.3 Ending automatic cleaning .............. 102 6 Troubleshooting ...
-
Page 7: 1 Introduction
Introduction 1 Introduction 1.1 About this manual The operating instructions are part of the unit and contain information: • On safe operation, • On cleaning and care, • On remedies in case of faults. Be aware of the following notes and adhere to them: •... -
Page 8: Explanation Of Signs
Introduction 1.1.1 Explanation of signs DANGER Imminent threat of danger Failure to comply will lead to death or very severe injuries. WARNING Possible threat of danger Failure to comply can lead to death or very severe injuries. CAUTION Dangerous situation Failure to comply can lead to slight or moderately severe injuries. -
Page 9: Intended Use
Introduction 1.2 Intended use This unit is intended to be used solely for commercial purposes, particularly in commercial kitchens. This unit may only be used with suitable accessories and for the cooking of food. It is forbidden to use the unit for purposes, which include the following: •... -
Page 10: 2 Safety Information
Safety information 2 Safety information The unit complies with applicable safety standards. Residual risks associated with operation or risks resulting from incorrect operation cannot be ruled out and are mentioned specifically in the safety instructions and warnings. The operator must be familiar with regional regulations and observe them. - Page 11 Safety information Risk of scalding from hot oil • Protect arms and hands by wearing suitable protective gloves. • Prior to deep frying, remove excess ice from frozen foods to be cooked. • Prior to deep frying, dry wet foods to be cooked. •...
- Page 12 Safety information Firefighting • In the event of a fire, disconnect the unit from the electric mains. • Use a Fire Class F fire extinguisher, never water, to extinguish grease fires. Other fires, for instance, can be extinguished with fire extinguishers suitable for Fire Classes A, B, C, CO fire extinguishers or extinguishing media suitable for the fire class...
- Page 13 Safety information Improper use Risk of physical damage from improper use • Do not operate the unit outdoors. • Use only original accessories. • Train operators regularly. • Do not heat food warmer plates or tins of preserved food. • Use only appropriate and undamaged cookware.
-
Page 14: 3 Description Of The Unit
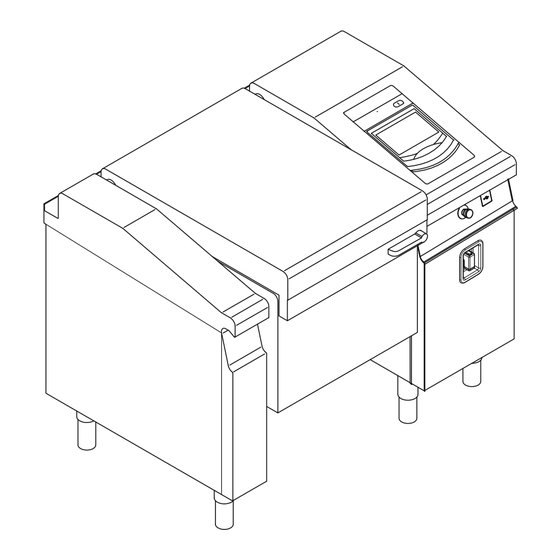
Description of the unit 3 Description of the unit The multi-function unit is intended for universal use in commercial kitchens for cooking food. Possible uses include cooking, intensive simmering, frying, braising, boiling, pressure-cooking, deep-frying. Units with the pressure-cooking function fall under the scope of Pressure Equipment Directive 2014/68/EU and are classified as Category II. -
Page 15: Features
Description of the unit 3.2 Features 3.2.1 Operating modes Overview of the operating modes • Manual cooking • Automatic cooking (autoChef) Manual cooking In the Manual cooking mode, individual cooking processes and equipment functions can be actuated directly. The various cooking modes can be adapted individually. - Page 16 Description of the unit Cooking The cooking mode enables food to be cooked at various boiling strengths in a temperature range of 90 °C to 100 °C. The food is heated to boiling temperature at maximum output, and it then continues to be cooked with the selected boiling strength. Frying The frying mode enables food to be fried at various output levels in a temperature range of 100 °C to 300 °C.
-
Page 17: Core Temperature Measurement
Description of the unit Zone cooking The zone cooking mode enables food to be cooked in a temperature range of 90 °C to 100 °C. The pan is divided into four different zones. Each zone can be operated with its own cooking time. The output and cooking temperature are the same for all zones. -
Page 18: Operating, Control And Display Element Functions
FlexiHelp button • Displays the help texts for the active menu or window. Equipment version symbol • The equipment version is dis- played. • On FlexiChef Team: Active equipment unit is highlighted. – Tap the equipment unit to activate it. –... -
Page 19: Application
Description of the unit 3.4 Application 3.4.1 Fill quantities FlexiChef Size 1, Size 2, Size 2, Size 3, Size 3, flat flat deep flat deep Minimum fill quantity of deep-frying oil (l) Maximum fill quantity of deep-frying oil (l) Maximum fill quantity (l) •... -
Page 20: Display Elements
Description of the unit 3.5.2 Display elements The following table lists the basic display elements of the unit's control system with examples. Symbol Display element Function Information bar The information bar is the uppermost bar on the touchscreen and visible at all times. The information bar is used to display current information;... - Page 21 Description of the unit Symbol Display element Function The Blue tab and Green tab are located on the left side of the touchscreen. The tabs are only available in the Cooking steps display. Tapping the tabs offers quick access to equipment functions and cooking program functions.
-
Page 22: Main Menu
Description of the unit 3.5.3 Main menu Image: Main menu a Language selection buttons e Back button b "Manual cooking" button f Information bar g FlexiHelp button c "Equipment functions" button d "Automatic cooking" button h Equipment version symbol Operating instructions... -
Page 23: 4 Operating The Unit
Operating the unit 4 Operating the unit ATTENTION Risk of physical damage from fouling • Keep the touchscreen free of unusually heavy fouling. • Mop up any drips immediately. 4.1 Switching the unit on and off 4.1.1 Switching on The power-on process for the touchscreen is around 45 seconds. -
Page 24: Using The Core Temperature Sensor
Operating the unit 4.2 Using the core temperature sensor WARNING Risk of injury from a bursting core temperature sensor • The core temperature sensor can burst as the result of overheating of the measuring tip. • Never heat a core temperature sensor with a cigarette lighter or other heat source. -
Page 25: Measuring The Core Temperature When Cooking Frozen Food
Operating the unit 4.2.2 Measuring the core temperature when cooking frozen food Image: Drilling an insertion channel with a hand drill 1. Use a hand drill to make an insertion channel for inserting the sensor. 2. Put the food to be cooked into the pan. 3. -
Page 26: Retrieving Equipment Information
Operating the unit 4. Tap the Confirm button. The Equipment settings menu is displayed. The basic settings can be changed. If an incorrect PIN is entered, access can only be gained to the equipment information in the Equipment settings menu. 4.3.2 Retrieving equipment information The equipment information contains details about the software and hardware version, the serial number of the unit and contact... -
Page 27: Presetting The Language Selection
Operating the unit 5. Tap the Confirm button. The Keypad menu closes. The date, time and altitude are set. 4.3.4 Presetting the language selection A maximum of 5 languages can be specified for language selection in the main menu. Image: Presetting the language selection Highlighted fields represent the specified languages. -
Page 28: Setting Cookbook Authorisations
Operating the unit 4.3.5 Setting cookbook authorisations Image: Setting cookbook authorisations The following authorisation levels are available for selection: Free: No restrictions. Restricted: Saving or deleting cooking programs is not permitted. Locked: Changing the cooking programs is not permitted. Requirement Equipment settings menu displayed 1. -
Page 29: Selecting A Cookbook
Operating the unit 4.3.6 Selecting a cookbook Image: Selecting a cookbook Requirement Equipment settings menu displayed 1. Tap the "Select cookbook" field. The Languages menu is displayed. 2. Tap a national flag to select the cookbook. Cookbook is selected. 3. Tap the Confirm button. Cookbook is selected. - Page 30 Operating the unit Setting a constant cooking temperature Image: Setting the cooking temperature, frying mode a Setting window c Confirm button b Rollers d Cooking temperature field Requirement Cooking program selected Cooking mode window displayed 1. Tap the Cooking temperature field. The Setting window is displayed.
- Page 31 Operating the unit Setting the cooking temperature difference The cooking temperature difference is set in the Delta-T cooking mode. Image: Setting the cooking temperature difference, Delta-T cooking mode a Setting window c Confirm button b Rollers d Cooking temperature difference field Requirement Cooking program selected Cooking mode window displayed...
-
Page 32: Setting The Cooking Time
Operating the unit 4.4.2 Setting the cooking time Once a cooking mode has been selected from the Manual cooking menu, the cooking time is set to "Continuous operation" as standard. Setting continuous operation Image: Setting continuous operation, cooking mode a Setting window d Continuous operation button b Rollers e Cooking time field... - Page 33 Operating the unit Setting a time-controlled cooking time Image: Setting a time-controlled cooking time, frying mode a Setting window d Cooking time button b Rollers e Cooking time field c Confirm button Requirement Cooking program selected Cooking mode window displayed 1.
- Page 34 Operating the unit Setting a core temperature-controlled cooking time The temperature range differs, depending on the cooking mode. At a temperature outside the allowed temperature range, the display for the allowed temperature range turns red and the temperature cannot be confirmed. Image: Setting a core temperature-controlled cooking time, frying mode a Setting window d Core temperature button...
-
Page 35: Setting The Level
Operating the unit 4.4.3 Setting the level Image: Setting the level, soft cooking mode a Setting window c Confirm button b Roller d Level field Requirement Cooking program selected Cooking mode window displayed 1. Tap the Level field. The Setting window is displayed. 2. -
Page 36: Inserting And Removing A Usb Flash Drive
Operating the unit 4.4.4 Inserting and removing a USB flash drive Inserting the USB flash drive In the case of USB flash drives which cannot be connected to the MultiPort due to their dimensions, use an extension cable. Requirement USB flash drive with a minimum of 2 GB and maximum of 32 GB available storage capacity (not included with delivery) USB flash drive not write-protected Press the MultiPort cover panel on the control arm of the unit until... -
Page 37: Exporting The Haccp Log
Operating the unit 4.4.5 Exporting the HACCP log The unit logs operation in an HACCP log. The HACCP logs can be exported via the USB port with a USB flash drive. Image: Exporting HACCP a Operating instructions window c "Export HACCP" field b Confirm button Requirement USB flash drive inserted Equipment settings menu displayed... -
Page 38: Opening The Equipment Function Menu
4.5.1 Opening the Equipment function menu Requirement Unit switched on Main menu displayed FlexiChef Team: Desired equipment unit is active Tap the "Equipment functions" button. The Equipment functions menu is displayed. All equipment functions can also be accessed from within a cooking program by tapping the blue tab. - Page 39 Operating the unit Opening the lid Requirement Pan in the operating position Lid not fully open Equipment function menu displayed 1. Tap the "Lid" field. Actuate window is displayed. 2. Make sure that the lid is unlocked. 3. Tap the Triangle symbol. A signal sounds.
-
Page 40: Tilting Or Tilting Back The Pan
Operating the unit 4.5.3 Tilting or tilting back the pan The pan can be tilted to any angle between the operating position and the end position. CAUTION Risk of crushing from the pan moving • Make sure that no one is standing between the pan and the rear panel. - Page 41 Operating the unit During a cooking program, all that appears is a prompt to tilt or tilt back the pan. The equipment functions can be reached via the blue tab. The pan is automatically tilted back into the operating position as soon as a cooking program is started.
-
Page 42: Opening And Closing The Water Inlet
Operating the unit 4.5.4 Opening and closing the water inlet ATTENTION Risk of physical damage through overflowing water • Monitor the water inlet and do not leave the unit unattended. Image: Opening and closing the water inlet a Actuate window f "Continue"... - Page 43 Operating the unit The water quantity can be entered directly in litres or as a fill quantity. The "ReadyXpress" selection provides the optimal water quantity in the pressure cooking mode. If no water quantity is set ("000" litres), the water inlet must be controlled manually.
-
Page 44: Opening And Closing The Drain
Operating the unit 4.5.5 Opening and closing the drain ATTENTION Risk of property damage from improper use • Do not empty out deep-frying oil via the drain. • Do not empty out hot products (over 105 °C) via the drain. Image: Opening the drain a Actuate window c "Drain"... -
Page 45: Portioning
Operating the unit 4. Tap the "Close" button. The drain closes. The "Close" button is replaced with the "Open" button. The pan is completely empty. 4.5.6 Portioning The portion quantity can be set in litres or as a GN dimension. Image: Portioning a Actuate window c "Open"... -
Page 46: Flushing The Pan
Operating the unit The process can be cancelled at any time by tapping the "Stop" button. When the process has been cancelled, the pan must once again be tilted until the contents are just about to overflow. The process ends automatically when the set portion quantity is reached and the pan tilts back slightly to prevent the contents from overflowing. -
Page 47: Manual Cooking
Operating the unit Requirement Pan in the operating position Lid fully open Drain closed Equipment function menu displayed 1. Tap the "Manual flush" field. Actuate window is displayed. 2. Swipe to set the water temperature for the water inlet. 3. Tap the "Open" button in the "Water inlet" area. Water runs into the pan. -
Page 48: Opening The Manual Cooking Menu
Information • Information 4.6.1 Opening the Manual cooking menu Image: Manual cooking menu Requirement Unit switched on Main menu displayed FlexiChef Team: Desired equipment unit is active Tap the "Manual cooking" button. The Manual cooking menu is displayed. Operating instructions... -
Page 49: Cooking Program Sequence
Operating the unit 4.6.2 Cooking program sequence Setting and starting A single-step cooking program is created by selecting a cooking mode or equipment function. Settings such as level, cooking temperature or cooking time are specified, and the cooking program can be started directly. Heating The unit is heated to the set cooking temperature. -
Page 50: Using Pressure Cooking (Optional)
Operating the unit 4.6.3 Using pressure cooking (optional) Image: Pressure cooking mode d Level field a "Start" button b Cooking mode window e Cooking time field c Cooking mode field f Pressure release rate field Possible settings for the pressure cooking mode: Setting Possible setting Explanation... - Page 51 Operating the unit Starting pressure cooking CAUTION Risk of scalding from overflowing food being cooked • Observe the maximum fill quantity. Pressure cooking may cause loud operating noises. Requirement Food placed in unit Lid closed and locked Manual cooking menu displayed 1.
- Page 52 Operating the unit Ending pressure cooking CAUTION Risk of scalding if lock is opened forcibly • Do not open the lid until prompted to do so by the touchscreen. CAUTION Risk of scalding from overflowing food • Do not open the lid until prompted to do so by the touchscreen.
-
Page 53: Using Soft Cooking
Operating the unit Image: Message: pressure released 4. Open the lid lock. The Cooking mode window is displayed. The cooking time is reset. 5. Open the lid with a slight gap. The steam escapes. 6. Open the lid completely. Pressure cooking has ended. 4.6.4 Using soft cooking Image: Soft cooking mode a "Start"... - Page 54 Operating the unit Possible settings for the soft cooking mode: Setting In level Possible setting Explanation Level Very tender Robustness of the food to be cooked Tender Normal Robust Very robust Maximum Cooking temperature Very tender 30 – 95 °C In 1-degree increments Tender Normal...
- Page 55 Operating the unit Starting soft cooking CAUTION Risk of scalding from overflowing food being cooked • Observe the maximum fill quantity. Observe the minimum fill quantity of 4 cm to ensure that the temperature measurement works correctly. Requirement Food placed in unit Lid closed Manual cooking menu displayed 1.
-
Page 56: Using Cooking
Operating the unit 4.6.5 Using cooking Image: Cooking mode d Cooking temperature field a "Start" button b Cooking mode window e Cooking time field c Cooking mode field f Level field Operating instructions... - Page 57 Operating the unit Possible settings for the cooking mode: Setting In level Possible setting Explanation Level Lightly simmering These settings relate to sauces; for water, set a Boiling strength Simmering higher boiling strength Intensive simmering Boiling Boiling Intensive boiling Level Low power Heats up with the selected level...
- Page 58 Operating the unit Starting cooking CAUTION Risk of scalding from overflowing food being cooked • Observe the maximum fill quantity. Keep the lid closed during operation in order to save energy. When the lid is closed, cooking temperatures over 97 °C are automatically lowered to 97 °C.
-
Page 59: Using Frying
Operating the unit 4.6.6 Using frying Image: Frying mode d Cooking temperature field a "Start" button b Cooking mode window e Cooking time field c Cooking mode field f Level field Possible settings for the frying mode: Setting Possible setting Explanation Level Slow frying... - Page 60 Operating the unit Starting frying Do not exceed the maximum oil level of 5 mm when using frying mode. For higher oil levels, select deep-frying mode. Leave the lid open when frying. When the lid is closed, cooking temperatures over 200 °C are automatically lowered to 200 °C.
-
Page 61: Using Deep Frying (Optional)
Operating the unit 4.6.7 Using deep frying (optional) CAUTION Risk of fire from deep-frying oil If the deep-frying oil level drops below the minimum fill quantity, it may ignite. • Refill deep-frying oil after use. • Observe the unit during operation. CAUTION Risk of fire due to low ignition point •... - Page 62 Operating the unit Image: Timers for deep-frying mode a "Stop" button e Cooking temperature field b Timer window f Cooking time field c Operating temperature display g Level field d Start/Stop field Possible settings for the deep-frying mode: Setting Possible setting Explanation Level Deep frying...
- Page 63 Operating the unit Ensuring food is fit for consumption CAUTION Hygiene risk from rancid oil • When the oil starts to become rancid, replace the deep-frying oil completely; do not add oil. • Observe the manufacturer's information regarding the duration of use of the deep-frying oil. Deep-frying oil counts as food.
- Page 64 Operating the unit Filling the unit with deep-frying oil Observe the minimum and maximum fill quantities for deep- frying oil (see "Fill quantities"). Refill deep-frying oil after use. Do not exceed a food to deep-frying oil ratio of 1:10. Do not exceed the maximum fill quantity for the pan.
- Page 65 Operating the unit Requirement Lid fully open Filled with deep-frying oil Level of deep-frying oil is between the "OIL" fill level marks Manual cooking menu displayed 1. Tap deep-frying mode. The Cooking mode window is displayed. The cooking time and cooking temperature are applied for all timers.
- Page 66 Operating the unit Stopping timers Requirement Deep frying has started Tap the Start/Stop field for the timer that has started. The cooking time on the timer is reset. The Start/Stop field turns green and displays "Start". The pan continues to heat. Remove the deep-frying basket from the zone and allow the oil to drip off.
- Page 67 Operating the unit Image: Message: ECO mode activated If ECO mode is activated, the ECO mode window is displayed. The cooking temperature is lowered to 120 °C. Requirement ECO mode activated Tap the ECO mode window. The ECO mode window closes. The Timer windows are displayed.
-
Page 68: Using Regeneration
Operating the unit Emptying out the deep-frying oil CAUTION Risk of scalding from hot oil • Protect arms and hands by wearing suitable protective gloves. • Use heat-resistant containers with handles and lockable lids for transportation. • Observe the maximum fill quantity for the unit. Only use containers that are suitable for transporting deep-frying oil and can accommodate the entire amount of deep-frying oil. - Page 69 Operating the unit Possible settings for the regeneration mode: Setting In level Possible setting Explanation Level Very tender Robustness of the food to be cooked Tender Normal Robust Very robust Maximum Cooking temperature Very tender 30 – 95 °C In 1-degree increments Tender Normal Robust...
- Page 70 Operating the unit Starting regeneration Requirement Food to be cooked is in the pan Lid closed Manual cooking menu displayed 1. Tap regeneration mode. The Cooking mode window is displayed. 2. Configure the settings. The Cooking mode window shows the configured settings. 3.
-
Page 71: Using Delta-T Cooking
Operating the unit 4.6.9 Using Delta-T cooking Image: Delta-T cooking mode d Cooking temperature difference a "Start" button field b Cooking mode window e Cooking time field c Cooking mode field f Level field Possible settings for the Delta-T cooking mode: Setting Possible setting Explanation... -
Page 72: Using Zone Frying
Operating the unit 3. Tap the "Start" button in the information bar. The pan heats up. The "Start" button is replaced with the "Stop" button. The cooking time is updated in the Cooking mode window. Delta-T cooking has started. Ending Delta-T cooking Requirement Delta-T cooking has started Cooking time has not elapsed 1. - Page 73 Operating the unit The timer has a timing function only and does not end the cooking mode. Possible settings for the zone frying mode: Setting Possible setting Explanation Level Zone off Output setting, set individually for each zone Slow frying Quick frying Searing Cooking temperature...
- Page 74 Operating the unit 5. Wait for the zone to reach the cooking temperature. A signal sounds. The Operating temperature display for the zone turns orange. All zones can be started independently of each other. In zones where frying has started, the actual temperature of the frying surface in the zone can be displayed by tapping the Cooking temperature field.
-
Page 75: Using Zone Cooking
Operating the unit Tap the Confirm button. The heating of the zone is ended. The Setting window closes. The Level field displays "0". The Start/Stop field turns white and displays "Zone off". The zone is switched off. Ending zone frying Requirement Zone frying has started 1. - Page 76 Operating the unit Possible settings for the zone cooking mode: Setting In level Possible setting Explanation Level Lightly simmering Boiling strength setting applies to all zones, boiling Simmering strengths relate to sauces; for water, set a higher Intensive simmering boiling strength Boiling Boiling Intensive boiling...
- Page 77 Operating the unit 2. Configure the settings. The Cooking mode window shows the configured settings. 3. Load in the food to be cooked. 4. Tap the "Start" button in the information bar. The pan heats up. The "Start" button is replaced with the "Stop" button. 5.
- Page 78 Operating the unit Ending zone cooking Requirement Zone cooking has started Cooking time has not elapsed 1. Tap the "Stop" button in the information bar. The heating of the pan is ended. All timers are stopped. The Cooking mode window opens. The "Stop"...
-
Page 79: Using An Equipment Function
Operating the unit 4.6.12 Using an equipment function Possible settings for the equipment functions: Equipment function Setting Possible setting Explanation Lid function Open lid Close lid Execute via blue tab Control Manual operation Automatic Automatic execution Pan function Tilt pan Tilt back pan Control Manual operation... - Page 80 Operating the unit Starting an equipment function Requirement Manual cooking menu displayed 1. Tap the desired equipment function. 2. The Equipment function window is displayed. 3. Configure the settings. The Equipment function window shows the configured settings. 4. Tap the "Start" button in the information bar. The equipment function is executed.
-
Page 81: Using Information
Operating the unit 4.6.13 Using information This function opens a window which displays information to the user during a cooking program. Image: Information a Information window c Image field b Description field d Description field Possible settings for information: Setting Possible setting Explanation Image... -
Page 82: User's Own Cooking Programs
Operating the unit Ending information Requirement Information has started 1. Tap the "Stop" button in the information bar. In the case of "Continue automatically" control: if the "Pause" field is tapped within 30 seconds, information must be ended manually by tapping the "Continue" field. 2. -
Page 83: Creating A Cooking Program
Operating the unit 4.7.1 Creating a cooking program Creating a cooking program step Requirement Manual cooking menu open 1. Tap the field for the desired cooking mode, equipment function or information. The first step of the cooking program is created. The Cooking program step display reads "Step 1 of 1". - Page 84 Operating the unit 4. Configure the desired settings for the step. The new step is added. Deleting a cooking program step If a cooking program has only one step, it cannot be deleted. The function is not active. Image: Deleting a step a "Delete step"...
-
Page 85: Saving The Cooking Program
Operating the unit 4.7.2 Saving the cooking program A cooking program can be saved if it has not been started. The green tab is deactivated once a cooking program has been started. All saved cooking programs are stored in the cookbook and can be accessed via the Automatic cooking menu. - Page 86 Operating the unit 5. Tap the Confirm button. The Keypad menu closes. The name of the cooking program is displayed in the Save window. 6. Tap the "Category" field. The Category menu is displayed. 7. Tap the field with the desired category. The category is set.
-
Page 87: Exporting A Cooking Program
Operating the unit Assigning a recipe Requirement Save window displayed Required storage settings configured 1. Tap the "Recipe" field. The Recipe menu is displayed. 2. Tap the "Recipes in unit" button or the "Recipes on USB flash drive" button. The Recipe menu is updated. 3. -
Page 88: Automatic Cooking (Autochef)
The cooking program is selected in the Automatic cooking menu. 4.8.1 Opening the Automatic cooking menu Image: Automatic cooking menu Requirement Unit switched on Main menu displayed FlexiChef Team: Desired equipment unit is active Tap the "Automatic cooking" button. The Automatic cooking menu is displayed. Operating instructions... -
Page 89: Finding And Opening A Cooking Program
Operating the unit 4.8.2 Finding and opening a cooking program Selecting the cooking program by category Cooking programs can be found in the Automatic cooking menu by category and subcategory. Arrow symbols in a window always display the next or previous page. - Page 90 Operating the unit Finding a cooking program Image: Find window a Find window d Text input display b Separating bar display e "autoChef" button c Results keypad Requirement Automatic cooking menu displayed 1. Tap the "autoChef" button. The autoChef window is displayed. 2.
-
Page 91: Starting The Cooking Program
Operating the unit Image: Finding a cooking program 4. Tap the field with the desired cooking program in the Results display. The cooking program is selected and being loaded. The cooking program steps are displayed. The cooking program is open. 4.8.3 Starting the cooking program Requirement Cooking program open 1. -
Page 92: Modifying The Cooking Program
Operating the unit 4.8.4 Modifying the cooking program Modifying a cooking program once started All settings of the current step can be modified. Requirement Cooking program started Cooking program time has not elapsed 1. Modify the settings for the current step. The modifications of the step become active immediately. -
Page 93: Ending The Cooking Program
Operating the unit 4.8.5 Ending the cooking program Requirement Cooking program started Cooking program time has not elapsed Tap the "Stop" button in the information bar. Wait for the cooking program time to end. Cooking program ends. The "Stop" button is replaced with the "Start" button. The cooking program has ended. -
Page 94: Exporting And Importing Cooking Programs
Operating the unit 4.8.7 Exporting and importing cooking programs Exporting cooking programs When exporting, all of the user-created cooking programs in the cookbook are exported. Previously exported cooking programs on the USB flash drive will be overwritten. Image: Exporting cooking programs a Operating instructions window c "Export cooking programs"... - Page 95 Operating the unit Importing cooking programs When importing, new cooking programs are added to the existing cookbook. Image: Importing cooking programs a Operating instructions window c "Import cooking programs" field b Confirm button d "autoChef" button Requirement USB flash drive inserted Automatic cooking menu displayed 1.
-
Page 96: Emptying The Pan
Operating the unit 4.9 Emptying the pan CAUTION Risk of scalding from hot liquids • Protect arms and hands by wearing suitable protective gloves. • Use heat-resistant containers with handles and lockable lids for transportation. Requirement Cooking program ended Lid fully open Remove the food being cooked from the pan with a suitable kitchen utensil. -
Page 97: 5 Cleaning And Caring For The Unit
Cleaning and caring for the unit 5 Cleaning and caring for the unit CAUTION Risk of burns from hot surfaces • Allow surfaces to cool prior to cleaning. CAUTION Risk of crushing between pan and rear panel • Switch off the unit before cleaning. ATTENTION Risk of physical damage from extremely abrupt cooling •... -
Page 98: Remove Rust Spots
Cleaning and caring for the unit 5.2 Remove rust spots • Remove fresh rust spots with a mild abrasive or fine sandpaper. • Always remove rust spots completely. • Expose treated areas to fresh air for at least 24 hours. During this time, do not allow any contact with greases, oils or foods so that a new protective layer can form. -
Page 99: Cleaning The Touchscreen
Cleaning and caring for the unit 5.5 Cleaning the touchscreen ATTENTION Risk of physical damage from improper cleaning • Do not clean the touchscreen with highly abrasive or chemically aggressive cleaning agents. • Do not clean the touchscreen with highly abrasive sponges. A cleaning time of 20 seconds is provided. -
Page 100: Cleaning The Pan Automatically With Spaceclean (Optional)
Cleaning and caring for the unit 5.8 Cleaning the pan automatically with SpaceClean (optional) The SpaceClean cleaning system cleans the pan in a fully automated process. The entire interior is sprayed down with high-pressure water. There is no need to use an additional cleaning agent. Cleaning is carried out by a cleaning lance which is inserted into the rear panel of the pan. -
Page 101: Inserting The Cleaning Lance
Cleaning and caring for the unit 5.8.1 Inserting the cleaning lance Image: Inserting the cleaning lance a Tool d Cleaning lance opening b Cover for cleaning lance opening e Lock marking c Cleaning lance Requirement Pan empty Pan in the operating position Lid fully open 1. -
Page 102: Starting Automatic Cleaning
Cleaning and caring for the unit 5.8.2 Starting automatic cleaning Requirement FlexiChef Team: Desired equipment unit is active Cleaning lance inserted Food remains removed Core temperature sensor in the holder Lid closed and locked Equipment function menu displayed 1. Tap the "Start cleaning" field. -
Page 103: 6 Troubleshooting
Troubleshooting 6 Troubleshooting DANGER Danger to life due to electric shock • Repairs to the unit may only be performed by qualified technical personnel. ATTENTION Risk of physical damage from improper intervention • Do not open the unit. • Do not tamper with the unit. 6.1 Causes of errors and remedies Error Possible causes... -
Page 104: Deactivating Emergency Off
Troubleshooting Error Possible causes Remedy The safety temperature limiter Electronic fault or error in heating • Reset the safety temperature limiter: has tripped system Press the MultiPort cover panel on – the control arm of the unit. The unit does not heat up Press Reset 1 button briefly and –... -
Page 105: 7 Carrying Out Maintenance
Carrying out maintenance 7 Carrying out maintenance 7.1 Carrying out required maintenance ATTENTION Risk of physical damage from improper inspection • Inspect in accordance with the inspection intervals. • Have inspections performed by a capable user. • In the event of damage or signs of wear, contact customer service immediately and stop using the unit. - Page 106 Carrying out maintenance In accordance with Section 12 Para. 3 of the BetrSichV, the operator is obliged to "keep the system in good order, monitor the system, carry out the necessary repair or maintenance work without delay, and take the appropriate safety measures for the situation in question".
-
Page 107: Checking The Safety Valve
Carrying out maintenance 7.1.2 Checking the safety valve Checking the safety valve involves building up and releasing increased pressure multiple times. One week before the test date is due to elapse, a note is displayed after the unit has been switched on. This note is displayed until the test has been successfully performed. -
Page 108: Testing The Safety Temperature Limiter
Carrying out maintenance 7.1.3 Testing the safety temperature limiter The safety temperature limiter monitors the temperature of the base temperature sensor and must be tested regularly. During the test the pan is heated up to the test temperature, and it is then checked that the safety temperature limiter is triggered. - Page 109 MultiPort is opened. 4. For FlexiChef: Press Reset 1 button briefly. 5. For FlexiChef Team: Press Reset 1 button briefly and then Reset 2 button briefly. The safety temperature limiter is reset. 6. Press the MultiPort cover panel on the control arm of the unit.
-
Page 110: Filling Out The Maintenance Certificate
• The maintenance has been carried out in accordance with the "FlexiChef maintenance instructions" checklist. • All activities performed are fully logged in the "FlexiChef maintenance instructions" checklist. • The completed "FlexiChef maintenance instructions" checklist can be accessed at the unit location. - Page 111 Carrying out maintenance Maintenance task Date Company, person Signature Maintenance task Date Company, person Signature Maintenance task Date Company, person Signature Operating instructions...
-
Page 112: Carrying Out Recommended Maintenance
Carrying out maintenance 7.2 Carrying out recommended maintenance Inspection Inspection interval Checking the emergency off • Weekly 7.2.1 Checking the emergency off Requirement Unit not in operation Lid fully open 1. Press the Emergency off switch. Emergency off switch is locked. The unit is switched off 2. -
Page 113: 8 Dispose Of Unit In An Environmentally Responsible
Dispose of unit in an environmentally responsible manner 8 Dispose of unit in an environmentally responsible manner The unit has been designed to provide a lifetime of 10 years or 15,000 pressure cycles. Do not dispose of unit or the unit's components together with non- recyclable waste. -
Page 114: 9 Manufacturer's Declaration
Manufacturer's declaration 9 Manufacturer's declaration EC Declaration of Conformity Manufacturer MKN Maschinenfabrik Kurt Neubauer GmbH & Co. KG • Halberstädter Straße 2a • 38300 Wolfenbüttel, Germany We hereby declare, that the following product: Description of the unit Unit for cooking food in commercial applications... - Page 115 Manufacturer's declaration EC Declaration of Conformity Manufacturer MKN Maschinenfabrik Kurt Neubauer GmbH & Co. KG • Halberstädter Straße 2a • 38300 Wolfenbüttel, Germany We hereby declare, that the following product: Description of the unit Unit for cooking food in commercial applications...
-
Page 116: Keyword Index
Keyword index Automatic cooking (autoChef) HACCP Deleting a cooking program...... 93 Exporting the log........ 37 Ending the cooking program..... 93 Exporting cooking programs ..... 94 Information ............ 81 Finding a cooking program ....... 90 Importing cooking programs ..... 95 Modifying the cooking program.... 92 Language selection ........ - Page 117 Keyword index Use ............ 75 Zone frying Zone cooking Description .......... 16 Description .......... 17 Use ............ 72 Operating instructions...
- Page 118 Keyword index Operating instructions...
- Page 120 www.mkn.com...
Need help?
Do you have a question about the FlexiChef and is the answer not in the manual?
Questions and answers
Hello we have a problem 1 of our multi cooker flexi chef for automatic cleaning its says internal error (paramater) details error 95 status 0 code 0