MKN FlexiChef Operating Instructions Manual
Hide thumbs
Also See for FlexiChef:
- Operating instructions manual (92 pages) ,
- Operating instructions manual (120 pages)
Table of Contents
Advertisement
Read the operating instructions prior to
commissioning
Operating instructions
FlexiChef General information
Unit
FlexiChef
FlexiChef Team
Energy type
Design
Electric
Deep-frying
High-speed cooking
Automatic cleaning
10000008612ABEBEA
Model
FCEKMP1XXXX-----G2...
FCEKMP3XXXX-----G2...
FCEKMP2XXXX-XXXXG2...
en-GB
Advertisement
Table of Contents

Related Manuals for MKN FlexiChef


Summary of Contents for MKN FlexiChef
- Page 1 Read the operating instructions prior to commissioning Operating instructions FlexiChef General information Unit Energy type Design Model FlexiChef Electric Deep-frying FCEKMP1XXXX-----G2... High-speed cooking FCEKMP3XXXX-----G2... Automatic cleaning FlexiChef Team FCEKMP2XXXX-XXXXG2... 10000008612ABEBEA en-GB...
- Page 2 Operating and display elements Image: Control unit Image: Control unit front panel a Touchscreen c Emergency off switch (optional) b Contact for "Reset safety d On Off switch ("I O") temperature limiter" Operating instructions...
- Page 3 Fax +49 5331 89-280 Internet www.mkn.com Copyright All rights to text, graphics and pictures in this documentation are held by MKN Maschinenfabrik Kurt Neubauer GmbH & Co. KG. Distribution or duplication is only permitted with the prior written consent of MKN.
-
Page 4: Table Of Contents
Directory of contents 1 Introduction ................. 7 1.1 About this manual ................ 7 1.1.1 Explanation of signs .................. 8 1.2 Intended use .................. 9 1.3 Warranty .................... 9 2 Safety information ............ 10 3 Description of the unit ............. 14 3.1 Overview of the unit ............... 14 3.2 Features .................. 15 3.2.1 Operating modes ... - Page 5 Directory of contents 4.5.2 Longer pauses and end of use .............. 39 5 Cleaning and caring for the unit ........ 40 5.1 Preventing corrosion .............. 40 5.2 Remove rust spots ................. 41 5.3 Cleaning the housing .............. 41 5.4 Cleaning the operating elements .......... 41 5.5 Cleaning the touchscreen ...
-
Page 6: Directory Of Contents
Directory of contents Operating instructions... -
Page 7: 1 Introduction
Introduction 1 Introduction 1.1 About this manual The operating instructions are part of the unit and contain information: • On safe operation, • On cleaning and care, • On remedies in case of faults. Be aware of the following notes and adhere to them: •... -
Page 8: Explanation Of Signs
Introduction 1.1.1 Explanation of signs DANGER Imminent threat of danger Failure to comply will lead to death or very severe injuries. WARNING Possible threat of danger Failure to comply can lead to death or very severe injuries. CAUTION Dangerous situation Failure to comply can lead to slight or moderately severe injuries. -
Page 9: Intended Use
Introduction 1.2 Intended use This unit is intended to be used solely for commercial purposes, particularly in commercial kitchens. This unit may only be used with suitable accessories and for the cooking of food. It is forbidden to use the unit for purposes, which include the following: •... -
Page 10: 2 Safety Information
Safety information 2 Safety information The unit complies with applicable safety standards. Residual risks associated with operation or risks resulting from incorrect operation cannot be ruled out and are mentioned specifically in the safety instructions and warnings. The operator must be familiar with regional regulations and observe them. - Page 11 Safety information Risk of chemical burns from evaporating cleaners • Follow the instructions of the cleaning agent manufacturer. Risk of burns from steam • Protect arms and hands by wearing protective gloves. • Do not hold your hand under the outlet connection of the air vent and safety valve.
- Page 12 Safety information Risk of physical damage from improper cleaning • Clean the unit after using it. • Do not clean the unit with a high-pressure cleaner or water jet. • Do not clean the housing with highly abrasive or chemically aggressive cleaning agents.
- Page 13 • Do not connect any mobile phones or USB devices such as USB printers, external hard drives, WLAN adapters, UMTS adapters or Bluetooth adapters. Exempted from this are approved MKN genuine accessories for the unit. • Do not connect PCs or notebooks.
-
Page 14: 3 Description Of The Unit
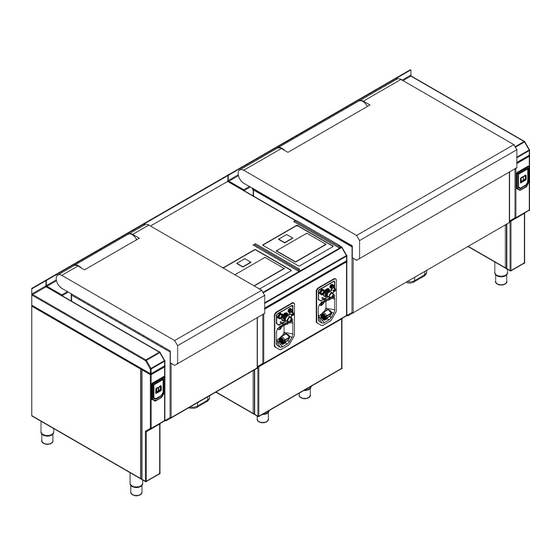
Description of the unit 3 Description of the unit The multi-function unit is intended for universal use in commercial kitchens for cooking food. Possible uses include cooking, intensive simmering, frying, braising, boiling, high-speed cooking, deep-frying. 3.1 Overview of the unit Image: Unit with high-speed cooking and automatic cleaning a Water supply k Steam outlet safety valve... -
Page 15: Features
Description of the unit 3.2 Features 3.2.1 Operating modes Overview of the operating modes • Manual cooking: myCooking • Automatic cooking: autoChef Manual cooking (myCooking) In the Manual cooking mode, individual cooking processes and equipment functions can be actuated directly. The various cooking modes can be adapted individually. - Page 16 Description of the unit Cooking Cooking mode enables food to be cooked at various boiling strengths in a temperature range of 90 °C to 100 °C. The food is heated to boiling temperature at maximum output, and it then continues to be cooked with the selected boiling strength.
-
Page 17: Core Temperature Measurement
Description of the unit FlexiZone cooking FlexiZone cooking mode enables food to be cooked in a temperature range of 90 °C to 100 °C. The pan is divided into four different zones. Each zone can be operated with its own cooking time. The output and cooking temperature are the same for all zones. -
Page 18: Haccp Logging
3.3 Application 3.3.1 Fill quantities The maximum fill quantity with the High-speed cooking mode and Cooking mode is always the filled liquid plus the food to be cooked. FlexiChef Size 1, Size 2, Size 2, Size 3, Size 3,... -
Page 19: Magicpilot Equipment Controls
Description of the unit 3.4 MagicPilot equipment controls 3.4.1 Main menu Image: Main menu a Language selection button f "myFavourites" button b "QuickStart" button g "autoChef" button c "myCooking" button h Standby button d "SpaceClean" button i Information bar e "myFlexiChef" button j FlexiHelp button Operating instructions... -
Page 20: 4 Operating The Unit
Operating the unit 4 Operating the unit ATTENTION Risk of physical damage from fouling • Keep the touchscreen free of unusually heavy fouling. • Mop up any drips immediately. ATTENTION Risk of physical damage from excessively high load Excessively high load can damage the lid mechanism. •... -
Page 21: Performing The Basic Control Setting
Operating the unit 4.2 Performing the basic control setting 4.2.1 Opening the equipment settings menu The basic settings for operation can be displayed and changed by entering the PIN "111". Image: PIN window Requirement Main menu displayed 1. Tap the "myFlexiChef" button. Equipment function menu is displayed. -
Page 22: Setting The Date And Time
Operating the unit 4.2.3 Setting the date and time Image: Setting the date and time Requirement Equipment settings menu displayed 1. Tap the "Set date and time" field. Setting window is displayed. 2. Set date and time with wiping gesture. 3. -
Page 23: Select Languages
Operating the unit 4.2.4 Select languages A maximum of 5 languages can be specified for language selection in the main menu. Image: Selecting languages Highlighted fields represent the specified languages. Fields that are not highlighted are languages that have not been specified. -
Page 24: Setting Cookbook Authorisation
Operating the unit 4.2.5 Setting cookbook authorisation Image: Setting cookbook authorisation The following authorisation levels are available for selection: Free: No restrictions. Restricted: Saving or deleting cooking processes is not permitted. Locked: Changing the cooking processes is not permitted. Requirement Equipment settings menu displayed 1. -
Page 25: Selecting A Cookbook
Operating the unit 4.2.6 Selecting a cookbook Image: Select the cookbook Requirement Equipment settings menu displayed 1. Tap the "Select cookbook" field. Languages menu is displayed. 2. Tap a national flag to select the cookbook. Cookbook is selected. 3. Tap on "OK" button. Cookbook is selected. -
Page 26: Basic Functions
Operating the unit 4.3 Basic functions 4.3.1 Setting the cooking temperature The temperature range differs, depending on the cooking mode. At a temperature outside the allowed temperature range, the display for the allowed temperature range turns red and the temperature cannot be confirmed. To set the cooking temperature: •... - Page 27 Operating the unit Setting the cooking temperature difference The cooking temperature difference is set in the Delta-T cooking mode. Image: Setting the cooking temperature difference, Delta-T cooking mode a Setting window c "OK" button b Rollers d Cooking temperature difference field Requirement Cooking process selected Step window displayed...
-
Page 28: Setting The Cooking Time
Operating the unit 4.3.2 Setting the cooking time Once a cooking mode has been selected from the Manual cooking menu, the cooking time is set to "Continuous operation" as standard. Setting continuous operation Image: Setting continuous operation, cooking mode a Setting window d Continuous operation button b Rollers e Cooking time field... - Page 29 Operating the unit Setting a time-controlled cooking time Image: Setting a time-controlled cooking time, Cooking mode a Setting window d Cooking time button b Rollers e Cooking time field c "OK" button Requirement Cooking process selected Step window displayed 1. Tap the Cooking time field. Setting window is displayed.
- Page 30 Operating the unit Setting a core temperature-controlled cooking time The temperature range differs, depending on the cooking mode. At a temperature outside the allowed temperature range, the display for the allowed temperature range turns red and the temperature cannot be confirmed. Image: Setting a core temperature-controlled cooking time, Cooking mode a Setting window d Core temperature button...
-
Page 31: Setting The Level
Operating the unit 4.3.3 Setting the level Image: Setting the level, soft cooking mode a Setting window c "OK" button b Roller d Level field Requirement Cooking process selected Step window displayed 1. Tap the Level field. Setting window is displayed. 2. -
Page 32: Inserting And Removing A Usb Flash Drive
Operating the unit 4.3.4 Inserting and removing a USB flash drive Inserting the USB flash drive Requirement USB flash drive with a minimum of 2 GB and maximum of 32 GB available storage capacity (not included with delivery) USB flash drive is not write-protected 1. -
Page 33: Using The Core Temperature Sensor
Operating the unit 3. Tap on "OK" button. Operating instructions window is displayed. 4. Read displayed operating instructions. 5. Tap on "OK" button. HACCP protocol is exported to the USB flash drive. Confirmation window is displayed. 6. Tap on "OK" button. Confirmation window is closed. - Page 34 Operating the unit Inserting 4-point core temperature sensor The core temperature sensor measures the temperature at four measuring points. The sensor can determine the middle of the food being cooked, and this value is used to control the cooking process. The tip of the core temperature sensor can protrude out of the core of the food.
- Page 35 Operating the unit Inserting external sous-vide core temperature sensor (optional) The sous-vide core temperature sensor, which is available as special equipment, is connected to the external core temperature sensor connection on the unit. Image: Sous-vide core temperature sensor with sous-vide pads Attach foam rubber or expanded rubber sous-vide pads to the vacuum-packed food to be cooked.
-
Page 36: Using Quickstart Function
Operating the unit 4.3.7 Using QuickStart function Assigning QuickStart button Image: Save QuickStart a Save window c "Save" button b QuickStart button fields d Save QuickStart field Requirement Manual cooking menu displayed 1. Tap the desired step. Step window is displayed. 2. - Page 37 Operating the unit Using QuickStart button Image: Using QuickStart a QuickStart button 1 c QuickStart button 3 b QuickStart button 2 Press and hold the particular QuickStart button to display the saved QuickStart function. Requirement Main menu displayed 1. Tap the desired QuickStart button. QuickStart button not assigned: Audible signal sounds.
-
Page 38: Emptying The Pan
Operating the unit 4.4 Emptying the pan CAUTION Risk of scalding from hot liquids • Protect arms and hands by wearing suitable protective gloves. • Use heat-resistant containers with handles and lockable lids for transportation. Requirement Cooking process ended Lid completely opened Remove the food being cooked from the pan with a suitable kitchen utensil. -
Page 39: Longer Pauses And End Of Use
Operating the unit Deactivating stand-by mode Image: Stand-by screen lock Requirement Stand-by mode activated Tap the touchscreen. Screen lock is displayed. Unlock the screen lock with a swipe movement. Stand-by mode is deactivated. 4.5.2 Longer pauses and end of use Switch off the unit during pauses and at end of use. -
Page 40: 5 Cleaning And Caring For The Unit
Cleaning and caring for the unit 5 Cleaning and caring for the unit CAUTION Risk of burns from hot surfaces • Allow surfaces to cool prior to cleaning. CAUTION Risk of crushing between pan and rear panel • Switch off the unit before cleaning. ATTENTION Risk of physical damage from extremely abrupt cooling •... -
Page 41: Remove Rust Spots
Cleaning and caring for the unit 5.2 Remove rust spots • Remove fresh rust spots immediately with a mild abrasive or fine sandpaper. • Always remove rust spots completely. • Expose treated areas to fresh air for at least 24 hours. During this time, do not allow any contact with greases, oils or foods so that a new protective layer can form. -
Page 42: Cleaning The Touchscreen
Cleaning and caring for the unit 5.5 Cleaning the touchscreen ATTENTION Risk of physical damage from improper cleaning • Do not clean the touchscreen with highly abrasive or chemically aggressive cleaning agents. • Do not clean the touchscreen with highly abrasive sponges. A cleaning time of 10 seconds is provided. -
Page 43: Inserting And Removing The Cleaning Lance (Optional)
Cleaning and caring for the unit 5.8 Inserting and removing the cleaning lance (optional) Use the cleaning lance that belongs to the unit. 5.8.1 Inserting the cleaning lance Image: Inserting the cleaning lance a Tool d Cleaning lance b Cover for cleaning lance opening e Cleaning lance opening c Lock marking Requirement Pan empty... -
Page 44: Removing The Cleaning Lance
Cleaning and caring for the unit 5.8.2 Removing the cleaning lance CAUTION Risk of injury from clogged cleaning lance Water can escape from the cleaning lance holder. • Remove the cleaning lance carefully. Requirement Cleaning or decalcification ended Lid completely opened 1. -
Page 45: Starting Automatic Cleaning
Cleaning and caring for the unit Cleaning program Duration Note short 2 minutes Forced cleaning, rinsing the pan. fast 5 minutes Do not use additional cleaning agent. intensive 80 minutes A non-foaming alkaline liquid cleaning agent may be used. Maximum quantity: 0.5 l. 5.9.1 Starting automatic cleaning Water pressure that is too low can adversely affect the cleaning performance. -
Page 46: Ending Automatic Cleaning
Cleaning and caring for the unit 5.9.2 Ending automatic cleaning Requirement Automatic cleaning started 1. Wait until the cleaning time has finished. The prompt to open the lid is displayed. 2. Open the lid. The pan is tilted slightly to allow the residual water to drain. Automatic cleaning has ended. -
Page 47: Starting Decalcification
Cleaning and caring for the unit ATTENTION Risk of physical damage from unsuitable decalcifying agents • Corrosion can form, use a special decalcifier. A note is displayed at the time period for decalcification. If the decalcification is not performed at the right time, the automatic cleaning is disabled in the equipment control. -
Page 48: Cancelling Decalcification
Cleaning and caring for the unit 6. Insert the decalcifier bottle vertically downwards into the filling nozzle. The sealing film is opened. The decalcifier drains out. 7. Tap on "OK" button. Decalcification is started. 5.10.2 Cancelling decalcification After decalcification is cancelled, automatic forced rinse is performed. -
Page 49: 6 Troubleshooting
Troubleshooting 6 Troubleshooting DANGER Danger to life due to electric shock • Repairs to the unit may only be performed by qualified technical personnel. ATTENTION Risk of physical damage from improper intervention • Do not open the unit. • Do not tamper with the unit. 6.1 Causes of errors and remedies Failure Possible causes... - Page 50 Troubleshooting Failure Possible causes Remedy Lid closing is interrupted Object between lid and pan • Remove object. • Start equipment function again. Lid opens again Collision with the locking pin • Have the unit realigned. • Contact the Customer service author- ised by the manufacturer.
-
Page 51: Deactivating Emergency Off
Troubleshooting 6.1.1 Deactivating emergency off Activating the Emergency off switch interrupts the electrical supply. With the High-speed cooking mode: Steam in the pan is not released. Requirement Emergency off activated With the High-speed cooking mode: Press the On Off ("I O") switch to "O". -
Page 52: 7 Carrying Out Maintenance
Carrying out maintenance 7 Carrying out maintenance 7.1 Carrying out required maintenance ATTENTION Risk of physical damage from improper inspection • Inspect in accordance with the inspection intervals. • Have inspections performed by a capable user. • In the event of damage or signs of wear, contact customer service immediately and stop using the unit. - Page 53 Carrying out maintenance For units with high-speed cooking and/or automatic cleaning The unit with ReadyXpress high-speed cooking has a positive operating pressure of maximum 49 kPa. Observe national regulations. The inspection intervals depend on the frequency of high-speed cooking. The specified inspection intervals are based on two high-speed cooking processes per day.
-
Page 54: Checking The Safety Valve
Carrying out maintenance 2. Fill out the maintenance certificate. Visual inspection is performed. 7.1.2 Checking the safety valve When checking the safety valve, steam should be built up and released several times. One week before the test date is due to elapse, a note is displayed after the unit has been switched on. -
Page 55: Filling Out The Maintenance Certificate
• The maintenance has been carried out in accordance with the "FlexiChef maintenance instructions" checklist. • All activities performed are fully logged in the "FlexiChef maintenance instructions" checklist. • The completed "FlexiChef maintenance instructions" checklist can be accessed at the unit location. - Page 56 Carrying out maintenance Maintenance task Date Company, person Signature Maintenance task Date Company, person Signature Maintenance task Date Company, person Signature Operating instructions...
-
Page 57: 8 Dispose Of Unit In An Environmentally Responsible
Dispose of unit in an environmentally responsible manner 8 Dispose of unit in an environmentally responsible manner The unit has been designed to provide a lifetime of 10 years or 15,000 pressure cycles. Do not dispose of unit or the unit's components together with non- recyclable waste. -
Page 58: 9 Manufacturer's Declaration
Manufacturer's declaration 9 Manufacturer's declaration EC Declaration of Conformity Manufacturer MKN Maschinenfabrik Kurt Neubauer GmbH & Co. KG • Halberstädter Straße 2a • 38300 Wolfenbüttel, Germany We hereby declare, that the following product: Description of the unit Unit for cooking food in commercial applications... -
Page 59: Keyword Index
Keyword index Cleaning HACCP Clean touchscreen........ 42 Exporting log.......... 32 Decalcifying cleaning system.... 47 High-speed cooking Inserting the cleaning lance ...... 43 Description .......... 15 Lock touchscreen........ 42 Manual cleaning........ 42 Language selection ........ 23 Removing cleaning lance...... 44 SpaceClean automatic cleaning .... 44 Cooking QuickStart Description .......... - Page 60 Keyword index Operating instructions...
- Page 64 www.mkn.com...
Need help?
Do you have a question about the FlexiChef and is the answer not in the manual?
Questions and answers