Table of Contents
Advertisement
Quick Links
The product complies with the European Safety Standards EN60335-2-30 and the European Standard Electromagnetic
Compatibility (EMC) EN55014, EN60555-2 and EN60555-3 These cover the essential requirements of EEC Directives
2006/95/EC and 2004/108/EC
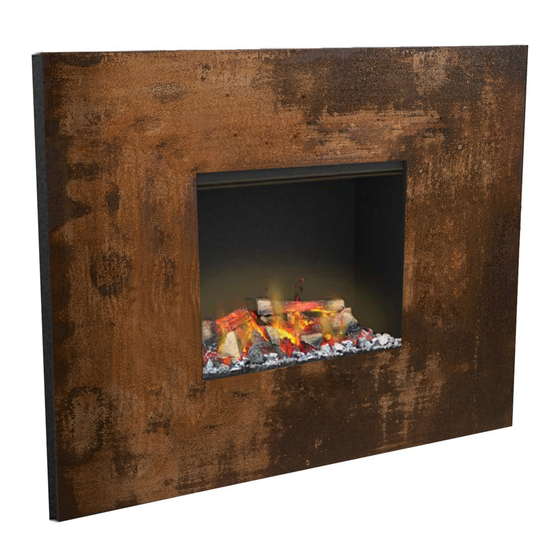
SENSES 3D
Dimensions
H 700 mm x W 900 mm x D 170 mm
Capacity
1,1 litres ( filtered water)
Autonomy
8 hours
Voltage
220/240 V
Frequency
50 Hz
Lamps
4 x 50W Xenon Amber
Heat Power
1000 W—2000 W / 20
(depending of the room area)
Weight
40 kg
°
°
C —25
C
Advertisement
Table of Contents

Subscribe to Our Youtube Channel
Related Manuals for GlammFire SENSES 3D


Summary of Contents for GlammFire SENSES 3D
- Page 1 SENSES 3D Dimensions H 700 mm x W 900 mm x D 170 mm Capacity 1,1 litres ( filtered water) Autonomy 8 hours Voltage 220/240 V Frequency 50 Hz Lamps 4 x 50W Xenon Amber Heat Power ° ° 1000 W—2000 W / 20 C —25...
- Page 2 Congratulations on purchasing your GlammFire Electric appliance. This quality product has been designed with preci- sion and rigour that characterizes us to offer you pleasant and soothing moments. Please read the instructions for use carefully and effective before using the appliance.
-
Page 3: Table Of Contents
GlammFire. PAG./3 ÍNDICE 1—Material Fornecido 2—Important Safety Advice 3—General Information 3.1—Electrical connection 4—Installation Instructions 4.1—Before You Start 4.2—Installation 4.3—Connection the transducer 4.4—Remove water from the sump 5—Operating mode 5.1—Manual Controls 5.2—Remote control 5.2.1—Switching on the appliance 5.2.2—Adjust the flame setting 5.2.3—Switching on the heat... -
Page 4: 1-Material Fornecido
GlammFire. PAG./4 Supplied material: 1— Senses 3D; Remote control; Decorative firewood; Transducer; Water tank; Set of lamps; Eletric cable; Nozzle; Remote control base 4xLamps; Screw kit; Cleaning brush; Template. -
Page 5: 2-Important Safety Advice
GlammFire. PAG./5 Important Safety Advice 2— When using electrical appliances, basic precautions should always be followed to reduce the risk of fire, electrical shock and injury to persons, including the following: If the appliance is damaged, check with the supplier before installation and operation. -
Page 6: 3-General Information
GlammFire. PAG./6 3—General information Unpack the heater carefully and retain the packaging for possible future use, in the event of moving or returning the fire to your supplier. The fire incorporates a flame effect, which can be used with or without heating, so that the comforting effect may be enjoyed at any time of the year. -
Page 7: Electrical Connection
GlammFire. PAG./7 3.1—Electrical connection: WARNING – THIS APPLIANCE MUST BE EARTHED. This heater must be used on an AC supply only and the voltage marked on the heater must correspond to the supply voltage. Before switching on, please read the safety warnings and operating instructions. -
Page 8: 4-Installation Instructions
GlammFire. PAG./8 4—Installation instructions 4.1—Before You Start Ensure that all packing items are removed (read any warning labels carefully). Retain all packing for possible future use, in the event of moving or returning the appliance to your supplier. 4.2—Installation To install the unit: Clean the area where the fire will be installed;... - Page 9 GlammFire. PAG./9 Rotate the safety fixation bracket on the base so that the fixation is visible, marking the wall Hang the unit on the fixed wall bracket. Turn the safety fixation bracket on the base of the product so that the fixation hole is exposed.
-
Page 10: Connection The Transducer
GlammFire. PAG./10 4.3—Connection the transducer Remove the wood from the appliance; Carefully lift the tank and set it aside (Figura 3); Figura 3- Removal of firewood and tank; Remove the nozzle by un-clipping and lifting upwards and outwards;. Inserting the lamps according to figure 4. - Page 11 GlammFire. PAG./11 Locate the tab on the transducer unit into the moulded recess in the base of the sump. Ensure that the cable does not obstruct the transducer disc. To prevent the cable becoming pinched between the nozzle and the sump, place the cable in the slot in the wall of the sump.
-
Page 12: Remove Water From The Sump
GlammFire. PAG./12 Remove water from the sump 4.4— Disconnect the appliance from the mains; Remove the wood, tank and nozzle. Then remove the transducer and clean it; Remove the sump and pour the water to a desired location; Replace all the above components and then turn the unit on. -
Page 13: 5-Operating Mode
GlammFire. PAG./13 5—Operating mode 5.1—Manual controls The manual controls are located on the base of the appliance. Switch“A” : Controls the electricity supply to the Fire. Note: This switch must be in the “ON” (I) position for the Fire to operate with or without heat when activated. -
Page 14: 1-Switching On The Appliance
GlammFire. PAG./14 5.2.1—Switching on the appliance Press and hold the button for 3 seconds to activate the remote control. FIRE will be displayed and ON will be blinking. P r e s s to switch on the appliance. To turn off the appliance press so that FIRE is blinkin, press twice. -
Page 15: 6-Setting The Date And Time
GlammFire. PAG./15 Caution: In order to avoid a hazard due to inadvertent resetting of the thermal cut-out, this appliance must not be supplied through an external switching device, such as a timer, or connected to a swith that is regularly switched on and off by utiliy. -
Page 16: 8-Setting The Timer Modes
GlammFire. PAG./16 5.2.8—Setting the timer modes To set the timer: Press the button Press the button once to program the icon and click on Press twice and click on Note: The days of the week are indicated at the top of the screen... -
Page 17: 9- Manual Mode
GlammFire. PAG./17 5.2.9—Modo manual To select a constant heat mode. This mode ignores the timer and maintains the displayed temperature. Press the button Press the button twice to highlight the hand icon and click on to confirm to set the desired temperature 5.2.10—Protection against low temperatures:... -
Page 18: 11-Screen Personalization
GlammFire. PAG./18 5.2.11—Screen Personalization: The maximum temperature setting of the product is 32°C. You have the option to reduce this temperature and to change from °C to °F. Press the button Press the button twice and the SP message will flash, then click on... -
Page 19: 6-Maintenance
GlammFire. PAG./19 6—Maintenance WARNING – ALWAYS DISCONNECT FROM THE POWER SUPPLY BEFORE CLEANING THE HEATER. 6.1—Changing lamps If there is a large amount of gray or colorless smoke, it is likely that one or more bulbs have melted. You can check the lamp failure as follows: 1. -
Page 20: Sump
GlammFire. PAG./20 6.4—Sump Press to place the product on "standby" Carefully lift the tank nozzle and the water tank and place them on the ground. Remove the sump by lifting it up and out Slope the water tank in a sink so that the liquid exits Put a small dose of non-abrasive detergent and rub with the supplied brush all the surfaces Rinse thoroughly and clean the component. -
Page 21: 7-Troubleshooting
GlammFire. PAG./21 7—Troubleshooting Symptom Cause Corrective Action The flame effect will not Mains plug is not plugged in. Check plug is connected to wall socket correctly. start. Low water level. Check that the water tank is full and there is water in the sump. -
Page 22: 8-Overall Dimensions
GlammFire. PAG./22 8—Overall dimensions... -
Page 23: 9-Warranty
GlammFire. PAG./23 9—Warranty Equipment: Guarantee beneficiary: Version: Adress: Controller: Tel.: Availability date: Local…………………………………………..Date……………………….. Signature Series and Guarantee numbers: Distributor code: Name and adress of the distributor: Guarantee This Electric Appliance carries a guarantee against defects of manufacture and faulty workmanship for a period of 2 years from the date of purchase. - Page 24 Recuperadores Pachinha Lda. Zona Industrial da Lagoa, Lote G1 4950-850 CORTES - MONÇÃO PORTUGAL Tel(+351) 251 654 800 Fax(+351) 251 654 801 info@glammfire.com www.glammfire.com PT04458-D-EN...
Need help?
Do you have a question about the SENSES 3D and is the answer not in the manual?
Questions and answers