danalock V3 BT HK SCANDI Mounting Manual
Hide thumbs
Also See for V3 BT HK SCANDI:
- Mounting manual (36 pages) ,
- Manual (36 pages) ,
- Manual (32 pages)
Table of Contents
Advertisement
Quick Links
Advertisement
Table of Contents

Related Manuals for danalock V3 BT HK SCANDI


Summary of Contents for danalock V3 BT HK SCANDI
- Page 1 Danalock V3 BT HK SCANDI Mounting guide...
-
Page 2: Table Of Contents
Table of contents Tools needed page Parts involved page 1. Secure the front lock page 2. Remove the current door lock page 3. Normal tailpiece length page 4. Tailpiece too short - insert a new page 5. Mounting the backplate on the door page 6. - Page 3 Table of contents 9. Align the platemarks page 10. Fasten the Danalock page 11. Activate batteries page 12. Add the Danalock in the HomeKit App page 13. Calibrate the lock page 14. Dismounting page 15. LED-Signals page 16. Click-commands page 20-21 17.
-
Page 4: Tools Needed
Tools needed: Page 4... -
Page 5: Parts Involved
Parts involved: tailpiece plate tailpiece Thumb turn Page 5... -
Page 6: Secure The Front Lock
1. Secure the front lock On some doors it can be helpful to put a piece of tape across the lock on the front of the door to prevent it from falling when the screws are removed. Page 6... -
Page 7: Remove The Current Door Lock
2. Remove the current door lock First you have to remove the existing thumb turn on the inside of the door. Page 7... -
Page 8: Normal Tailpiece Length
3. Normal tailpiece length Most doors have a tailpiece that extends 10 mm from the doorplate. They will fit the Danalock without need for any adjustments to their length! If the tailpiece is less than 10 mm long from the door surface, an... -
Page 9: Tailpiece Too Short - Insert A New
If the tailpiece is less than 10 mm long you have to remove the plate that holds the tailpiece and replace it with the new tailpiece found in the Danalock box. You may need to shorten the new tailpiece after you have mounted the back plate. -
Page 10: Mounting The Backplate On The Door
5. Mounting the backplate on the door Place the back plate where the thumb turn used to be on your door. The round hole in the middle is for the tailpiece. Use the 2 screws from the thumb turn to attach the back plate. -
Page 11: Give The Tailpiece The Right Length
6. Give the tailpiece the right length To avoid damaging the danalock you will have to shorten the new cylinder tailpiece to max. 35 mm from the door surface. Use two pliers or a wire cutter to shorten the tailpiece. -
Page 12: Attach The Tailpiece Adaptor
7. Attach the tailpiece adapter Insert the green tailpiece adapter in the center tube on the back side of the Danalock. Press on the adapter until a click ensures it is fixed firmly to the Danalock. Page 12... -
Page 13: Fit The Tailpiece To The Middle Of The Housing Base
8. Fit the tailpiece to the middle of the housing base Fit the Danalock over the back plate. Make sure the tailpiece hits the slide in the middle of the adapter. Page 13... -
Page 14: Align The Platemarks
9. Align the platemarks Find the small marking on the edge of the back plate and align the mark on the back of the Danalock base plate with it. Now you are sure to hit the notches on the backplate with the Danalock. -
Page 15: Fasten The Danalock
10. Fasten the Danalock Turn the Danalock clockwise until it clicks to fasten it to the back plate. NOTE: If you need to unfasten and retry, see “Uninstall instructions” at the end of this manual. Page 15... -
Page 16: Activate Batteries
11. Activate batteries Pull out the plastic tab to activate the batteries. A light will flash to confirm that the Danalock is ready. Note: If the batteries are disconnected, you will have to re-calibrate the Danalock. Page 16... -
Page 17: Add The Danalock In The Homekit App
12. Add the Danalock in the HomeKit App When the Danalock has been mounted on the door it is ready to be set up with the Home app. Instructions on how to use the Home app can be found at: https://support.apple.com/en-us/HT204893... -
Page 18: Dismounting
14. Dismounting If at any time you need to dismount the Danalock from your door, insert a pen tip into the hole at the top inner edge of the lock and press while turning the lock counter-clockwise until the lock releases. -
Page 19: Led-Signals
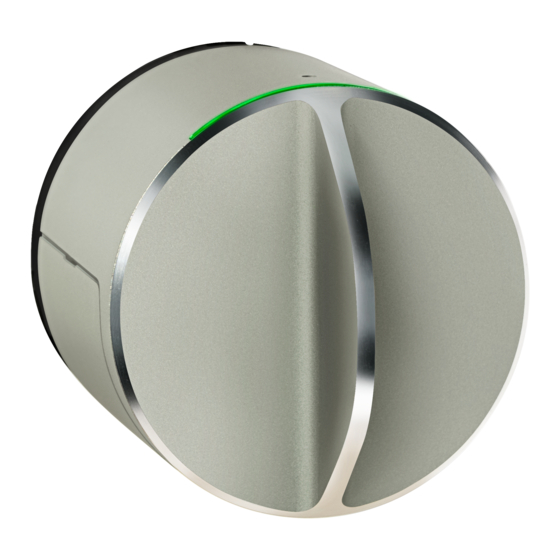
15. LED-Signals A LED light on the Danalock indicates the status of several operations with different colours: LED-Mode LED colour Status indication Constant red till light finishes Lock has successfully locked Constant green till light finishes Lock has successfully unlocked Constant white for 3 seconds Power on. -
Page 20: Click-Commands
Start by turning the Danalock to the desired unlocked position. Start the calibration with the click command and wait for the LED to start blinking yellow. Turn the Danalock to the desired locked position while the LED blinks and click the button once to save the locked position. The Danalock will confirm with a green blink. - Page 21 • Long wait will respond with one long green blink when being set and will lock after 30 seconds. Reset user settings This action will delete all user settings on the Danalock. The Danalock will respond by blinking red. Page 21...
-
Page 22: Firmware Upgrade
17. Firmware upgrade To install the latest firmware on your Danalock download the Danalock app on App Store and log in as a ”HomeKit only” user. Press the download icon on the front page in the app to start the firmware upgrade process. -
Page 23: Technical Information
18. Technical information Controlling this HomeKit-enabled accessory automatically and away from home requires an Apple TV with tvOS 10.0 or later or an iPad with iOS 9.0 or later set up as a home hub. HomeKit technology provides advanced security with end-to- end encryption and authentication between a HomeKit-enabled accessory and your iPhone, iPad, or iPod touch. - Page 24 www.danalock.com...
Need help?
Do you have a question about the V3 BT HK SCANDI and is the answer not in the manual?
Questions and answers