Table of Contents
Advertisement
Quick Links
Advertisement
Table of Contents

Related Manuals for Insportline Kapekor


Summary of Contents for Insportline Kapekor
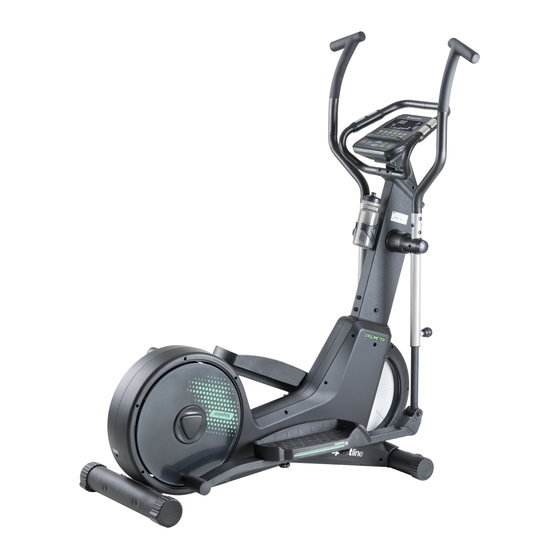
- Page 1 USER MANUAL – EN IN 20156 Elliptical Trainer inSPORTline Kapekor...
-
Page 2: Table Of Contents
CONTENTS SAFETY INSTRUCTIONS ........................3 IMPORTANT NOTES ..........................3 PARTS LIST ............................4 ASSEMBLY ............................. 6 CONSOLE ............................. 11 PROGRAMS ............................14 USE OF ELEPTICAL TRAINER ......................26 MAINTENANCE ............................ 26 ENVIRONMENT PROTECTION ......................26 TERMS AND CONDITIONS OF WARRANTY, WARRANTY CLAIMS ..........26... -
Page 3: Safety Instructions
SAFETY INSTRUCTIONS • To ensure the best safety of the exerciser, regularly check it on damages and worn parts. • If you pass on this exerciser to another person or if you allow another person to use it, make sure that that person is familiar with the content and instructions in these instructions. •... -
Page 4: Parts List
• Be sure to set up the exerciser in a dry and even place and always protect it from humidity. If you wish to protect the place particularly against pressure points, contamination, etc., it is recommended to put a suitable, non-slip mat under the exerciser. •... - Page 5 F1/F2 Handles (left/right) G1/G2 Handles (left/right) H1/H2 Pedals (left/right) Iron bracket Knob Adapter Bottle Bottle holder Screw M9 x 90 Washer M6 Washer M6 Washer M10 Washer M10...
-
Page 6: Assembly
Tools ASSEMBLY STEP 1 Remove the pre-installed washers (C2), spring washers (C3) and nuts (C4) from the rear stabilizer (C). Attach the rear stabilizer (C) with the 2 screws (C1), washer (C2), spring washer (C3) and nut (C4), to the main frame (A). STEP 2 Attach the front stabilizer (D) to the main frame (A) with two screws (J1), spring washer (J13) and washer (J14). - Page 7 STEP 3 Remove the screws (J1), spring washers (J2) and washers (J3) from the main frame (A). Connect the cables (A1) and (B1) and then attach the middle post (B) to the main frame (A) using the screws (J1), spring washer (J2) and washer (J3). Pay attention to the cables, do not pinch them between the frame and the post.
- Page 8 KROK 5 Remove the pre-installed screws (J7), spring washers (J2) and washers (J3). Attach the iron bracket (H3) to the right pedal bracket using the screws (J7), spring washer (J2) and washer (J3). Repeat on the left. Attach left and right handle (G1 and G2) to pedal rods. Adjust the height using adjustable holes and secure the knobs (G3) at the same height on both handles.
- Page 9 STEP 7 Connect the cables (B1 and B2) to the console (E) and attach the console. Attach the handles (F1 and F2) to the middle post with the screw (J10), the iron holder (F3) and the screw (J12) Unscrew the pre-installed screws (B4). Attach the bottle holder to the middle post (B) using the screws (B4).
- Page 10 TRANSPORT The front stabilizer has built-in transportation wheels. Tilt the machine to the front wheels and move slowly. ADAPTER CONNECTION The power outlet is located on the back of the frame.
-
Page 11: Console
CONSOLE BUTTONS START/STOP Starts or stops program RECOVERY Cardiac test Button for navigation or increasing value Button for navigation or decreasing value RESET If the program is stopped, it is used to return to the menu QUCIK KEY Quick start of the program MODE Confirmation Only for tablet / mobile recharging... - Page 12 TURN ON Power on or hold the RESET button for 3 seconds to turn on the LCD display. All data are displayed and you will hear a sound signal. 78 is displayed. (Fig. 1 and 2) Use the +/- buttons to select user profile 0-4 and confirm with MODE. (Fig. 3 and 4) Then set up your gender, age, weight, and height information.
- Page 13 PROGRAM SELECTION After setting the profile, press MODE and use +/- to select: MANUAL - PROGRAM - FITNESS - WATT - USER PROGRAM – HRC 0:00 – 99:00 TIME 0.0 – 99.9 SPEED 0.00 – 99.95 DISTANCE 0 – 990 CALORIES 60 –...
-
Page 14: Programs
PROGRAMS MANUAL PROGRAM Press and hold RESET for 3 seconds, select a profile and set the data or just press RESET. Select MANUAL with the +/- buttons and confirm with the MODE button (Fig. 8) Set the load and confirm with MODE (Fig. 9) Set time, distance, calorie and target pulse values. - Page 16 PROGRAM SELECTING Press and hold RESET for 3 seconds, select a profile and set the data or just press RESET. Select PROGRAM with +/- buttons and confirm with MODE (Fig. 16) Select program 1–12 with the +/- buttons and confirm with the MODE button (Fig. 17) or select the program with the P1-P12 quick selection buttons (Fig.
- Page 19 FITNESS MODE Press and hold RESET for 3 seconds, select a profile and set the data or just press RESET. Select PROGRAM with +/- buttons and confirm with MODE (Fig. 16) Start the program with the START / STOP button. Use the +/- buttons to adjust the load. After 12 minutes, the training results are displayed.
- Page 20 WATT MODE Press and hold RESET for 3 seconds, select a profile and set the data or just press RESET. Select WATT with the +/- buttons and confirm with the MODE button (Fig. 26) Select the value with the +/- buttons and confirm with the MODE button (Fig. 27) Set time, distance, calorie and target pulse values.
- Page 22 USER MODE Press and hold RESET for 3 seconds, select a profile and set the data or just press RESET. Select USER with the +/- buttons and confirm with the MODE button (Fig. 32) Use the +/- buttons to select the load for each column, confirm with the MODE button and set the next column.
- Page 23 HRC PROGRAM Press and hold RESET for 3 seconds, select a profile and set the data or just press RESET. Select HRC with the +/- buttons and confirm with the MODE button (Fig. 38) Select the target heart rate from 55%, 75%, 90%, or use the +/- buttons. (Fig. 39-42). The value varies depending on the age of the user.
- Page 25 RECOVERY After training, grab the handles and press RECOVERY. All display functions will stop and only the 00:60 countdown time will be displayed. (Fig. 46). The result is displayed after the countdown (Fig. 47) Press RECOVERY again to return to the main menu. If no pulse is detected, Er (error) is displayed (fig.
-
Page 26: Use Of Eleptical Trainer
USE OF ELEPTICAL TRAINER The elliptical trainer is a popular fitness machine, one of the newest and most effective home training machines. When you are exercising on an elliptical treadmill, your feet move along the elliptical curve. The elliptical treadmill is a frequent replacement for exercise bikes and treadmills because it is gentler for your joints. - Page 27 otherwise specified in the Purchase Agreement, in the Amendment to this Contract or in another written agreement. Warranty Conditions Warranty Period The Seller provides the Buyer a 24 months Warranty for Goods Quality, unless otherwise specified in the Certificate of Warranty, Invoice, Bill of Delivery or other documents related to the Goods. The legal warranty period provided to the Consumer is not affected.
Need help?
Do you have a question about the Kapekor and is the answer not in the manual?
Questions and answers