Table of Contents
Advertisement
Quick Links
Advertisement
Table of Contents

Summary of Contents for Eneo VMC-17LCD-OPC3
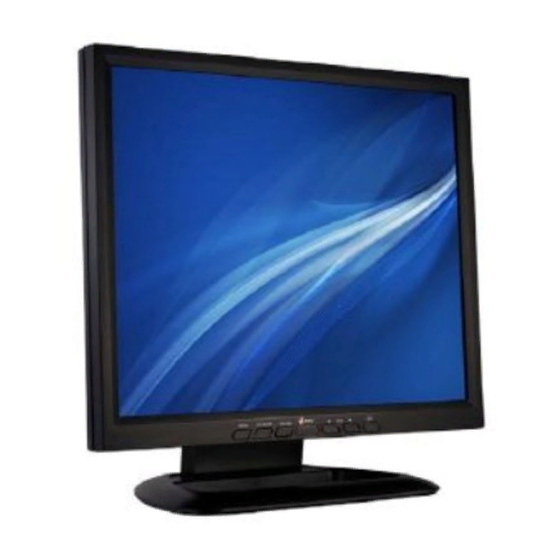
- Page 1 Installation and User’s Guide Installation and Operating Instructions 17, 19” TFT LCD MONITOR VMC-17LCD-OPC3, VMC-19LCD-OPC3 All contents of this document may change without prior notice, and actual product appearance may differ from that depicted herein...
- Page 2 Installation and User’s Guide Warning Statements Follow this safety instruction to use the monitor properly and prevent the damages. * This safety instruction has “ Warning” and “ Caution” as below. WARNING: If the user does not follow this instruction, it may cause the serious damage to the user.
- Page 3 Installation and User’s Guide Warning Statements Do not install this monitor on the outside For cleaning do not use liquid cleaners. and near water. If may cause damage to Never touch the power plug with wet- the product, electric shock and fire. hands.
- Page 4 Installation and User’s Guide Cautions Install this monitor some distance Place this product on a stable place. From the wall and do not install unless If not, it may fall, causing serious Damages to the monitor and people. Proper ventilation is provided. The openings must not be blocked by When carrying this monitor, be careful curtain, rug or other similar surface.
-
Page 5: Table Of Contents
Installation and User’s Guide TABLE OF CONTENTS 1. INSTALLATION 1.1 Unpacking ……......................……......................1.2 Part List 1.3 Main Functional Button ……..................1.4 Connection ……......................1.5 Remote Controller …....................2. OSD SETTING …......................10-12 3. FEATURES 3.1 Specifications …….……........................................4. APPENDIX 5. -
Page 6: Installation
Installation and User’s Guide INSTALLATION 1.1 Unpacking Remove the package cover and place the product on a flat and secure surface or in the installation location. This equipment should be unpacked and handled with care. If an item appears to have been damaged in shipment, notify the shipper immediately. -
Page 7: Main Functional Button
Installation and User’s Guide INSTALLATION 1.3 Main Functional Button MENU Activates and exits the OSD. SOURCE / ▽ Select input source, and move the OSD menu. AUTO / △ Move the OSD menu and auto adjustment of RGB source. IR RECEIVER & POWER INDICATOR WINDOW ◁... -
Page 8: Connection
Installation and User’s Guide INSTALLATION 1.4 Connection HDMI IN RGB IN DC12V IN VIDEO-1 IN VIDEO-1 OUT VIDEO-2 OUT VIDEO-2 IN S-VIDEO IN VIDEO AUDIO IN PC AUDIO IN... -
Page 9: Remote Controller
Installation and User’s Guide INSTALLATION 1.5 Remote Controller A. SOURCE SELECT Press the button to select the desired input source. (VIDEO1, S-VIDEO, RGB… etc) B. CONTROL MENU □ POWER ( Turn the monitor ON or OFF. □ MUTE Temporarily silences the sound. □... - Page 10 Installation and User’s Guide OSD (On Screen Display) SETTING ■ A. INPUT Select Inputs can be set to VIDEO1, VIDEO2, S-VIDEO, RGB PC and HDMI mode. Press the ► key then you can change the input source. ■ B. MENU SELECTION 1.
- Page 11 Installation and User’s Guide ■ C. SCREEN MENU 1. SCAN MODE Select the screen size of main. (FULL / UNDER / OVER / 16:9) ■ D. SETUP MENU 1. INPUT Select input source. (VIDEO1 / VIDEO2 / S-VIDEO / RGB PC / HDMI) 2.
- Page 12 Installation and User’s Guide 4. BUTTON LOCK Select ‘On’, the front key button is locked. Release the button lock: 1) Use the Remote control for releasing the button lock. (If you don’t have, go to num 2.) 2) Push the ▲ and ◀ arrow at the same time for 5 sec then the button is activated. 5.
-
Page 13: Features
Installation and User’s Guide FEATURES 3.1 Specification VIDEO Screen Size 17” 19” Pixel Type Active Matrix TFT Active Matrix TFT Panel Resolution 1280 x 1024 @60Hz 1280 x 1024 @60Hz Brightness 250cd/m² 250cd/m² Contrast Ratio 800:1 800:1 Aspect Ratio 5 : 4 5 : 4 Viewing Angle (H/V) 170°/160°... -
Page 14: Appendix
Installation and User’s Guide APPENDIX 4.1 D-SUB Connector PIN Assignment PIN NO. PIN Name PIN NO. PIN Name RED VIDEO GREEN VIDEO SIGNAL CABLE DETECT BLUE VIDEO GROUND GROUND SDA (for DDC) GROUND H-SYNC RED GROUND V-SYNC GREEN GROUND SCL (for DDC) BLUE GROUND pg14... -
Page 15: Information To The User
Installation and User’s Guide INFORMATION TO THE USER This equipment has been tested and found to comply with the limits for a Class A digital device, pursuant to part 15 of the FCC Rules. These limits are designed to provide reasonable protection against harmful interference in a residential installation. -
Page 16: Troubleshooting
All products carry a limited warranty from ship date against defects in materials and workmanship. We are not liable for improper installation that results in damage to mounts, adapters, display equipment or personal injury. eneo ® is a registered trademark of Videor E. Hartig GmbH Exclusive distribution through specialised trade channels only.


Need help?
Do you have a question about the VMC-17LCD-OPC3 and is the answer not in the manual?
Questions and answers