Advertisement
Available languages
Available languages
Quick Links
SAVE THESE INSTRUCTIONS
Operations Guide for
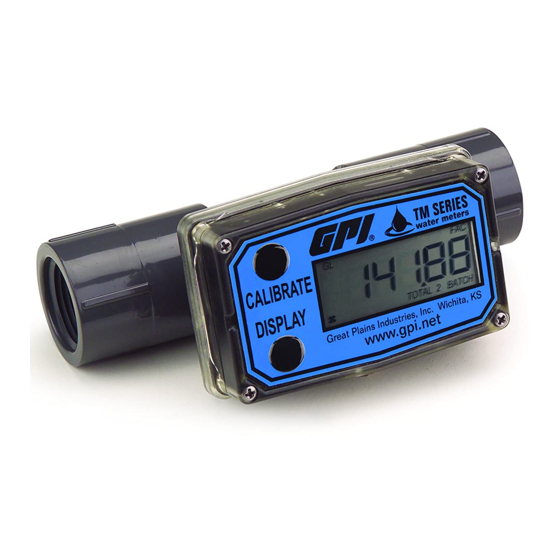
TM Series Electronic Water Meters
TABLE OF CONTENTS
English ......................................................... 1
Español ........................................................ 6
Deutsch ...................................................... 11
Italiano ....................................................... 17
Français ..................................................... 22
E N G L I S H
IMPORTANT NOTICE
Use TM Series meters with water only. Do
not use to meter fuel or chemicals. TM Series
meters measure in gallons or litres. Refer to
the Calibration Section for details.
These meters are not legal for trade applica-
tions.
TM Series meters are very sensitive to
electric noise if operated within one to two
inches of some electric motors or other
sources of electronic noise.
06/03
" A G r e a t P l a i n s Ve n t u r e s S u b s i d i a r y "
1-800-835-0113
INSTALLATION
Install your meter in-line either horizontally or
vertically or at the end of the hose adjacent
to the nozzle. Installation to metal connec-
tions is not recommended. Install as follows:
1. Plan to install turbine with a minimum
straight pipe length as follows:
– Upstream from the turbine, allow a
minimum straight pipe length of 10
times the internal diameter of the
turbine.
– Downstream from the turbine, allow a
minimum straight pipe length of 5
times the internal diameter of the
turbine.
2. Use only primer and solvents approved
for PVC gluing.
3. Attach meter with arrow pointed in the
direction of flow.
Verify Meter Accuracy
Before using, check the meter's accuracy
and verify calibration.
1. Make sure there is no air in the system
by starting the flow until it runs steadily.
Then, stop the flow using a valve or
nozzle.
2. If desired, hold down DISPLAY for 3
seconds to zero the meter's Batch Total.
When zeros appear, release the button.
3. Meter an exact known volume into an
accurate container. For best results,
meter with one continuous full stream.
4. Check the readout. If the amount
metered is accurate, field calibration is
not necessary. If not, refer to the
Calibration Section for further instruc-
tions.
5252 East 36th Street North
Wichita, KS USA 67220-3205
TEL: 316-686-7361
FAX: 316-686-6746
www.gpi.net
Rev. -
920786-01
1
Advertisement

Related Manuals for GPI TM Series


Summary of Contents for GPI TM Series
- Page 1 2. If desired, hold down DISPLAY for 3 Use TM Series meters with water only. Do seconds to zero the meter’s Batch Total. not use to meter fuel or chemicals. TM Series When zeros appear, release the button. meters measure in gallons or litres. Refer to the Calibration Section for details.
-
Page 2: Field Calibration
Factory and Field Calibration Curves OPERATION All calibration information is visible to the Batch and Cumulative Totals user as words in the upper part of the display, above the numeric digits. The meter maintains two totals. The Cumula- tive Total provides continuous measurement All units are configured with a “factory”... - Page 3 For improved accuracy under such condi- 3. Once the buttons have been released tions, the GPI flow computer allows for “field” from Step 2, the display will show the calibration, that is, user entry of custom blinking message “run 01”. If you want to calibration parameters.
-
Page 4: Specifications
11. If you HAVE NOT dispensed any fluid, 4. When the batteries are replaced, the you can exit calibration without changing faceplate will power ON. Check the the cal curve. If the message “run 01” is display to ensure normal functions have showing and you have not dispensed any resumed before assembling again. - Page 5 TM075 2 x 2.7 x 5.3 The following replacement parts and acces- TM100 2 x 3 x 6 sories are available for the TM Series meters: TM150 2.3 x 3.6 x 7 TM200 2.8 x 4.1 x 7.5 Part No.
- Page 6 Si desea, mantenga el botón de la E S P A Ñ O L EXHIBICIÓN durante 3 segundos para llevar a cero el total de medidor. Cuando aparezcan los ceros, suelte el botón. AVISO IMPORTANTE Con el medidor, mida un volumen exacto en un envase exacto.
- Page 7 La calibración se Para la exactitud mejorada bajo tales puede cambiar o modificar en cualquier condiciones, la computadora GPI de flujo momento usando los procedimientos de la tienen en cuenta la calibración del “campo” calibración descritos en la sección de la (es decir un apunte del usuario dentro de los calibración.
- Page 8 Se recomienda altamente usar un envase por cerca de 3 segundos hasta que confiable, y exacto para la calibración. Para usted vea el mensaje de “dd-CAL” en obtener resultados más exactos. debido al centelleo. Una vez que mensaje del “dd- alto índice de flujo, se recomienda CAL”, aparezca, suelte ambos botones.
- Page 9 9. Para incorporar otro punto de calibra- Reemplazo De La Batería ción, vuelva a repetir los pasos del 3 al El medidor funciona a través de dos baterías 8. Es posible fijar hasta 15 puntos de la del litio 3-voltios que puedan ser substituidas cal-curva, y “run ##”...
- Page 10 Tipo De Las Guarnicione: Resbalón - Temperatura De Funcionamiento: de 40 Soc 0° a +60° C Máxima Presión De Funcionamiento: Temperatura Del Almacenaje: 150 PSIG a los 73°F -40° a +70° C Peso: Medida De Estados Unidos TM050 .141 kilogramo TM075 .173 kilogramo Unidad De La Medida: Galón...
- Page 11 Si usted WICHTIGE NACHRICHT necesita ayuda adicional, contacte con el departamento de servicios al cliente de GPI: TM Series Meßinstrumente nur fur Wasser benutzen. TM Series mißt in Gallonen oder 1-800-835-0113 Litern. Auf den Kalibrierungsabschnitt für Details beziehen. Usted necesitará: Diese Meßinstrumente sind nicht für den...
- Page 12 1. Überprüfen, daß es keine Luft in der FließgeschwindigkeitEigenschaft Anlage gibt, indem Sie den Fluß Wenn diese Vorichtung betätigt wird, beginnen, bis er ständig läuft. Dann den erscheint das Wort FLOWRATE Links auf der Fluß mit einem Ventil oder einer Düse untersten linie.
- Page 13 DISPLAY Taste ebenfalls pressen und Fließgeschwindigkeiten des Meßinstruments freigeben. (Sie können die KALIBRIEREN- erreichen: TASTE dann auch freigeben.) Die TM Series Meßinstrumente Markierungsfahnenanzeiger auf der obersten Linie ändern sich, sodass sie die TM050 1/2 Zoll 1 GPM (3,8 LPM) neugewählte Kalibrierung anzeigen.
- Page 14 3. Sobald die Tasten von Schritt 2 10. Um den Kalibrierungsprozeß zu beenden, freigegeben worden sind, erscheint die beide der Tasten für ungefähr 3 Blinkenanzeige “run 01”. Wenn Sie den Sekunden betätigen und halten, bis Sie Kalibrierungsprozeß jetzt beenden Anzeige “CAL End” sehen. Nachdem Sie möchten, bevor Sie irgendeine die Tasten freigeben, nimmt der Flüssigkeit zuführen, zu Schritt 11 gehen.
- Page 15 Verbindungstyp: Beleg - Zeitplan 40 Soc BatterieAustausch Das Meßinstrument wird durch zwei 3-Volt Max. FunktionsDruck: 150 PSIG @ 73°F Lithium Batterien angetrieben, die ausgetauscht werden können, während das U.S. Maß Meßinstrument installiert ist. Die Zwischensummen und kumulativen Maßeinheit der Maßnahme: Gallone Gesamtmengen stellen sich auf Null zurück, FlußStrecke: wenn die Batterien schwach werden oder...
- Page 16 Behandlung und der Beseiti- 125510-01 3/4 Zoll, Turbineeinheitsinstalla- gung der gefährlichen oder feuergefährli- tionssatz chen Flüssigkeiten, nimmt GPI nicht 125512-01 1 Zoll, Turbineeinheitsinstalla- Meßinstrumente für Überarbeitung an, es tionssatz sei denn, class sie vom flüssigen Überrest 125514-01 1-1/2 Zoll, Turbineeinheitsinstal- vollständig frei sind.
- Page 17 2. Se voluto, mantenere il tasto dell’ I T A L I A N O DISPLAY per 3 secondi – zero totali in lotti del tester. Quando gli zeri compaiono, liberare il tasto. AVVISO IMPORTANTE 3. Per mezzo del tester, misurare un volume Usare soltanto l’acqua con i tester dei Series conosciuto esatto in un contenitore del TM.
- Page 18 La taratura può essere Per esattezza migliorata in tali circostanze, i cambiata o modificata in qualunque GPI fluiscono calcolatore tengono conto la momento seguendo le procedure di taratura taratura “del campo” (entrata di utente dei descritte nella sezione di taratura. I totali o il parametri di taratura su ordinazione) A “che...
- Page 19 vivamente che la taratura del campo è 3. Una volta che i tasti sono stati liberati da completata con una combinazione di volume punto 2, l’esposizione mostrerà che il e di peso usando le scale di alta risoluzione. messaggio di lampeggiamento “run 01”. Se desiderate ora rimuovere il processo di taratura prima dell’...
- Page 20 10. Per concludere il processo di taratura, ed i totali cumulativi ripristinati a zero ma le premere e tenere entrambi i tasti per calibrature della fabbrica e del campo sono circa 3 secondi fino a che non vediate mantenuti. messaggio dell “CAL End”. Dopo che Se l’esposizione del tester diventa fioca o in liberiate i tasti il calcolatore riprenderà...
- Page 21 Misura Degli Stati Uniti Peso: TM050 .141 chilogrammo Unità Della Disura: Gallone TM075 .173 chilogrammo TM100 .232 chilogrammo Gamma Di Flusso: TM150 .368 chilogrammo TM050 1 - 10 GPM TM200 .518 chilogrammo TM075 2 - 20 GPM TM100 5 - 50 GPM Dimensioni - Centimetro (Larghezza, TM150 10 - 100 GPM Altezza, Lunghezza):...
- Page 22 Suivez ces étapes pour infiammabili, GPI non accetterà i tester per installer: la ripresa a meno che siano completamente 1. Projetez installer la turbine avec une esenti da residuo liquido.
- Page 23 Vérifiez L’Exactitude De Compteurs Dispositif De Débit Avant utilisation, vérifiez l’exactitude du Quand ce dispositif est activé, les affichages compteur et vérifiez le calibrage. de mot FLOWRATE vers la gauche sur le résultat inférieur. 1. Assurez-vous qu’il n’y a aucun air dans le système en commençant le flux de Quand le FLOWRATE est montré, les fluide jusqu’à...
- Page 24 La courbe d’étalonnage de “champ” peut Pour l’exactitude améliorée dans de telles être placée par l’utilisateur, et peut être conditions, les GPI coulent ordinateur changé ou modifié à tout moment en utilisant tiennent compte du calibrage d’”champ” les procédures de calibrage décrites dans la (entrée d’utilisateur des paracompteurs de...
- Page 25 Procédures De Calibrage De changer la valeur du chiffre qui clignote. Utilisez le bouton de DISPLAY pour Champ De Dispense/Display décaler le “clignotement” au prochain 1. Maintenez le bouton de CALIBRATE tout chiffre. en serrent et libérent du DISPLAY 8. Quand le nombre correct est écrit, jusqu’à...
- Page 26 Si le rotor ne tourne pas librement, appliquez Type De Condeption: Turbine un lubrifiant pénétrant sur le rotor, l’axe, et les Composants Mouillés: roulements. Enlevez tous les débris ou gise- Loger: PVC ments du rotor en utilisant une brosse molle Coussinets: En Céramique ou une petite sonde.
- Page 27 Ne renvoyez pas le compteur sans autorité PIÉCES spécifique du département de service à la clientèle de GPI. En raison des règlements Les pièces et les accessoires de rechange stricts régir le transport, la manipulation, et suivants sont disponibles pour les compteurs...
- Page 28 “ A G r e a t P l a i n s Ve n t u r e s S u b s i d i a r y ” www.gpi.net 1-800-835-0113 GPI is a registered trademark of Great Plains Industries, Inc. © 2003 GREAT PLAINS INDUSTRIES, INC., Wichita, KS Printed in U.S.A.
Need help?
Do you have a question about the TM Series and is the answer not in the manual?
Questions and answers