
Related Manuals for Belling Farmhouse 932


Summary of Contents for Belling Farmhouse 932
- Page 1 Belling Farmhouse 932 Dual Fuel Cooker Installation & User’s instructions 932 Dual Fuel - Natural Gas (Liquid Petroleum gas convertible) Note: This appliance is supplied for use with the category of gas specified and can be converted to LP gas with the kit provided.
-
Page 2: Table Of Contents
Care and Cleaning Control Panel / Oven Doors / Ovens & Grill.. Burner Caps / Burner Bodies…….………… Belling Cookclean Panels... . . … Replacing the Oven Lamp …………………. Is There Something Wrong? ………………………….…….…………………... -
Page 3: Product Specification
PRODUCT SPECIFICATION Gas Type II2H3+ Gas Supply Pressure 20mbar for G20 28mbar for G30 37mbar for G31 Electrical Supply 230V – 240v Electrical Supply Frequency 50Hz Total Heat Input (Gas) 11.1 kW Total Heat Input (Electric) 6.25 – 6.80 kW Large Fan Oven Wattage (Timed) 2.07 - 2.25 kW Standard Conventional Oven Wattage... -
Page 4: Your Belling Cooker
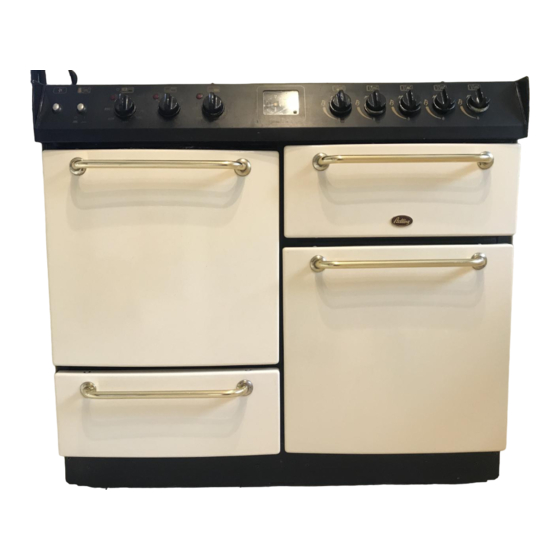
INTRODUCTION Your Belling Cooker Welcome to your new Belling Farmhouse Cooker. Its stylish and practical design will enhance your kitchen and make cooking a pleasure with the combined benefits of gas and electric. It features a large efficient fan oven, a standard conventional oven, a separate grill, a storage compartment, 5 gas burners and a warming area. -
Page 5: Installation Instructions
INSTALLATION INSTRUCTIONS This appliance has been tested and certified by the British Standards Institution and carries the C.E. Mark. The installation must be in accordance with the current I.E.E. Wiring Regulations. Gas safety (Installation & Use Regulations 1994.) This appliance must be installed in accordance with BS6172: 1990. In your own interest and that of safety, it is LAW that all Gas Appliances are installed by competent persons in accordance with Gas Safety Regulations. - Page 6 Siting/Moving the Cooker Your cooker is heavy, so be careful when moving or positioning it. Do not try to move the cooker by pulling on the doors or handles or control panel. The Belling Farmhouse is designed to 'slot-in' between 600mm deep cabinets, spaced approximately 1000mm apart. It can also be used freestanding, with a cabinet to one side, in a corner setting or with its back to a wall.
- Page 7 Installation Instructions Any overhanging surface or cooker hood should be at least 760mm (30") above the cooker hob. We do not recommend positioning the cooker below wall cupboards, as the heat and steam from the cooker may cause damage to the cupboard and its contents.
- Page 8 Installation Instructions Connecting to electrical supply WARNING: THIS APPLIANCE MUST BE EARTHED! The cooker should be plugged into a double pole switch or an unswitched socket outlet which is properly connected to the house electricity distribution system and efficiently earthed. The flexible mains lead is fitted with a 13 amp BS1363 plug having a fuse of 3 amp capacity, however, should this plug not fit the socket outlet in your home, it should be cut off and replaced with a suitable plug as described below.
- Page 9 Installation Instructions Check for Gas Soundness Gas pressure may be checked on a semi-rapid hob burner. Light the other 4 burners and attach test nipple to the burner after removing the injector. Check the operation of the cooker Check that the five hotplate electrodes spark correctly. The hotplate burners should be checked for a steady flame when turned down to the smallest flame setting marked on the control panel.<R><R>Before you cook for the first time, we recommend that you turn on each element and hotplate in turn to burn off...
-
Page 10: Never
FOR YOUR OWN SAFETY When used properly your Belling Cooker is completely safe, but as with any cooker there are some precautions you must take in its use. NEVER • Never allow anyone except an authorized Belling Service Agent to service or repair your cooker. -
Page 11: Always
FOR YOUR OWN SAFETY • Never use the hotplates with the burner caps removed. • Never use badly designed or misshapen pans which may be unstable. • Never allow pan handles to stick out beyond the hotplate (where they can be knocked) or over another burner. - Page 12 KNOW YOUR COOKER Center Hotplate (Wok) Triple ring Rear left hotplate (Semi-Rapide) Rear right hotplate (Auxiliary) Warming Zone Front left hotplate (Rapide) Front right hotplate (Semi-Rapid) Control panel Warming Zone Switch Spark Ignition Switch Analogue/Digital Timer Large Timed Gas oven Grill 2 Oven shelves Grill pan with...
- Page 13 KNOW YOUR CONTROL PANEL Warming Zone On/Off Switch Grill Gas Tap Control Electronic Analogue/Digital Clock Minute Minder & Large Oven Timer Spark Ignition Switch Standard Oven Thermostat Large Oven Thermostat (Timed) Hotplate Gas Top Controls Control Knobs & Switches The control knobs can only be rotated anti-clockwise from the off position. The spark ignition switch is operated by depressing and holding in the depressed position, this will provide a repetitive spark to the burners.
- Page 14 TIMER INSTRUCTIONS IMPORTANT NOTE: Please allow 1-2 seconds after selecting a function for the circuit to activate. To set the time of day. Turn the control knob to Push in the control knob and hold (the clock hands will move). Release the knob when the correct time is displayed.
- Page 15 TIMER INSTRUCTIONS Delayed Cooking (Auto) 3b Set the large oven thermostat to the required temperature. Large Oven Only The oven will automatically ignite at the designated time and cook for the duration specified and automatically switch off. An audible alarm (quadruple bleep) will sound after the required duration. To cancel the alarm, push in the control knob or turn to an other function.
-
Page 16: Rules To Follow When Cooking Automatically
Automatic Cooking (Large Fan Oven) Rules to follow when When planning your meal, remember that the oven control setting cooking automatically refers to the center of the oven - it is warmer above and cooler below. Food should be as cold as possible when it goes into the oven, ideally straight from the refrigerator. -
Page 17: Control Setting Guide
USING THE HOB Description of The hob is made of enamelled mild steel and fitted with five gas Hotplate Burners hotplate burners. The left front hotplate burner (Rapide) is rated at 3.0kW. The left rear and right front hotplate burners (Semi – Rapide) are rated at .75kW. -
Page 18: Using The Hob
USING THE HOB Choosing Your Utensils Any type of flat based kettle or pan from 100mm (4in.) to 230mm (9in.) base diameter may be used. Do not use pans which are unstable when placed on a flat work-top. The use of split pans, i.e. those comprising two or more pans designed to fit together over a single burner, is not recommended as these can be unstable on the hotplate. -
Page 19: Safety Requirements For Deep Fat Frying
USING THE HOB Safety Requirements for IMPORTANT: Deep Fat Frying As there could be some fire risk attached to the heating of oil, particularly for deep fat frying, cooking utensils containing oil must not be left unattended (e.g. to answer the telephone) or in close proximity to hotplates. - Page 20 GRILLING CAUTION ACCESSIBLE PARTS MAY BECOME HOT WHEN THE GRILL IS IN USE. YOUNG CHILDREN SHOULD BE KEPT AWAY.<R> DO NOT use the grill with the door closed. DO NOT cover the grill pan or grid with aluminum foil as this can hold fat, intensify the heat and create a fire hazard.
-
Page 21: The Ovens
THE OVENS The Belling Farmhouse has one large gas and one standard oven. The ovens have different heat zones with the thermostat settings referring to the temperature on the middle shelf; above the shelf it is hotter and below it is cooler. - Page 22 THE 'E' SETTING This is used for slow cooking, keeping food warm and warming plates or dishes for short periods. Extra care must be taken when warming bone china. Some advantages of slow cooking are: The oven stays cleaner because there is less splashing. Timing of the food is not as critical, so there is less fear of overcooking.
- Page 23 Storage and Reheating of Food. It is vitally important to strictly adhere to the basic principles of food handling and hygiene to prevent the possibility of bacterial growth. If food is to be frozen or not served immediately, cool it in a clean container as quickly as possible.
-
Page 24: Oven Cooking Chart
Oven Cooking Chart The following times and setting are for guidance only. You may wish to alter the setting to give a result more to your satisfaction. When a different setting to that shown below is given in a recipe, the recipe instructions should be followed. - Page 25 Oven Cooking Chart FOOD Gas Shelf Approx. Cooking time and Comments Mark Position Cakes, Pastries & Biscuits Small Cakes 2 and 4 17 - 25 mins. (12 per tray) 2 trays 1 tray 17 - 25 mins. Victoria Sandwich 2 and 4 20 - 30 mins.
-
Page 26: Temperature Conversion Scale
TEMPERATURE CONVERSION SCALE Approximate Oven Temperature Conversion Chart FAN OVEN °C GAS MARK CONVENTIONAL OVEN (It is not always necessary to °F °C pre-heat oven) -
Page 27: Oven Roof
CARE AND CLEANING In the interests of both safety and hygiene your Belling Cooker needs to be kept clean. A build-up of grease or fat from cooking could cause a fire hazard. WARNING! For your own safety , always switch off your cooker at the mains supply and allow to cool before cleaning. - Page 28 Belling Cookclean Panels Both ovens have side runners that are coated with a special enamel which will absorb and gradually vaporise any splashes which occur during cooking. This surface coating, which can be recognised by its matt finish, may be damaged by using aerosol oven cleaners, oven pads, detergents or scouring powders and their use is not recommended.
- Page 29 IS THERE SOMETHING WRONG WITH YOUR COOKER? Fault Finding Guide Before contacting your Belling Service Center/Installer, check the problem guide below; there may be nothing wrong with your cooker. Problem Check Nothing Works. Is the main cooker wall switch turned on?
-
Page 30: Baking
COOKING RESULTS NOT SATISFACTORY? PROBLEM CHECK GRILLING Uneven cooking front Ensure that the grill pan is positioned centrally to back below the grill burner. Fat Splattering Ensure that the grill is not set at too high a setting. BAKING GENERAL. Uneven rising of cakes Ensure that the oven shelves are level by using a spirit level on the rod shelf. - Page 31 Also note your postcode ......In order to provide a complete service history for your Belling appliance,...
- Page 33 Belling Appliances Ltd, Mexborough, South Yorkshire, S64 8AJ. Tel: Belling Help Line 01709 579902 General Enquiries 01709 579900. Part No. 8/18115/0...
Need help?
Do you have a question about the Farmhouse 932 and is the answer not in the manual?
Questions and answers