Table of Contents
Advertisement
Available languages
Available languages
Quick Links
Advertisement
Chapters
Table of Contents

Subscribe to Our Youtube Channel
Related Manuals for ProLights MOSAICOXL


Summary of Contents for ProLights MOSAICOXL
- Page 1 MOSAICOXL OUTDOOR LED PROJECTOR USER MANUAL MANUALE UTENTE EN - IT...
- Page 2 All rights reserved by Music & Lights S.r.l. No part of this instruction manual may be reproduced in any form or by any means for any commercial use. In order to improve the quality of products, Music&Lights S.r.l. reserves the right to modify the characteristics stated in this instruction manual at any time and without prior notice.
-
Page 3: Table Of Contents
3. 18 Construction of the DMX termination 4 Maintenance 4. 1 Maintenance and cleaning the unit 4. 2 Trouble shooting 4. 3 Gobos replacement Packing content • MOSAICOXL • Power adapter cable • Signal adapter cable (2 pcs) • User manual... -
Page 4: General Instructions
MOSAICOXL WARNING! Before carrying out any operations with the unit, carefully read this instruction manual and keep it with cure for future reference. It contains important information about the installation, usage and maintenance of the unit. SAFETY General instruction • The products referred to in this manual conform to the European Community Directives and are there- fore marked with . -
Page 5: Introduction
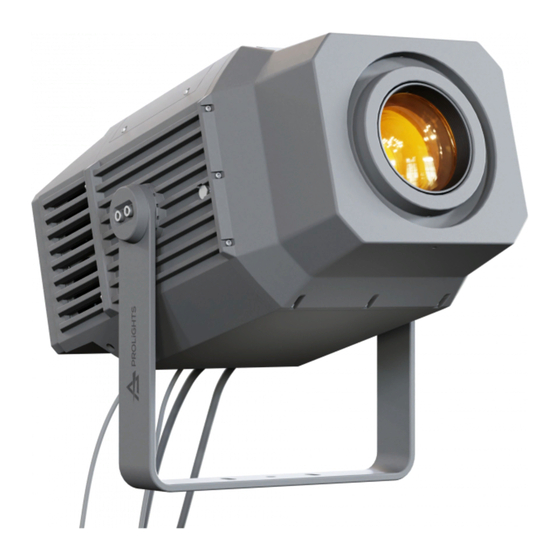
- 1 - INTRODUCTION 1.1 DESCRIPTION MOSAICOXL is an extremely powerful long-range outdoor LED fixture for the projection of textures, im- ages and logos onto buildings and landscapes. Built in a durable IP66 die-cast housing, the MOSAICO XL offers a phenomenal output of 17’000 lumens and an extensive set of features including CMY colour mix- ing system and profile to precisely shape the projection area. - Page 6 MOSAICOXL • DMX channels: 28 / 30 / 35channel • W-DMX: included, wireless solution receiver • RDM: RDM ready for fixture remote monitor and settings • Display: black OLED touch display • Firmware upgrade: yes, via USB - DMX interface (UPBOX1) not included •...
-
Page 7: Operating Elements And Connections
MOSAICOXL 1.3 OPERATING ELEMENTS AND CONNECTIONS Fig.2 Rear panel 1. MOUNTING BRACKET 2. 2x HEXAGONAL HEAD SCREW SYSTEMS for side, to tighten the bracket. 3. PRESSURE COMPENSATION VALVE 4. POWER IN/ OUT: for connection to a socket (100-240V~/50-60Hz) via the supplied mains cable. -
Page 8: Installation
2.1 MOUNTING MOSAICOXL may be set up on a solid and even surface. The unit can also be mounted upside down to a cross arm. For fixing, stable mounting clips are required. The mounting place must be of sufficient stability and be able to support a weight of 10 times of the unit’s weight. -
Page 9: Mounting With Optional Bracket
MOSAICOXL 2.2 MOUNTING WITH OPTIONAL BRACKET MOSAICOXL bracket for wall mounting and suspension on poles with square cross-section with diam- eter from 50x50 mm to 150x150mm or circular cross-section with diameter from 50 mm to 150 mm. Complete kit of nuts and bolts included. -
Page 10: Functions And Settings
3.2 BASIC MOSAICOXL has a OLED display and 4 button used to access the control panel functions and manage them (fig.4). Remove the cover from the control panel so you can set up the fixture using the control panel. -
Page 11: Menu Structure
MOSAICOXL 3.3 MENU STRUCTURE MENU ð ð Default: 1 CONNECT DMX Address Value (1-512) ð DMX Mode 28 CH Default: 28CH 30 CH 35 CH ð Default: Off Wireless Receive On/Off On/Off ð Default: No Receive Reset Yes/No ð Default: No... - Page 12 MOSAICOXL ð ð ð ADVANCED Reset Yes/No Cyan Magenta Yellow Color Gobo Prism Effect Focus Zoom Frost Iris Fr.shutters Rot. Fr.shutter 1 M1 Fr.shutter 1 M2 Fr.shutter 2 M1 Fr.shutter 2 M2 Fr.shutter 3 M1 Fr.shutter 3 M2 Fr.shutter 4 M1 Fr.shutter 4 M2...
- Page 13 MOSAICOXL ð Software DISP1: V1.0 Version DISP2: V1.0 FPGA: V2.0 CTR1:V1.0 CTR2:V1.0 CTR3:V1.0 ð 15D0****** View ð ð 5 STAND ALONE Play Default:Off ð Show Show 1 Default: Show 1 Show 2 Show 3 ð Chase Chase 1 Default: Chase 1 Chase 8 ð...
- Page 14 MOSAICOXL ð ð Scenes Record Scenes 01 Scenes 02 DMX - Scenes Record Scenes 03 ..Scenes 30 Scenes 31 Scenes 32 ð ð Slave setup Edit Scenes 01 RGobo/ Focus/Zoom/RShutter Default: Edit Scenes 02 RGobo/ Focus/Zoom/RShutter RGobo: 0 ..
- Page 15 MOSAICOXL ð ð DMX Show Dmx Show 1 No/Yes Record Dmx Show 2 Dmx Show 3 Dmx Show 4 Dmx Show 5 Dmx Show 6 Dmx Show 7 Dmx Show 8 Dmx Show 9 Dmx Show 10 Dmx Show 11...
- Page 16 MOSAICOXL ð ð Snapshot Snapshot1 Snapshot2 Snapshot3 Snapshot4 Snapshot5 Snapshot6 Snapshot7 Snapshot8 Snapshot9 Snapshot10 Snapshot11 Snapshot12 Snapshot13 Snapshot14 Snapshot15 Snapshot16 ð Clock Setting Current Time 2018/12/19 14:20 Clock Setting 2018/12/19 14:20 ð ð ð ð Schedule Show Schedule Show 1...
- Page 17 MOSAICOXL ð Dmx Show 11 Dmx Show 12 Dmx Show 13 Dmx Show 14 Dmx Show 15 Dmx Show 16...
-
Page 18: Dmx Addressing
• Press the MENU button repeatedly to exit the menu and save changes. To able to operate the MOSAICOXL with a light controller, adjust the DMX start address for the first a DMX channel. If e. g. address 33 on the controller is provided for controlling the function of the first DMX chan- nel, adjust the start address 33 on the MOSAICOXL. -
Page 19: Wireless
At this point connect the DMX console to the WiFi unit to open the communication with the MOSAICOXL. • To reset the unit, select the Receive Reset function using the UP/DOWN buttons, press the RIGHT button until the display shows Connect, then select Receive Reset using the UP/DOWN buttons, then press the ENTER button. -
Page 20: Fixture Settings
MOSAICOXL - Backlight - Auto Off display backlight. This function allows you to switch off automatically the back- lighting of the display after a certain time which can be set using the directional keys. To have the display always on select On or set a value between those shown (10s, 20s, 30s) to turn off the display once the chosen time has elapsed, after exiting the menu. -
Page 21: Advanced
MOSAICOXL • Press repeatedly the button MENU to return the menu mode. 3.11 ADVANCED It is possible to modify the following parameters following the same procedure: • Press the MENU button to access the main menu. • Press the UP/DOWN button to scroll through the menu, select Advanced, then press the ENTER button to enter the next menu. - Page 22 MOSAICOXL • Press the MENU button repeatedly to exit the menu and save changes. The unit will go into automatic mode by executing the program automatically. Play Chase The function Chase lets you choose the automatic program to actually run.
- Page 23 After pushing ENTER button, MOSAICOXL will wait for the confirm. • From the DMX console, change the parameters of the MOSAICOXL based on the scene to be created. • After creating the scene, press ENTER on the MOSAICOXL (the message STORED will appear).
- Page 24 MOSAICOXL Slave Setup The function Slave Setup allows you to execute automatic pre-programmed show set on the master projector. • Press the MENU button to access the main menu. • Press the UP/DOWN button to scroll the menu, select Stand Alone, then press the ENTER button to enter the next menu.
-
Page 25: Dmx 512
Press the MENU key several times to exit the menu and to save the changes made. PLAY Choose this function to run your shows and / or snapshots, recorded on board the MOSAICOXL. • Press the ENTER key to access the main menu. - Page 26 - Press the UP / DOWN button to select On/Off and press the ENTER button to confirm. 2. Delete existing shows and snapshots. 3. Make sure that date and time of the MOSAICOXL are correct. See the paragraph “Clock Setting”. 4. Record desired shows and snapshots.
-
Page 27: Color Wheel And Rotating Wheel
MOSAICOXL 3.15 COLOR WHEEL SLOT5: ORANGE SLOT6: VIOLET SLOT4: CTO OPEN SLOT3: PRIMARY GREEN SLOT1: DEEP RED SLOT2: LIGHT BLUE ROTATING GOBOS... -
Page 28: Dmx Control
MOSAICOXL 3.16 DMX CONTROL SCENES 28 CH 30 CH 35 CH FUNCTION RECORD Value SHUTTER Shutter closed 000 - 031 No function (shutter open) 032 - 063 Strobe effect slow to fast 064 - 095 No function (shutter open) 096 - 127... - Page 29 MOSAICOXL SCENES 28 CH 30 CH 35 CH FUNCTION RECORD Value ROTATING GOBO WHEEL Open 000 - 005 Position 1 006 - 010 Position 2 011 - 015 Position 3 016 - 020 Position 4 021 - 025 Position 5...
- Page 30 MOSAICOXL SCENES 28 CH 30 CH 35 CH FUNCTION RECORD Value ANIMATION WHEEL Open/No Function 000 - 003 Forward stop to fastest 004 - 127 Stop 128 - 131 Reverse stop to fastest 132 - 255 ANIMATION 000 - 007...
- Page 31 MOSAICOXL SCENES 28 CH 30 CH 35 CH FUNCTION RECORD Value SHUTTERS MACROS No Function 000 - 003 Macro 1 004 - 011 Macro 2 012 - 018 Macro 3 019 - 025 Macro 4 026 - 032 Macro 5...
- Page 32 MOSAICOXL SCENES 28 CH 30 CH 35 CH FUNCTION RECORD Value Reset all (Hold 3 Second) 200 - 209 No function 210 - 255 SHOW No Function 000 - 063 Show 1 064 - 127 Show 2 128 - 191...
-
Page 33: Connection Of The Dmx Lin
MOSAICOXL 3.17 CONNECTION OF THE DMX LINE DMX connection employs standard XLR connectors. Use shielded pair-twisted cables with 120Ω imped- ance and low capacity. The following diagram shows the connection mode: DMX - INPUT DMX - OUTPUT XLR plug XLR socket... -
Page 34: Maintenance
MOSAICOXL - 4 - MAINTENANCE 4.1 MAINTENANCE AND CLEANING THE UNIT • Make sure the area below the installation place is free from unwanted persons during setup. • Switch off the unit, unplug the main cable and wait until the unit has cooled down. -
Page 35: Gobos Replacement
MOSAICOXL 4.3 GOBOS REPLACEMENT This procedure will explain how to replace gobos. 1. Lift and extract the gobo holder you want to replace from the gobo wheel. 2. Remove the spring that secures the gobo to the support. 3. Insert the new gobo respecting the direction of the painted part. - Page 36 Music & Lights S.r.l. si riserva ogni diritto di elaborazione in qualsiasi forma delle presenti istruzioni per l’uso. La riproduzione - anche parziale - per propri scopi commerciali è vietata. Al fine di migliorare la qualità dei prodotti, la Music&Lights S.r.l. si riserva la facoltà di modificare, in qualunque momento e senza preavviso, le specifiche menzionate nel presente manuale di istruzioni.
- Page 37 3. 18 Costruzione del terminatore DMX 4 Manutenzione 4. 1 Manutenzione e pulizia del sistema ottico 4. 2 Risoluzione dei problemi 4. 3 Sostituzione gobos Contenuto dell'imballo: • MOSAICOXL • Adattatore cavo di alimentazione • Adattatore cavo di segnale (2 pz) • Manuale utente...
-
Page 38: Avvertenze Generali
MOSAICOXL ATTENZIONE! Prima di effettuare qualsiasi operazione con l’unità, leggere con attenzione questo manuale e conservarlo accuratamente per riferimenti futuri. Contiene informazioni importanti riguardo l’installazione, l’uso e la manutenzione dell’unità. SICUREZZA Avvertenze generali • I prodotti a cui questo manuale si riferisce sono conformi alle Direttive della Comunità Europea e per- tanto recano la sigla . -
Page 39: Introduzione
- 1 - INTRODUZIONE 1.1 DESCRIZIONE MOSAICOXL is an extremely powerful long-range outdoor LED fixture for the projection of textures, im- ages and logos onto buildings and landscapes. Built in a durable IP66 die-cast housing, the MOSAICO XL offers a phenomenal output of 17’000 lumens and an extensive set of features including CMY colour mix- ing system and profile to precisely shape the projection area. - Page 40 MOSAICOXL • W-DMX: integrato, ricevitore ad antenna (2.4 GHz) by Wireless Solution Sweden • RDM: RDM ready per controllo e impostazioni remote della fixture • Display: display touch black OLED • Aggiornamento firmware: si, con interfaccia USB - DMX (UPBOX1) non inclusa •...
-
Page 41: Elementi Di Comando E Di Collegamento
MOSAICOXL 1.3 ELEMENTI DI COMANDO E COLLEGAMENTI Pannello Posteriore Fig.2 1. STAFFA DI MONTAGGIO 2. 2x SISTEMI A VITE A TESTA ESAGONALE per lato, per stringere la staffa. 3. VALVOLA DI COMPENSAZIONE DELLA PRES- SIONE 4. POWER IN/OUT: per il collegamento ad una presa di rete (100-240V~/50-60Hz) tramite il cavo rete in dotazione. -
Page 42: Installazione
- 2 - INSTALLAZIONE 2.1 MONTAGGIO Il MOSAICOXL può essere collocato su un piano solido. Inoltre, grazie alle possibilità di fissaggio sulla dop- pia staffa (fig.3), l’unità può essere montata anche a testa in giù, su una traversa. Per il fissaggio occorrono dei supporti robusti per il montaggio. -
Page 43: Montaggio Con Staffa Opzionale
• Individuare la posizione della staffa opzionale MOSUNIBRACKXL in un al- tezza opportuna. • Sia la staffa che il MOSAICOXL devo- no essere assicurati con un cavo di sicurezza. Fig.4 - Esempio con pali a sezione quadrata di 150x150 mm... -
Page 44: Funzioni E Impostazioni
Per spegnere il MOSAICOXL, staccare la spina dalla presa di rete. Per maggiore comodità è consigliabile collegare l’unità con una presa comandata da un interruttore. 3.2 IMPOSTAZIONE BASE Il MOSAICOXL dispone di un LED display e 4 pulsanti per accesso alle funzioni del pannello di controllo (fig.4). Mode... -
Page 45: Struttura Menu
MOSAICOXL 3.3 STRUTTURA MENU MENU ð ð Default: 1 CONNECT DMX Address Value (1-512) ð DMX Mode 28 CH Default: 28CH 30 CH 35 CH ð Default: Off Wireless Receive On/Off On/Off ð Default: No Receive Reset Yes/No ð Default: No... - Page 46 MOSAICOXL ð ð ð ADVANCED Reset Yes/No Cyan Magenta Yellow Color Gobo Prism Effect Focus Zoom Frost Iris Fr.shutters Rot. Fr.shutter 1 M1 Fr.shutter 1 M2 Fr.shutter 2 M1 Fr.shutter 2 M2 Fr.shutter 3 M1 Fr.shutter 3 M2 Fr.shutter 4 M1 Fr.shutter 4 M2...
- Page 47 MOSAICOXL ð Software DISP1: V1.0 Version DISP2: V1.0 FPGA: V2.0 CTR1:V1.0 CTR2:V1.0 CTR3:V1.0 ð 15D0****** View ð ð 5 STAND ALONE Play Default:Off ð Show Show 1 Default: Show 1 Show 2 Show 3 ð Chase Chase 1 Default: Chase 1 Chase 8 ð...
- Page 48 MOSAICOXL ð ð Scenes Record Scenes 01 Scenes 02 DMX - Scenes Record Scenes 03 ..Scenes 30 Scenes 31 Scenes 32 ð ð Slave setup Edit Scenes 01 RGobo/ Focus/Zoom/RShutter Default: Edit Scenes 02 RGobo/ Focus/Zoom/RShutter RGobo: 0 ..
- Page 49 MOSAICOXL ð ð DMX Show Dmx Show 1 No/Yes Record Dmx Show 2 Dmx Show 3 Dmx Show 4 Dmx Show 5 Dmx Show 6 Dmx Show 7 Dmx Show 8 Dmx Show 9 Dmx Show 10 Dmx Show 11...
- Page 50 MOSAICOXL ð ð Snapshot Snapshot1 Snapshot2 Snapshot3 Snapshot4 Snapshot5 Snapshot6 Snapshot7 Snapshot8 Snapshot9 Snapshot10 Snapshot11 Snapshot12 Snapshot13 Snapshot14 Snapshot15 Snapshot16 ð Clock Setting Current Time 2018/12/19 14:20 Clock Setting 2018/12/19 14:20 ð ð ð ð Schedule Show Schedule Show 1...
- Page 51 MOSAICOXL ð Dmx Show 11 Dmx Show 12 Dmx Show 13 Dmx Show 14 Dmx Show 15 Dmx Show 16...
-
Page 52: Indirizzo Dmx
DMX per il primo canale DMX. Se, per esempio, sull’unità di comando è previsto l’indirizzo 33 per coman- dare la funzione del primo canale DMX, si deve impostare sul MOSAICOXL l’indirizzo di start 33. Le altre funzioni del pannello saranno assegnate automaticamente agli indirizzi successivi. -
Page 53: Wireless
A questo punto collegare la console DMX al Unità WiFi per aprire la comunicazione col MOSAICOXL. • Per ripristinare l’unità, selezionare Receive Reset utilizzando i pulsanti UP/DOWN, premere il pulsante MENU fino a quando sul display non viene visualizzato Connect, quindi selezionare Receive Reset utilizzan- do i pulsanti UP/DOWN, quindi premere il pulsante ENTER. -
Page 54: Impostazioni Fixture
MOSAICOXL - Backlight - Retroilluminazione display Auto Off. Questa funzione consente di spegnere automati- camente la retroilluminazione del display dopo un determinato tempo che può essere impostato tramite i tasti direzionali. Per avere il display sempre acceso seleziona On oppure imposta un valore (10s, 20s, 30s) per far funzionare il display una volta trascorso il tempo scelto, dopo l’uscita dal menu.-... -
Page 55: Advanced
MOSAICOXL • Utilizzare i tasti direzionali per calibrare l’effetto impostando un valore compreso tra 0 - 255. Quindi pre- mere il pulsante ENTER per confermare. • Premere ripetutamente il tasto MENU per tornare alla modalità menu. 3.11 ADVANCED È possibile modificare i seguenti parametri seguendo la stessa procedura: •... - Page 56 MOSAICOXL cessivo. • Premere il tasto UP/DOWN per selezionare Show 1, Show 2, Show 3, quindi premere il tasto ENTER per confermare. • Premere il tasto MENU più volte per uscire dal menu e per salvare le modifiche apportate. Play Chase La funzione Chase permette di scegliere il programma automatico da mandare in esecuzione.
- Page 57 MOSAICOXL Edit Chase La funzione Edit Chases permette di creare show automatici preprogrammati. I programmi automatici Chase sono suddivisi ognuno in Chase1-Chase8. Ogni Chase può essere composto da 1-16 step che possono essere configurati attraverso la seguente procedura: • Premere il tasto ENTER per accedere al menu principale.
- Page 58 MOSAICOXL Slave Setup La funzione Slave Setup permette di eseguire il programma automatico impostato nella macchina MASTER da mandare in esecuzione. • Premere il tasto ENTER per accedere al menu principale. • Premere il tasto UP/DOWN per scorrere nel menu, selezionare Stand Alone, quindi premere il tasto ENTER per accedere al menu successivo.
-
Page 59: Dmx 512
MOSAICOXL 3.14 DMX 512 MODE EDIT Erase DMX Show La funzione Erase DMX Show permette di eliminare gli show e gli snapshot. • Premere il tasto ENTER per accedere al menu principale. • Premere il tasto UP/DOWN per scorrere nel menu, selezionare DMX 512, quindi premere il tasto ENTER per accedere al menu successivo. - Page 60 MOSAICOXL • Premere il tasto MENU più volte per uscire dal menu e per salvare le modifiche apportate. CLOCK SETTING Scegli questa funzione per impostare data ed orario correnti. • Premere il tasto ENTER per accedere al menu principale. • Premere il tasto UP/DOWN per scorrere nel menu, selezionare DMX 512, quindi premere il tasto ENTER per accedere al menu successivo.
-
Page 61: Ruota Colori E Gobos
MOSAICOXL 3.15 RUOTA COLORI SLOT5: ORANGE SLOT6: VIOLET SLOT4: CTO OPEN SLOT3: PRIMARY GREEN SLOT1: DEEP RED SLOT2: LIGHT BLUE RUOTA GOBOS... -
Page 62: Canali Dmx
MOSAICOXL 3.15 CANALI DMX SCENES 28 CH 30 CH 35 CH FUNCTION RECORD Value SHUTTER Shutter closed 000 - 031 No function (shutter open) 032 - 063 Strobe effect slow to fast 064 - 095 No function (shutter open) 096 - 127... - Page 63 MOSAICOXL SCENES 28 CH 30 CH 35 CH FUNCTION RECORD Value ROTATING GOBO WHEEL Open 000 - 005 Position 1 006 - 010 Position 2 011 - 015 Position 3 016 - 020 Position 4 021 - 025 Position 5...
- Page 64 MOSAICOXL SCENES 28 CH 30 CH 35 CH FUNCTION RECORD Value ANIMATION WHEEL Open/No Function 000 - 003 Forward stop to fastest 004 - 127 Stop 128 - 131 Reverse stop to fastest 132 - 255 ANIMATION 000 - 007...
- Page 65 MOSAICOXL SCENES 28 CH 30 CH 35 CH FUNCTION RECORD Value SHUTTERS MACROS No Function 000 - 003 Macro 1 004 - 011 Macro 2 012 - 018 Macro 3 019 - 025 Macro 4 026 - 032 Macro 5...
- Page 66 MOSAICOXL SCENES 28 CH 30 CH 35 CH FUNCTION RECORD Value Reset all (Hold 3 Second) 200 - 209 No function 210 - 255 SHOW No Function 000 - 063 Show 1 064 - 127 Show 2 128 - 191...
-
Page 67: Collegamenti Della Linea Dmx
MOSAICOXL 3.17 COLLEGAMENTI DELLA LINEA DMX La connessione DMX è realizzata con connettori standard XLR. Utilizzare cavi schermati, 2 poli ritorti, con impedenza 120Ω e bassa capacità. Per il collegamento fare riferimento allo schema di connessione riportato di seguito: DMX - INPUT... -
Page 68: Manutenzione
MOSAICOXL - 4 - MANUTENZIONE 4.1 MANUTENZIONE E PULIZIA DEL SISTEMA OTTICO • Durante gli interventi, assicurarsi che l’area sotto il luogo di installazione sia libera da personale non qualificato. • Spegnere l’unità, scollegare il cavo di alimentazione ed aspettare finché l’unità non si sia raffreddata. -
Page 69: Sostituzione Gobos
MOSAICOXL 4.3 SOSTITUZIONE GOBOS Questa procedura spiegherà come sostituire i gobos. 1. Sollevare ed estrarre delicatamente dalla ruota gobo il supporto del gobo che desiderate sostituire. 2. Rimuovere la molla che assicura il gobo al supporto. 3. Inserire il nuovo gobo rispettando il verso della parte verniciata. - Page 70 Note...
- Page 72 MUSIC & LIGHTS S.r.l. - Phone +39 0771 72190 - www.musiclights.it...
Need help?
Do you have a question about the MOSAICOXL and is the answer not in the manual?
Questions and answers