Advertisement
Advertisement

Related Manuals for TRONXY XY-2


Summary of Contents for TRONXY XY-2
- Page 1 Model name:XY-2 Instructions 深圳市创星元科技有限公司 SHENZHEN TRONXY TECHNOLOG CO.,LTD...
- Page 2 Notice Before using this machine, please carefully read this notice and the following notes: 1. Children should stay away from the machine when using the machine. Children are forbidden to touch the machine in use. 2. Please put the machine on a stable surface before using the machine.
-
Page 3: Table Of Contents
Catalogue 1、Introduction to basic parameters………… 4 2、Packing list ………………………… 5 3、Introduction to machine structure ……… 6 4、Installation instructions ………………… 7 5 、Connection ………………………… 8 6、Product debugging …………………… 9 7、Print operation………………………… 10 8、Fault cause analysis………………………13... -
Page 4: 1、Introduction To Basic Parameters
1、Machine parameter Print parameter: Print size: 220*220*260mm Print accuracy: 0.05-0.3mm Print principle: Nozzle size: 0.4mm Nozzle quantity: Print speed: 20-100mm/s(advs: 60mm/s) Movement speed: 120mm/s Position accuracy: X/Y -0.0125mm,Z – 0.002mm Print materials: PLA、ABS Temperature parameter: Print environment: 8-40℃ Nozzle environment: ≤... -
Page 5: 2、Packing List
2、Packing list Upper rack Base Power supply Filament rack PM5*25 4PCS XY-2 Control box PM3*25 2PCS USB cable Power lines Tools bag Reader Filament Hotbed sticker Specification (incl SD card)... -
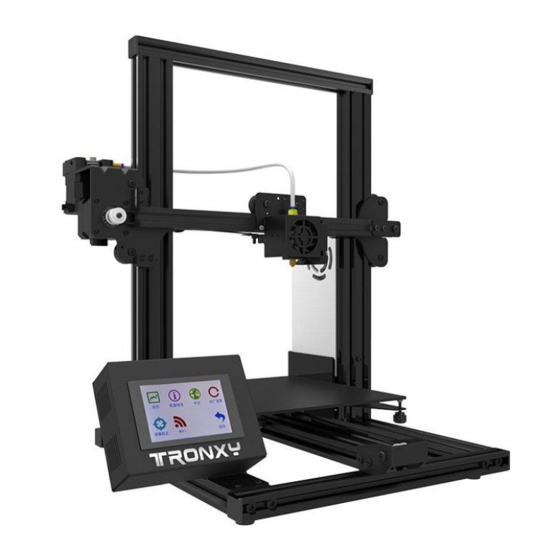
Page 6: 3、Introduction To Machine Structure
3、Introduction to machine structure (1)Upper rack(2)teflon tube(3) Left slider assembly(4)extruder(5)control box (6)touch screen(7)bottom frame (8)right slider assembly(9)print head parts (10)leveling nuts(11)hotbed (12)Y axis wheel(13)lead screw (14)feeding motor(15)X axis motor(16)Z motor(17)USB interface(18)SD card interface(19) Y axis motor(20)Power switch(21)power interface(22)voltage change-over switch (23)Z axis-adjustment parts... -
Page 7: 4、Installation Instructions
4、Installation instructions HM5*25 Upper rack Control box baser Tighten the boat nuts with a screwdriver ,Fix the control box on the aluminum of the base. Pay attention: The control box must be fixed on the beam, Put the four holes on the base, and lock the four otherwise its easy to hit the print head. -
Page 8: Connection
5、Connection AC:110V-220V Power Heat-bed Z-motor X-motor Extr-motor Y-Endstop Y-motor Power Heat-bed Endstop E-motor Z-motor Y-motor X-motor Z-Endstop X-Endstop... -
Page 9: 6、Product Debugging
6、Production debugging Due to transportation reasons, the Z axis wire rod may not move smoothly or get stuck, the belt is loose, and so on. The following steps can be used to fine-tune the product. 1. Z-axis screw debugging: When the machine is not moving smoothly in the direction of the Z axis or is stuck, please loosen 2 M3 fixing screws of the motor components of the right and left Z axis or 4 M3*8 fixing screws of the screw nut. -
Page 10: 7、Print Operation
7、Print operation 1. Operation interface introduction: Print files System information menu information menu Tools menu 2. Menu control axis The printhead is operation guide moves right/ left The printhead is moves forward/ back The print platform moves down/ rising Extrusion motor forward /adversefeed Auto home... - Page 11 2.Load and Unload filaments: Click and wait for preheating Click on the red Wait for the area to start temperature heating to reach the target 40/40 temperature 220/220 Straightening the front end of the filaments, press the extruder clip with your hand, insert the filaments into the hole of the extruder until the nozzle is in position.
- Page 12 3. Verify platform flatness and print test Step 1: move the printing head to the nearest boundary point of the platform by hand, as shown in FIG. (1). Then place an A4 paper between the nozzle and the platform (2).Then move the printing head to another boundary point of the platform, and repeat the above operation to adjust the leveling, until the four points around the platform and the middle of the platform have been leveling completed (if leveling nut adjustment fails to meet...
-
Page 13: 8、Fault Cause Analysis
8、Analysis of common fault causes The printing head does not output material or less output material · the print head did not reach a temperature of 170 ℃ above (PLA), led to filaments cannot feeding. · the material is knotted, resulting in poor discharge. ·...
Need help?
Do you have a question about the XY-2 and is the answer not in the manual?
Questions and answers