TRONXY XY-2 PRO User Manual
Hide thumbs
Also See for XY-2 PRO:
- User's manual & installation manual (20 pages) ,
- Installation manual (52 pages)
Advertisement
Advertisement

Related Manuals for TRONXY XY-2 PRO


Summary of Contents for TRONXY XY-2 PRO
- Page 2 Thank you for choosing TRONXY products! We will serve you whole heartedly! Please read the instruction carefully Please visit tronxy.com for more information TEL:+86-755-89968500 Relevant information is stored in SD card,please check...
- Page 3 عب : البيعsupport@tronxy.com د 판매 후 서비스 : support@tronxy.com Servicio postventa: support@tronxy.com Serviço pós-venda: support@tronxy.com After- sale service:support@tronxy.com アフターサービス:support@tronxy.com Service nach dem Verkauf: support@tronxy.com Послепродажное обслуживание: support@tronxy.com XY-2PRO Pro Install Aftersale contact Facebook QR Code video QR Code QR Code...
-
Page 4: Table Of Contents
Directory 1. Machine parameters ………………………… 2 2. Packing list ………………………………… 3 3. Machine details ……………………………… 4 4. Installation ………………………………… 5 5. Wiring connection …………………………… 6 6. Structure debug ……………………………… 7 7. Operation & Print ………………………… 8 8. Failure cause analysis ………………………14... -
Page 5: Machine Parameters
PLA、ABS Temp parameters: Print environment : 8-40℃ : Nozzle temp 275℃(MAX) Power supply: AC 110/220V 50/60Hz DC 24V/360W Software: : Slicer Tronxy、Cura、Simplify3D : Input format .stl、.obj : Output format .gcode : Connection SD card、USB cable Machine parameters: : Machine size 478*455*520mm :... -
Page 6: Packing List
2. Packing list Filament Upper bracket Base bracket Installation XY-2 PRO HM5*50 4PCS Tools Manual Reader(with Shovel Power line USB cable Stickers SD card) Filament Clips(Color 0.25KG random) Notes :Please check if all the items are included before installing the printer. -
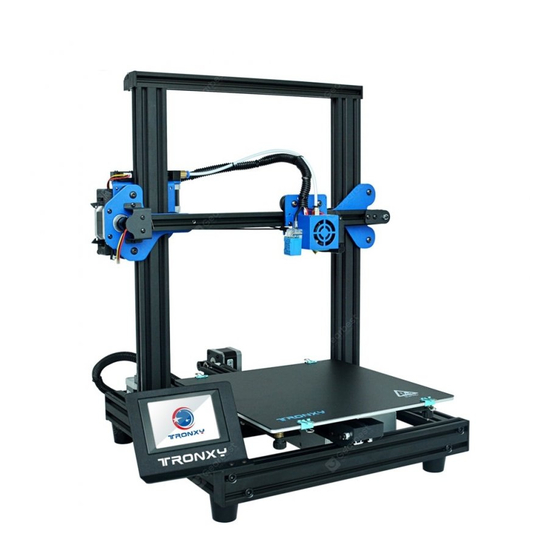
Page 7: Machine Details
3. Machine details Commodity Commodity Commodity Commodity Upper Y axis wheels Touch screen Y axis motor bracket Filament Y limited Feeding tube Lead screws run-out switch USB/SD card X axis motor Right slicer Extruder motor interface X limited Print head 30P single cable switch component... -
Page 8: Installation
4. Installation Note: Please make sure the voltage is consistent with the local voltage before printing . If not, please adjust it (110V- 220V) Loosen the screws with the socket wrench and remove the touch screen from the beam. Remove the screws and nuts. -
Page 9: Wiring Connection
5. Wiring connection Switch board Switch line Z motor line Z motor line Switch board Switch line installation method: Remove the buckle, and put it on the notch side of the quasi-adapter plate on the raised side of the adapter, and insert it firmly until the buckle bounces back. -
Page 10: Structure Debug
6. Structure debug If the machine structure is loose during transportation, it can be solved by adjusting the eccentric nut.As shown in the figure below (eccentric nut in red circle), turn the nut with a wrench to adjust the tightness of the pulley (the pulley should not be adjusted too tight to avoid smooth operation). -
Page 11: Operation & Print
7. Operation & Print... - Page 12 Manual leveling: Click the four points of ABCD (see the picture ), the print head will move to the corresponding position, and then adjust the leveling nut M, to ensure the space between the nozzle and the platform is a piece of A4 paper.
- Page 13 Load and unload filaments: 23/0 Click 23/199 After waiting for temperature up to 180 ℃, filament go through from the filament detection, extruder and feed pipe to the nozzle until the filaments are squeezed , as the following picture shows : Feed pipe Straighten Filament...
- Page 14 1. Installation Find out slice software in SD card“TronxyInstall.exe ”click twice , Then follow these steps to complete the installation.
- Page 15 2. How to use slice software ① Type setting: follow the steps below to complete the setting. ① ③ ② ④ ⑤ ⑥...
- Page 16 ② Parameter setting:(The following figure gives the reference value, according to their own needs can be modified) Some parameters are set for reference: Layer thickness : 0.1-0.3mm : PLA - 200 ℃ ABS - 240 ℃ Print temp ABS - 80 ℃ Heatbed temp :...
-
Page 17: Failure Cause Analysis
8. Failure cause analysis 1. Machine cannot start 1)Check the power line and other wires are connected well or not . 2)Check whether the supply voltage suits the local standard. 3)Check whether the screen or power supply is damaged and replace it in time. - Page 18 5. The model is not easy to take off 1)Try to heat the hot bed to 50-70 ℃ take off it by the shovel . 2) It is recommended to buy TRONXY magnetic stickers. 6. Can‘t heat it up 1)Check the heating rod and thermistor for poor contact or damage.
- Page 19 9. Model dislocation and fault 1)Nozzle feeding not smoothly, please clean the nozzle or replace the nozzle 2)Check that if the printing speed is too fast 3)The quality of filaments is poor, please replace with new filaments 10. Abnormal sound and vibration of filaments feeding motor 1)Please check whether the nozzle is blocked 2)The nozzle feeding is not smooth, please clean the nozzle...
- Page 20 ONLY NEEDS 3 STEP TO FINISH THE REST INSTALLATION FILAMENT RUN-OUT DETECTION RESUME PRINT AFTER POWER-OFF AUTO LEVEL ALL METAL...
Need help?
Do you have a question about the XY-2 PRO and is the answer not in the manual?
Questions and answers