Table of Contents
Advertisement
Quick Links
Advertisement
Table of Contents

Related Manuals for Bartscher 900T2 Series


Summary of Contents for Bartscher 900T2 Series
- Page 1 110156 110157 200259 200278 Original-Gebrauchsanleitung V2/0416...
-
Page 2: Table Of Contents
5. Installation and operation ..................37 5.1 Positioning and connection ................... 37 5.2 Operation ......................38 6. Cleaning and maintenance ..................41 7. Possible Malfunctions .................... 43 8. Waste disposal ......................44 Bartscher GmbH Franz-Kleine-Str. 28 D-33154 Salzkotten phone: +49 (0) 5258 971-0 Germany fax:... -
Page 3: Safety
Read these instructions before using and keep them available at all times! This instruction manual contains information about the installation, operation and maintenance of the device and should be consulted as an important source of information and reference guide. Awareness of the safety instructions and instructions for use in this manual will ensure the safe and correct use of the device. - Page 4 Do not use any accessory or spare parts that have not been recommended by the manufacturer. These can be dangerous for the user or lead to damages of the device or personal injury, and further, the warranty expires. To prevent hazards and to ensure optimum efficiency, no modifications or alterations to the device that are not explicitly approved by the manufacturer may be undertaken.
-
Page 5: Key To Symbols
1.2 Key to symbols In this manual, symbols are used to highlight important safety instructions and any advice relating to the device. The instructions should be followed very carefully to avoid any risk of accident, personal injury or material damage. WARNING! This symbol highlights hazards which could lead to injury. - Page 6 In any case do not open the device housing. In case of electrical or mechanical modifications the electric shock hazard will occur. Never immerse the plug in water or other liquids. Never operate the device with moist hands or standing on wet floor. ...
-
Page 7: Proper Use
1.4 Proper use CAUTION! The device has been designed and constructed only for commercial use and should be operated by qualified personnel of restaurants, cafeterias, bars and similar facilities. The operational safety of the device is assured only in case of proper use, according to the operation manual. -
Page 8: General Information
2. General information 2.1 Liability and Warrantees All the information and instructions in this manual take into account standard safety regulations, current levels of technical engineering as well as the expertise and experience we have developed over the years. The instruction manual was translated with all due care and attention. However, we do not accept liability for any translation errors. -
Page 9: Transport, Packaging And Storage
3. Transport, packaging and storage 3.1 Delivery check Please check the delivery upon completeness and transport damage immediately after receipt. In case of visible damage do not accept or accept the delivery with reservation only. ’ b o d v y. o p nt. -
Page 10: Technical Data
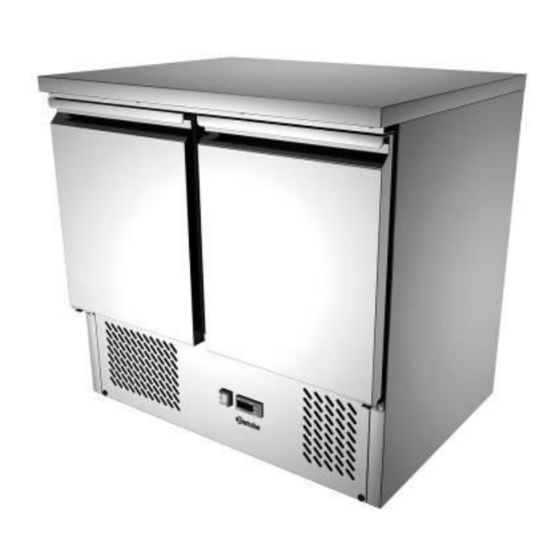
4. Technical data 4.1 Overview of parts 110156 Worktop Housing Door (2) Air vents ON/OFF switch with network indicator Digital temperature controller Frating – rack (2) Guides for grid - racks - 31 -... - Page 11 110157 Worktop Housing Door (2) Air vents ON/OFF switch with network indicator Digital temperature controller Drawer (2) Frating – rack (2) Guides for grid - racks - 32 -...
- Page 12 200259 Superstructure cooling cover Trough for GN containers Cooling superstructure Worktop Housing Door (2) Air vents (2) ON/OFF switch with network indicator Digital temperature controller Frating – rack (2) Guides for grid - racks Bridge (5) - 33 -...
- Page 13 200278 Granit worktop Door (2) Air vents Tray, without cooling (6) Height-adjustable feet Digital temperature controller ON/OFF switch with integrated Housing network indicator light (green) Cooling chamber lock Guides - 34 -...
-
Page 14: Technical Specification
4.2 Technical specification Name Mini refrigerated counter 900T2 110156 Code-no.: Material: Chrome nickel steel 2 doors Ventilated cooling Electronic control Features: Evaporation condensation Foam evaporator Capacity: 260 liters Power: 0,204 kW / 220-240 V 50 Hz 0 °C –... - Page 15 Name Preparation refrigerated counter 900T2 200259 Code-no.: Material: Chrome nickel steel Superstructure cooling cover, for 5 x 1/6 GN depth 150 mm*** 2 doors Ventilated cooling Features: Electronic control Evaporation condensation Foam evaporator Capacity: 260 liters Power: 0,204 kW / 220-240 V 50 Hz...
-
Page 16: Installation And Operation
5. Installation and operation 5.1 Positioning and connection CAUTION! The installation and connection of the device should be made only by qualified specialist establishment. Positioning Unpack the device and remove any packing material. Place the device on a firm, dry, level and waterproof surface adapted to the impact of high temperatures and sufficient load-bearing capacity for the weight of the device including the entire contents. -
Page 17: Operation
Connection DANGER! Electric shock hazard! The device can cause injuries due to improper installation! Before installation and connecting the local power grid specification should be compared with that of the device (see rating plate). Connect the device only in case of compliance! Connect the device only to properly installed single socket with protective terminal. - Page 18 Combination of buttons To activate or deactivate some of the functions you may need to press more than one button at the same time. Block or unblock the buttons: - to block, press both buttons and hold longer than 3 seconds, until you see “OFF”...
- Page 19 Change of required value (required temperature) press and hold button for at least 3 seconds; the required value will be displayed and the diode will flash on the display; use button to decrease or increase the value until the display shows the required value;...
-
Page 20: Cleaning And Maintenance
User instructions Using the refrigerated counter should begin only when the display shows the desired temperature value. Foodstuffs for release should be placed in appropriate GN containers , which is set in the refrigerated counter in chambers with doors, drawers or the superstructure. - Page 21 The refrigerated counter o The interior of the refrigerated counter (chamber doors, shelf guides, drawers, cooling basin for GN containers and cover raiser) must be cleaned using a disinfectant approved for contact with food. o Wipe these elements with a moistened cloth with clean water, then dry the cleaned surfaces thoroughly.
-
Page 22: Possible Malfunctions
7. Possible Malfunctions In case of failure turn the device off with the main switch and disconnect the device from the power supply (pull the plug!). Before calling the technician or informing the vendor check the possibility of removing the failure by yourself according to the table below. Failure Possible reason Solution... -
Page 23: Waste Disposal
CAUTION! For the disposal of the device please consider and act according to the national and local rules and regulations. Bartscher GmbH Franz-Kleine-Str. 28 D-33154 Salzkotten phone: +49 (0) 5258 971-0 Germany...
Need help?
Do you have a question about the 900T2 Series and is the answer not in the manual?
Questions and answers