Table of Contents
Advertisement
Available languages
Available languages
Quick Links
Advertisement
Chapters
Table of Contents

Related Manuals for KeyB viscount Legend Solo

Summary of Contents for KeyB viscount Legend Solo
- Page 1 viscount Manuale Utente - IT User Manual - EN Bedienungshandbuch - DE Ver. 1.1...
-
Page 3: Table Of Contents
viscount Manuale Utente INDICE 1. Note importanti ..............................2 1.1 Cura del prodotto ..............................2 1.2 Bote riguardanti il manuale ..........................2 2. Introduzione ..............................3 2.1 Caratteristiche generali di Legend Solo....................... 3 3. Comandi e connessioni ..........................4 3.1 Pannello frontale ..............................4 3.2 Pannello posteriore............................... -
Page 4: Note Importanti
viscount Manuale Utente 1. NOTE IMPORTANTI 1.1 CURA DEL PRODOTTO Non applicate eccessiva forza alle strutture ed ai comandi dello strumento (manopole, pulsanti, tastiera ecc…). Non collocare, quando possibile, lo strumento in prossimità di unità che producano forti interferenze come apparecchi radio –... -
Page 5: Introduzione
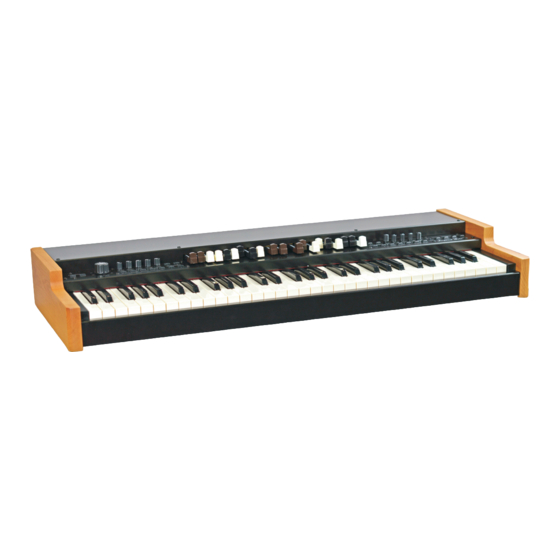
viscount Manuale Utente 2. INTRODUZIONE 2.1 CARATTERISTICHE GENERALI DI LEGEND SOLO Legend Solo è un organo digitale a singola tastiera, divisibile eventualmente in manuale superiore, manuale inferiore e pedaliera, in grado di simulare, grazie alla nuova tecnologia di generazione sonora TMT (Tonewheel Modeling Technology), tutte le caratteristiche dell’organo elettromeccanico più... -
Page 6: Comandi E Connessioni
viscount Manuale Utente 3. COMANDI E CONNESSIONI 3.1 PANNELLO FRONTALE 4 6 8 10 11 1. Pulsante [VIBRATO/CHORUS UPPER]. Pulsante per assegnare l’effetto di Vibrato o Chorus (vedi punto 3) alla sezione Upper. 2. Pulsante [VIBRATO/CHORUS LOWER]. Pulsante per assegnare l’effetto di Vibrato o Chorus (vedi punto 3) alla sezione Lower. 3. - Page 7 viscount Manuale Utente 10. Potenziometro [K.CLICK]. Potenziometro per la regolazione del volume del click dei tasti della tastiera degli originali organi elettromeccanici. Con il potenziometro completamente a sinistra l’effetto non è udibile. Per maggiori informazioni consultare il par. 4.4. 11. Potenziometro [XTALK]. Potenziometro per la regolazione del livello dell’effetto di Crosstalk tramite il quale simulare il disturbo dovuto ai cavi audio interni degli originali organi elettromeccanici.
- Page 8 viscount Manuale Utente 19 20 21 22 29 30 31 32 24 25 26 27 28 17. Pulsanti [LOWER PRESETS]. Pulsanti per la selezione dei Preset della sezione Lower. Il led acceso indica quale Preset è attualmente selezionato. NOTA I Lower Preset sono selezionabili solo in modalità Split e Double. 18.
-
Page 9: Pannello Posteriore
viscount Manuale Utente 26. Pulsante [PEDALS TO LOWER]. A led acceso, è possibile suonare i drawbars di pedaliera con le prime 25 note della tastiera del Legend Solo (in modalità Single o Split ) o della tastiera collegata al connettore [MIDI IN] (in modalità Double ). 27. - Page 10 viscount Manuale Utente mixer, amplificatori), in cui è presente il segnale generale dello strumento. In caso di impianto stereofonico collegare l’uscita [LEFT] al canale sinistro e l’uscita [RIGHT] al canale destro. Qualora si utilizzi un impianto monofonico, è possibile collegare indistintamente una delle uscite [LEFT] o [RIGHT], tenendo però...
- Page 11 MIDI tramite la quale suonare i drawbars di pedaliera. NOTA Sebbene entrambi i connettori [IN] e [PEDALS KEYB ONLY] siano prese MIDI di ingresso, si consiglia vivamente l’utilizzo di [PEDALS KEYB ONLY] per il collegamento di pedaliere MIDI in quanto prettamente sviluppata per tale scopo.
-
Page 12: Accensione E Normale Funzionamento
viscount Manuale Utente 4. ACCENSIONE E NORMALE FUNZIONAMENTO Per l’accensione dello strumento attenersi a queste semplici regole: 1. Posizionare il potenziometro [VOLUME] completamente a sinistra (volume chiuso). 2. In caso di utilizzo delle cuffie, non indossarle. 3. Accendere lo strumento tramite l’interruttore [POWER] posto nel pannello posteriore. 4. - Page 13 viscount Manuale Utente SERIE ARMONICA INTONAZIONE 16’ 5-1/3’ 8’ 4’ 2-2/3’ 2’ 1-3/5’ 1-1/3’ 1’ DELLA CANNA INTERVALLO SUB- UNISONO OTTAVA OTTAVA NELLA SCALA NOTA EQUIVALENTE Per ottenere la relazione che intercorre tra il suono generato dai vari drawbars è sufficiente dividere la misura in piedi di qualsiasi drawbar per la dimensione del primo a sinistra (che genera lo stesso suono di una canna da 16’).
-
Page 14: Cosa Sono E Come Si Utilizzano I Presets
viscount Manuale Utente FUNZIONE CANCEL Tenendo premuto il pulsante [TRANSPOSE SELECT] e premendo [SET A/SET B], di cui si accende il led rosso, si richiama la funzione Cancel, ovvero il Local Off dello strumento, tramite la quale è possibile disabilitare la generazione sonora interna consentendo di utilizzare lo strumento come master keyboard. -
Page 15: La Percussione
viscount Manuale Utente 4.3 LA PERCUSSIONE La percussione, effetto tipico dell’organo elettromeccanico, fornisce la replica di un’armonica che si somma a quelle preimpostate con i drawbars, con un rapido attacco ed un decadimento esponenziale. Sempre nello strumento originale, inoltre, la percussione viene generata solo sul manuale superiore, solo se è selezionato il Set B dei drawbars ed il suono prodotto dal drawbar 1’... -
Page 16: Aggiungere I Rumori Interni
viscount Manuale Utente 4.4 AGGIUNGERE I RUMORI INTERNI Il suono dell’organo elettromeccanico non è solo caratterizzato dalle ruote foniche, dai drawbars e dalla percussione, ma da anche altri aspetti che all’inizio erano considerati difetti ma che con il tempo sono diventati caratteristici di questo tipo di strumento. - Page 17 viscount Manuale Utente così il manuale superiore dell’organo a due manuali, ed i drawbars che ne controllano il suono sono quelli del Set A. La sezione Lower invece suona con i dati MIDI ricevuti dal connettore [MIDI IN], quindi quelli trasmessi con la tastiera esterna che simula il manuale inferiore dell’organo.
-
Page 18: Aggiungere Gli Effetti Al Suono
viscount Manuale Utente 5. AGGIUNGERE GLI EFFETTI AL SUONO 5.1 VIBRATO O CHORUS Nella sezione VIBRATO/CHORUS del pannello frontale sono presenti tre controlli per aggiungere al suono l’effetto desiderato di Vibrato o Chorus. Il Vibrato modula ciclicamente l’intonazione del segnale aggiungendo così... -
Page 19: Rotary
viscount Manuale Utente Tramite il pulsante [DRIVE CLASSIC/ROCK] è inoltre possibile selezionare il tipo di effetto di distorsione. A led spento corrisponde l’effetto CLASSIC, ovvero la distorsione ottenuta con l’amplificatore a valvole interno del classico diffusore rotante utilizzato con l’organo elettromeccanico. -
Page 20: Funzioni Aggiuntive
viscount Manuale Utente 6. FUNZIONI AGGIUNTIVE 6.1 TRASPOSIZIONE E’ possibile trasporre la tastiera e la pedaliera in un range di -6 / +5 semitoni. Per impostare la trasposizione, tenendo premuto il pulsante [TRANSPOSE SELECT] premere uno dei tasti da F#1 (-6 semitoni) a F2 (+5 semitoni). Il C2 corrisponde a trasposizione nulla. -5 -4 -3 -2 -1 +1 +2 +3 +4 +5 Quando il led del pulsante [TRANSPOSE SELECT] è... -
Page 21: Appendice
viscount Manuale Utente 7. APPENDICE 7.1 PRESET DI FABBRICA Upper Presets Lower Presets Button Registration Name Button Registration Name 00 5320 000 Stopped Flute 00 4545 440 Cello 00 4432 000 Dulciana 00 4432 220 Flute & Strings 00 8740 000 French Horn 00 7373 430 Clarinet... - Page 22 viscount Manuale Utente Il pedale d’espressione non produce alcun effetto. Verificare che il cavo di collegamento sia collegato al connettore [EXP] del pannello posteriore e che non sia danneggiato. Il/i pedali switch non producono alcun effetto. Se si desidera controllare le velocità dell’effetto Rotary controllare che il cavo di collegamento sia collegato al connettore [ROTARY] del pannello posteriore.
- Page 23 Smaltimento dei rifiuti elettrici ed elettronici (applicabile nell’Unione Europea e negli altri paesi europei con servizio di raccolta differenziata) Ai sensi dell’art. 13 del Decreto legislativo 25 luglio 2005, n. 151 “Attuazione delle Direttive 2002/95/CE, 2002/96/CE e 2003/108/CE” II simbolo presente sul prodotto o sulla sua confezione indica che il prodotto non verrà trattato come rifiuto domestico.
- Page 25 viscount User Manual INDEX 1. Important notes ................................2 1.1 Product care ................................. 2 1.2 Notes about this manual ............................2 2. Introduction ................................3 2.1 General features of Legend Solo ......................... 3 3. Controls and connections ............................4 3.1 Front panel ................................4 3.2 Rear panel ................................
- Page 26 viscount User Manual 1. IMPORTANT NOTES 1.1 PRODUCT CARE Do not apply excessive force to the instrument's structures and controls (knobs, buttons, keyboard etc...). Whenever possible, do not place the instrument close to units that generate strong interference, such as radio - TV sets, monitors, etc ...
- Page 27 viscount User Manual 2. INTRODUCTION 2.1 GENERAL FEATURES OF LEGEND SOLO Legend Solo is a single-key digital organ, which can also be split into upper manual, lower manual and pedal, that can simulate, thanks to the new sound generation technology TMT (Tonewheel Modeling Technology), all the features of the electromechanical organ commonly known as Hammond.
- Page 28 viscount User Manual 3. CONTROLS AND CONNECTIONS 3.1 FRONT PANEL 4 6 8 10 11 1. [VIBRATO/CHORUS UPPER] button. Button to assign the Vibrato or Chorus effect (see section 3) to the Upper section. 2. [VIBRATO/CHORUS LOWER] button. Button to assign the Vibrato or Chorus effect (see section 3) to the Lower section. 3.
- Page 29 viscount User Manual 10. [K.CLICK] potentiometer. Adjust the volume of the typical keyboard clicks of the original electromechanical organs. When the potentiometer is to the far left, there is no keyclick effect. For further information on percussion, see par. 4.4. 11.
- Page 30 viscount User Manual 19 20 21 22 29 30 31 32 24 25 26 27 28 17. [LOWER PRESETS] buttons. Buttons for selecting the Lower section Presets. he led indicates which Preset is currently selected. 18. [BASS] potentiometer. Regulates the gain of +12 dB (with the potentiometer turned to the right) or attenuation of -12 dB (with potentiometer turned to the left) of the low frequencies centred at 125 Hz.
- Page 31 viscount User Manual 27. [TRANSPOSE SELECT] button. Adjust the keyboard transposition (see par. 6.1), set up functions and recall the Panic function (see par. 6.2). 28. [TUNING] trimmer. Adjust the instrument's fine tuning. When the trimmer is to the far left, the tuning is 1/2 semitone lower; at the far right, the tuning is 1/2 semitone higher.
- Page 32 viscount User Manual audio outputs and turn off the [PEDALS] output. WARNINGS ON THE USE OF SPEAKERS • The [ROTARY SPEAKER] on Legend Solo should only be connected to a rotating speaker equipped with a cable with the following pinout: 1: Audio + 4: Audio GND 5 - 6: common of speed switch...
- Page 33 This pedalboard will play the instrument's pedalboard drawbars. Even though both the [IN] and [PEDALS KEYB ONLY] ports are MIDI inputs, it is strongly adviised to use the [PEDALS KEYB ONLY] connector with MIDI pedalboards, since the port has been developed for this purpose. Furthermore, notes received through this connector are recalculated according to the currently set transposition (if any) and then sent to the [OUT 1] and [OUT 2] ports, so they can be played also through external devices.
- Page 34 viscount User Manual 4. SWITCHING ON AND NORMAL FUNCTIONING To switch on the instrument follow these simple rules: 1. Turn the [VOLUME] potentiometer to the left (closed). 2. When using headphones, do not wear them. 3. Switch on the instrument through the [POWER] switch on the rear panel. 4.
- Page 35 viscount User Manual HARMONIC SERIE PIPE 16’ 5-1/3’ 8’ 4’ 2-2/3’ 2’ 1-3/5’ 1-1/3’ 1’ INTONATION SCALE SUB- 12th 15th 17th 19th 22th UNISON OCTAVE OCTAVE PITCH CORRESPONDING NOTE To know the relationship between the sound generated by various drawbars it is necessary to divide the size in feet of a given drawbar for the size of the first drawbar to the left (that generates the same sound of a 16' pipe).
- Page 36 viscount User Manual CANCEL FUNCTION While holding down the [TRANSPOSE SELECT] button and pressing [SET A/SET B], the LED lights red, the Cancel function is activated, i.e. the Local Off of the instrument, through which it is possible to disable the internal sound generation and allowing you to use the instrument as a master keyboard.
- Page 37 viscount User Manual 4.3 PERCUSSION The percussion, typical feature of electromechanical organs, provides a replication of a harmonic that is added to those set through drawbars, with a rapid attack and an exponential decay. On the original instrument, however, the percussion is only generated on the upper manual, only if the drawbars Set B is selected and the sound produced by the drawbar 1’...
- Page 38 viscount User Manual 4.5 SINGLE, SPLIT AND DOUBLE MODES Legend Solo Single Split Double You can use the in three operating modes: SINGLE In this mode, the set of drawbars selected using the [SET A/SET B] button (see section 5 of par. 3.1) will sound throughout the keyboard extension.
- Page 39 viscount User Manual NOTES In Single mode, you can play the Lower section with an external device (keyboard, sequencer, computer) connected to the [MIDI IN] port, but you can’t control the sound with the drawbars of the Legend Solo. The Lower section sound is initially adjusted based on the position of the drawbars of Set B when powering up the instrument.
- Page 40 viscount User Manual 5.3 DRIVE Legend Solo The Drive effect of faithfully reproduces the sound features of the analog distortion; the higher the input signal to the amplifier, the greater the distortion. You will notice therefore that the effect depends on a number of factors including the position of the expression pedal, the level and number of pulled-out drawbars and the amount of notes played (at low volumes, for example, it is necessary to play many notes to drive the signal to saturation.
- Page 41 viscount User Manual 6. ADDITIONAL FUNCTIONS 6.1 TRANSPOSITION The keyboard can be transposed within a range of -6 / +5 semitones. To set the transposition, while holding the [TRANSPOSE SELECT] button, press one of the keys from F#1 (-6 semitones) to F2 (+5 semitones). C2 corresponds to no transposition. -5 -4 -3 -2 -1 +1 +2 +3 +4 +5 When the [TRANSPOSE SELECT] button's led is on, this means that the keyboard is transposed.
- Page 42 viscount User Manual 7. APPENDIX 7.1 FACTORY PRESET Upper Presets Lower Presets Button Registration Name Button Registration Name 00 5320 000 Stopped Flute 00 4545 440 Cello 00 4432 000 Dulciana 00 4432 220 Flute & Strings 00 7373 430 Clarinet 00 8740 000 French Horn...
- Page 43 viscount User Manual The switch pedal(s) have no effect. If you want to control Rotary speed check that the cable is properly connected to the [ROTARY] port. If you want to use the Hold function (Sustain) check that the pedal cable is connected to the [HOLD] connector.
- Page 44 Disposal of old Electrical & Electronic Equipment (Applìcable throughout the European Union and other European countries with separate collection programs) Dir. 2002/95/CE, 2002/96/CE e 2003/108/CE This syrnbol, found on your product or on its packaging, indicates that this product should not be treated as household waste when you wish to dispose of it.
- Page 47 viscount Bedienungshandbuch INHALT 1. Wichtige Hinweise ............................2 1.1 Pflege des Instruments ............................2 1.2 Hinweise zu diesem Handbuch ........................... 2 2. Einleitung ..............................3 2.1 Ausstattungsmerkmale der Legend Solo ......................3 3. Regler und Anschlüsse ..........................4 3.1 Vorderseite ................................4 3.2 Rückseite ................................7 4.
-
Page 48: Wichtige Hinweise
viscount Bedienungshandbuch 1. WICHTIGE HINWEISE 1.1 PFLEGE DES INSTRUMENTS Achten Sie darauf, das Gehäuse und die Bedienelemente (Regler, Taster, Tastatur usw.) des Instruments keinen übermäßigen mechanischen Belastungen auszusetzen. Stellen Sie das Instrument möglichst nicht in der Nähe von starken Störquellen (Radiogerät, Fernsehgerät, PC-Monitor usw.) auf. -
Page 49: Einleitung
viscount Bedienungshandbuch 2. EINLEITUNG 2.1 AUSSTATTUNGSMERKMALE DES LEGEND SOLO Die Legend Solo ist eine Digitalorgel mit Einzeltastatur, die man bei Bedarf auch in ein oberes und unteres Manual plus Pedal unterteilen kann. Dank der neuen TMT (Tonewheel Modeling Technology) Klangerzeugungstechnologie kann die Legend Solo alle Features der unter dem Begriff Hammond bekannten elektromechanischen Orgeln simulieren. -
Page 50: Regler Und Anschlüsse
viscount Bedienungshandbuch 3. REGLER UND ANSCHLÜSSE 3.1 VORDERSEITE 4 6 8 10 11 1. [VIBRATO/CHORUS UPPER]-Regler. Mit diesem Taster weisen Sie den Vibrato- oder Chorus-Effekt (siehe Abschnitt 3) der Upper-Sektion zu. 2. [VIBRATO/CHORUS LOWER]-Regler. Mit diesem Taster weisen Sie den Vibrato- oder Chorus-Effekt (siehe Abschnitt 3) der Lower-Sektion zu. 3. - Page 51 viscount Bedienungshandbuch von Gitarrenverstärkern der 1970er erzeugt werden. Nähere Informationen zum Drive-Effekt finden Sie in Abs. 5.3. 10. [K.CLICK]-Regler. Regelt die Lautstärke der typischen Klickgeräusche der Tastatur einer originalen elektromechanischen Orgel. Drehen Sie den Regler ganz nach links, um den Keyclick-Effekt zu deaktivieren. Nähere Informationen zur Percussion finden Sie in Abs.
- Page 52 viscount Bedienungshandbuch leuchten. - Split - oder Double -Modus: Mit diesen Zugriegeln kann man den Klang der Lower-Sektion regeln. Nähere Informationen zu den Zugriegeln finden Sie in Abs. 4.1. 19 20 21 22 29 30 31 32 24 25 26 27 28 17.
-
Page 53: Rückseite
viscount Bedienungshandbuch 25. [OCTAVE UP]-Taster. Split Wenn die LED dieses Tasters im -Modus leuchtet, ist die Lower-Sektion eine Oktave höher transponiert. 26. [PEDALS TO LOWER]-Taster. Bei leuchtender LED kann man die Fußpedal-Zugriegel mit den ersten 25 Tasten des unteren Manuals spielen. - Page 54 viscount Bedienungshandbuch - [LEFT] und [RIGHT]: Über diese Line-Ausgänge wird das Hauptsignal des Instruments übertragen und das Instrument an externe Audiogeräte angeschlossen (Aktivboxen, Mixer, Verstärker). Beim Anschluss an ein Stereo-System schließt man den [LEFT]-Ausgang an den linken Kanal und den [RIGHT]-Ausgang an den rechten Kanal an.
- Page 55 Fußpedals: Mit diesem Fußpedal spielt man die Fußpedal-Zugriegel des Instruments. HINWEIS Obwohl der [IN]- und der [PEDALS KEYB ONLY]-Port beides MIDI-Eingänge sind, sollte man nur den [PEDALS KEYB ONLY]-Anschluss mit MIDI-Fußpedalen verwenden, da er für diesen Zweck entwickelt wurde. Außerdem werden die über diesen Port empfangenen Noten entsprechend der aktuell eingestellten Transposition neu berechnet und dann...
-
Page 56: Einschalten Und Normalbetrieb
viscount Bedienungshandbuch 4. EINSCHALTEN UND NORMALBETRIEB Beachten Sie beim Einschalten des Instruments bitte folgende einfache Regeln: 1. Drehen Sie den [VOLUME]-Regler ganz nach links. 2. Setzen Sie Ihre Kopfhörer erst nach dem Einschalten auf. 3. Schalten Sie das Instrument mit dem rückseitigen [POWER]-Schalter ein. 4. - Page 57 viscount Bedienungshandbuch OBERTONREIHE PFEIFENINTONATION 16’ 5-1/3’ 8’ 4’ 2-2/3’ 2’ 1-3/5’ 1-1/3’ 1’ SUB- 12te 15te 17te 19te 22ste SKALENTONHÖHE UNISONO OKTAVE OKTAVE ENTSPRECHENDE NOTE Um das Verhältnis zwischen den Klängen zu kennen, die von den verschiedenen Zugriegeln erzeugt werden, muss man die Größe in Fuß...
-
Page 58: Über Presets Und Ihre Anwendung
viscount Bedienungshandbuch CANCEL-FUNKTION Wenn man den [TRANSPOSE SELECT]-Taster gedrückt hält und [SET A/SET B] drückt, leuchtet die LED rot, und die Cancel-Funktion bzw. Local Off ist aktiviert, wodurch die interne Klangerzeugung ausgeschaltet wird und man das Instrument als Master Keyboard nutzen kann. In diesem Modus reagiert die Tastatur auf unterschiedliche Anschlagstärken und die gespielten Noten werden mit variabler Anschlagdynamik über die [MIDI OUT 1]- und [MIDI OUT 2]-Ports ausgegeben. -
Page 59: Percussion
viscount Bedienungshandbuch 4.3 PERCUSSION Percussion ist eine standard Funktion elektromechanischer Orgeln. Sie fügt den mit den Zugriegeln eingestellten Obertönen einen weiteren simulierten Oberton mit schneller Attack und exponentialem Decay hinzu. Beim Originalinstrument wird Percussion allerdings nur auf dem oberen Manual erzeugt, und nur wenn Zugriegel-Set B gewählt ist und der mit Zugriegel 1’... -
Page 60: Interne Geräuschsimulation
viscount Bedienungshandbuch 4.4 INTERNE GERÄUSCHSIMULATION Der Klang der elektromechanischen Orgel ist nicht nur gekennzeichnet durch Tonräder, Zugriegel und Percussion, sondern auch durch andere Geräusche, die man ursprünglich als Makel betrachtete, die aber im Lauf der Zeit zu prägnanten Merkmalen dieses Instrumententyps geworden sind. Zu ihnen zählt auch das Klickgeräusch, das durch den Schalter der Taste bei der Attack eines Tons erzeugt wird. - Page 61 viscount Bedienungshandbuch zweimanualigen Orgel zu simulieren, wobei die Zugriegel von Set A den Klang der Upper-Sektion steuern. Die Lower-Sektion spielt die über den [MIDI IN]-Port empfangenen MIDI-Daten, die von der externen Tastatur gesendet werden, um das untere Manual der Orgel zu simulieren. Hierbei steuert Zugriegel-Set B den Klang der Lower-Sektion.
-
Page 62: Effekte Anwenden
viscount Bedienungshandbuch 5. EFFEKTE ANWENDEN 5.1 VIBRATO ODER CHORUS Die vorderseitige VIBRATO/CHORUS-Sektion verfügt über drei Regler, mit denen man den gewünschten Effekt (Vibrato oder Chorus) für den Klang einstellen kann. Vibrato bewirkt eine zyklische Modulation der Tonhöhe des Signals und verleiht dem Klang mehr Räumlichkeit und Fülle. Chorus fügt dem modulierten Signal das Direktsignal hinzu und beeinflusst somit sowohl die Stimmung als auch die Amplitude des Signals. -
Page 63: Rotary
viscount Bedienungshandbuch Röhrenverstärker des klassischen Rotationslautsprechers, der häufig mit elektromechanischen Orgeln eingesetzt wird. Der ROCK-Effekt (bei leuchtender LED) erzeugt die schärferen Verzerrungen eines Gitarren- Röhrenverstärkers der 70er Jahre. Dieser Effekt simuliert die Signalverzerrungen, die entstehen, wenn ein an die Orgel angeschlossener Röhrenverstärker übersteuert wird. -
Page 64: Weitere Funktionen
viscount Bedienungshandbuch 6. WEITERE FUNKTIONEN 6.1 TRANSPOSITION Man kann die Tastatur im Bereich von -6/+5 Halbtönen transponieren. Um die Transposition einzustellen, halten Sie den [TRANSPOSE SELECT]-Taster gedrückt und drücken eine der Tasten F#1 (-6 Halbtöne) bis F2 (+5 Halbtöne). Bei C2 findet keine Transposition statt. -5 -4 -3 -2 -1 +1 +2 +3 +4 +5 Wenn die LED des [TRANSPOSE SELECT]-Tasters leuchtet, sind die Tastatur und Pedale transponiert. -
Page 65: Anhang
viscount Bedienungshandbuch 7. ANHANG 7.1 WERKS-PRESETS Upper-Sektion Lower-Sektion Taste Registrierung Name Taste Registrierung Name 00 5320 000 Stopped Flute 00 4545 440 Cello 00 4432 000 Dulciana 00 4432 220 Flute & Strings 00 8740 000 French Horn 00 7373 430 Clarinet 00 4544 222 Salicional... - Page 66 viscount Bedienungshandbuch Die Schaltpedale sind wirkungslos. Prüfen Sie, ob das Kabel zur Steuerung der Rotary-Geschwindigkeit korrekt mit der [ROTARY]-Buchse verbunden ist. Prüfen Sie, ob das Kabel zur Steuerung der Hold-Funktion (Sustain) korrekt mit der [HOLD]-Buchse verbunden ist. Prüfen Sie, ob das Verbindungskabel beschädigt ist. Die Pedalfunktion ist umgekehrt.
- Page 67 Entsorgung von alten Elektro- und Elektronikgeräten (gültig in der Europäischen Union und anderen europäischen Ländern mit separatem Sammelsystem) Dir. 2002/95/CE, 2002/96/CE e 2003/108/CE Dieses Symbol auf dem Produkt oder auf der Verpackung bedeutet, dass dieses Produkt nicht wie Hausmüll behandelt werden darf.
-
Page 68: Midi Informations
MIDI messages are transmitted (by the [OUT 1] and [OUT 2] ports) and received (by the [IN] and [PEDALS KEYB ONLY] ports) on the following MIDI channels: Section... - Page 69 viscount MAIN MIDI MESSAGES TRANSMITTED AND RECEIVED BY THE LEGEND SOLO Note On: • 9nH kkH vvH This message is transmitted when a note is played, i.e. when a keyboard key is pressed. Each Note On message includes the following codes: Note On (9nH): when a key has been pressed, n is the MIDI channel;...
- Page 70 Hold (CC 64) = Off All Notes Off message are transmitted when PEDALS TO LOWER function is switched off. By the [PEDALS KEYB ONLY] MIDI port, the instrument can receive the following messages on all 16 MIDI channels: Notes On / Off...
- Page 71 MIDI IMPLEMENTATION CHART Viscount Legend Solo Version: 1.0 Drawbars Organ Date: 11/07/2017 FUNCTION… TRANSMITTED RECEIVED REMARKS BASIC Default 1, 2, 3, 4, 5, 6 1, 2, 3, 4, 5, 6 CHANNEL Changed ******** ******** MODE Default Mode 3 Mode 3...
- Page 72 viscount Viscount International S.p.A. Via Borgo, 68 / 70 – 47836 Mondaino (RN), ITALY Tel: +39-0541-981700 Fax: +39-0541-981052 Website: www.viscountinstruments.com...
Need help?
Do you have a question about the viscount Legend Solo and is the answer not in the manual?
Questions and answers
Is the Viscount Legend Solo the same keyboard as the KeyB Solo organ?