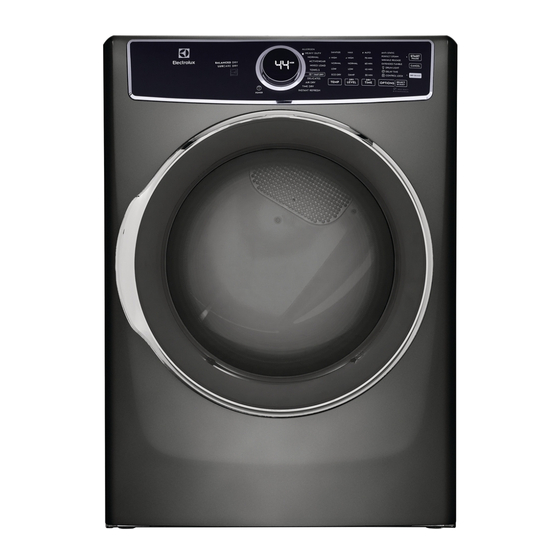
Electrolux 300 Series Use & Care Manual
Front load dryer
Hide thumbs
Also See for 300 Series:
- Use & care manual (100 pages) ,
- Installation instructions manual (50 pages) ,
- Owner's manual (11 pages)

Related Manuals for Electrolux 300 Series


Summary of Contents for Electrolux 300 Series
- Page 1 USE & CARE GUIDE EN FRONT LOAD DRYER GUIDE D’UTILISATION ET D’ENTRETIEN FR SÉCHEUSE Á CHARGEMENT FRONTAL GUÍA DE USO Y CUIDADO ES SECADORA DE CARGA FRONTAL A16331701 June 2019...
-
Page 2: Table Of Contents
Please read and save Table of Contents this guide Important Safety Information ....2 Thank you for choosing Electrolux, our Features ..........8 premium brand in home appliances. Pre-Installation Requirements ....9 This Use & Care Guide is part of our commitment to customer satisfaction and Installation .......... - Page 3 Important Safety Information Important safety instructions - gas dryer WARNING FIRE OR EXPLOSION HAZARD Failure to follow safety warning exactly could result in serious injury, death, or property damage. DO NOT store or use gasoline or other flammable vapors and liquids in the vicinity of this or any other appliance.
- Page 4 Important Safety Information WARNING RISK OF FIRE • Ensure the entire dryer exhaust system is clean and free of lint and debris prior to the installation of your new dryer. The entire exhaust system should be inspected and cleaned a minimum of every 18 months with normal us- age.
-
Page 5: Prevent Fire
Important Safety Information Definitions • DO NOT place items exposed to cooking oils in your dryer. Items contaminated This is the safety alert symbol. It is with cooking oils may contribute to a used to alert you to potential personal chemical reaction that could cause a load injury hazards. -
Page 6: Protect Children
Important Safety Information • DO NOT use fabric softeners or products Before you throw away your old washer or dryer: to eliminate static unless recommended by the manufacturer of the fabric softener • Remove doors or product. • Remove the electric power cord •... - Page 7 Important Safety Information • Thermal limiter switches automatically turn off the motor in the unlikely event of an overheated situation. A service technician must replace the thermal limiter switch(es) after correcting the fault. • Failure to comply with these warnings could result in serious personal injuries.
-
Page 8: Features
Model series ........26 Cycle selection ........31 Setting chart - 300 series dryer ... 27 Cycle settings ........32 Setting chart - 400 series dryer ... 28 Cycle options ........33 Setting chart - 500 series dryer ... -
Page 9: Pre-Installation Requirements
Pre-Installation Requirements Installation Checklist Exhaust Venting 240v Electric Supply (Electric Dryer) ˆ Free-flowing, clear of lint buildup ˆ Approved NEMA 10-30 or 14-30 ˆ 4 inch (102 mm) rigid metal or service cord with all screws tight on semi-rigid metal transition ducting terminal block of minimal length and turns ˆ... - Page 10 Pre-Installation Requirements Electrical system Tools and materials requirements needed for installation: NOTE Because of potentially inconsistent voltage capabilities, the use of this dryer Phillips, with power created by gas powered Adjustable Adjustable straight, & pliers wrench square bit generators, solar powered generators, screwdrivers wind powered generators or any other generator other than the local utility...
-
Page 11: Gas Dryer
Pre-Installation Requirements Electrical requirements for 3-wire power supply cord (not supplied) gas dryer: CIRCUIT - Individual, properly polarized 3-wire receptacle and grounded 15 amp. branch circuit (NEMA type 10-30R) fused with 15 amp. time delay fuse or circuit breaker. The dryer MUST employ a 3-conductor POWER SUPPLY - 2-wire, with ground, power supply cord NEMA 10-30 type 120 volt, single phase, 60 Hz, Alternating... -
Page 12: Exhaust System
12 Pre-Installation Requirements The following are specific NFPA 54, or in Canada, the Natural Gas requirements for proper and safe and Propane Installation Code, CSA operation of your dryer. B149.1. 2. The gas supply line should be 1/2 inch (1.27 cm) pipe. WARNING 3. -
Page 13: Exhaust Direction
Pre-Installation Requirements WARNING WARNING Exceeding the length of duct pipe FIRE HAZARD or number of elbows allowed in the • A clothes dryer must be exhausted “MAXIMUM LENGTH” charts can cause outdoors. an accumulation of lint in the exhaust • DO NOT exhaust dryer into a system. - Page 14 14 Pre-Installation Requirements • Running the exhaust system through NOTE an uninsulated area may cause condensation and faster accumulation of lint. Use of 90° quick- turn elbow required • Compression or crimping of the exhaust to meet minimum installation depth. system will cause an increase in vent restriction.
-
Page 15: Clearance Requirements
Pre-Installation Requirements Clearance requirements MIN INSTALLATION CLEARANCES - Inches (cm) IMPORTANT Sides Rear Front 0” 0” 0” Alcove (0 cm) (0 cm) (0 cm) DO NOT INSTALL YOUR DRYER: Under- 0” 0” 0” 1. In an area exposed to dripping water (0 cm) (0 cm) (0 cm) -
Page 16: Dryer Dimensions
16 Pre-Installation Requirements Dryer dimensions 53.5” (136 cm)* to clear open door 32” (81.25 cm)* 27.0” to front of closed door (68.5 cm) electrical 38.0” supply on (96.5 cm) rear of unit 1.5” 3.7” (4 cm) (9.5 53.25” (135.5 cm) centerline gas supply height of... -
Page 17: Installation
Installation Connecting the The dryer, when installed, must be electri- cally grounded in accordance with local electrical system codes and the National Electrical code ANSI/NFPA 70 or the Canadian Electrical The following are specific requirements Code, Part 1, CSA C22.1. for proper and safe electrical installation of your dryer. - Page 18 18 Installation Grounding requirements - Grounding requirements - electric dryer (Canada) gas dryer 1. The dryer is equipped with a three- prong (grounding) plug for your WARNING protection against shock hazard and should be plugged directly into Improper grounding of the dryer may a properly grounded three-prong cause serious injury or death.
-
Page 19: Electrical Connection
Installation Electrical connection IMPORTANT (non-Canada) - 3 wire cord If moving dryer from a 4-wire system and 3-wire receptacle (NEMA type 10-30R) installing it in a 3-wire system, move the internal ground from the center terminal back to the GREEN screw next to the terminal block. - Page 20 20 Installation Electrical connection WARNING (non-Canada) - 4 wire cord ELECTRICAL SHOCK HAZARD 4-wire receptacle (NEMA type 14-30R) DO NOT make a sharp bend or crimp wiring/conductor at connections. 9. Follow manufacturer’s guidelines for WARNING firmly securing the strain relief and power cord.
-
Page 21: Water Supply Requirements
Installation Connecting the gas WARNING 1. Remove the shipping cap from gas pipe EXPLOSION HAZARD at the rear of the dryer. NEVER test for gas leaks with an open flame. WARNING IMPORTANT DO NOT connect the dryer to L.P. gas service without converting the gas valve. - Page 22 Installation Short Hose Rubber Washer Must be Present and Undamaged “Y” Connector Cold Inlet Hose Water Inlet on Dryer to Washer 3. Turn on COLD supply and run water to clear any contaminants in the line. Cold Water Supply Hose to Washer 6.
- Page 23 Installation Completing the installation 5. Plug the power cord into a grounded outlet. 1. Connect the exhaust duct to the outside exhaust system. Use of a 4” (102 mm) WARNING clamp (item A) is recommended to connect the dryer to the exhaust vent system.
-
Page 24: Reversing The Door
Installation Reversing the door NOTE Door reversibility is available on all dryer models. Tools needed for reversal: IMPORTANT BEFORE YOU REVERSE YOUR DRYER DOOR: Screwdriver with #2 1. Be sure you have adequate swing area square bit before reversing door. 2. - Page 25 Installation Removing door assembly Reinstalling latch and hole plugs 1. Completely open the door to expose all 1. Install door latch with screws removed four hinge screws. earlier. 2. Remove all four hinge screws with #2 square bit driver. Save for reinstalling later.
-
Page 26: Controls And Settings
Controls and Settings Model series 300 SERIES 400 SERIES 500 SERIES 600 SERIES power cycle LED display cycle selector temperature dryness (dry level) time dry (dry time) options/select (set) cancel start/pause This manual covers many models and not all cycles, options, or features listed are... -
Page 27: Setting Chart - 300 Series Dryer
Controls and Settings Setting chart - 300 series dryer These temperature, dryness levels and options are available with the following cycles: CYCLE SELECTIONS temperature (temp) high normal air dry dry level (dryness) high ... -
Page 28: Setting Chart - 400 Series Dryer
28 Controls and Settings Setting chart - 400 series dryer These temperature, dryness levels and options are available with the following cycles: CYCLE SELECTIONS temperature (temp) high normal ... -
Page 29: Setting Chart - 500 Series Dryer
Controls and Settings Setting chart - 500 series dryer These temperature, dryness levels and options are available with the following cycles: CYCLE SELECTIONS temperature (temp) sanitize high normal ... -
Page 30: Setting Chart - 600 Series Dryer
30 Controls and Settings Setting chart - 600 series dryer These temperature, dryness levels and options are available with the following cycles: CYCLE SELECTIONS temperature (temp) sanitize high normal ... -
Page 31: Cycle Selection
Controls and Settings Cycle selection Selecting the right cycle to save energy This dryer has been specifically designed with options to help you save energy and at the same time utilize the optimal drying setting for your clothing. The normal cycle was used to rate the dryer for energy efficiency. The normal cycle defaults to normal temperature setting, normal dryness level and eco mode option (if available). -
Page 32: Timed Dry Cycles
32 Controls and Settings To protect your fabrics, not all tempera- Timed dry cycles tures or dryness levels are available with The timed drying cycles allow the selection every cycle. If a temperature or dryness of exact drying times. The time dry cycle level is not appropriate for the cycle, it allows the option to select drying time cannot be selected and will not be lit when... -
Page 33: Cycle Options
Controls and Settings eco option and sanitize temperature (on Dryness level (dryness) select models). When this happens, the To set or change the dryness level, press option selected first will cause the conflict- the dryness button to scroll to the desired ing option to not be selectable. -
Page 34: Other Features
34 Controls and Settings during off-peak energy hours. The start of The estimated cycle time for auto dry, the actual time for time dry, or the delay any cycle can be delayed for 30 minutes to 12 hours. After selecting the delay time op- time countdown will be displayed when tion, use the cycle button (models 300/400) the cycle is selected. - Page 35 Controls and Settings Install the drying rack NOTE For step-by-step instructions cleaning Front legs in the lint filter, refer to Cleaning the Filter in side of grill the Care and Cleaning section of this Use & Care Guide. Optional drying rack Rear legs on drum (not included)
-
Page 36: Operating Instructions
36 Operating Instructions Operating the dryer WARNING To reduce the risk of fire, electric shock or injury to persons, read the Important Safety Information in this Use & Care Guide before operating your dryer. WARNING WARNING Clean the lint filter after every load. DO NOT operate dryer without lint filter in place. -
Page 37: Operating Instructions
Operating Instructions STEPS TIPS IMPORTANT 4. Select the • See Cycle Selection and Cycle Settings for Over-drying can appropriate detailed descriptions of cycle controls. cause wrinkles, cycle and shrinkage, lint, • See Cycle Setting Charts to determine which settings for harshness, and a settings are available for each cycle. -
Page 38: Normal Operating Sounds
38 Normal Operating Sounds Normal operating sounds You may or may not hear the following sounds from your new dryer: A. WATER VALVE (Steam models only.) The flow of water is controlled by electric solenoids. During operation there may be a clicking sound as the valve opens and closes to control the water flow. -
Page 39: Care And Cleaning
Care and Cleaning 4. Snap the filter closed and place back WARNING into the dryer. To reduce risk of fire or serious injury to IMPORTANT persons or property, comply with the basic warnings listed in the Important • DO NOT open the clamshell filter Safety Information and those listed beyond the hinge limit. - Page 40 40 Care and Cleaning • When cleaning chrome parts, it is best or cross thread the fittings. DO NOT allow to use only a damp cloth. the hose to rub against sharp objects. Al- ways ensure the hose fitting rubber gasket •...
-
Page 41: Troubleshooting
Troubleshooting Common drying inquiries Many drying problems involve poor cleaning results, poor soil and stain removal, resi- dues of lint and scum, and fabric damage. For satisfactory drying results, follow these suggestions provided by The Soap and Detergent Association. PROBLEM POSSIBLE SOLUTIONS PREVENTIVE CAUSES... -
Page 42: Troubleshooting
42 Troubleshooting Before calling Before calling for service, review this list. It may save both time and expense. The list includes common occurrences that are not the result of defective workmanship or materials in this dryer. PROBLEM POSSIBLE CAUSES SOLUTIONS Dryer does •... - Page 43 Troubleshooting PROBLEM POSSIBLE CAUSES SOLUTIONS Drying cycle • Lint filter is clogged with lint. • Make sure all lint has been removed takes too from the dryer lint filter before start- long, outside ing each cycle. of the dryer • Exhaust duct requirements •...
-
Page 44: Limited Warranty
For the applicable warranty period as set forth below, as measured from your original date of purchase, Electrolux will repair or replace any parts of this appliance that prove to be defective in materials or workmanship when such appliance is installed, used and maintained in accordance with the provided instructions. - Page 46 electrolux.com/shop...
Need help?
Do you have a question about the 300 Series and is the answer not in the manual?
Questions and answers