
Related Manuals for Seaga N2G5000


Summary of Contents for Seaga N2G5000
- Page 1 For more information contact: Gumball.com (800) 260-0010 support@gumball.com Owner’s Manual Vending System Model N2G5000 Revision EL950 1.1.1062C - 04-2017...
-
Page 2: Introduction
For more information contact: Gumball.com (800) 260-0010 support@gumball.com INTRODUCTION Congratulations on the purchase of your N2G5000. This vending system has been designed to give you many years of dependable service. It requires little maintenance and is easy to set up and operate. READ THIS MANUAL COMPLETELY Your vending machine is designed to operate simply and reliably, but to take full advantage of your vendor, please read this owner’s manual thoroughly. It contains important information regarding installation and operations, as well as a brief trouble‐shooting guide. By following prescribed procedures outlined in this manual, machine performance and safety will be assured. EQUIPMENT INSPECTION After you have received your vendor and have it out of the box, place it on a secure surface for further inspection. Note: Any damages that may have occurred during shipping must be reported to the delivery carrier immediately. Reporting damages and the seeking of restitution is the responsibility of the equipment owner. The factory is willing to assist you in this process in any way possible. Feel free to contact Seaga’s Customer Care Department with questions you may have on this process. It is important that you keep the original packaging for your vending machine at least through the warranty period. If your machine needs to be returned for repair, you may have to purchase ... -
Page 3: Table Of Contents
For more information contact: Gumball.com (800) 260-0010 support@gumball.com Introduction ..........................2 Preliminary Information ......................4 Initial Setup ..........................7 Equipment Setup ........................8 Loading Snack Trays ........................9 Removing Snack Trays .......................11 Adjusting Coils...........................12 Replacing Snack Motors ......................14 Loading Beverage Lanes ......................15 Customer Interface ........................21 Setting Up and Loading the Payment Systems ................22 Coin Changer ..........................22 ... -
Page 4: Preliminary Information
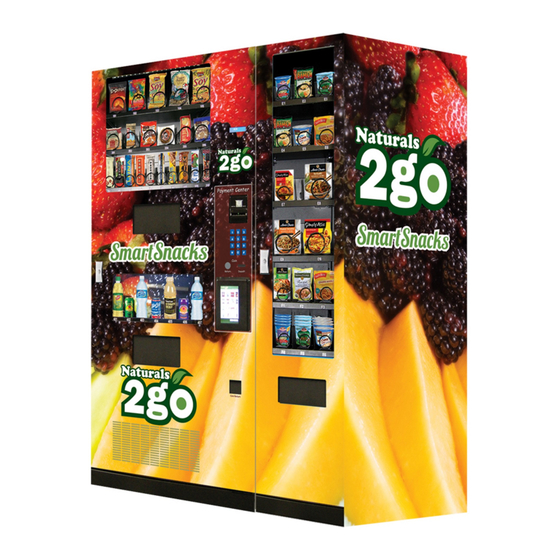
For more information contact: Gumball.com (800) 260-0010 support@gumball.com Preliminary Information Figure 1 – The N2G5000 Vending System Main Unit – Snack, Beverage, VMC Entree Unit Entree Display Snack Window Display Display Window Bill Validator Snack Delivery Door Keypad Coin Return Button Main Door Coin Slot Handle and Lock Beverage Entree Door Display Handle and Lock Window Air Vend Beverage Delivery Door Coin Return Entree Delivery Door ... - Page 5 For more information contact: Gumball.com (800) 260-0010 support@gumball.com Machine Description Main Unit Entree Unit Height (in) 73.5 73.5 Width (in) Depth (in) 28.25 28.25 Volts (V) Frequency (Hz) Watts (W) Current (A)* Figure 2 ‐ Interior of machine and controls Display VMC Bill Validator Beverage Harness Coin Changer Vertical Drop Door Hasps EL950.1.1.1062C.4-2017 Page 5...
- Page 6 For more information contact: Gumball.com (800) 260-0010 support@gumball.com Power Requirements The wall receptacle used for your vendor must be properly polarized, grounded and of the correct voltage. Operating the N2G5000 system from a source of low voltage will VOID YOUR WARRANTY. Each N2G5000 system should have its own 15 Amp electrical circuit that is protected by a circuit breaker or fuse conforming to local power safety regulations. Unpacking the Vending System Remove all packing materials from the interior of the vending machine. Keep all documents found packed inside which include payment system and accessory manuals as appropriate. Keep and set aside any accessory kits. Controls and Indicators Display The Display is how the vending system communicates with your customers while they are in front of the machine. The customer may see messages about how much an item costs, when a ...
-
Page 7: Initial Setup
For more information contact: Gumball.com (800) 260-0010 support@gumball.com Initial Setup Moving the Vending System Your N2G5000 system should never be moved with product or coins loaded, it should be completely empty and any moving parts must be secured. The system can be located as close as 2 inches to the back wall but requires 6 inches clearance on either side for the doors to open properly while you service the machine. After locating your vending system, plug in the power cord and the system will turn on. Front Door Unlocking – Insert the key into the lock and turn counter‐clockwise 3 or more revolutions until the door can be pulled open. Locking – Close the door firmly. Turn the lock housing one revolution clockwise and pull to test that the lock spear has engaged with the locking mechanism. If the door does not open, push the lock housing into its seated position in the door. Location Requirements The N2G5000 is meant for operation indoors only – which not only means physical protection from the elements of sun, rain, etc. but also means a climate controlled environment. Location of the N2G5000 in excessively hot, cold, humid or dirty locations will VOID YOUR WARRANTY. Tool Kit ... - Page 8 For more information contact: Gumball.com (800) 260-0010 support@gumball.com Leg Levelers Leg Levelers have been provided in your parts pack as it is essential for proper operation to have a level vending machine. Installation requires two people; one to slightly tilt the machine while the other installs the leveler by screwing it in to the base of the machine on all four corners. Note: Care should be taken not to tip the vending machine more than a few degrees. Excessive tipping of the machine can ruin your refrigeration system and void your warranty. Figure3 – Entrée Unit Bolts Attach with provided bolts and washers 3.) Disconnect power from Main Unit. 4.) Connect Wire Harness from the Entree Unit to the Main Unit. (Figure 4) 5.) Reconnect power to Main Unit. Figure 4 – Wire Harnesses N2G900 Entrée Unit N2G5000 Main Unit Coffee Entrée Entree Unit Wire Harness Wire Harness Light Harness Light Harness EL950.1.1.1062C.4-2017 Page 8...
-
Page 9: Equipment Setup
For more information contact: Gumball.com (800) 260-0010 support@gumball.com Equipment Setup Loading Snack Trays Each snack tray has a release lever located on the right side. To place the tray in load position, hold down on the release lever and lift the tray up slightly; slide the tray forward (toward you) until the roller hits the stop built into the side rail. Gently lower the front of the snack tray until it is tilted down and all coils are exposed (Figure 5). Figure 5 – Snack Tray in Load Position IMPORTANT: Make sure front wheels on both Each tray has a sides are properly Release Lever engaged in side rails when placing tray back in sales position. Tray in Load Position When loaded, lift the tray front up so that the tray is level and push back into position. NOTE: Make sure the wheels on the front of the tray are engaged properly in the side rails and the release lever is in the forward position. Products Make sure your products are appropriate for the column and coil you are placing them in. Do not force products that are too wide into a narrow tray or too tight coil as this will cause vend problems for your customers. The product must also pass under the tray immediately above the ... - Page 10 For more information contact: Gumball.com (800) 260-0010 support@gumball.com Figure 6 – Load products properly and neatly Correct Incorrect Incorrect Figure 6a –Properly loaded products sell more and vend consistently Correct Incorrect Incorrect You should insure that the products are loaded like a retail store shelf to entice customers and give a neat, professional appearance. Make sure packages are upright, facing front and in good condition. EL950.1.1.1062C.4-2017 Page 10...
-
Page 11: Removing Snack Trays
For more information contact: Gumball.com (800) 260-0010 support@gumball.com Removing Snack Trays It is sometimes necessary to replace a snack tray or you may find it easier to work on certain elements of a tray if it is removed from the vending system cabinet. To remove a snack tray: 1.) Remove all product from the tray you want to remove. 2.) Reach in and squeeze the two cable release tabs on the top and bottom of the connector and unplug the proper tray harness. Figure 7 – Tray Harnesses Tray 110 Harness Tray 120 Harness Squeeze tabs and pull harness connector free. Tray 130 Harness 3.) Rest the tray harness on top of the tray you are removing to keep it out of the way. 4.) Flip the release lever on the right side of the tray to face toward the back of the machine and raise the front wheels out of the side rails until you feel the roller come to the built in rail stop. 5.) With a firm hold on the tray, lift up to release the roller from the rails on the sides of the cabinet. 6.) Pull the tray free and place it on a sturdy, flat surface to complete your work. EL950.1.1.1062C.4-2017 Page 11... -
Page 12: Adjusting Coils
For more information contact: Gumball.com (800) 260-0010 support@gumball.com Figure 8 – Remove the tray Tray 130 Harness Lift tray free Adjusting Coils If you are required by a location to vend a product of a non‐standard size, you may need to order a different coil and install it. Replacing a coil is easier with the tray removed, as described in the last section. To replace a coil: 1.) Remove the coil from the coil driver by lifting the back of the coil up off the coil driver. You will need to move the bottom of the coil clear of the coil driver to completely remove the coil. See Figure 9 2.) Align the new coil end with the front of the product tray, which gives the coil better contact with the product. The position of the coil in the coil driver is adjustable to assist you in aligning the new coil at the front of the product tray. See Figure 9. This coil adjustment can be done for all the selections on snack or entree product trays. See Figures 6 and 6a for examples of the location of home position on the coils. ... - Page 13 For more information contact: Gumball.com (800) 260-0010 support@gumball.com Figure 9 – Removing and Aligning a Coil Lift Coil Coil Driver with three (3) adjustment options Apply pressure to the straight part of the coil that is inserted into the Coil Driver. Lift up the Coil to remove. Back of Product Tray, Snack or Entree If you are experiencing vending issues with certain products, you may need to adjust the coil rotation to better provide the momentum to push the snack off the tray and into the delivery area. To adjust the coil rotation: 1.) Squeeze the two tabs on the back of the coil driver and pull the coil driver and coil toward the front of the tray to remove it. 2.) Turn the coil clock‐wise 1/8 of a rotation. 3.) Reinsert the coil driver with coil attached back into the motor, through the back wall of the tray. 4.) Load the tray and perform at least 5 (five) test vends to insure a proper vend. 5.) If the item does not vend consistently, repeat another 1/8 of a rotation until you are confident of consistent vend function. ...
-
Page 14: Replacing Snack Motors
For more information contact: Gumball.com (800) 260-0010 support@gumball.com Replacing Snack Motors As one of the moving parts of the vending system, vend motors experience regular wear and may need to be replaced on occasion. To replace a vend motor, remove the tray as instructed in the Remove Trays section of this manual and then remove the coil driver and coil as shown in Figure 11. 1.) Unplug motor harness. 2.) Unscrew the two screws as shown in Figure 11. Figure 11 –Motor on Snack Tray Unscrew two screws Unplug motor harness Squeeze to remove coil driver 3.) Replace motor and plug motor harness back in. 4.) Reinstall coil driver so that coil is in home position (see Figures 6 and 6a for coil home position examples). 5.) Perform at least 5 (five) test vends to insure a proper vend. EL950.1.1.1062C.4-2017 Page 14... -
Page 15: Loading Beverage Lanes
For more information contact: Gumball.com (800) 260-0010 support@gumball.com Loading Beverage Lanes The Product Columns in your machine use an Auger that rotates counter‐clockwise to drop the drink into the Product Bin. 1.) Load products horizontally (laying down). Grasp Locking Tab and slide up to allow Retainer to move forward into Load Position. Figure 12 – Retainer Retainer Locking Tab Figure 13 – Retainer in Load Position Retainer EL950.1.1.1062C.4-2017 Page 15... - Page 16 For more information contact: Gumball.com (800) 260-0010 support@gumball.com 2.) 20 oz/591 ml Bottles are loaded laying down, two deep in each column. Load the first bottle so that the top touches the back of the column. The next bottle should also be loaded with the top toward the back of the column, positioned against the bottom of the first bottle. 3.) 12 oz/355 ml Cans (not slim cans) are loaded laying down, three deep in each column. Load cans with the top of the first can touching the back of the column. The bottom of the next can should be touching the bottom of the first can. The third can should be loaded with the top touching the top of the second can. 4.) Finish loading to the top of the column, not exceeding maximum capacity (see chart), making sure the items are not tilted or skewed in the column. 5.) With column loaded, lift the Retainer Gate back into sales position using the Locking Tab and push down to lock. Figure 14 – Loaded Product with Retainers Secured ...
- Page 17 For more information contact: Gumball.com (800) 260-0010 support@gumball.com Below is an overhead view of several product types loaded and an illustration of accessory placement: *Note: see list below for Loading Group by Selection; this illustration is not of your machine set Figure 15 – Overhead Loading by Group Back of machine Front of machine Your vending machine has been set by the factory for the following products and groups (see chart): Selection 140 – Dasani Water, 16.9 oz. Bottle – Group 10 Selection 141 – Monster, Rock Star, etc., 16 oz. Cans – Group 4 Selection 142 – Monster, Rock Star, etc., 16 oz. Cans – Group 4 Selection 143 – Gatorade 20 oz. Bottle – Group 3 Selection 144 – Vitamin Water 20 oz. Bottle – Group 3 Selection 145 – 12 oz. Can – Group 5 Selection 146 – 12 oz. Can – Group 5 Selection 147 – 12 oz. Can – Group 5 To accommodate a wide variety of packaging, spacers and other accessories are provided to assist with vending performance. Any necessary accessories should be installed prior to loading the column. EL950.1.1.1062C.4-2017 Page 17...
- Page 18 For more information contact: Gumball.com (800) 260-0010 support@gumball.com For 12 oz. cans, small cans, some bottles and glass bottles, (see chart), use the Large Side Spacer, and/or the Auger Insert and/or Small Back Spacer. Refer to chart for products requiring Accessories. Capacity Size Description Product Setup/Accessory Load Group Aquafina Water, Country Time 20 oz Lemonade, Lipton Tops to Bottle Small Side Spacer 10 1 519 ml Iced or Green Tea, Back Coke, Pepsi, and Various Brands 14 oz Tops to Bottle Nesquik Small Side Spacer 10 1 414 ml Back ...
- Page 19 For more information contact: Gumball.com (800) 260-0010 support@gumball.com Figure 16– Small Side Spacer, Large Side Spacer and Right Side Spacer Small Side Spacer Large Side Spacer Right Side Spacer Figure 17 – Auger Insert Auger Insert Figure 18 –Back Spacer EL950.1.1.1062C.4-2017 Page 19...
- Page 20 For more information contact: Gumball.com (800) 260-0010 support@gumball.com Unlike the snack section of the vending system, the products that will vend are not viewable by your customers when they are positioned in the vertical drop columns. To provide a live display, a product display shelf has been provided. Take care to use packaging that is in perfect condition and products that are still within their expiration date to present the best possible retail store front to your potential customers. To load the live product display: 1.) Remove the Drink Display Back Panel by loosening and removing the thumb screws located on either side of the panel. 2.) Place each beverage, in order of selection, in the display window taking care to make them evenly spaced and oriented properly toward the front of the machine where the customer will see them. 3.) Reinstall the beverage back panel. Figure 19 – Live Drink Display Thumb Screw Thumb Screw Loading Entrees Entrees are loaded in spiral equipped columns very similar to the snack section of the N2G5000 vending system. Please review the procedures in that section of the manual to assist you with loading the entrees. EL950.1.1.1062C.4-2017 Page 20...
-
Page 21: Customer Interface
For more information contact: Gumball.com (800) 260-0010 support@gumball.com Customer Interface Display The LCD Display (Fig. 20) is a two line, 40 character text display panel located on the front of your vending machine. The display interacts with the customer to show the amount of money entered into the vendor and the cost of their selection among other information as programmed. The display also shows the operator the Service Mode functions for setting the vendor. Fig. 20 – LCD Display in Sales Mode When in Sales Mode Display Formats Display Reads WELCOME! Please insert money Normal Operation, no credit available and make a selection..; Normal Operation, some credit available $00.01 – 99.99 After Pressing a selection, if there is no credit or the credit is less than the selection’s price, the price of the selection is displayed for a few seconds before reverting to one of the above credit display formats. Price $00.01 – 99.99 (If a coin or other payment is made the display reverts immediately to display the credit available) Free Vend Mode (all prices set to zero) Free Vend If a selection is out of stock when a selection is Sold Out pressed – this is displayed for a few seconds Sold Out All Items out of stock Out of Order Machine Out Of Order During a Vend (Progress bar, dashes) ‐‐‐‐‐‐‐‐‐‐‐‐‐‐ ... -
Page 22: Setting Up And Loading The Payment Systems
For more information contact: Gumball.com (800) 260-0010 support@gumball.com Setting Up and Loading the Payment Systems Coin Changer The Coin Changer receives and returns change to customers. The Coin Changer will accept Dollar Coins, Quarters, Dimes, and Nickels. Once the coin tubes reach the required inventory level, all other coins will be routed into the coin overflow tray. Loading Changer As change is given to the customer in coins only, it is recommended that you initially load the coin tubes completely full when setting up your machine. In order for your VMC to keep an accurate coin inventory, enter MENUS Mode, scroll through to Qty/Tube, and load coins in through the front coin slot, as if you were inserting money to purchase items. Once the coins ... -
Page 23: Coin Retrieval
For more information contact: Gumball.com (800) 260-0010 support@gumball.com Coin Retrieval The Coin Overflow Tray holds all accepted coins except for coins needed to maintain inventory in the Tubes. The User Interface Buttons are located on the upper portion of the changer (Figure 21). When in Service Mode, go to Settings, Coin Refill and press a User Interface Button on the changer to dispense the coins in that tube. Note that the changer will empty that selection of coins. To stop this mode, press the selection’s User Interface Button again. Note: You may also physically remove the Coin Cassette to load and unload coins. Note that doing so will not maintain audit totals. Figure 21 ‐ Coin Changer Coin Return Lever Coin Funnel Diagnostic LED User Interface Buttons for Coin Tubes A, B, C, D, E Channel Acceptor Gate Assembly Cover Cassette Latch Coin Coin Tubes Cassette A B C D E EL950.1.1.1062C.4-2017 Page 23... -
Page 24: Clearing Coin Jams
For more information contact: Gumball.com (800) 260-0010 support@gumball.com Clearing Coin Jams 1. Unplug the machine from the power source 2. Unlock and open the Front Door 3. Open the Acceptor Gate Assembly by pulling forward on the Coin Funnel 4. Check for coin jams in this area. Note: the ramp in this area should also be cleaned on a regular basis to insure trouble‐free operation. Coin Ramp – keep clean 5. Open the Coin Channel Cover by using the tab on the left side to pull forward EL950.1.1.1062C.4-2017 Page 24... -
Page 25: Removal Of Coin Changer
For more information contact: Gumball.com (800) 260-0010 support@gumball.com 6. Check this area for any jammed coins Removal of Coin Changer To Remove the Coin Changer: a. Disconnect the power to the machine – this is very important to avoid damaging not only the coin changer but your VMC. Failure to disconnect power before performing this operation will void your warranty. b. Disconnect the Wire Harness to the changer Disconnect Wire Harness EL950.1.1.1062C.4-2017 Page 25... - Page 26 For more information contact: Gumball.com (800) 260-0010 support@gumball.com c. Lift up on the white lever on the top left side of the coin mechanism d. Tilt the Discriminator assembly forward and lift off main housing. Note: the discriminator will still be attached by a cable. e. Loosen the three (3) Mounting Screws f. Lift Changer and remove. EL950.1.1.1062C.4-2017 Page 26...
-
Page 27: Bill Validator
For more information contact: Gumball.com (800) 260-0010 support@gumball.com Bill Validator The Bill Validator allows your customers to pay for their purchase with paper currency. Your Bill Validator is installed at the factory, and is set to validate $1, $5 and $10 bills, but will not accept bills if the coin tubes are empty. The Bill Validator verifies, accepts and stores paper currency but change is given in coins only. Bill Validator Capacity The Bill Storage Box will hold approximately 250 bills. Bill Retrieval The bills your customers spend are kept in the Bill Collection Box. 1. To Retrieve Bills. a. Unlock and open the Front Door b. Open door located on top of bill collection box and lift out bills c. Close top door on bill collection box after bills are retrieved EL950.1.1.1062C.4-2017 Page 27... -
Page 28: Removing Bill Validator
For more information contact: Gumball.com (800) 260-0010 support@gumball.com Figure 22 – Bill Validator Tab Bill Collection Box (4) Mounting Nuts Lower Housing REMOVING BILL VALIDATOR From time to time it may be necessary to remove the Bill Validator for cleaning and clearing jams. 1. To remove the Bill Validator a. Disconnect the power to the machine – this is very important to avoid damaging not only the bill validator but your VMC. Failure to disconnect power before performing this operation will void your warranty. b. Unlock and open the Front Door c. Push Bill Validator Tab forward and slide Bill Storage Box up to remove Tab d. Disconnect Bill Validator from Wire Harness e. Remove the Four (4) Mounting Nuts. EL950.1.1.1062C.4-2017 Page 28... - Page 29 For more information contact: Gumball.com (800) 260-0010 support@gumball.com Wire Harness Four (4) Mounting Nuts f. Remove Bill Validator EL950.1.1.1062C.4-2017 Page 29...
-
Page 30: Clearing Bill Jams
For more information contact: Gumball.com (800) 260-0010 support@gumball.com Clearing Bill Jams It is possible that a torn or damaged bill can jam within the Bill Validator, putting it out of service. 1. To Clear a Jam. a. Remove Bill Collection Box as instructed in Bill Retrieval and inspect for a jammed bill b. Remove bill jam, and reassemble c. If no jam was found in the Bill Collection Box, lift up on the metal bar at the bottom of the bill validator and pull the lower unit out towards you. d. Inspect and remove jammed bill. e. Replace lower unit to resume normal operation. EL950.1.1.1062C.4-2017 Page 30... -
Page 31: Programming
For more information contact: Gumball.com (800) 260-0010 support@gumball.com Programming Enter Service Mode by pressing the MENUS Button on the VMC Circuit board. (Fig. 23) Figure 22 – VMC and Menus Button MENUS Button SERVICE MODE NAVIGATION Use the 0 through 9 keys to access the various menus and sub‐menus. Use the “ * ” key on the keypad to Exit without changing or to go back (Previous). Use the “#” key on the keypad to Save. EL950.1.1.1062C.4-2017 Page 31... - Page 32 For more information contact: Gumball.com (800) 260-0010 support@gumball.com SERVICE MODE 1. PRICE PROGRAM Price Program is used to set the prices for All Items, by Row or by individual Selection. Save time and set All Items to the most common price, going back to Row or Selection for different prices as required. The value for Coupons accepted by pre‐programmed validators and Tokens accepted by pre‐ programmed coin changers as well as Combo pricing are also set in this menu. ALL ITEMS STEP DISPLAY 1. Press Service Mode Button Motor Count or Error Code ** 2. Press 1 for Price Program Price Program All Items: $‐‐.‐‐ (flashes current price) 3. Press 1 for All Items * ‐Exit, no change All Items: (New Price) * ‐Exit, no change #‐Save 4. Use number keys to enter new price Press # to Save Press * two times to exit to Sales Mode 5. ...
- Page 33 For more information contact: Gumball.com (800) 260-0010 support@gumball.com COUPON IMPORTANT: This option requires a programmed validator. Up to five different coupon values can be set. In sales mode, once a coupon is accepted, no further coupons will be accepted until a successful vend has been made. If no value is set, coupons will be shown as free vends. If using both coupons and tokens, there are only five selection combinations available. For example, if Coupon1 is set for “All” items, Token1 is also set for “All” items. STEP DISPLAY 1. Press Service Mode Button Motor Count or Error Code ** 2. Press 1 for Price Program Price Program Coupons 3. Press 4 for Coupons * ‐Exit, no change Coupon1 Press 1 for Coupon1 (or corresponding number for 4. * ‐Exit, no change #‐Save additional coupons, up to Coupon5) All Items (Current Setting) 5. Press 1 for All Items * ‐Exit, no change 1‐Edit All Items (Choice Flashing) 6. Press 1 to toggle On/Off ...
- Page 34 For more information contact: Gumball.com (800) 260-0010 support@gumball.com All Items (New Setting) 7. Press # to Save the new setting to Off if necessary * ‐Exit, no change #‐Save 8. Press * to return to Coupon1 Coupon1 Row: ‐‐ 9. Press 2 to enter a Row Number *‐Exit Row: XX (Current Setting) 10. Enter Row Number * ‐Exit/Del #‐Edit Row: XX (Choice Flashing) 11. Press 1 to toggle Row On/Off * ‐Exit, no change #‐Save Row: XX (New Setting) 12. Press # to save the setting * ‐Exit, no change #‐Edit 13. Press * twice to return to the Coupon1 menu Coupon1 Coupon1: $0.00 14. Press 4 to enter Coupon Value menu ...
- Page 35 For more information contact: Gumball.com (800) 260-0010 support@gumball.com Selection: XX (New Setting) 12. Press # to save the setting * ‐Exit, no change #‐Edit 13. Press * twice to return to the Coupon1 menu Coupon1 Coupon1: $0.00 14. Press 4 to enter Coupon Value menu * ‐Exit, no change #‐Edit Coupon1: $0.00 15. Press # to edit Coupon1 value * ‐Exit, no change #‐Save Coupon1: $0.00 16. Enter Coupon1 value *‐Exit, no change #‐Save Coupon1: $(New Value) 17. Press # to Save the Coupon1 value setting * ‐Exit, no change #‐Save Press * two times to continue to Coupon2 – 5 or press * 18. Price Program five times to exit. ...
- Page 36 For more information contact: Gumball.com (800) 260-0010 support@gumball.com TOKEN BY ROW STEP DISPLAY Motor Count or Error Code 1. Press Service Mode Button ** 2. Press 1 for Price Program Price Program Tokens 3. Press 5 for Tokens * ‐Exit, no change Token1 Press 1 for Token1 (or corresponding number for additional 4. * ‐Exit, no change #‐Save tokens, up to Token5) All Items (Current Setting) 5. Press 1 for All Items to verify Off * ‐Exit, no change 1‐edit All Items (Choice Flashing) 6. Press 1 to toggle On/Off if necessary * ‐Exit, no change 1‐edit All Items (New Setting) 7. ...
- Page 37 For more information contact: Gumball.com (800) 260-0010 support@gumball.com All Items (Current Setting) 5. Press 1 for All Items to verify Off * ‐Exit, no change #‐Save All Items (Choice Flashing) 6. Press 1 to toggle On/Off if necessary * ‐Exit/del #‐Save All Items (New Setting) 7. Press # to Save the new setting to Off if necessary * ‐Exit/del #‐Save 8. Press * to return to Token 1 Token1 Selection: ‐‐ 9. Press 3 to enter an Item *‐Exit Selection: XX (Current Setting) 10. Enter Item Number * ‐Exit, no change #‐Edit Selection: XX (Choice Flashing) 11. Press 1 to toggle Item On/Off * ‐Exit, no change #‐Save ...
- Page 38 For more information contact: Gumball.com (800) 260-0010 support@gumball.com COMBO Combos are a group of 2‐5 selections that can be sold together for one price. For example, a price of $7.50 the customer will be able to purchase a bagged snack (110), a snack from the third tray (131) and a drink (142) which will all vend when the Combo Selection is used. If the customer purchased these items separately it would cost them more. Combos are used to encourage higher vend amounts through discounted pricing.
- Page 39 For more information contact: Gumball.com (800) 260-0010 support@gumball.com 2. CASH COUNTERS Cash Counters displays the total vend count and the total sales value for the machine, for All Items, by Row or by individual Selection. Note: The resettable counters can be cleared. ALL ITEMS STEP DISPLAY Motor Count or Error Code 1. Press Service Mode Button ** 2. Press 2 for Cash Counters Cash Counters 3. Press 1 for All Items All Items 4. Press 1 for Historical Count Hist Count ‐‐ 5. Press 2 for Historical Cash Hist Cash $‐‐.‐‐ 6. Press 3 for Reset Count Res Count ‐‐ 7. Press 4 for Reset Cash Res Cash $‐‐.‐‐ 8. Press 5 for Historical Card His Card $‐‐.‐‐ 9. ...
- Page 40 For more information contact: Gumball.com (800) 260-0010 support@gumball.com SELECTION STEP DISPLAY Motor Count or Error Code 1. Press Service Mode Button ** 2. Press 2 for Cash Counters Cash Counters Selection – Use alpha and numeric keys 3. Press 3 for Selection to choose an individual Selection 4. Press 1 for Historical Count Hist Count ‐‐ 5. Press 2 for Historical Cash Hist Cash $‐‐.‐‐ 6. Press 3 for Reset Count Res Count ‐‐ 7. Press 4 for Reset Cash Res Cash $‐‐.‐‐ 8. Press 5 for Historical Card His Card $‐‐.‐‐ 9. Press 6 for Reset Card ...
- Page 41 For more information contact: Gumball.com (800) 260-0010 support@gumball.com 4. CONFIGURATION The following sub‐menus are included in the Configuration Menu: Date/Time Selection – Type Health Safety Auto Reinstate Language All Items – Type StS Custom Row – Type Advanced Config* DATE/TIME STEP DISPLAY Motor Count or Error Code 1. Press Service Mode Button ** 2. Press 4 for Configuration Configuration 3. ...
- Page 42 For more information contact: Gumball.com (800) 260-0010 support@gumball.com 2‐ Toggle On/Off # to Save Selection – Use alpha and number keys to select row 7. Press 3 to change one Selection ON/OFF *‐Exit, no change 3‐ Toggle On/Off # to Save 8 Press 2 to change Lower Zone Lower Zone All Items ON/OFF *‐Exit, no change 9. Press 1 to change All Items 1‐ Toggle On/Off # to Save Row – Use alpha keys to select row ON/OFF 10. Press 2 to change Row *‐Exit, no change 1‐ Toggle On/Off # to Save Selection – Use alpha and number keys to select row 11. ...
- Page 43 For more information contact: Gumball.com (800) 260-0010 support@gumball.com ALL ITEMS: TYPE STEP DISPLAY 1. Press Service Mode Button Motor Count or Error Code ** 2. Press 4 for Configuration Configuration All Items: Snack, Can or Bottle Press 4 for All Items: Type * ‐Exit, no change 1 – Edit 3. 1 to Toggle *NOTE: This should ALWAYS be set on Snack. Press # to Save Press * two times to exit 12. 0.00 ROW: TYPE (Trays 110, 120, 130 must be set to Snack, 140 to Sold Out) STEP DISPLAY 1. Press Service Mode Button Motor Count or Error Code ** 2. Press 4 for Configuration Configuration Row – Use alpha keys to enter Row ...
- Page 44 For more information contact: Gumball.com (800) 260-0010 support@gumball.com # to Save Row – Use alpha keys to select row ON/OFF 6. Press 2 to change Row *‐Exit, no change 2‐ Toggle On/Off # to Save Selection – Use alpha and number keys to select row 7. Press 3 to change one Selection ON/OFF *‐Exit, no change 3‐ Toggle On/Off # to Save 12. Press * two times to exit 0.00 SPACE TO SALES (StS) This feature is not applicable in this model and must be set to OFF. STEP DISPLAY Motor Count or Error Code 1. Press Service Mode Button ** 2. Press 4 for Configuration Configuration StS (Current setting) ...
- Page 45 For more information contact: Gumball.com (800) 260-0010 support@gumball.com StS ‐‐‐: 6. Press 9 to return to StS Menu * ‐Exit StS XXX: (in our example, 401) * ‐Exit, no change # to Save 7. Enter Selection (in our example, 140) 1 to Clear? XXX: Clear links? 8. Press 1 to clear links menu * ‐Exit, no change # to Clear? XXX: Cleared * ‐Exit, no change # Add 9. Press # to clear current links settings 1 – Clear XXX:‐‐‐ 10. Press # to add new selection * ‐Exit, no change XXX:YYY (in our example, 140) 11. Enter next selection * ‐Exit, no change # Add XXX:YYY, ZZZ ...
- Page 46 For more information contact: Gumball.com (800) 260-0010 support@gumball.com OPTICS DISABLES Note: Must be set to ON. STEP DISPLAY 1. Press Service Mode Button Motor Count or Error Code ** 2. Press 4 for Configuration Configuration Password: 3. Press 0 for Advanced Config Use keypad to enter password Optics Disables (Current Setting) 4. Press 2 for Optics Disables menu * ‐Exit, no change 2‐Edit Optics Disables (Choice Flashing) 5. Press 2 to toggle ON/OFF * ‐Exit, no change # to Save Optics Disables (New Setting) 6. Press # to save the setting * ‐Exit, no change 2‐Edit Press * three times to exit 7. ...
- Page 47 For more information contact: Gumball.com (800) 260-0010 support@gumball.com *‐Exit, no change 4‐Edit 7. Press * three times to exit 0.00 SEL STYLE Note: Must be set to 3 Digit. STEP DISPLAY 1. Press Service Mode Button Motor Count or Error Code ** 2. Press 4 for Configuration Configuration Password: 3. Press 0 for Advanced Config Use keypad to enter password Sel Style (Current Setting) 4. Press 5 for Sel Style *‐Exit, no change 5‐Edit Sel Style (Choice Flashing) 5. Press 5 to toggle 3 digit, 2 Dgt 40+, 2‐Dgt ever, */# USD *‐Exit, no change # to Save Sel Style (New Setting) 6. Press # to save the setting *‐Exit, no change 5‐Edit 7. Press * three times to exit 0.00 5.
- Page 48 For more information contact: Gumball.com (800) 260-0010 support@gumball.com BILL ESCROW Allows the last bill accepted to be returned, provided the bill acceptor is capable of such a feature. STEP DISPLAY 1. Press Service Mode Button Motor Count or Error Code ** 2. Press 5 for Options Menu Options Bill Escrow (Current Setting) 3. Press 2 for Bill Escrow Menu * ‐Exit 2‐Edit Bill Escrow (Choice Flashing) 4. Press 2 to toggle between ON and OFF * ‐Exit #‐Save Bill Escrow (New Setting) 5. Press # to save the setting * ‐Exit 2‐Edit Press * three times to exit 6. 0.00 MULTI VEND Allows the customer to purchase more than one product if enough credit has been deposited. ...
- Page 49 For more information contact: Gumball.com (800) 260-0010 support@gumball.com Free Vend (New Setting) 5. Press # to save the setting * ‐Exit 4‐Edit Press * three times to exit 6. 0.00 FAST CHANGE Enables the vending machine to give change immediately after the customer makes a selection. If Fast Change is ON, it overrides the Multi Vend feature. STEP DISPLAY 1. Press Service Mode Button Motor Count or Error Code ** 2. Press 5 for Options Menu Options Fast Change (Current Setting) 3. Press 5 for Fast Change Menu * ‐Exit 5‐Edit Fast Change (Choice Flashing) 4. Press 5 to toggle between ON and OFF * ‐Exit #‐Save Fast Change (New Setting) 5. ...
- Page 50 For more information contact: Gumball.com (800) 260-0010 support@gumball.com * ‐Exit 1‐Edit Row: X (Choice Flashing) 6. Press 1 to toggle between ON and OFF * ‐Exit #‐Save Row: X (New Setting) 7. Press # to save the setting * ‐Exit 1‐Edit 8. Repeat Steps 4 through 7 until all desired rows are completed. Press * to enter another Row or four times to exit 7. 0.00 OPTICS BY SELECTION STEP DISPLAY 1. Press Service Mode Button Motor Count or Error Code ** 2. Press 5 for Options Menu Options 3. Press 6 for Optical Vend Menu Optical Vend Item: ‐‐...
- Page 51 For more information contact: Gumball.com (800) 260-0010 support@gumball.com SET POINT Displays the factory default Set Point temperature for each machine type. See Temp section for the specific machine refrigeration modes. Ambient snack machines without a refrigeration system will display 43 °F. These temperatures may be adjusted, however it is not advised without direction by an authorized technician. The optimal temperatures have been set according to NAMA specifications for optimal product safety. Before making any adjustment see Temp and Health Safety section. STEP DISPLAY 1. Press Service Mode Button Motor Count or Error Code ** 2. Press 5 for Options Menu Options Setpoint (Current Setting)F 3. Press 8 for Set Point * ‐Exit 8‐Edit Setpoint (Choice Flashing)F 4. Press 8 to edit the temperature Set Point * ‐Exit #‐Save Setpoint (New Temp)F Continue pressing 8 until the desired temperature is 5. * ‐Exit 8‐Edit shown on the display Setpoint (New Setting)F ...
- Page 52 For more information contact: Gumball.com (800) 260-0010 support@gumball.com 6. ADVANCED FEATURES* This menu requires a password. The following sub‐menus are included in the Advanced Features menu: Discount Shutdown Exact Change Energy Savings Unconditional Acceptance Pair Degrees Max Change DISCOUNT This menu uses various sub‐menu settings to allow a different price for selections at different times or on different days. STEP DISPLAY 1. Press Service Mode Button Motor Count or Error Code ** 2. Press 6 for Password (Advanced Features) Menu Password 3. Enter Password (default 2314) Advanced Features ...
- Page 53 For more information contact: Gumball.com (800) 260-0010 support@gumball.com 20. Press 6 two times for Stop Time menu Stop Time New Time 21. Press 6, then enter Start Time in 24‐hr time (HH:MM) * ‐Exit #‐Save New Time 22. Press # to save the time * ‐Exit 6‐Edit Press * two times to return to Discount menu 23. Discount Discount (Current Value) 24. Press 7 for Discount Value menu * ‐Exit 7‐Edit Discount (New Value) Press 7, then enter new Discount Value (Enter the new 25. * ‐Exit #‐Save price at which to sell the item) Discount (New Setting) 26. Press # to save the discount value * ‐Exit #‐Save ...
- Page 54 For more information contact: Gumball.com (800) 260-0010 support@gumball.com All Days (New Setting) 13. Press # to save the setting * ‐Exit 1‐Edit Mon (Choice Flashing) 14. Press 2 to toggle Monday ON/OFF * ‐Exit 2‐Edit Mon (New Setting) 15. Press # to save the setting * ‐Exit 2‐Edit Use numbers 3‐8 to complete the other days of the week using steps 14 and 15. Press * two times to return to Discount menu 16. Discount (Current Time) 17. Press 5 two times for Start Time menu * ‐Exit 5‐Edit New Time 18. Press 5, then enter Start Time in 24‐hr time (HH:MM) * ‐Exit #‐Save New Time 19. ...
- Page 55 For more information contact: Gumball.com (800) 260-0010 support@gumball.com Selection: ‐‐ 5. Press 3 for Selection menu * ‐Exit Selection XX: (Current Setting) 6. Enter Selection number * ‐Exit 3‐Edit Selection XX: (Choice Flashing) 7. Press 1 to toggle Selection ON/OFF * ‐Exit #‐Save Selection XX: (New Setting) 8. Press # to save the setting * ‐Exit 3‐Edit Press * once to enter another row or two times to return 9. Discount to Discount menu 10. Press 4 for Day menu All Days (Current Setting 11. Press 1 for All Days * ‐Exit 1‐Edit All Days (New Setting) ...
- Page 56 For more information contact: Gumball.com (800) 260-0010 support@gumball.com Enable (Choice Flashing) 29. Press 9 for Enable Discount menu * ‐Exit 9‐Edit Enable (Choice Flashing) 30. Press 9 to toggle Enable ON/OFF * ‐Exit #‐Save Enable (New Setting) 31. Press # to save the setting * ‐Exit 9‐Edit Press * five times to exit to Sales Mode 32. 0.00 EXACT CHANGE Sets the coin tube value that will trigger the display to show Please Use Exact Change message. For example, if Exact Change is set to $5.00, the message will display when the total of coins in the tube, as counted by the VMC, is at or below $5.00 total. STEP DISPLAY 1. Press Service Mode Button Motor Count or Error Code ** 2. Press 6 for Password (Advanced Features) Menu Password 3. ...
- Page 57 For more information contact: Gumball.com (800) 260-0010 support@gumball.com UNCONDITIONAL ACCEPTANCE Sets the unconditional acceptance value. All cash box coins or bills equal to or less than this set value will be accepted, even if the changer cannot return an equal amount of change. When set to 0 (zero), all changer tube coins are accepted. Bills are accepted once there is enough change in the changer to pay back the bill type. Note: the Unconditional Acceptance set value is adjustable but the maximum value is equal to the largest denomination of currency or coin accepted by the changer or validator. STEP DISPLAY 1. Press Service Mode Button Motor Count or Error Code ** 2. Press 6 for Password (Advanced Features) Menu Password 3. Enter Password (default 2314) Advanced Features Uncond Accept: (Current Setting) 4. Press 3 for Unconditional Acceptance menu * ‐Exit #‐Edit Uncond Accept: (New Setting) 5. Press 3 then enter value * ‐Exit #‐Save Uncond Accept: (New Setting) 6. Press # to save the setting * ‐Exit #‐Save Press ...
- Page 58 For more information contact: Gumball.com (800) 260-0010 support@gumball.com selected for shutdown, then the message, “Vending Operation to Resume at hh.mm,” will be displayed. If a row or individual selection has been set for Shutdown, the same message displays once every time the customer makes that selection or selections (row). NOTE: the correct time and date must be set so that the shutdown intervals work correctly. See Time and Date section of this manual. Also, for any given day these four time intervals may overlap each other. For each interval, the VMC can be programmed from no days up to every day of the week on which the specified shutdown time intervals are active. STEP DISPLAY 1. Press Service Mode Button Motor Count or Error Code ** 2. Press 6 for Password (Advanced Features) Menu Password 3. Enter Password (default 2314) Advanced Features 4. Press 5 for Shutdown Shutdown 5. Press 1 for Interval1 (2 for Interval2, and so on) Interval1 All Items (Current Setting) 6. Press 1 to for All Items * ‐Exit 1‐Edit All Items (Choice Flashing) 7. Press 1 to toggle ON/OFF ...
- Page 59 For more information contact: Gumball.com (800) 260-0010 support@gumball.com 21. Press 6 two times for Stop Time menu Stop Time New Time 22. Press 6, then enter Stop Time in 24‐hr time (HH:MM) * ‐Exit #‐Save New Time 23. Press # to save the time * ‐Exit 6‐Edit Press * two times to return to Shutdown 24. Shutdown 25. Press 2, 3 or 4 to edit Intervals 2, 3 or 4 IntervalX Lighting (Current Setting) 26. Press 8 for Lighting menu * ‐Exit 8‐Edit Press 8 to toggle Lighting ON/OFF Lighting (Choice Flashing) 27. Lighting ON turns off lights during Energy Saving interval * ‐Exit 8‐Edit Lighting OFF leaves lights on during Energy Saving interval ...
- Page 60 For more information contact: Gumball.com (800) 260-0010 support@gumball.com Use numbers 3‐8 to complete the other days of the week using steps 15 and 16. Press * two times to return to Shutdown menu 16. Shutdown (Current Time) 17. Press 5 two times for Start Time menu * ‐Exit 5‐Edit New Time 18. Press 5, then enter Start Time in 24‐hr time (HH:MM) * ‐Exit #‐Save New Time 19. Press # to save the time * ‐Exit 5‐Edit Press * two times to return to Shutdown menu 20. Shutdown 21. Press 6 two times for Stop Time menu Stop Time New Time 22. Press 6, then enter Start Time in 24‐hr time (HH:MM) * ‐Exit #‐Save ...
- Page 61 For more information contact: Gumball.com (800) 260-0010 support@gumball.com Mon (New Setting) 15. Press # to save the setting * ‐Exit 2‐Edit Use numbers 3‐8 to complete the other days of the week using steps 15 and 16. Press * two times to return to Shutdown menu 16. Shutdown (Current Time) 17. Press 5 two times for Start Time menu * ‐Exit 5‐Edit New Time 18. Press 5, then enter Start Time in 24‐hr time (HH:MM) * ‐Exit #‐Save New Time 19. Press # to save the time * ‐Exit 5‐Edit Press * two times to return to Shutdown menu 20. Shutdown 21. Press 6 two times for Stop Time menu Stop Time ...
- Page 62 For more information contact: Gumball.com (800) 260-0010 support@gumball.com * ‐Exit 1‐Edit Mon (Choice Flashing) 10. Press 2 to toggle Monday ON/OFF * ‐Exit 2‐Edit Mon (New Setting) 11. Press # to save the setting * ‐Exit 2‐Edit Use numbers 3‐8 to complete the other days of the week using steps 10 and 11. Press * two times to return to Interval1 menu 12. Interval1 (Current Time) 13. Press 5 two times for Start Time menu * ‐Exit 5‐Edit New Time 14. Press 5, then enter Start Time in 24‐hr time (HH:MM) * ‐Exit #‐Save New Time 15. Press # to save the time * ‐Exit 5‐Edit Press ...
- Page 63 For more information contact: Gumball.com (800) 260-0010 support@gumball.com Pair ‐ ‐ ‐ 4. Press 7 for Pair menu * ‐Exit Pair 013 to ‐‐‐ 5. Enter the first motor number * ‐Exit #‐Add Pair 013 to 015 6. Press # and enter the 2 motor number * ‐Exit #‐Save Pair ‐ ‐ ‐ Press * two times to add another pair of motors or 7. * ‐Exit #‐Save Press * five times to exit to Sales Mode 8. 0.00 DEGREES ...
- Page 64 For more information contact: Gumball.com (800) 260-0010 support@gumball.com This function tests all motors in sequence automatically. To stop the test, press * to exit. NOTE: All selections should be empty prior to performing this test. STEP DISPLAY 1. Press Service Mode Button Motor Count or Error Code ** Selection: (First Selection) 2. Press 9 for Selection motor test menu * ‐Stop Press * to exit to Sales Mode 3. 0.00 10. TEST MODES This menu contains diagnostic tests and settings for the following systems: Relays System Logs* Vigilant Vend Sensor On Door Drop Bias Setting* Manual Defrost STEP ...
- Page 65 For more information contact: Gumball.com (800) 260-0010 support@gumball.com MENU HIERARCHY 1 – Price Program 1-1 All Items 1-2 Row 1-3 Selection 1-4 Coupon – 1 All, 2 Row, 3 Item 1-5 Token – 1 All, 2 Row, 3 Item 1-6 Combo 2 –...
- Page 66 For more information contact: Gumball.com (800) 260-0010 support@gumball.com 7 – Motors 8 – Selection 9 – Selection: All 0 – Test Modes 0-1 Relays 0-2 Vend Sensor 0-3 Drop Bias Setting* 0-4 System Logs* 0-5 On Door 0-6 Manual Defrost ERROR CODE MESSAGES ...
- Page 67 For more information contact: Gumball.com (800) 260-0010 support@gumball.com Motor Errors Error Message Description Possible Solutions Motor [Number] Open The motor indicated or harness to Check the motor and motor that motor has an open electrical harness for open connections. connection. Test vend motor. Replace if necessary. Motor [Number] Short The motor or harness has an Check motor and motor harness electrical short. for short. Replace if necessary. Motor [Number] Home The motor home switch was not Check motor type service mode Sns detected while the motor was in setting, motor, motor switch and operation. This may also indicate a then spiral for blockage. Test vend motor jam condition. selection motor if necessary. Motor [Number] Jam A motor jam has been detected. Check motor and spiral for blockage. Motor [Number] Errors One or more motor errors have been ...
- Page 68 For more information contact: Gumball.com (800) 260-0010 support@gumball.com Coin Mech Tube Sns The coin changer has reported a tube See changer service manual. sensor error. Coin Mech Inlet The coin changer has reported an Check changer tubes. See changer acceptor blockage. service manual. Coin Mech Tube Jam The coin changer has reported a tube Check changer tubes. See changer payout error. service manual. Coin Mech ROM The coin changer has reported a See changer service manual. program memory error. Coin Mech Excess Esc The coin changer has reported that a Check changer escrow lever large number of coin escrow requests position. have occurred. Coin Mech Coin Jam The coin changer has reported that a Check changer coin path. See coin is jammed in the coin path. changer service manual. Coin Mech Low Accept The VMC has seen a low acceptance Review inserted coins. See rate on coins. ...
- Page 69 For more information contact: Gumball.com (800) 260-0010 support@gumball.com Refrigeration Your beverages are kept cold by a high efficiency refrigeration system having two air circulation fans to chill the cans and bottles. The refrigeration unit can be easily accessed by opening the Front Door. Remove the blue thumb screws from the center of the refrigeration deck and unplug the wire harnesses on the side of the deck (Fig. 25). The refrigeration deck can now be pulled out from the machine. Note: Make sure you unplug wire harnesses and feed the harnesses back through the divider wall before pulling the refrigeration deck all the way out of the machine. Do not tip the refrigeration deck more than 20° in any direction. The refrigeration deck is a modular system consisting of Compressor, Condenser, Condenser fan, Evaporator, Evaporator Fans, Accumulator or Dryer, and Temperature Sensor which communicates to the VMC. The temperature is pre‐set at the factory for efficient and effective operation. Figure 23 – Refrigeration unit Unplug Temp Sensor Harness Condenser Unplug Power Gently Harness clean fins on a Do not unplug regular ...
-
Page 70: Refrigeration
For more information contact: Gumball.com (800) 260-0010 support@gumball.com Refrigeration Refrigeration is the transfer of heat from one area to another. In the case of this machine we are transferring the heat from the area containing the beverage selections to the outside of the machine and dissipating the heat throughout the room. The more heat we are able to transfer away from the beverages the colder they become. This process is accomplished by the use of a sealed compressing system using an ozone friendly gas commonly known as R134a refrigerant. The system is comprised of several key mechanical components: the condenser, the evaporator and the compressor. The condenser is located in the lower front left of the machine and it is where the heat is dissipated from the cooling process and blown to the outside of the machine. The evaporator is located inside the machine towards the back of the cooling system underneath the beverage unit section being cooled. Its purpose is to absorb the heat from the drink selections and provide the cool air needed to refrigerate the beverages. The compressor is the heart of the cooling system and its purpose is to provide pressure and circulation of the refrigeration gas. ... -
Page 71: Refrigeration Status Display
For more information contact: Gumball.com (800) 260-0010 support@gumball.com Refrigeration Status Display Use the “#” key on the Keypad to display the current temperature: Figure 24 – Refrigeration Indicators on LCD Display Current Temperature in Vertical Drop Beverage Area EL950.1.1.1062C.4-2017 Page 71... -
Page 72: Troubleshooting
For more information contact: Gumball.com (800) 260-0010 support@gumball.com Troubleshooting SELECTION DISPLAYS SOLD OUT WHEN PRODUCT IS PRESENT 1. Product is not loaded correctly. Ensure product is located to the front of the column and depresses sold out indicator. Sold out switch wire harness not connected. Sold out switch defective NO DISPLAY ON THE FRONT PANEL 2. Harness may be unplugged Transformer circuit breaker tripped Restart machine Faulty display harness Display board defective SELECTION WILL NOT VEND 3. Tray or Motor connection unplugged or faulty connection Vend mechanism binding on tray Product jammed Defective motor... - Page 73 For more information contact: Gumball.com (800) 260-0010 support@gumball.com UNIT WILL NOT ACCEPT MONEY 6. Verify Payment Systems are enabled using Service Mode All Prices are set to zero or machine is set to Free Vend Note: Will not accept bill if coins in coin changer below the minimum level Note: Will not accept more than one bill if the bill equal or exceeds the highest priced item. No power to system control board Coin Mechanism or Bill acceptor defective. Harness to payment system is disconnected or faulty. MACHINE WILL NOT COOL 7. Press the “#” key on the keypad to get a temperature reading Verify that Temp Set is 43° F in Service Mode. Note: Setting the temperature too cold will put your evaporator at risk of freezing up. Verify that all fans are running Clean the condenser Remove your refrigeration deck and inspect for ice. EL950.1.1.1062C.4-2017 Page 73...
- Page 74 For more information contact: Gumball.com (800) 260-0010 support@gumball.com FREQUENTLY ASKED QUESTIONS Keypad What do I do if my keypad isn’t responding, displays double the number pressed or displays a different number? 1. If not responding, check the connection at the VMC to make sure it’s secure. Examine the whole keypad harness to make sure there is no damage to the harness. 2. If the wrong number or a double number appears, locate the mounting plate inside the machine, and you will see a series of nuts in each corner of the mounting plate. Loosen each one of those a half to full turn. Power the machine off for 10 seconds then power back up and test the keypad. Changer My vendor won’t accept change, how do I fix this? 1. Check to make sure the changer has power. 2. Check your payment device setting and make sure that the changer is enabled. 3. Check to make sure there are no coins jammed in the changer. 4. Check to make sure the coin return mechanism is releasing all the way. What does it mean when the lights on top of the changer are flashing? 1. If the amber C/C light is flashing, it means that the lower coin cassette is not fully engaged. Remove the lower coin cassette, line up correctly and reinsert. 2. If the red DIS light is flashing, it means that there is a jam located in the upper cassette. You can clear that by opening the clear center access door or opening the flap on top to check for interior jams. Bill Validator My vendor won’t accept bills, what do I do? 1.
- Page 75 For more information contact: Gumball.com (800) 260-0010 support@gumball.com Beverage Vending My beverages aren’t vending at all. 1. Make sure all items are loaded correctly. 2. Make sure all product loaded is installed in the correct selection. Load product according to the machine Plan‐O‐Gram. A change from the Plan‐O‐Gram may require new setup. See the Loading Beverage Lanes section of this manual and study the Product Groups and how to load them and accessories required (if any). 3. Make sure the Sensitivity Adjust (Menu > 5 Options > 9 Sensitivity Adjust, see Programming section of this manual) is set properly. If the sensitivity is set too high, the sensor may trip before the product drops and stop the vend process prematurely. Under advisement from technical support, change the sensitivity from high to medium or medium to low and test vend. My beverages are vending more than one at a time. 1. Make sure all items are loaded correctly. Review Loading Beverage Lanes section of this manual and verify all recommendations and steps are followed for your type of packaging. 2. Make sure the Drop Sensor Sensitivity (Menu > 5 Options > 9 Drop Sensor, see Programming section of this manual) is set properly. If the sensitivity is set too low, the sensor may not trip when the product drops and perform a second vend. Under advisement from technical support, change the sensitivity from medium to high or low to medium and test vend. The selection vends fine in Test Mode, but during Sales Mode says Make Alternate Selection. 1. You have an error code or a jam blocking the use of that particular selection. You will need to empty all products and make sure there are no jams. Return the auger to the home position and reload the product. Then go to the menu and clear the errors. This will allow you to resume vending from that particular selection(s). Power ...
- Page 76 For more information contact: Gumball.com (800) 260-0010 support@gumball.com Figure 25 – Wiring Diagram EL950.1.1.1062C.4-2017 Page 76...
- Page 77 Freeport IL 61032 Seaga will repair or replace, at our option, any covered part which meets the provisions herein during the warranty period. It is our discretion to replace defective parts with comparable parts. Seaga reserves the right to make changes or improvements in its products without notice and without obligation, and without being required to make corresponding changes or improvements in equipment already manufactured or sold.
Need help?
Do you have a question about the N2G5000 and is the answer not in the manual?
Questions and answers