
Related Manuals for vogel's PFW 6854


Summary of Contents for vogel's PFW 6854
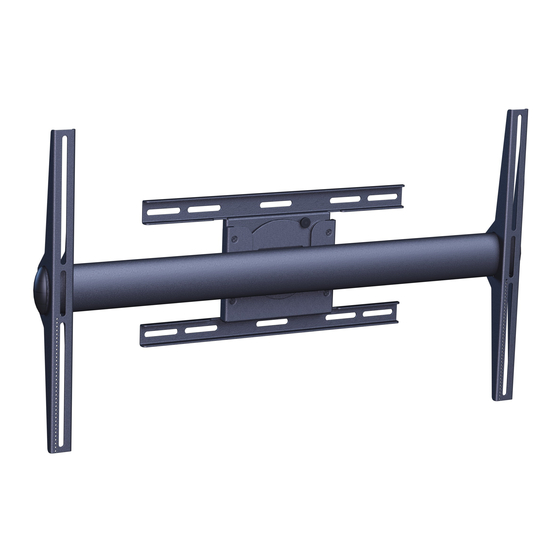
- Page 1 PFW 6854 Display Wall Mount, Rotating Installation Guide Installationsanleitung, Guía de Instalacíon, Guida de Installazione, Guide d’Installation, Installatie gids Max: 72kg/160lbs MOUIN_PFW6854_V02...
-
Page 2: Parts List
This mount is shipped with all installation hardware and components. Make sure that none of these parts are missing and/or damaged before beginning installation. Universal Mounting Brackets (Qty 2) Rotating Universal Bracket Bar (Qty 1) PFW 6854 Mounting Bracket (Qty 1) 5/16” x 3” Lag Bolts - wooden studs 5/16” Flat Washers M6 Knurl Knob Griplate™... -
Page 3: Installation Tools
PFW 6854 Installation Tools Phillips Head Screw Driver Soft Material/Blanket 1/2” Socket and Wrench Pencil Tape Measure Drill Gun Level (Supplied) M5 Allen Wrench (Supplied) 5/32” Allen Wrench (Supplied) 1/4” Drill Bit (Pilot Holes) Thread Depth Indicator (Supplied) Masonry Drill Bit (Concrete Applications - Commercially Available) - Page 4 PFW 6854 The nylon spacers may be stacked to achieve proper spacing. 9/16" Nylon spacers 1/4" Nylon spacers (large) (Qty 8) (Qty 8) 1/2" Nylon spacers Nylon sleeves (large) (Qty 8) (Qty 12) 5/16" Flat washers (metal) (Qty 8) 1" Nylon Spacers (Qty 8) 1/4"...
-
Page 5: Thread Depth Indicator
PFW 6854 Thread Depth Indicator 1. Insert the thread depth indicator (supplied) through the thread inserts found on the back of the flat panel to make sure the inserts measure the same full depth and mark it (Figure 1). 2. Locate the correct diameter screw for the thread insert. Compare your marking to the screws (supplied). -
Page 6: Mount Installation
PFW 6854 Mount Installation Step 1 Step 2 Step 3 Determine where the mount lo- Once the stud has been located, use a Using a 1/4” drill bit, drill the upper mount- cation will be. Use a stud finder pencil to mark the spot. - Page 7 PFW 6854 Concrete Mounting Concrete anchors must be used for concrete installation. They can be purchased at your local hardware store. The mounting surface must be a minimum 6” thick. Begin by placing the mount into position against the wall, keeping it level.
- Page 8 To access the knurl knob/security screw location while the display is attached, the PFW 6854 must be rotated to the “portrait” position (vertical position Tighten the two (2) Phillips head screws (located on the side of the mounting block) once the final position is attained.
-
Page 9: Display Orientation
The PFW 6854 will allow the user to adjust the display a full 360°. BEFORE ROTATING THE PFW 6854, MAKE SURE THAT THE M6 KNURL KNOB IS SECURELY FASTENED TO THE PFW 6854. ALSO, PLEASE MAKE SURE YOU ALLOW ENOUGH CABLE AND WIRE CLEARANCE FOR FULL ROTATION. - Page 10 Lock-It™ Security Hardware Pack The PFW 6854 is shipped with a safety knurl knob already installed. If the user decides to incorporate the optional security hardware, the following steps will show the user how to effectively remove the safety knurl knob and install the optional Lock-It™ hardware kit.
Need help?
Do you have a question about the PFW 6854 and is the answer not in the manual?
Questions and answers