
Related Manuals for vogel's PFW 6875


Summary of Contents for vogel's PFW 6875
- Page 1 PFW 6875 Installation Guide Installationsanleitung, Guía de Instalacíon, Guida de Installazione, Guide d’Installation, Installatie gids www.vogels.com | Europe +31 (0)40 26 47 400...
-
Page 2: Included Components
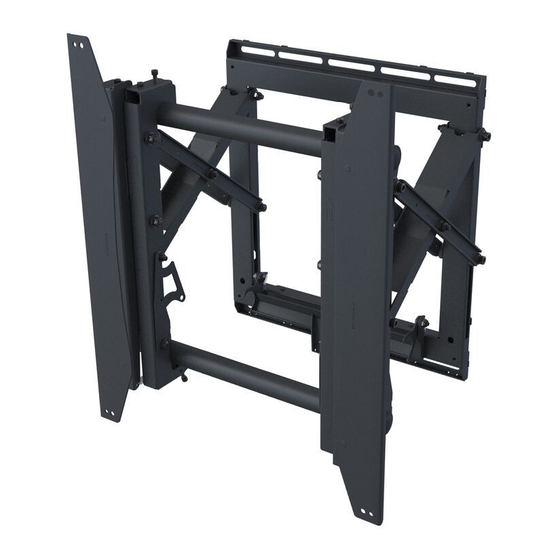
PFW 6875 Maximum Flat Panel Weight: 160 lb. / 72.57 kg. Installation Guide Installationsanleitung, Guía de Instalacíon, Guida de Installazione, Guide d’Installation, Installatie gids Included Components Wall Mount Extension Brackets Bracket (Qty 1) (Qty 2) (Qty 1 Pair) 5/16” Flat Washers... -
Page 3: Wood Stud Installation
PFW 6875 Installation Guide Installationsanleitung, Guía de Instalacíon, Guida de Installazione, Guide d’Installation, Installatie gids Wood Stud Installation Use a pencil to mark the upper right mounting location of the wall Use a stud finder to determine the wall studs in the stud. - Page 4 PFW 6875 Installation Guide Installationsanleitung, Guía de Instalacíon, Guida de Installazione, Guide d’Installation, Installatie gids 1) Level the mount Drill a “pilot hole” in each of the three (3) marks with a power drill and 2) Use a pencil to mark the remaining three (3) mounting locations a M6 or 1/4”...
-
Page 5: Concrete Wall Installation
PFW 6875 Installation Guide Installationsanleitung, Guía de Instalacíon, Guida de Installazione, Guide d’Installation, Installatie gids Concrete Wall Installation Drill a “pilot hole” in each of the four (4) mark areas with a M8 or Two people recommended for this step; one person to level the 5/16”... -
Page 6: Installing Optional Model Specific Spacers
Make sure the spacer is plumb and level and mark each corner where the PFW 6875 will be mounted (or secure to the wall). It is best to start from the bottom corner and work your way up. -
Page 7: Selecting The Mounting Hardware
Mark Mark Securing the Adapters Optional adapters are available with your PFW 6875 mount. Secure the adapters to the PFW 6875 brackets with the supplied M8 washers and Nuts. M8 Nylon nut M8 Washer www.vogels.com | Europe +31 (0)40 26 47 400... -
Page 8: Universal Washer Installation
PFW 6875 Installation Guide Installationsanleitung, Guía de Instalacíon, Guida de Installazione, Guide d’Installation, Installatie gids Universal Washer Installation Universal Washers are designed to accommodate the various M4, M5, M6 and M8 hole sizes required by flat-panels. M5, M6 Do not place excessive pressure on the back of the flat-panel, as this may damage your flat-panel. -
Page 9: Attaching The Flat-Panel To The Mount
PFW 6875 Installation Guide Installationsanleitung, Guía de Instalacíon, Guida de Installazione, Guide d’Installation, Installatie gids Attaching the Mount Bracket to the Flat-Panel Place your flat-panel screen-side down on a soft, flat surface. Identify the number and location of the thread inserts on the back of your flat-panel. -
Page 10: Locking Safety Screw Installation
Installationsanleitung, Guía de Instalacíon, Guida de Installazione, Guide d’Installation, Installatie gids Locking Safety Screw Installation The locking safety screws keep the flat-panel from being accidently dislodged from the PFW 6875. Locate the pre-installed security locking safety screw at the bottom of each of the mounting brackets. - Page 11 PFW 6875 Installation Guide Installationsanleitung, Guía de Instalacíon, Guida de Installazione, Guide d’Installation, Installatie gids Tilt Left Left Control Right Control Tilt Right Left Control Right Control Tilt Up Left Control Right Control Tilt Down (from tilted-up position) Left Control Right Control www.vogels.com | Europe +31 (0)40 26 47 400...
-
Page 12: Rotate Left
PFW 6875 Installation Guide Installationsanleitung, Guía de Instalacíon, Guida de Installazione, Guide d’Installation, Installatie gids Level Up Left Control Right Control Level Down (from leveled up position) Left Control Right Control Rotate Left Left Control Right Control Rotate Right Left Control Right Control www.vogels.com | Europe +31 (0)40 26 47 400... - Page 13 PFW 6875 Installation Guide Installationsanleitung, Guía de Instalacíon, Guida de Installazione, Guide d’Installation, Installatie gids Use the GAPit GO/No Go Gauge (supplied with model specific spacer) as a final step in the process to inspect and adjust the gap to prevent costly replacement and extend the lifespan of the displays.
- Page 14 Installationsanleitung, Guía de Instalacíon, Guida de Installazione, Guide d’Installation, Installatie gids Servicing Push evenly in the front of the PFW 6875 to release the single latch spring lock(Figure 1). Slowly pull the front of the PFW 6875 to extend the scissor arms (Figure 2).
Need help?
Do you have a question about the PFW 6875 and is the answer not in the manual?
Questions and answers