Table of Contents
Advertisement
Quick Links
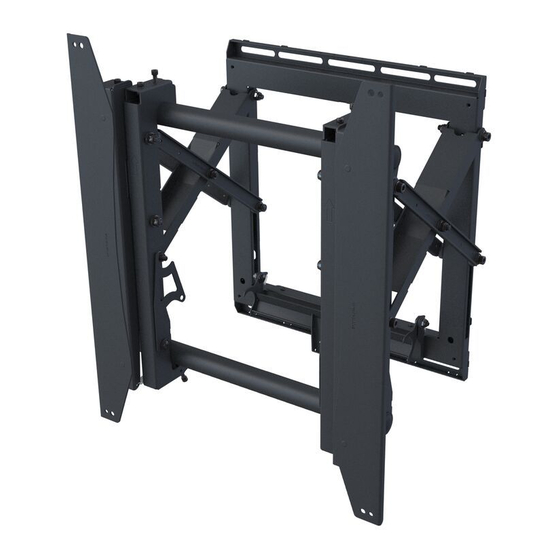
PFW 6875
PFW 6875
Installation Guide
Installation Guide
Installationsanleitung, Guía de Instalacíon, Guida de Installazione, Guide d'Installation, Installatie gids
Installationsanleitung, Guía de Instalacíon, Guida de Installazione,
Guide d'Installation, Installatie gids
www.vogels.com | Europe +31 (0)40 26 47 400
Max: 72,5kg/160lbs
MOUIN_PFW6875_V2
Advertisement
Table of Contents

Subscribe to Our Youtube Channel
Related Manuals for vogel's PFW 6875


Summary of Contents for vogel's PFW 6875
- Page 1 PFW 6875 PFW 6875 Installation Guide Installation Guide Installationsanleitung, Guía de Instalacíon, Guida de Installazione, Guide d’Installation, Installatie gids Installationsanleitung, Guía de Instalacíon, Guida de Installazione, Guide d’Installation, Installatie gids www.vogels.com | Europe +31 (0)40 26 47 400 Max: 72,5kg/160lbs...
-
Page 2: Included Components
PFW 6875 Installation Guide Installationsanleitung, Guía de Instalacíon, Guida de Installazione, Guide d’Installation, Installatie gids Maximum Flat Panel Weight: Included Components 160 lb. / 72.57 kg. Wall Mount Bracket Extension Brackets (Qty 1) (Qty 1 Pair) (Qty 2) 5/16” Flat Washers... -
Page 3: Wood Stud Installation
PFW 6875 Installation Guide Installationsanleitung, Guía de Instalacíon, Guida de Installazione, Guide d’Installation, Installatie gids Wood Stud Installation Use a pencil to mark the upper right mounting location 1. Use a stud finder to determine the wall studs in of the wall stud. - Page 4 PFW 6875 Installation Guide Installationsanleitung, Guía de Instalacíon, Guida de Installazione, Guide d’Installation, Installatie gids 1. Level the mount Drill a pilot hole in each of the three (3) marks with a 2. Use a pencil to mark the remaining three (3) power drill and a M6 or 1/4”...
-
Page 5: Concrete Wall Installation
PFW 6875 Installation Guide Installationsanleitung, Guía de Instalacíon, Guida de Installazione, Guide d’Installation, Installatie gids Concrete Wall Installation Two people recommended for this step; one person Drill a pilot hole in each of the four (4) mark areas to level the mount and another person to mark the with a 3/8”... -
Page 6: Installing Optional Model Specific Spacers
PFW 6875 Installation Guide Installationsanleitung, Guía de Instalacíon, Guida de Installazione, Guide d’Installation, Installatie gids Installing OPTIONAL Model Specific Spacers Level For ease of installation Mount the PFW6875 to the desired location. Model-specific spacers are availible for most flat-panel Align and Level the spacer to the corner register tabs displays. -
Page 7: Selecting The Mounting Hardware
Selecting the Mounting Hardware Insert a small straw or toothpick into the threaded inserts found on the back of the flat-panel. Use a pencil to mark the depth of the threaded insert on the small straw or toothpick. Mark the straw or toothpick 1/8” above the depth of the threaded insert, as shown in Figure 1. -
Page 8: Universal Washer Installation
PFW 6875 Installation Guide Installationsanleitung, Guía de Instalacíon, Guida de Installazione, Guide d’Installation, Installatie gids Universal Washer Installation Universal Washers are designed to accommodate the various M4, M5, M6 and M8 hole sizes required by flat-panels. Place the flat-panel screen-side down on a soft, flat surface. -
Page 9: Attaching The Flat-Panel To The Mount
PFW 6875 Installation Guide Installationsanleitung, Guía de Instalacíon, Guida de Installazione, Guide d’Installation, Installatie gids Attaching the Flat-Panel to the Mount Place your flat-panel screen-side down on a soft, flat surface. Identify the number and location of the thread inserts on the back of your flat-panel. -
Page 10: Locking Safety Screw Installation
PFW 6875 Installation Guide Installationsanleitung, Guía de Instalacíon, Guida de Installazione, Guide d’Installation, Installatie gids Attaching the Flat-Panel to the Mount Mounting bracket adjustments are factory pre-set (see Note). This section requires two people. Do not release the flat-panel prematurely. The top and bottom... - Page 11 PFW 6875 Installation Guide Installationsanleitung, Guía de Instalacíon, Guida de Installazione, Guide d’Installation, Installatie gids MOVE INWARD Left Right Control Control BOTTOM BOTTOM MOVE OUTWARD Left Right Control Control BOTTOM BOTTOM TILT UP AND/ BOTTOM BOTTOM BOTTOM BOTTOM TILT DOWN...
- Page 12 PFW 6875 Installation Guide Installationsanleitung, Guía de Instalacíon, Guida de Installazione, Guide d’Installation, Installatie gids LEVEL UP Left Right Control Control LEVEL LEVEL LEVEL DOWN Left Right Control Control LEVEL LEVEL ROTATE LEFT Left Right Control Control LEVEL LEVEL ROTATE RIGHT...
- Page 13 PFW 6875 Installation Guide Installationsanleitung, Guía de Instalacíon, Guida de Installazione, Guide d’Installation, Installatie gids Use the GAPit GO/No Go Gauge (supplied with model specific spacer) as a final step in the process to inspect and adjust the gap to prevent costly replacement and extend the lifespan of the displays.
- Page 14 PFW 6875 Installation Guide Installationsanleitung, Guía de Instalacíon, Guida de Installazione, Guide d’Installation, Installatie gids Servicing 1. Push evenly in the front of the PFW6875 to release the single latch spring lock (Figure 1). 2. Slowly pull the front of the PFW6875 to extend the scissor arms (Figure 2).
Need help?
Do you have a question about the PFW 6875 and is the answer not in the manual?
Questions and answers