
Subscribe to Our Youtube Channel
Related Manuals for Leica Geosystems TPS700 Series


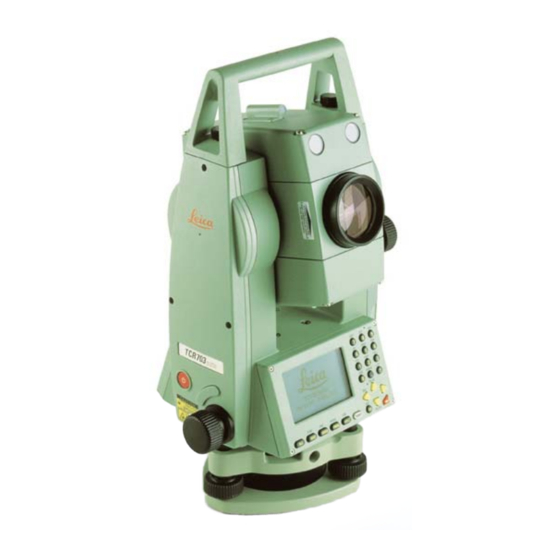
Summary of Contents for Leica Geosystems TPS700 Series
- Page 1 TPS700 Performance Series: TPS700auto Steps Productivity A Leica Advantage Self Study Guide Page 1...
- Page 2 Introduction Welcome to “TPS700auto: Three Steps to • Productivity”. Three Steps to Productivity is a Leica Advantage • Self Study Guide and is designed to familiarize you with the key components of your new TPS700auto Total Station. Three Steps to Productivity will not teach you how •...
- Page 3 Before You Start Before you start, please read the • following pages from the “TPS700 Performance Series User Manual” (Version 2.0): Introduction, pages 6-11 • Measuring Preparation / Setting Up, • pages 15 – 20, 23-24, This study guide will refer to exercises •...
- Page 4 Contents Step Configuring • Step Surveying • Step Setting Out • Page 4...
- Page 5 Step : Configuring Configuring • There are many ways to configure your • TPS700auto Total Station. This Self Study will step you through one way • to do it. It’s not the only way, or necessarily the best, but will serve as a basis for learning. Set your instrument up next to your PC.
- Page 6 Step : Configuring Configuring your • TPS700auto: When you turn your ----------MEAS & REC-----------1/4 • instrument on, you will see a Pt Id screen similar to the one on TgHt 0.000 m the left. This is the Measure and Record screen. 68º44’32”...
- Page 7 Step : Configuring From the System Menu • screen: Use the Arrow keys to move SYSTEM MENU • the cursor to [3] All Settings, 1 DATA Manager then press the ENTER key. 2 Quick Settings/User-k The result is the ALL •...
- Page 8 Step : Configuring From the ALL SETTINGS • MENU: Use the Arrow keys to move ALL SETTINGS MENU • the cursor to [1] System 1 System Settings Settings, then press the 2 Angular & Compensator ENTER key. 3 Measurement Units The result is the SYSTEM •...
- Page 9 Step : Configuring From SYSTEM SETTINGS: • Use the Arrow keys to make • the settings as displayed in SYSTEM SETTINGS the figure to the left. Beep Normal Note: The symbols show • Sector Beep you that you can change a Face I Def.
- Page 10 Step : Configuring From SYSTEM SETTINGS: • Press SHIFT, then Pg DN for page 2/3. • Make the settings to match those in the figure. • Then, press SHIFT, then Pg DN for page 3/3. • Make the settings to match those in the figure. •...
- Page 11 Step : Configuring From the ALL SETTINGS • MENU: Use the Arrow keys to move ALL SETTINGS MENU • the cursor to [2} Angular & 1 System Settings Compensator, then press the 2 Angular & Compensator ENTER key. 3 Measurement Units The result is the ANGULAR •...
- Page 12 Step : Configuring From the ANGULAR & • COMPENSATOR menu: Use the Arrow keys to make ANGULAR & COMPENSATOR • the settings as displayed in Tilt Corr. 2-Axis the figure to the left. Hz collim. When you’ve finished • Angle res. 0º00’01”...
- Page 13 Step : Configuring From the ALL SETTINGS • MENU: Use the Arrow keys to move ALL SETTINGS MENU • the cursor to [3} 1 System Settings Measurement Units, then 2 Angular & Compensator press the ENTER key. 3 Measurement Units The result is the •...
- Page 14 Step : Configuring From the MEASUREMENT • UNITS menu: Use the Arrow keys to make MEASUREMENT UNITS • the settings as displayed in ANGLE 360º ’ the figure to the left. ” D istance US-ft-3 When you’ve finished • Temp. º...
- Page 15 Step : Configuring From the ALL SETTINGS • MENU: We won’t be making any more ALL SETTINGS MENU • configuration settings at this 1 System Settings time. 2 Angular & Compensator Use the Arrow keys to move • 3 Measurement Units the cursor to EXIT, then press 4 PC Communications the ENTER key.
- Page 16 Step : Configuring Now is a good time to see if you’re • still on target. Please refer to your TPS700auto Self • Study Exercises document. Complete all the exercises in the Step 1: • Configuring section. Page...
- Page 17 Step : Surveying Surveying • In Step 2: Surveying, we’ll take your new • instrument out for a spin. We will: • Make some measurements using ATR, Automatic • Target Recognition, and RL, the reflectorless EDM. Install Leica Survey Office, LSO, the program •...
- Page 18 Step : Surveying Making some measurements: • The best way to learn is by doing. So, let’s do it. • Pick an area outside, in the parking lot or in the • backyard, suitable for setting up your new total station and making some measurements.
- Page 19 Step : Surveying Installing Leica • Survey Office: Exercise #2 in your • TPS700auto Self Study Exercises document will guide you through the installation of the Leica Survey Office program. LSO is found on the • TPS Surveying Series CD that came with your instrument.
- Page 20 Step : Surveying Creating a Codelist: • In preparation for doing some data collection, • we will now create a Codelist. Additionally, you will learn how to upload the Codelist to you Total Station. A Codelist contains descriptors for features •...
- Page 21 Step : Surveying Uploading a Format File: • A Format file is used to define the format of • your field data as it is downloaded from the instrument to your computer. You can use Format files to output your field •...
- Page 22 Step : Surveying Field to Finish: • You are ready to collect field data. In this • exercise you will use the onboard Surveying application program to: Collect some points in the field, • Assign Codes to these points, • Download the data using a format file and •...
- Page 23 Step : Setting Out Setting Out • In this section you will learn how to use the Setting • out application program. You have already used another application • program, Surveying, in Step 2. You will find that the TPS700auto programs all •...
- Page 24 Step : Setting Out Input Points: • From the Measure and • Record screen, press ----------MEAS & REC-----------1/4 SHIFT, then MENU. Pt Id TgHt 0.000 m The System Menu is • Displayed 68º44’32” 94 º45”46” ----.--- m <SETUP> <Hz0> <QCODE> Page...
- Page 25 Step : Setting Out From the System Menu • screen: Use the Arrow keys to move SYSTEM MENU • the cursor to [1] DATA 1 DATA Manager Manager, then press the 2 Quick Settings/User-k ENTER key. 3 All Settings The result is the DATA •...
- Page 26 Step : Setting Out From the DATA Manager • screen: Use the Arrow keys to move DATA Manager • the cursor to [1] 1 Meas/Code/Job/Fix Meas/Code/Job/Fix, then 2 Clear Memory press the ENTER key. 3 Memory Information The VIEW/ADD/DEL/EDIT • 4 Download to PC DATA screen is displayed.
- Page 27 Step : Setting Out From the • VIEW/ADD/DEL/EDIT DATA screen: VIEW/ADD/DEL/EDIT DATA Since our objective is to input • 1 Measurements points in the Fixpoints area of 2 Codes our Job, use the Arrow keys to move the cursor to [4] 3 Jobs FIXpoints, then press the 4 Fixpoints...
- Page 28 Step : Setting Out From the FIXPOINT screen: • To input a new point, use the • Arrow keys to move the cursor --FIXPOINT--< 1/1>-- to <NEW/EDIT>, then press LEICA the ENTER key. Find PtID ---- ---- The NEW FIXPOINT screen •...
- Page 29 Step : Setting Out From the NEW FIXPOINT • menu: Refer to the list of points in • NEW FIXPOINT Exercise#1 in the TPS700auto Self Study Exercise document. LEICA PtID In the New FIXPOINT screen, • make sure you've selected the 1000.00 LEICA Job.
- Page 30 Step : Setting Out Field Exercise: • Ready to set out some points? • Please refer to Exercise #2 for • the procedure for using the Setting Out application program. You use the points you justed • stored in the instrument in this exercise.
- Page 31 Step : Setting Out You have just completed TPS700auto: Three Steps • to Productivity Self Study. It is our hope that you now have a good basic • understanding of the operation of your new TPS700auto and that you will enjoy a creative and productive career with it.
- Page 32 TPS Surveying TPS700auto Three Steps to Productivity Self Study Exercises December, 2001...
-
Page 33: Table Of Contents
Table of Contents TPS 700auto Self Study Exercises - Introduction..................3 Step 1: Configuring ........................... 4 Step 2: Surveying ............................. 7 Step 3: Staking Out..........................25 Continued on next page TPS 700auto – 3-Steps to Productivity Dec, 2001 Exercises Page 2/27... -
Page 34: Tps 700Auto Self Study Exercises - Introduction
TPS 700auto Self Study Exercises - Introduction Overview The following exercises accompany “ TPS700auto: Three Steps to Productivity ” This Leica Advantage Self Study Guide is distributed on the Leica Advantage web site in a compressed file, “ T hree Steps to Productivity.zip”... -
Page 35: Step 1: Configuring
Step 1: Configuring The purpose of the following exercises is to review what you Introductio have just learnt about configuring your TPS700auto instrument. Exercise 1 Review the configuration settings we just made in the ALL Settings Menu. List any changes you would make for your day to day use. - Page 36 Exercises in Configuring your TPS700auto, Continued Exercise 3 List all the distance units’ settings available on the instrument and give the definition for the setting. • (Hint: If you’re not sure, change the setting, then view the Measure and Record Screen.) Distance Unit Setting Description What important information is displayed in the SYSTEM INFO...
- Page 37 Exercises in Configuring your TPS700auto, Continued Set the Date and Time on your instrument Exercise 5 Exercise 6 To use an external hand held data collector, you must make two settings on your instrument. Please view these settings screens, now: Step Action Go to the PC Communications screen (in ALL SETTINGS).
-
Page 38: Step 2: Surveying
Step 2: Surveying Exercise 1: Making some measurements Introductio The purpose of the exercise is to see what your TPS700auto can do. Set your instrument up outdoors. If possible, have someone carry a prism and pole for you. You will need a watch. Measuring To get a feel for ATR, Automatic Target Recognition, follow the procedures below. - Page 39 Exercise 1: Making some measurements, Continued Step Action Now locate the same 10 points using ATR: • First, turn ATR on: Press SHIFT, then the FNC (Function) key. Press SHIFT, then the PG Dn (down arrow) key. Use the arrow keys to go to menu selection (8), ATR On/Off Prees Enter to turn ATR ON (Note that this selection is merely a toggle, select it again to toggle ATR OFF)
- Page 40 Exercise 1: Making some measurements, Continued Using the Now try out the reflectorless EDM. Try getting a distance to several different Reflectorle surfaces. In the table below, note the various objects, their attributes and the ss EDM distance achieved. See how small an object you can locate. Try the corner of an overhang or a pole, or something of that nature.
- Page 41 Exercise 1: Making some measurements, Continued Using the Here are a few features that come in handy: Reflectorle • ss EDM From the Meaure and Record screen, press SHIFT, then EDM for the EDM Settings screen. Take a look at the various EDM and Prism selections. Quick Tips…...
- Page 42 Exercise 2: Installing Leica Survey Office Introductio This exercise shows you how to install and Set Up the Leica Survey Office program. Installatio Follow these steps to install the software: Step Action Place the TPS Surveying Series CD that came with your instrument in your CD drive.
- Page 43 Exercise 2: Installing Leica Survey Office, Continued Set-Up From the LSO main screen, you will notice seven menu selections: • Data Exchange Manager: Used transfer data and Codes to and from the instrument and PC. • Codelist Manager: Used to build Codelist files containing your descriptor codes.
- Page 44 Exercise 3: Creating a Codelist with Leica Survey Office Introductio In this exercise we will create and upload a Codelist in Leica Survey Office. We’ll name this codelist: LEICA Codelist Name Needed We’ll create a sample codelist with the following seven codes: Codes Code Description...
- Page 45 Exercise 3: Creating a Codelist with Leica Survey Office, Continued Procedure Use the following steps to create the Codelist. Step Action From Leica Survey Office main screen, select Code List Manager. From the Codelist Manager Screen, select File, then New. From the Codelist Type dialog box, select TPS700 as the Instrument Class and set the Codelist Type to Advanced.
- Page 46 Exercise 3: Creating a Codelist with Leica Survey Office, Continued Step Action Save your new Codelist: • From the Codelist Manager Screen, select File, then Save. • Sava As dialog box, make sure the Codelist Name and the Directory fields are right. •...
- Page 47 Exercise 4: Uploading a Codelist Uploading In this exercise we will upload your new Codelist, Leica.crf, to the TPS700auto. your Codelist Step Action Connect your TPS700auto instrument to your PC with the data upload cable that came with your instrument. From the Leica Survey Office main screen, click on the Data Exchange Manager Button.
- Page 48 Exercise 4: Uploading a Codelist, Continued Step Action In the illustration above, a TCR702auto is connected to the PC’s Com port 1. Click the + next to the TCR702auto to expand the instrument: The Codelists, Jobs, and Formats are folders onboard the TCR702auto.
- Page 49 Exercise 5: Uploading a Format File Introductio In this exercise, you will use the Leica Survey Office Data Exchange Manager to upload a Format file. Step Action Connect your TPS700auto instrument to your PC with your data upload cable as you did in Exercise #3. From the Leica Survey Office main screen, click on the Data Exchange Manager Button.
- Page 50 Exercise 5: Uploading a Format File, Continued Step Action In the illustration above, a TCR702auto is connected to the PC’s Com port 1. Click the + next to the TCR702auto to expand the instrument: The Codelists, Jobs, and Formats are folders onboard the TCR702auto.
- Page 51 Exercise 6: Field to Finish Introductio Now we’re ready to go to the field. Set the instrument up in area that will give you enough room to locate 20 to 30 points. Bring the instructions, below, with you to the field. Step Action Once you have set up the instrument, from the Measure...
- Page 52 Exercise 6: Field to Finish, Continued Step Action Notice that the Set Job selection has a diamond in front of it. This signifies that the Set Job task has been completed. Each step is marked complete once you’ve been through it. Now select (2) Set Station.The Set Station screen is displayed.
- Page 53 Exercise 6: Field to Finish, Continued Step Action Now we are ready to go! To shoot and record a point: • Input a starting point number in the PtId field, press Enter. • Specify the height of the target • Assign a Code to a point by pressing the Enter key in the Code field.
- Page 54 Exercise 7: Downloading the Field Data Now you can download your field data with your favorite Leica Downloading Survey Office program, Data Exchange Manager. the Field Data Step Action Connect your TPS700auto instrument to your PC with your data upload cable. From the Leica Survey Office main screen, click on the Data Exchange Manager Button.
- Page 55 Exercise 7: Downloading the Field Data, Continued Step Action To download your field data, just drag the Leica Job Measurement Data file from the Total Station’s Job folder on the left side of the screen to the folder you would like the data in, on your PC, on the right side of the screen.
-
Page 56: Step 3: Staking Out
Step 3: Staking Out Exercise 1: Input Points Introductio Here is a list of the points to input for Setting Out. your instrument up next to your PC and follow the directions to input these point values in the Three Steps to Productivity presentation. - Page 57 Introductio In this exercise, you will set out points you have just entered into the Fixed point file of the Leica Job. The point plot in Exercise #1, above, shows the layout of the points you are going to set out. You will occupy point #1 and will orient the instrument so that the set out points will physically fall within the site...
- Page 58 Exercise 2: Staking Out, Continued Step Action Select (3) Set Orientation. The Orientation screen is displayed. • Point the instrument to an assumed North. • Then, select <Hz0> to set the horizontal circle to zero, to match the assumed azimuth. •...
Need help?
Do you have a question about the TPS700 Series and is the answer not in the manual?
Questions and answers