Table of Contents
Advertisement
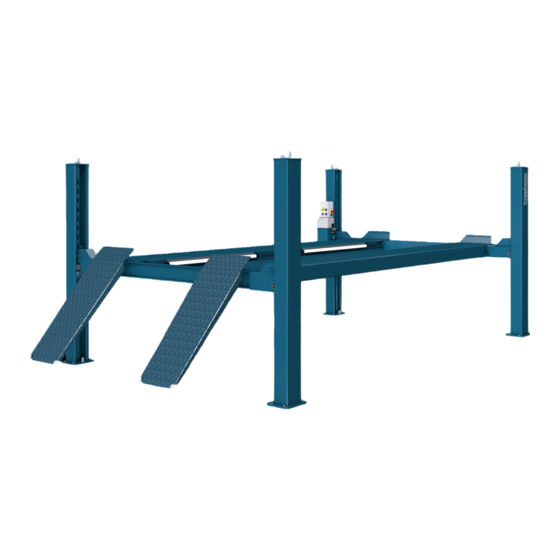
4.65H/ 4.65H plus
Automotive-Lift date 05/1998
Manual date: 01.08.2012
Operating instructions and documentation
Serial-number: ..............................................
Made in Germany
Otto Nußbaum GmbH & Co. KG | Korker Straße 24 | D-77694 Kehl-Bodersweier | Tel: +49(0)7853/8990
Fax: +49 (0) 78 53 / 87 87 | E-mail: info@nussbaum-lifts.de | http://www.nussbaum-lifts.de
Retailer address / phone
Advertisement
Table of Contents

Related Manuals for Nussbaum 4.65H Plus


Summary of Contents for Nussbaum 4.65H Plus
- Page 1 Operating instructions and documentation Serial-number: ..........Retailer address / phone Made in Germany Otto Nußbaum GmbH & Co. KG | Korker Straße 24 | D-77694 Kehl-Bodersweier | Tel: +49(0)7853/8990 Fax: +49 (0) 78 53 / 87 87 | E-mail: info@nussbaum-lifts.de | http://www.nussbaum-lifts.de...
-
Page 2: Table Of Contents
Table of contents ............................3 OREWORD ........................5 ECORD OF INSTALLATION ........................6 ECORD OF HANDING OVER INTRODUCTION ..........................7 ..............7 NSTALLATION AND CHECK OF THE AUTOMOTIVE LIFT ........................7 ARNING NOTICES MASTER DOCUMENT OF THE AUTOMOTIVE LIFT ..............8 ........................ -
Page 3: Foreword
Dangers when operating the lift: Nussbaum Lifts are designed and built according to technical standards and the approved regulations for technical safety. The use of Nussbaum lifts for purposes others than those for which they were designed, may result in injury or even death. - Page 4 In addition to the instructions for use, rules pertaining to other regulations i.e. accident prevention and environmental rules are to be observed and adhered to. The owner of the Nussbaum lifting system must ensure that operators and persons working with or around the lift occasionally conduct “refresher” courses to ensure that the appropriate operating procedures and safety precautions are known.
-
Page 5: Record Of Installation
Operating instructions and documentation 4.65H/ 4.65 plus After completely filling out this sheet including signatures, copy and return the original to the manufacturer within 7 days. The copy must remain in the manual. Otto Nußbaum GmbH & Co. KG Korker Straße 24 D-77694 Kehl-Bodersweier Record of installation The automotive lift... -
Page 6: Record Of Handing Over
Operating instructions and documentation 4.65H/ 4.65 plus Record of handing over The automotive lift with the serial number: ..........was installed on:....... at the firm:..........……... in:............The lift was installed, checked and started up. The persons below were familiarized with the operation of the automotive lift after the installation. The briefing was performed by an expert from the lift-manufacturer or from a franchised dealer: .......... -
Page 7: Introduction
Operating instructions and documentation 4.65H/ 4.65 plus 1 Introduction The document ”Operating Instructions and Documentation” contains important information about installation, operation and maintenance of the automotive lift. To furnish proof of installation of the automotive lift the form ”Record of Installation” must be signed and returned to the manufacturer. -
Page 8: Master Document Of The Automotive Lift
D-77694 Kehl-Bodersweier 2.2 Application The automotive lift 4.65H/ 4.65H plus is a lifting mechanism for lifting motor vehicles with a total weight of up to 6500 kg (14500 lb). The maximum load distribution is 2:1 or 1:2 in or against drive- on direction. -
Page 9: Declaration Of Conformity
Operating instructions and documentation 4.65H/ 4.65 plus 2.5 Declaration of conformity - 9 -... -
Page 10: Technical Information
Operating instructions and documentation 4.65H/ 4.65 plus 3 Technical information 3.1 Technical ratings capacity automotive lift: 6500kg (14500 lb) load distribution: 2:1 in or against drive-on direction lifting time automotive lift: approx. 41 sec. lowering time automotive lift: approx. 36 sec. lifting height: max. -
Page 11: Datasheet
Operating instructions and documentation 4.65H/ 4.65 plus 3.3 Datasheet - 11 -... - Page 12 Operating instructions and documentation 4.65H/ 4.65 plus - 12 -...
-
Page 13: Foundation Diagram
Operating instructions and documentation 4.65H/ 4.65 plus 3.4 Foundation diagram C 20/25 * If length of rail is 5500 mm Foundation plan: quality of the concrete minimum C20/25 Depth of the foundation minimum 140 mm If the concrete is available the quality of the concrete C20/25 and the minimum depth of 140 mm for the foundation must be guaranteed. -
Page 14: Hydraulic Diagram W/O Wheel Free Jack
Operating instructions and documentation 4.65H/ 4.65 plus 3.5 Hydraulic diagram w/o wheel free jack Hydraulic parts list part # description oil tank sub oil motor gear pump filter oil level gauge hydraulic block complete holding valve emergency lowering screw 0.10 pressure control valve 0.11 electrical holding valve... -
Page 15: Hydraulic Diagram With Wheel Free Jack
Operating instructions and documentation 4.65H/ 4.65 plus 3.6 Hydraulic diagram with wheel free jack Hydraulic parts list part # description oil tank 435H01003 motor 990445 gear pump 980486 filter 980201 screw 9VSTIR1/4ED hydraulic block complete 435H01073 ball valve (main lift / wheel free lift) 980513 holding valve 980480... -
Page 16: Electrical Diagram W/O Wheel Free Jack
Operating instructions and documentation 4.65H/ 4.65 plus 3.7 Electrical diagram w/o wheel free jack The electrical diagrams for automotive lift 4.35H are also valid for automotive lift 4.65H. - 16 -... - Page 17 Operating instructions and documentation 4.65H/ 4.65 plus List of electrical parts part # description main switch, 3-pin motor K1M: contactor motor SB1: key switch “lift” SB2: key switch “lower” SB3: button soft lowering in the ratchets (main lift) top limit switch (main lift) limit switch „the rope is torn“...
-
Page 18: Electrical Diagram With Wheel Free Jack
Operating instructions and documentation 4.65H/ 4.65 plus 3.8 Electrical diagram with wheel free jack - 18 -... - Page 19 Operating instructions and documentation 4.65H/ 4.65 plus List of electrical parts part # description main switch, 3-pin motor K1M: contactor motor SB1: key switch “lift” SB2: key switch “lower” SB3: button soft lowering in the ratchets (main lift) top limit switch (main lift) limit switch „the rope is torn“...
-
Page 20: Connection-Command (Pictures)
Operating instructions and documentation 4.65H/ 4.65 plus 3.9 Connection-command (pictures) Electrical wiring has to be executed by qualified personnel only! Einspeisung / supply Bild 1 Einspeisekabel/ supply lead Kabel Hebebühne/ lead lift - 20 -... - Page 21 Operating instructions and documentation 4.65H/ 4.65 plus Einspeisung / supply Bild 2 - 21 -...
- Page 22 Operating instructions and documentation 4.65H/ 4.65 plus Einspeisung / supply Bild 3 Einspeisung/ supply Bühne/lift - 22 -...
- Page 23 Operating instructions and documentation 4.65H/ 4.65 plus Oben-Aus-Schalter / top-off switch Anschluss/contact 11 oder/or 21 Anschluss/contact 12 oder/or 22 - 23 -...
- Page 24 Operating instructions and documentation 4.65H/ 4.65 plus Schlüsselschalter / key switch Ader 4 Ader 3 Ader 2 Ader 1 Ader 5 see also pag. 35 - 24 -...
-
Page 25: Safety Regulations
Operating instructions and documentation 4.65H/ 4.65 plus 4 Safety regulations If you use the automotive lift, the German following regulations are to be considered: BGG945: Examine of automotive-lifts; BGR500 Using automotive-lifts; (VBG14). Especially the following regulations are very important: • The laden weight of the lifted vehicle must not be more than the maximum capacity of the lift. -
Page 26: Lowering The Vehicle With Automotive Lift
Operating instructions and documentation 4.65H/ 4.65 plus lift 5.2 Lowering the vehicle with automotive • Check the dangerous places of the lift and be sure that there are no objects or people in the immediate area of the lift or on the lift. •... -
Page 27: Lowering The Vehicle With Wheel Free Jack
Operating instructions and documentation 4.65H/ 4.65 plus Never position polymeric overlay vertically to prevent vehicle from falling off. Vehicle needs to stand secured on the overlay. • Put selector switch into position „wheel free jack“ • Lift up vehicle until wheels are free; turn main switch to position „lift“, check if vehicle is fixed on the automotive lift. -
Page 28: Driving On An Obstacle With The Main Lift
Operating instructions and documentation 4.65H/ 4.65 plus 6.1 Driving on an obstacle with the main lift If the lift is running onto an obstacle during the lowering, it stops mechanically. In this case press the override switch at the rail and turn the key on position ”∆” simultaneously until the obstacle can be removed. -
Page 29: Emergency Lowering Of The Wheel Free Lift
Operating instructions and documentation 4.65H/ 4.65 plus 6.3 Emergency lowering of the wheel free lift In case of power failure or defective valves, the hydraulic valves for lowering of the wheel free jack and the safety valves at lower side of the hydraulic cylinders and the magnet to unlock the ratchet can not be opened. -
Page 30: How Often Must The Lift Be Cleaned
Operating instructions and documentation 4.65H/ 4.65 plus If theses repairs are not made immediately, permanent damage to the powder-coated surface may result. Repair and clean damaged areas with an abrasive paper (grain 120). After this is complete, use a suitable paint (observe the RAL Number). -
Page 31: Security Check
Operating instructions and documentation 4.65H/ 4.65 plus During poor conditions it may be necessary to clean the lift once week, but cleaning once a month will suffice. Clean the lift and the floor with a non-aggressive and non-abrasive detergent. Use a gentle detergent to clean the parts. -
Page 32: Erecting And Dowelling The Lift
Operating instructions and documentation 4.65H/ 4.65 plus 9.2 Erecting and dowelling the lift It is necessary to dowel the columns at 4 points and to safe the lift against slipping. Therefore a concrete floor without reinforcement, thickness of 160 mm and quality C20/25 is needed. In case of doubt perform a test drill and put a dowel in. - Page 33 Operating instructions and documentation 4.65H/ 4.65 plus • Lift the automotive lift to eye level and lower it into the ratchet (refer to operating Instructions). • Position each of the measuring scales on the traverse and check the level of the two rails. Tolerance handicap of Daimler Chrysler: in front left/right Difference ≤...
-
Page 34: Adjusting The Rails
Operating instructions and documentation 4.65H/ 4.65 plus 9.3 Adjusting the rails The standard distance between the rails is 880 mm. It is possible to adjust the rails +/- 100 mm (see datasheet). Lower the lift in the ratchets until there is no tractive power on the ropes. •... -
Page 35: Connecting The Operating Unit
Operating instructions and documentation 4.65H/ 4.65 plus 9.6 Connecting the operating unit The operating unit is not connected by the delivery. operating unit emergency switch The operating unit is not connected when the lift is delivered. The – conductor bunch is coming from the rail. Put the cable into the bolt connection at the top of the operating unit. -
Page 36: Position Of The Columns
Operating instructions and documentation 4.65H/ 4.65 plus 9.7 Position of the columns - 36 -... - Page 37 Operating instructions and documentation 4.65H/ 4.65 plus Bild 6: Auswahl der Dübellängen ohne Bodenbelag Tabelle zu Bild 8 Liebig-Sicherheitsdübel Gültig für Bohrungsdurchmesser 17 mm in der Grundplatte Dübeltyp BM10-15/70/40 Bohrungstiefe (mm) min. Verankerungstiefe (mm) Betonstärke (mm) min.140 (*) Bohrungsdurchmesser (mm) Bauteildicke (mm) 0-40 Betonqualität...
- Page 38 Operating instructions and documentation 4.65H/ 4.65 plus Bild 7: Auswahl der Dübellängen mit Bodenbelag Tabelle zu Bild 9 Liebig-Sicherheitsdübel Gültig für Bohrungsdurchmesser 17 mm in der Grundplatte Dübeltyp BM10-15/70/65 BM10-15/70/100 BM10-15/70/140 Bohrungstiefe (mm) min. Verankerungstiefe (mm) Betonstärke (mm) min.140 (*) min.140 (*) min.140 (*) Bohrungsdurchmesser (mm)
-
Page 39: First Security Check Before Installation
Operating instructions and documentation 4.65H/ 4.65 plus First security check before installation Serial-no.:________________ complete and leave in this manual defect veri- kind of check right missing fication remark ---------------------------------------------------------------------------------------------------------------------------------------- Type plate......................Short operating instruction................... Warning designation.................... Sticker max. capacity.................. -
Page 40: Regular Security Check
Operating instructions and documentation 4.65H/ 4.65 plus Regular security check Serial-no.:________________ Complete and leave in this manual defect veri- kind of check right missing fication remark ---------------------------------------------------------------------------------------------------------------------------------------- Type plate......................Short operating instruction................... Warning designation.................... Sticker max. capacity.................. - Page 41 Operating instructions and documentation 4.65H/ 4.65 plus Regular security check Serial-no.:________________ Complete and leave in this manual defect veri- kind of check right missing fication remark ---------------------------------------------------------------------------------------------------------------------------------------- Type plate......................Short operating instruction................... Warning designation.................... Sticker max. capacity..................
- Page 42 Operating instructions and documentation 4.65H/ 4.65 plus Regular security check Serial-no.:________________ Complete and leave in this manual defect veri- kind of check right missing fication remark ---------------------------------------------------------------------------------------------------------------------------------------- Type plate......................Short operating instruction................... Warning designation.................... Sticker max. capacity..................
- Page 43 Operating instructions and documentation 4.65H/ 4.65 plus Regular security check Serial-no.:________________ Complete and leave in this manual defect veri- kind of check right missing fication remark ---------------------------------------------------------------------------------------------------------------------------------------- Type plate......................Short operating instruction................... Warning designation.................... Sticker max. capacity..................
- Page 44 Operating instructions and documentation 4.65H/ 4.65 plus Regular security check Serial-no.:________________ Complete and leave in this manual defect veri- kind of check right missing fication remark ---------------------------------------------------------------------------------------------------------------------------------------- Type plate......................Short operating instruction................... Warning designation.................... Sticker max. capacity..................
-
Page 45: Extraordinary Security Check
Operating instructions and documentation 4.65H/ 4.65 plus Extraordinary security check Serial-no.:________________ Complete and leave in this manual defect veri- kind of check right missing fication remark ---------------------------------------------------------------------------------------------------------------------------------------- Type plate......................Short operating instruction................... Warning designation.................... Sticker max. capacity..................
Need help?
Do you have a question about the 4.65H Plus and is the answer not in the manual?
Questions and answers