Table of Contents
Advertisement
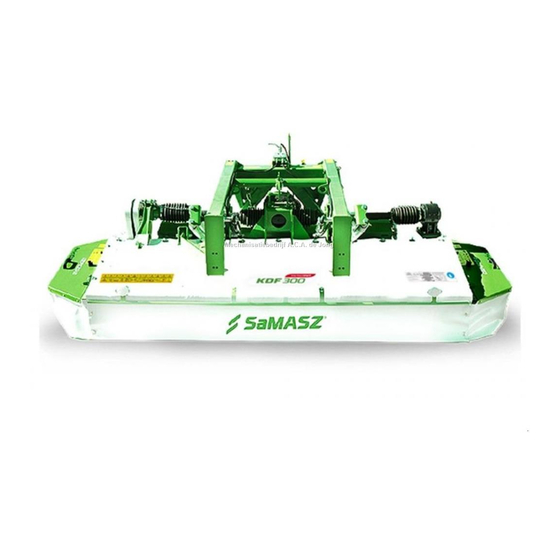
KDF 260
KDF 300
KDF 301 W
KDF 301 S
KDF 301 SL - 9' 10"
OPERATOR'S MANUAL
FRONT DISC MOWER
- 8' 6"
- 9' 10"
- 9' 10"
- 9' 10"
W – Mowers with roller conditioner
S – Mowers with tine conditioner
SL - Mowers with light weight swath conditioner
Serial No:
Translation of original instructions
SaMASZ Sp. z o.o.
Poland, 16-060 Zabłudów, ul. Trawiasta 1
KDF 340
KDF 341 W - 11' 2"
KDF 341 S
KDF 341 SL - 11' 2"
KDF 390
Established – 1984
NIP PL-966-159-29-76
tel. (+48) (85) 664 70 31
fax (+48) (85) 664 70 41
e-mail: samasz@samasz.pl
www.samasz.pl
- 11' 2"
- 11' 2"
- 12' 9"
IN229USA010
2017-02-20
EDITION No 10
Advertisement
Table of Contents

Subscribe to Our Youtube Channel
Related Manuals for SaMASZ KDF 301 W


Summary of Contents for SaMASZ KDF 301 W
- Page 1 SaMASZ Sp. z o.o. Poland, 16-060 Zabłudów, ul. Trawiasta 1 Established – 1984 NIP PL-966-159-29-76 tel. (+48) (85) 664 70 31 fax (+48) (85) 664 70 41 e-mail: samasz@samasz.pl www.samasz.pl OPERATOR’S MANUAL FRONT DISC MOWER KDF 260 - 8' 6"...
- Page 2 Well-proven design with thousands of machines in regular use in many countries and quality materials ensure high durability and reliability of SaMASZ mowers. We congratulate you on the purchase of your new SaMASZ mower and wish you much pleasure and the very best work results through the years to come.
-
Page 3: Table Of Contents
Front disc mowers Operator’s manual Contents page IDENTIFYING THE MACHINE ........................... 2 INTRODUCTION ..............................2 PROPER AND INTENDED USE ........................... 3 3.1. Technical data ............................... 4 3.2. Design and working principle ..........................5 3.3. Standard equipment and spare parts ........................7 SAFETY PRECATIONS ............................ -
Page 4: Identifying The Machine
Front disc mowers Operator’s manual 1. IDENTIFYING THE MACHINE Data plate is mounted to the mower’s main frame in the place shown below (Fig. 1). Fig. 1. Data plate location Fig. 2. Data plate Data plate includes: - name and adress of the manufacturer, - model year, - CE marking means, that the produce - version number,... -
Page 5: Proper And Intended Use
Front disc mowers Operator’s manual 3. PROPER AND INTENDED USE Mower KDF is equipped with the “Perfect Cut” cutting bar. In table 1 the mowing height differences, depending on the inclination angle of the cutting bar are shown. Tab. 1. Mowing height depending on cutterbar's inclination angle „Perfect Cut”... -
Page 6: Technical Data
Front disc mowers Operator’s manual WARNING Use of the mower for purposes other than described above is forbidden. Improper use can be dangerous and may lead to voiding the warranty. Mower should be operated and repaired only by persons familiar with its detailed specifications and with all applicable safety rules and regulations as well as the relative dangers. -
Page 7: Design And Working Principle
Front disc mowers Operator’s manual 3.2. Design and working principle Fig. 3a. Parts of SaMASZ front disc mower 1 – Suspension frame 6 – Cutterbar drive shaft 2 – Main frame 7 – Swath discs 3 – Cutterbar 8 – Support springs 4 –... - Page 8 Front disc mowers Operator’s manual 11 7 12 8 Fig. 3b. Parts of SaMASZ front disc mower with tine conditioner 1 – Suspension frame 8 – Support springs 2 – Main frame 9 – Hydraulic cylinders 3 – Cutterbar 10 – Safety guard 4 –...
-
Page 9: Standard Equipment And Spare Parts
Front disc mowers Operator’s manual Fig. 3c. Parts of SaMASZ front disc mower with roller conditioner 1 – Suspension frame 8 – Support springs 2 – Main frame 9 – Hydraulic cylinders 3 – Cutterbar 10 – Safety guard 4 – Intersecting axis gear I 11 –... -
Page 10: Safety Precations
Lubricate the PTO shaft with high quality multi-purpose grease every 50 shaft operating hours. The shaft should also be lubricated before and after longer idle periods. PTO shafts of other brands with equivalent parameters could be used afer SaMASZ permission. NOTICE: Optional extra equipment should be ordered separately. -
Page 11: General Safety Rules And Regulations
Front disc mowers Operator’s manual • WARNING indicates a hazardous situation which, if not avoided, could result in death or serious injury • CAUTION indicates a hazardous situation which, if not avoided, could result in minor or moderate injury • NOTICE is used to address practices not related to physical injury 4.1. -
Page 12: Conditions Of Mounting Mower On Tractor
In the event of an accident involving this mower in a field or on a road, follow all applicable first aid procedures and contact SaMASZ technical service. Mower should be kept clean, so as to avoid danger of fire. -
Page 13: Putting The Mower Onto Another Vehicle For Transport
Front disc mowers Operator’s manual During transport, always put the mower in its proper and safe transport position. See section 5.3. Before putting the mower in transport position, make sure that the tractor’s PTO is turned off and all rotating parts have come to a complete stop. Do not drive over 25 km/h (15 mph). -
Page 14: Working Parts
Front disc mowers Operator’s manual Fig. 6. Location of centre of gravity KDF mowers Tab. 5. Location of centre of gravity Model Dimension KDF 301 KDF 341 KDF 301 KDF 341 [ft in] KDF 390 S(SL) S(SL) 2′5″ 2′6″ 2′11″ 1′11″... -
Page 15: Safety Curtains
Operator’s manual 4.7. Safety curtains SaMASZ mowers feature standard safety curtains (1) for self-mounting. In order to mount the guard properly, put it on a mower and secure with catches (2) and front guard (3) Fig. 7. Examine condition of guards and its mounting on a regular basis. Fix immediately if damaged and replace if missing. -
Page 16: Residual Risk Assessment
Front disc mowers Operator’s manual never operate the mower when it is not in working order or has damaged safety guards, never get your hands and legs close to rotating parts of the mower, during repair and maintenance of the mower, always comply with descriptions included in operator’s manual. - Page 17 Front disc mowers Operator’s manual N-05 N-06 N-07 N-09 CAUTION – belt Caution – rotating parts Operating is forbidden Caution: rotor transmission, be extremely when any person is within careful! the danger area of 170’! N-11 N-14 N-15 N-23 N-35 N-40 N-48 Cutterbar "Perfect Cut"...
- Page 18 Front disc mowers Operator’s manual N-204 N-205 N-206 Use the required Personal Use the required Personal Use the required Personal Protective Protective Protective N-175 N-212 N-213 N-224 Conditioner's rpm Conditioner's intensity Do not open and remove safety guards with motor operating CAUTION: Any spare part used for repair of the mower should have all warning decals...
-
Page 19: Operation
Front disc mowers Operator’s manual N-113 N-14; N-15 N-01; N-02; N-03 N-162; N-204 N-04; N-05; N-09 N-205; N-206 N-06; N-07 N-23; N-48; N-49 N-50; N-117 N-167; N-168 N-175 N-212 N-213 Fig. 8b. Warning decals placed on the mower with tine conditioner N-113 N-14;... - Page 20 Front disc mowers Operator’s manual The mower is attached directly onto hitch triangle which is mounted to tractor's front 3-point linkage (hitch triangle, Cat. II is delivered as mower's standard equipment). Mount triangle (1) on tractor's lower arms, connect with pins (2), and then secure with spring cotters (3).
-
Page 21: Setting Clearance Between Suspension Frame And Bumper Base With Indicator (Option)
Front disc mowers Operator’s manual 5.2. Setting clearance between suspension frame and bumper base with indicator (option) Optionally, to facilitate correct setting of the mower for mowing from the tractor driver's position, it is possible to install indicator and indicator's spirit level on the mower. Once the mower is aggregated with the tractor, lift the mower using strands, and then using the mower's hydraulics, lower it onto such height that the indicator's green area is on the indicator's spirit level height (Fig. -
Page 22: Mounting Pto Shaft
Front disc mowers Operator’s manual Blocked Unblocked lock lock Fig. 12. The lock in transport position Fig. 13. Front disc mower in its transport position 5.5. Mounting PTO shaft PTO shaft’s end with overrunning clutch should be mounted on mower’s side. When connecting PTO shaft between tractor and mower make sure that external guard tube of the shaft is on the tractor’s side. -
Page 23: Moving From Transport To Working Position
Front disc mowers Operator’s manual CAUTION: Handle all parts with utmost care. Never place your hands or fingers between one part and the other. Wear safety clothes such as gloves, protective footwear and goggles. The operation of shortening must be carried out with the utmost care as the PTO shaft will have to be replaced if the telescopic shafts are shortened to an excessive extent. -
Page 24: Operation (Mowing)
Front disc mowers Operator’s manual 5.8. Operation (mowing) WARNING: The operator must be seated in the tractor’s driver’s seat when the machine is operating since only from that position is he able safely and properly operate the mower. Before he leaves the driver’s seat, the operator must stop the engine, apply the parking brake and turn off the tractor engine. - Page 25 Front disc mowers Operator’s manual When high grass prevails, first and second cut should be mowed at height level 2.4" - 2.8", but when the grass grows low it should be mowed at 2". The last cut should be mowed a little bit higher, 2.8"...
-
Page 26: Mower Clogging
Front disc mowers Operator’s manual 5.8.2. Mower clogging When operating the mower, pay attention to variable conditions on the field, which may cause the mower to clog, such as: terrain unevenness, height and density of grass as well as other objects in the grass. -
Page 27: Mounting And Adjustments
Front disc mowers Operator’s manual 6. MOUNTING AND ADJUSTMENTS 6.1. Mounting and timing of the knives The knives should be mounted as shown in Fig.17, 18 according to the rule, that the cutting edges should be directed towards ground, so that a knife will lift the grass after cutting. Fig. - Page 28 Front disc mowers Operator’s manual Fig. 19a. Disc turns KDF - 8' 6" Fig. 19b. Disc turns KDF - 9' 10" Fig. 19c. Disc rotation directions on mower's cutterbar with cutting width of 9' 10" (wide swath) Fig. 19d. Disc turns KDF - 11' 2" Fig.
-
Page 29: Adjusting The Cutterbar
Front disc mowers Operator’s manual 6.3. Adjusting the cutterbar Swath width is adjusted with swath guides mounted on the 3-point linkage frame of the cutterbar (Fig. 20). In order to adjust the guide, the following should be performed (for: KDF 260, KDF 300, KDF 340, KDF 390): loosen locknuts (2) and screws (3), shift the guide arm (6),... -
Page 30: Adjusting The Space Between Tine Conditioner's Mask And Its Shaft
Front disc mowers Operator’s manual In order to set swath width, adjustment of swath guides (1) should be performed (Fig. 22) (for: KDF W): loosen eye screw (2) of the swath guide, set the swath guide (1) as needed, tighten screw (2). Fig. -
Page 31: Adjusting Force Of The Pressure Of Roller Conditioner
Front disc mowers Operator’s manual Removal of the flail consists of unscrewing the nut using a flat and removing the flail. Installation of the flail is accomplised by revering these steps. 1. Conditioner roller 2. Flail 3. Bolt M16x60, Property Class 10.9 4. -
Page 32: Adjusting Pressure Of The Cutterbar Using Support Springs
L= 3.54″ KDF 301 SL Spring d 13 L= 29.92″ L= 3.74″ Spring d 13 L= 29.92″ L= 3.94″ KDF 301 W Spring d 13 L= 29.53″ L= 2.95″ Spring d 13 L= 27.56″ L= 4.53″ KDF 340 Spring d 11 L= 27.56″... -
Page 33: Maintenance And Service
Front disc mowers Operator’s manual 6.8. Maintenance and service 6.8.1. Checking the knives and knife holders All knives should have the same lengths and weights. Always check mower before starting work for damaged, missing and/or worn knives. Replace them, if necessary, only in sets. Make sure all knives in a set are of the same length and weight. -
Page 34: Daily Maintenance
Front disc mowers Operator’s manual 6.8.3. Daily maintenance When you finish each day of operation carry out the following maintenance: check all visible parts and components and their connections; tighten all loose bolts and nuts and replace all damaged and/or worn parts with new genuine ones, clean the mower, especially between discs and cutterbar, because grass with mud may damage bearings in disc module, remove grass and mud,... -
Page 35: Lubrication
Front disc mowers Operator’s manual After storage period, before the machine is used: check the mower's technical condition, and the transmission in particular, supplement the paint where missing, make sure that all nuts and screws are tightened properly, make sure that all guards are in place, protect all moving parts with grease in order to prevent their baking and creating any sources of corrosion, which significantly influences mower's proper operation, check oil level in axis gears and cutterbar. -
Page 36: Intersecting Axis Gears
Front disc mowers Operator’s manual Tab. 8. Oil capacities Oil capacity Model Oil type Lubrication frequency [US gal lqd] KDF 260 – 8' 6" Once every 3 seasons KDF 301 (S/SL/W) – 9' 10" (if working intensively more 80W90 KDF 341 (S/SL/W) – 11' 2" frequently) KDF 390 –... -
Page 37: Bearings And Joints
Front disc mowers Operator’s manual Tab. 10. Oil capacities Model Oil capacity Oil type Lubrication frequency US gal lqd Once every 3 seasons All types 80W90 (if working intensively) Fig. 33. Roller conditioner’s gearbox lubrication points 7.4. Bearings and joints Every 50 mower working hours lubricate tine/roller conditioner’s bearings and main joints of the mower (Fig. - Page 38 Front disc mowers Operator’s manual Fig. 36. Tine conditioner tensioner’s lubrication point Fig. 37. Lubrication points - 36 -...
-
Page 39: Malfunction And Their Repairs
Replace intersecting axis gear transmitted from the tractor Damaged gears in the cutterbar. This repair must be done by Damaged bearings in the disc hub SaMASZ service Mower is blocked Widen swath guides to the Swath guides are set too narrow maximum Replace oil in the tractor hydraulics. -
Page 40: Hydraulic Scheme
Front disc mowers Operator’s manual 10. HYDRAULIC SCHEME Hydraulic scheme for KDF mowers Hose M14X1,5 L = 2000 A-A Flow divider Hose M14X1,5 L = 2000 A-A 11. WARRANTY CARD FRONT DISC MOWER Serial number Date of manufacture Manufacturer’s stamp QC signature Date of purchase Dealer’s stamp... -
Page 41: Warranty Terms
2. The warranty period is for two years from the date of sale to the purchaser, stated above. 3. Any repair which is subject to warranty should be carried out by an authorised SaMASZ dealer. Upon completion of the repair the dealer must submit a warranty claim within 14 days. -
Page 42: Warranty Repairs Record
Front disc mowers Operator’s manual 12.2. Warranty repairs record Repairs description and changed spare parts: Date, stamp and signature of repair shop Date, stamp and signature of repair shop. Date, stamp and signature of repair shop - 40 -... -
Page 43: Appendix Calculating Axis Load
Front disc mowers Operator’s manual APPENDIX CALCULATING AXIS LOAD ATTENTION! When mounting the machine on a tractor using front and/or rear 3-point linkage, a maximum value of permissible load cannot be exceeded – tractor's front axis load must be 20% of the tractor's overall weight. Before using the tractor-machine assembly, check whether these conditions are met, while calculating and weighing the assembly. - Page 44 Front disc mowers Operator’s manual Calculating minimum weight of front ballast M – machine mounted at tractor's rear or P min. at rear and front: Calculating minimum weight of rear ballast M – machine mounted at tractor's front: T min. Calculating real axis load at tractor's front axis T P rzecz .
Need help?
Do you have a question about the KDF 301 W and is the answer not in the manual?
Questions and answers