Advertisement
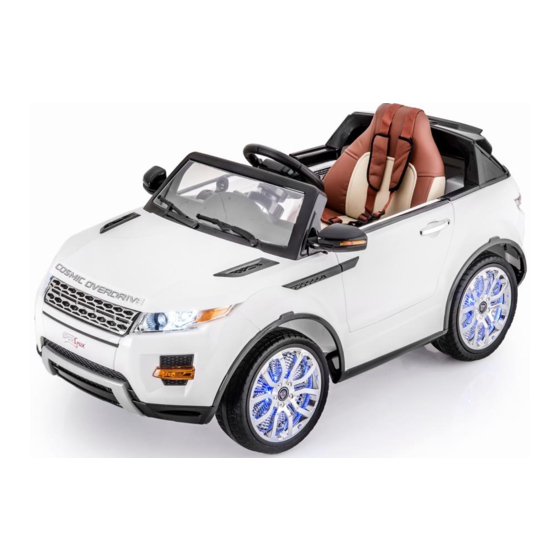
Cosmic Kids Ride on Car
Installation and Operation Instructions
Please read this instruction manual carefully. It is important to read and
follow all of the steps during assembly to ensure proper operation and safety
of the child. Please keep this manual for future reference.
Scan this QR Code to
view the Range Rover
Assembly Video
Advertisement
Table of Contents

Summary of Contents for Supertrax Cosmic
- Page 1 Cosmic Kids Ride on Car Installation and Operation Instructions Please read this instruction manual carefully. It is important to read and follow all of the steps during assembly to ensure proper operation and safety of the child. Please keep this manual for future reference.
-
Page 2: Specifications
SPECIFICATIONS: Car Type: Range Rover Style Battery Type: 12V7AH Electric Motor: 12V30W(Drive) 12V8W(Steering) Age Range: 2 – 5 Years Max. Weight: 65 lbs Product Size: 50”L x 34”W x 25”H Avg. Speed: 2 – 3 MPH Charging time: 8-12 hrs Avg. -
Page 3: Parts List
All assembly videos can be found on YouTube under SUPERtrax PARTS LIST: Car Body Windshield Screws Front Wheels Seat Wheel Covers Rear Spoiler Rear Wheels Steering Wheel Drive Motor Remote Control Rearview Mirror Charger ASSEMBLY INSTRUCTIONS: Front Wheel Assembly: Locate the Front axle, both on the left and right side of the vehicle and insert the wheel as shown in the illustration above. - Page 4 Installation of the Steering Wheel: Connect the wires (connect the red, black & white wires together and connect the green & black wires to the black wire). Cut the wire tie holding wires together then push the wires gently into the steering column and align the chrome pins and the holes and insert steering wheel firmly.
- Page 5 Connect the Battery Power: Connect the plug-in unit of the motor and car wire one, then connect the red power wire (remove the plastic cover) with the battery positive polarity (red wire). (This step is typically completed when the vehicle is tested prior to being shipped out).
- Page 6 Do not overload the vehicle; the maximum load is 65 pounds. Do not drag, pull, tow or haul anything in or behind the vehicle. Do not allow water or any other liquids to contact the battery or any other electrical component on the vehicle. Do not change the circuit system or attempt to rebuild or reassemble the electrical structure of the vehicle.
-
Page 7: Remote Control Instructions
Charging the battery: The charging port is located on the right side of the dashboard. Plug the charger into the charging port first, then plug the charger into wall outlet. BATTERY MUST BE CHARGED FOR A MINIMUM OF 12 HOURS BEFORE INITIAL USE TO AVOID DAMAGE TO THE BATTERY. - Page 8 5) Emergency brake. Press & hold stop button down to stop motion of the car immediately. Release the button to restore the normal functions of the car. Once battery is fully charged, disconnect from charger. Depress power button to turn on the car. Once power is on, all lights light up, accompanied by the sound of the engine.
- Page 9 All assembly videos can be found on YouTube under SUPERtrax WARNING: - Use only the rechargeable battery and charger supplied with your vehicle. NEVER substitute the battery or charger with another brand. Using another battery or charger may cause damage.
-
Page 10: General Maintenance
ENERAL MAINTENANCE: It is the parent’s responsibility to check main parts of the toy before using. Regularly examine the car for potential hazard, such as damage to the battery, charger, cable or cord, and plug. Also, check that all screws are tightened throughout the car. In the event of such damage, the toy must not be used until that damage is repaired or replaced. -
Page 11: Troubleshooting Guide
TROUBLE SHOOTING GUIDE: Problem Possible Cause Possible Solutions Car will not move Battery voltage is low. Charge the battery Battery connector or wires Re-connect the battery are loose. connector to the car Battery is damaged or Replace battery dead. Electrical box or motor is Replace motor damaged The battery will not...


Need help?
Do you have a question about the Cosmic and is the answer not in the manual?
Questions and answers