Table of Contents
Advertisement
Advertisement
Table of Contents

Related Manuals for Lilliput A11


Summary of Contents for Lilliput A11
- Page 1 Instruction Manual...
- Page 2 IMPORTANT SAFETY INSTRUCTIONS: The device has been tested for conformance to safety regulations and requirements, and has been certified for international use. However, like all electronic equipment, the device should be used with care. Please read and follow the safety instructions to protect yourself from possible injury and to minimize the risk of damage to the unit.
-
Page 3: Table Of Contents
CONTENTS PRODUCT DESCRITION....................3 1.1 Overview........................3 1.2 Main Features......................3 CONNECTIONS AND CONTROLS.................. 4 DV BATTERY MOUNT PLATE..................6 MENU SETTING........................6 4.1 Shortcut Keys......................7 4.1.1 Dial............................7 4.1.2 F1-F2..........................7 4.2 Menu Operation......................7 4.2.1 Picture..........................7 4.2.2 Marker..........................9 4.2.3 Function........................11 4.2.4 Assistant........................ -
Page 4: Product Descrition
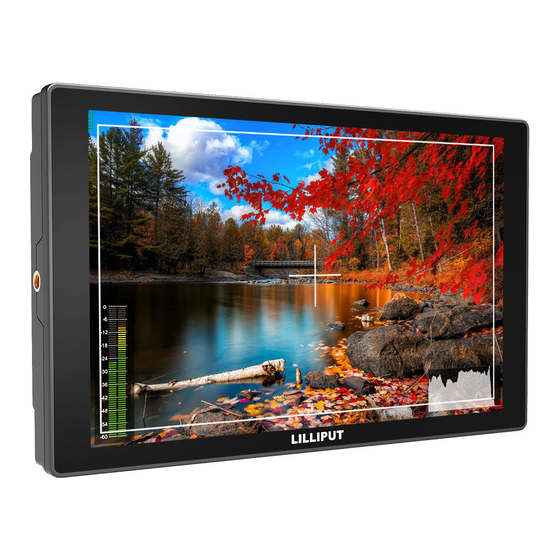
1. PRODUCT DESCRITION 1.1 Overview The 10.1'' monitor A11, matches with world-famous 4K / FHD camera brands, to assist cameraman in better photography experience for variety of applications, i.e. filming on site, broadcast live action, making movies and post-production, etc. -
Page 5: Connections And Controls
2. CONNECTIONS AND CONTROLS Power Indicator Green light is power on. Menu Dial FN function: Dial left or right to adjust the volume when power on. Menu function: Press to activate menu displayed on screen when power on. Option function: Select option via dialing to the left or right. - Page 6 F1,F2 User-definable Buttons F1: Scan. F2: Mute. /Input Power. Switch input signal after power on. SDI Input Interface Video and audio input from an SDI device SDI Output Interface Video and audio output from an SDI device ...
-
Page 7: Dv Battery Mount Plate
3. DV BATTERY MOUNT PLATE 3.1 Standard mounts process Battery of SONY DV: DCR-TRV series,DCR-TRV E series,VX2100E PD P series,GV-A700,GV-D800 FD/CCD-SC/TR3/FX1E/HVR-AIC,HDR-FX1000E,HVR-Z1C,HVR-V1C,FX7E F330 3.2. V-MOUNT battery plate (optional) Please refer to GP-L130AB type battery specifications. Plate Racket V mount Battery Plate 3.3. -
Page 8: Shortcut Keys
4.1 Shortcut Keys 4.1.1 Dial Dialing to the left or right when power on, volume will appear at the bottom of the screen. Then press the dial to switch among of volume, brightness, contrast, saturation, tint, sharpness and exit. User can adjust the value of the selected option via the dial. - Page 9 ITEMS OPTIONS Brightness 0 – 100 Contrast 0 – 100 Saturation 0 – 100 Tint 0 – 100 Sharpness 0 – 100 6500 K/7500 K/9300 K/USER Red gain 0 - 255 Green gain 0 - 255 Note: Only available when under Color Temp.
-
Page 10: Marker
image be colder. User can use this function to strengthen, weaken or balance the image color according requirements. The standard white light color temperature is 6500K. Note: Only available under "User" mode to adjust Color Bias and Gain. 4.2.2. Marker ITEMS OPTIONS Center Marker... - Page 11 Safety Marker Used to select and control the size and availability of the safety area. Available types are [95%], [93%], [90%], [88%], [85%], [80%], [Off]. Grid The grid feature displays a "thirds" overlay with two vertical and horizontal lines placed in each third of the image.
-
Page 12: Function
4.2.3. Function ITEMS OPTIONS Scan Aspect, Pixel to Pixel, Zoom Full/16:9/1.85:1/2.35:1/4:3/3:2/1.3X/ Aspect Onlyavailable under Aspect 2.0X/2.0X MAG Mode. Display scan Fullscan, Underscan, Overscan Check field Off, Mono, Red, Green, Blue Only available when the Scan Zoom X1.5/X2/X3/X4 is selected Zoom option. Freeze Off, On DSLR... -
Page 13: Assistant
Pixel to Pixel The pixel to pixel is a monitor set to 1:1 pixel mapping with native fixed pixels, which avoids loss of sharpness due to scaling artifacts and normally avoids incorrect aspect ratio due to stretching. Zoom The image can be enlarged by X1.5/X2/X3/X4 ratios. - Page 14 Peaking The peaking is used to aid the camera operator in obtaining the sharpest possible picture. Select "On" to display colored outlines around sharp areas of the image. Peaking Color Use this setting to change the color of focus assist lines to Red, Green, Blue, White, Black.
- Page 15 We have included a chart in this section that shows how the colors correspond to specific tonal values. Exposure & Exposure Level The exposure feature helps the user achieve optimum exposure by displaying diagonal lines over areas of the image that exceed the setting exposure level. The exposure level can be set to 0~100.
-
Page 16: Audio
4.2.5 Audio ITEMS OPTIONS Volume 0-100 CH0&CH1,CH2&CH3, CH4&CH5, Only available when Audio Channel CH6&CH7, CH8&CH9, CH10&CH11, under SDI mode CH12&CH13, CH14&CH15 Level meter Off, On Mute Off, On Volume Adjust the volume for the built in speaker and earphone jack audio signal. Audio Ch. -
Page 17: System
any audio that exceeds this level will be clipped, resulting in distortion. Ideally peak audio levels should fall in the upper end of the green zone. If the peaks enter into the yellow or red zones, the audio is in danger of clipping. Mute ... - Page 18 ITEM OPTION Language English, Chinese OSD timer 10s, 20s, 30s Image flip Off, H/V, H, V Back light 0-100 F1 Conf. Center Maker, Aspect Marker, Grid, Check Field, Display Scan, Scan, Aspect, DSLR, Freeze, Image Flip, Peaking, False Color, F2 Conf. Exposure, Histogram, Mute, Level Meter Reset Off, On...
-
Page 19: Parameters
5. PARAMETERS Display Screen 10.1 inch 8bits Physical Resolution 1920x1200 Brightness 320cd/㎡ Contrast 1000:1 Viewing Angle 175°/175° (H/V) Input Signal HDMI, VGA, 3G-SDI Output Signal HDMI, 3G-SDI Input Voltage DC 7-24V Power consumption ≤ 13W Operating Temperature 0℃~50℃ -20℃~60℃ Storage Temperature Dimension(LWD) 252×157×25mm Weight... -
Page 20: Trouble Shooting
7. TROUBLE SHOOTING Only black-and-white display: Check whether the color saturation is properly setup or not. Power on but no pictures: Check whether the cables of HDMI, VGA and SDI are correctly connected or not. Please use the standard power adapter coming with the product package. Improper power input may cause damage.
Need help?
Do you have a question about the A11 and is the answer not in the manual?
Questions and answers