
Related Manuals for Ametek TMC CleanBench Aktiv


Summary of Contents for Ametek TMC CleanBench Aktiv
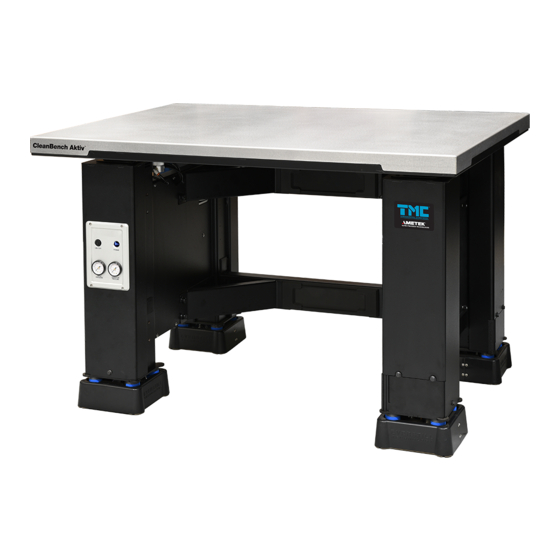
- Page 1 CleanBench ™ Aktiv ™ Everstill Technology Active Vibration Cancellation Lab Table User Guide 96-44439-01 Rev A 10/24/18...
- Page 2 Warnings CleanBench™Aktiv ▪ User Guide ▪ 96-44439-01 Rev A ▪ 10/24/18 Warnings Power Supply (included) The AC voltage requirement is 90-260 VAC, 50-60 Hz. Power Cord (applicable cable included) The main power cord has 0.75mm (18 AWG) wire and includes a PE ground. US AC power cord is UL / CSA certified Euro AC power cord is VDE certified UK AC power cord is VDE certified...
-
Page 3: Table Of Contents
CleanBench™ Aktiv ▪ User Guide ▪ 96-44439-01 Rev A ▪ 10/24/18 Table of Contents Return to TOC ABLE OF ONTENTS Introduction ................1 Unpacking & Moving System ..........3 Shipping Crate Content ............3 Tools required ................ 3 Unpacking System ..............4 Moving System ............... - Page 4 CleanBench™ Aktiv ▪ User Guide ▪ 96-44439-01 Rev A ▪ 10/24/18 Figures & Tables Return to TOC & T IGURES ABLES Figure 2-1 Shipping crate delivery ............... 3 Figure 2-2 Remove banding straps .............. 4 Figure 2-3 Remove ramp panel screws ............4 Figure 2-4 Lower ramp panel ...............
-
Page 5: Introduction
Introduction CleanBench™ Aktiv ▪ User Guide ▪ 96-44439-01 Rev A ▪ 10/24/18 Return to TOC Introduction The CleanBench™ Aktiv with Everstill technology is a two-stage vibration isolation table. The first stage: The active stage which senses and cancels vibration originating from the floor by incorporating TMC’s proven serial architecture originally developed for STACIS. - Page 6 Introduction CleanBench™ Aktiv ▪ User Guide ▪ 96-44439-01 Rev A ▪ 10/24/18 Return to TOC • Patented active vibration cancellation technology paired with passive isolation two stages of vibration isolation. Active and passive cancellation working together for ultra-precision instruments. • Advanced vibration sensor technology Incorporates geophone type velocity sensors for sub-1 Hz performance Better low frequency sensitivity than accelerometers...
-
Page 7: Unpacking & Moving System
CleanBench™ Aktiv ▪ User Guide ▪ 96-44439-01 Rev A ▪ 10/24/18 Unpacking & Moving System Return to TOC Unpacking & Moving System CAUTION! System weighs approximately 450 lbs. (204 kg) Figure 2-1 Shipping crate delivery Shipping Crate Content CleanBench™ Aktiv Applicable Power Cord Air Line 15 feet of ¼”... -
Page 8: Unpacking System
CleanBench™ Aktiv ▪ User Guide ▪ 96-44439-01 Rev A ▪ 10/24/18 Unpacking & Moving System Return to TOC Unpacking Instructions Ensure that your wearing hand and eye protection gear Cut and remove the 5 metal bands around the crate using metal shears. Step 1 Figure 2-2 Remove banding straps Remove philips screws attaching RAMP panel to crate. -
Page 9: Figure 2-4 Lower Ramp Panel
CleanBench™ Aktiv ▪ User Guide ▪ 96-44439-01 Rev A ▪ 10/24/18 Unpacking & Moving System Return to TOC Swing open hinged RAMP panel to the floor Step 3 Lower RAMP panel hinged to the lower edge of crate platform Swing open metal ramp. -
Page 10: Figure 2-6 Remove Metal Bands Securing System To Crate
CleanBench™ Aktiv ▪ User Guide ▪ 96-44439-01 Rev A ▪ 10/24/18 Unpacking & Moving System Return to TOC Remove two metal bands securing CleanBench™ Aktiv to the base of the crate Step 5 Do not remove two metal bands that secures tabletop protective cover to the frame Figure 2-6 Remove metal bands securing system to crate Lower two casters attached to each side of the frame to raise system off the Step 6... -
Page 11: Figure 2-8 Lower Center Caster
CleanBench™ Aktiv ▪ User Guide ▪ 96-44439-01 Rev A ▪ 10/24/18 Unpacking & Moving System Return to TOC Lower center caster wheel onto ramp’s metal track using supplied wrench Step 7 Ensure swivel caster is lowered into the ramp’s center track to allow system to roll forward down the ramp Figure 2-8 Lower center caster Using two people, carefully roll system down the ramp onto the floor. -
Page 12: Figure 2-10 Remove Two Metal Shipping Brackets
CleanBench™ Aktiv ▪ User Guide ▪ 96-44439-01 Rev A ▪ 10/24/18 Unpacking & Moving System Return to TOC Remove two metal shipping brackets from the two front legs of the frame using Step 9 supplied wrench. Figure 2-10 Remove two metal shipping brackets Step 10 Cut and remove two metal bands that secures protective top cover to frame using cuttng shears. -
Page 13: Moving System
CleanBench™ Aktiv ▪ User Guide ▪ 96-44439-01 Rev A ▪ 10/24/18 Unpacking & Moving System Return to TOC Moving System Moving system normally requires a minimum pathway of 48 inches (1219 mm) wide or greater with casters locked in position as system was uncrated. The casters can be adjusted to allow passing through narrow pathways with a minimum width of 35.5 inches (902 mm). -
Page 14: Figure 2-14 Rotate Side Casters 90 Degrees Toward Narrow Pathway
CleanBench™ Aktiv ▪ User Guide ▪ 96-44439-01 Rev A ▪ 10/24/18 Unpacking & Moving System Return to TOC 35.5 inches; If pathway ahead is less than 48 inches and a minimum of 35.5 Step 3 inches, then casters need to be adjusted for narrow pathway Rotate system so narrow end is pointing toward narrow pathway ... - Page 15 CleanBench™ Aktiv ▪ User Guide ▪ 96-44439-01 Rev A ▪ 10/24/18 Unpacking & Moving System Return to TOC Lower system to the floor by raising all three casters. Step 5 Remove locking pin on two side swivel casters Raise all three casters using wrench supplied by TMC ...
- Page 16 CleanBench™ Aktiv ▪ User Guide ▪ 96-44439-01 Rev A ▪ 10/24/18 Return to TOC Page is intentionally blank TMC 15 Centennial Drive Peabody, MA 01960 (800) 542-9725 www.techmfg.com Page 12...
-
Page 17: Setup And Operation
CleanBench™ Aktiv ▪ User Guide ▪ 96-44439-01 Rev A ▪ 10/24/18 Controls and Connections Return to TOC Controls and Connections Control Panel Push-push power Blue power indicator ON/ OFF switch illuminates once self-diagnostic has completed indicating system is functional Main air supply pressure Isolator air pressure Figure 3-1 Control panel functions Connections... - Page 18 CleanBench™ Aktiv ▪ User Guide ▪ 96-44439-01 Rev A ▪ 10/24/18 Return to TOC Page is intentionally blank TMC 15 Centennial Drive Peabody, MA 01960 (800) 542-9725 www.techmfg.com Page 14...
-
Page 19: Figure 4-1 Valve Level Adjust
CleanBench™ Aktiv ▪ User Guide ▪ 96-44439-01 Rev A ▪ 10/24/18 System Setup Return to TOC System Setup Note: System tabletop does not include a payload during first time initial setup procedure Ensure power is OFF. Step 1 Turn on air and adjust facility input air pressure gauge to read 15 to 20 psi Step 2 greater than the isolator pressure gauge. - Page 20 CleanBench™ Aktiv ▪ User Guide ▪ 96-44439-01 Rev A ▪ 10/24/18 Return to TOC Page is intentionally blank TMC 15 Centennial Drive Peabody, MA 01960 (800) 542-9725 www.techmfg.com Page 16...
-
Page 21: Operation
CleanBench™ Aktiv ▪ User Guide ▪ 96-44439-01 Rev A ▪ 10/24/18 Operation Return to TOC Operation Ensure power is OFF. Step 1 Place and center payload on the tabletop platform. Step 2 The center of mass of any device(s) should be well centered on the CleanBench™... -
Page 22: Troubleshooting Tips
CleanBench™ Aktiv ▪ User Guide ▪ 96-44439-01 Rev A ▪ 10/24/18 Operation Return to TOC Troubleshooting Tips 1) If blue indicator light fails to illuminate, then review the following • Review supplied power • Check the fuse, • Cycle power switch OFF and ON again •... -
Page 23: Specifications
CleanBench™ Aktiv ▪ User Guide ▪ 96-44439-01 Rev A ▪ 10/24/18 Specifications Return to TOC Specifications Vibration cancellation type ................Active & Passive Schematic architecture ....... Serial type active (actuator in series with isolator spring) Vibration sensors ....Geophone type velocity sensors (voltage proportional to velocity) Leveling ...... - Page 24 CleanBench™ Aktiv ▪ User Guide ▪ 96-44439-01 Rev A ▪ 10/24/18 Return to TOC Page is intentionally blank TMC 15 Centennial Drive Peabody, MA 01960 (800) 542-9725 www.techmfg.com Page 20...
-
Page 25: Dimensional Drawing
CleanBench™ Aktiv ▪ User Guide ▪ 96-44439-01 Rev A ▪ 10/24/18 Dimensional Drawing Return to TOC Dimensional Drawing 31.5” (800 mm) Figure 7-1 CleanBench™ Aktiv Dimensional Drawing TMC 15 Centennial Drive Peabody, MA 01960 (800) 542-9725 www.techmfg.com Page 21... - Page 26 All data in this document is subject to change in accordance with TMC–Ametek policy of continual product improvement. Copyright © 2018 TMC–Ametek All Rights Reserved All registered marks and trademarks are property of their respective holders...
Need help?
Do you have a question about the TMC CleanBench Aktiv and is the answer not in the manual?
Questions and answers