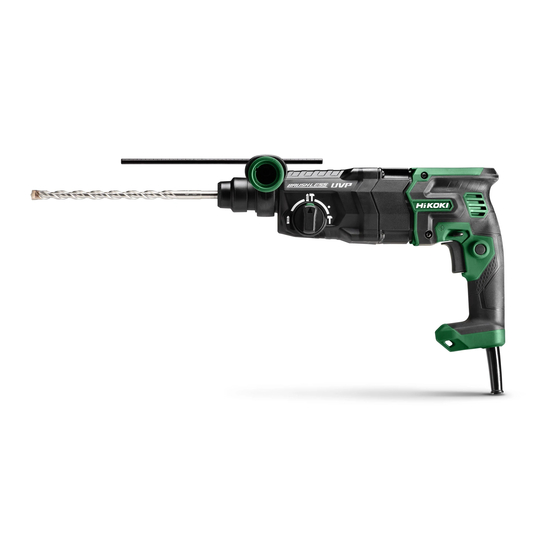
HIKOKI DH 28PEC Handling Instructions Manual
Hide thumbs
Also See for DH 28PEC:
- Handling instructions manual (44 pages) ,
- Handling instructions manual (28 pages) ,
- Handling instructions manual (132 pages)

Related Manuals for HIKOKI DH 28PEC


Summary of Contents for HIKOKI DH 28PEC
- Page 1 Rotary Hammer DH 28PEC Read through carefully and understand these instructions before use. Handling instructions...
-
Page 2: General Power Tool Safety Warnings
Symbols WARNING The following show symbols used for the machine. Be sure that you understand their meaning before use. To reduce the risk of injury, user must Only for EU countries read instruction manual. Do not dispose of electric tools together with Failure to follow the warnings and household waste material! instructions may result in electric shock, fi... -
Page 3: Specifications
d) Store idle power tools out of the reach of SPECIFICATIONS children and do not allow persons unfamiliar with the power tool or these instructions to Model DH28PEC operate the power tool. Power tools are dangerous in the hands of untrained Voltage (by areas)* (110 V, 230 V) users. -
Page 4: Optional Accessories (Sold Separately)
OPTIONAL ACCESSORIES (sold separately) Tool Adapters Use on jobs facing upwards ● Drilling holes in concrete or tile Dust cup Dust collector (B) Drill bit ● Drilling holes in concrete or tile Taper shank Cotter Drill bit (Taper shank) adapter ●... -
Page 5: Prior To Operation
APPLICATIONS Rotation and hammering function ○ Drilling anchor holes ○ Drilling holes in concrete ○ Drilling holes in tile Rotation only function ○ Drilling in steel or wood (with optional accessories) ○ Tightening machine screws, wood screws (with optional accessories) Grip Hammering only function Fig. - Page 6 ○ When turning the rotary hammer on while dust collector (B) is detached from a concrete surface, dust collector (B) will rotate together with the drill bit. Make sure to turn on the switch after pressing the dust cup on the concrete surface.
- Page 7 (2) Driving in wood screws Grip Front cap ○ Prior to driving in wood screws, make pilot holes suitable for them in the wooden board. Apply the bit to the screw head grooves and gently drive the screws into the holes. ○...
-
Page 8: How To Use The Core Bit
(3) Turn the change lever to mark (Fig. 11). HOW TO USE THE CORE BIT Then the tool is locked. (FOR LIGHT LOAD) 7. Using depth gauge (Fig. 14) (1) Loosen the knob on the side handle, and insert the depth When boring penetrating large holes use the core bit (for gauge into the mounting hole on the side handle. -
Page 9: Auto Stop Function
2. How to bore (Fig. 20) (1) Connect the plug to the power source. (2) A spring is installed in the center pin. Push it lightly to the wall or the fl oor straight. Connect the core bit tip fl ush to the surface and start operating. -
Page 10: Reactive Force Control
Table 1 REACTIVE FORCE CONTROL Display This product is equipped with a Reactive Force Control lamp Cause Solution (RFC) feature that reduces jerking of the tool body. fl ashing If the tool bit is suddenly overburdened, any jerking of the Operation has Allow the unit to cool tool body is reduced by activation of the slip clutch or by... -
Page 11: Maintenance And Inspection
Vibration total values (triax vector sum) determined For your continued safety and electrical shock according to EN60745. protection, carbon brush inspection and replacement on this machine should ONLY be performed by a HiKOKI Hammer drilling into concrete: Authorized Service Center. Vibration emission value , HD = 10.7 m/s... - Page 12 Hikoki Power Tools Deutschland GmbH Siemensring 34, 47877 willich, Germany Tel: +49 2154 49930 Fax: +49 2154 499350 URL: http://www.hikoki-powertools.de Hikoki Power Tools Netherlands B.V. Brabanthaven 11, 3433 PJ Nieuwegein, The Netherlands Tel: +31 30 6084040 Fax: +31 30 6067266 URL: http://www.hikoki-powertools.nl...
- Page 16 EN60745-2-6:2010 EN55014-1:2006+A1:2009+A2:2011 EN55014-2:1997+A1:2001+A2:2008 EN61000-3-2:2014 EN61000-3-3:2013 Representative offi ce in Europe 30. 11. 2018 Hikoki Power Tools Deutschland GmbH Naoto Yamashiro European Standard Manager Siemensring 34, 47877 Willich, Germany 30. 11. 2018 Head offi ce in Japan Koki Holdings Co., Ltd.
Need help?
Do you have a question about the DH 28PEC and is the answer not in the manual?
Questions and answers