Table of Contents
Advertisement
Quick Links
Two-Input Wallplate Switcher for HDMI and USB-C with
Ethernet-Enabled HDBaseT Output
AT-HDVS-210U-TX-WP
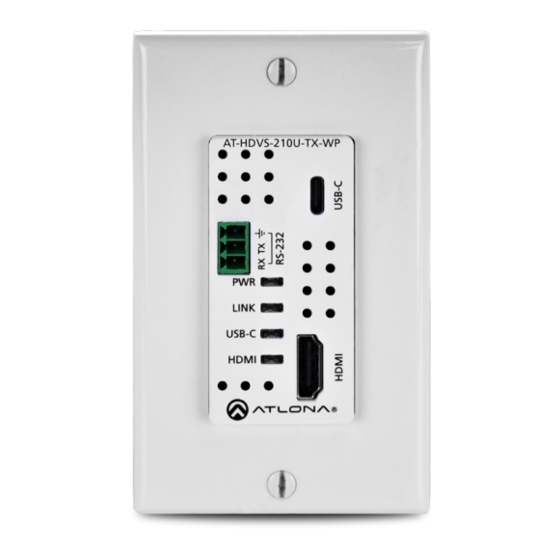
The Atlona AT-HDVS-210U-TX-WP is a 2x1 switcher and HDBaseT transmitter with HDMI
and USB-C inputs. It features a US one-gang, Decora-style wallplate form factor, and includes
interchangeable black and white wallplates and faceplates. The USB-C input is ideal for AV
interfacing with newer Mac®, Chromebook™, and Windows® PCs, as well as smartphones and
tablets. Video signals up to 4K/UHD @ 60 Hz with 4:2:0 chroma subsampling, plus embedded
audio, control, and Ethernet can be transmitted up to 330 feet (100 meters). The HDVS-210U-TX-
WP is HDCP 2.2 compliant. It is designed for use with the AT-UHD-EX-100CE-RX-PSE receiver,
but can also be used with the AT-HDVS-200-RX receiver and HD scaler, as well as Atlona
switchers and matrix switchers with HDBaseT inputs. This transmitter can serve as an integral
component of a fully automated AV system, with the convenience of automatic input selection
and display control. It is remotely powered by the UHD-EX-100CE-RX-PSE or other Atlona
HDBaseT-equipped devices through Power over Ethernet (PoE).
Package Contents
1 x AT-HDVS-210U-TX-WP
1 x White faceplate with RS-232 cover
1 x White wallplate
1 x Black faceplate with RS-232 cover
1 x Black wallplate
1 x 3-pin captive screw connector
1 x Installation Guide
IMPORTANT: Visit http://www.atlona.com/product/AT-HDVS-210U-TX-WP for the latest
firmware updates and User Manual.
1
Installation Guide
AT-HDVS-210U-TX-WP
Advertisement
Table of Contents

Summary of Contents for Atlona AT-HDVS-210U-TX-WP
-
Page 1: Installation Guide
WP is HDCP 2.2 compliant. It is designed for use with the AT-UHD-EX-100CE-RX-PSE receiver, but can also be used with the AT-HDVS-200-RX receiver and HD scaler, as well as Atlona switchers and matrix switchers with HDBaseT inputs. This transmitter can serve as an integral component of a fully automated AV system, with the convenience of automatic input selection and display control. -
Page 2: Panel Descriptions
Installation Guide AT-HDVS-210U-TX-WP Panel Descriptions AT-HDVS-210U-TX-WP HDBaseT LINK USB-C HDMI HDMI USB-C Connect a USB-C cable from this port to a USB-C source. RS-232 Connect an RS-232 controller or automation system to this port (shown with cover removed). This LED indicator glows solid green when the unit is powered. - Page 3 Installation Guide AT-HDVS-210U-TX-WP RS-232 The AT-HDVS-210U-TX-WP provides an RS-232 port which allows communication between an automation system and an RS-232 device. This step is optional. Remove the small plate covering the RS-232 port on the faceplate. small plate X - W...
- Page 4 AT-HDVS-210U-TX-WP Faceplate Removal and Assembly Removal of the faceplate requires that the AT-HDVS-210U-TX-WP be disassembled from the electrical box or mud ring. A small Phillips-head screwdriver is required to remove the faceplate. Unscrew the four Phillips-head screws from the sides of the faceplate, as shown:...
-
Page 5: Connection Diagram
Refer to the User Manual for more information. Install the AT-HDVS-210U-TX-WP into the 1-gang electrical box or mud ring. Attach the included Decora® wallplate to secure the AT-HDVS-210U-TX-WP to the wall/ surface. Connect an HDMI cable from an HD source to the HDMI IN port. - Page 6 AT-HDVS-210U-TX-WP IP Configuration By default, the AT-HDVS-210U-TX-WP is set to DHCP mode, allowing a DHCP server (if present) to assign the unit an IP address. If a DHCP server is not found within 15 seconds, the unit will be placed in Auto IP mode and use a self-assigned IP address within the range of 169.254.xxx.xxx.
- Page 7 AT-HDVS-210U-TX-WP Auto IP mode If the AT-HDVS-210U-TX-WP is unable to detect a DHCP server within 15 seconds, then the unit will use a self-assigned IP address within the range of 169.254.xxx.xxx. If this occurs, connect the AT-HDVS-210U-TX-WP to a computer running Microsoft Windows® and follow the procedure below.
-
Page 8: Troubleshooting
• © 2017 Atlona Inc. All rights reserved. “Atlona” and the Atlona logo are registered trademarks of Atlona Inc. All other brand names and trademarks or registered trademarks are the property of their respective owners. Pricing, specifications and availability subject to change without notice. Actual products, product images, and...


Need help?
Do you have a question about the AT-HDVS-210U-TX-WP and is the answer not in the manual?
Questions and answers