Table of Contents
Advertisement
Quick Links
Advertisement
Table of Contents

Related Manuals for ENHANCED VISION Merlin Plus


Summary of Contents for ENHANCED VISION Merlin Plus
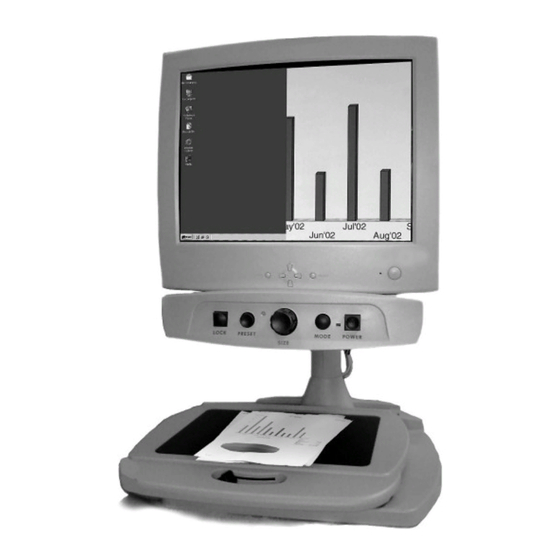
- Page 1 Merlin Plus User’s Manual...
- Page 2 In order to maintain the consistency with the printed version of this manual, this page is intentionally left without manual content.
-
Page 3: Table Of Contents
With a Computer ..........With a 20” Enhanced Vision TV Monitor ....... -
Page 4: About Merlin Plus
Please read this booklet and familiarize yourself with Merlin Plus’ features and operation before using this system. Merlin Plus is ready to use right out of the box. By reviewing Merlin Plus’ features and controls before using it and following the directions carefully, you’ll be able to enjoy all the great... -
Page 5: Computer System Recommended Configuration
Computer System Recommended Configuration Merlin Plus will work with a variety of computers. The computer system configuration listed below is recommended for usage with Merlin Plus*. • Operating System: Windows 98/NT/2000/XP • Processor Speed: Pentium III 500mhz • Hard Disk: 50MB of hard-disk space available •... -
Page 6: Merlin Plus At A Glance
Recessed handles for carrying Merlin Plus 10. 3-foot RCA video cable 11. Power supply and power cord 12. VGA extension cable 13. Merlin Plus control box with coil cable 14. Foot Switch 15. Software cable and adapter 16. Merlin Plus Remote Software CD ROM 17. - Page 7 Merlin Plus at a Glance included...
-
Page 8: Safety And Care
Merlin Plus for a patient’s individual impairment. Precautions • Merlin Plus is designed to be used on a stable, level surface such as a solid desk or table. • Do not place Merlin Plus on an unstable table, cart, or stand. It may fall, causing serious damage to the unit or bodily injury to a user. -
Page 9: Safety And Care
• Always turn the power OFF before cleaning Merlin Plus. • The plastic surfaces of Merlin Plus can be cleaned with a soft dry cloth or an electrostatic dusting wipe. DO NOT use liquid cleaners. -
Page 10: Setting Up Merlin Plus
1. Find a steady and level location, such as a table or desk, where you will be comfortable using Merlin Plus. 2. Carry Merlin Plus only by the two recessed figure 1 handles on the sides of the base for a secured grip (see figure 1). -
Page 11: With A 20" Enhanced Vision Tv Monitor
Merlin Plus. 2. Carry Merlin Plus only by the two recessed handles on the sides of the base for a secure grip (see figure 1). Place it on the table or desk. -
Page 12: With Remote Software Or Control Box
Setting Up Merlin Plus c. With Remote Software or Control Box Two options are available to control the Merlin Plus split screen, line markers, and window size features. It is recommended that you use the Merlin Plus Remote Software provided on the CD-ROM enclosed (see item 16 on page 7). -
Page 13: With External Video Source
Setting Up Merlin Plus • On the Merlin Plus Welcome Menu, click on the Merlin Plus Software Installation icon. This will bring up an installation wizard to walk you through the set-up process. • At the end of the installation process, you may choose to run the application immediately. -
Page 14: Turning On Merlin Plus
Turning on Merlin Plus Merlin Plus Power Button The Power button on Merlin Plus is located on the far right side of the control panel (#1 above). • Press the Power button. A green light to the left of the Power button will illuminate, indicating the power is ON. -
Page 15: About Merlin Plus Remote Software
About Merlin Plus Remote Software Merlin Plus Remote Software Actively Running on Your Computer Upon installation as described on page 12, your computer will now display the EV Remote Software icon at the lower portion of your screen as shown on figure 1. - Page 16 For instance, from another application, you may simply key in a preset HOT KEY combination and Merlin Plus will react to it. There is no need to use the mouse. This allows you to keep your hands on the keyboard at all times.
- Page 17 4. About the CONNECTION STATUS Indicator The CONNECTION STATUS indicates if a valid connection is detected with Merlin Plus. A green indicator shows an active connection (ACTIVE PORT 1) (see figure 5). A red indicator shows a non-valid connection-NONE (see figure 4).
- Page 18 HOT KEYS on page 16 anymore. To run the software again, use the START MENU, PROGRAMS, MERLIN PLUS REMOTE and click on the MERLIN PLUS REMOTE icon. Uninstalling Merlin Plus Remote Software: To uninstall the application completely from your system, use the START MENU, PROGRAMS, MERLIN PLUS REMOTE and click on the UNINSTALL icon.
-
Page 19: Changing Viewing Mode
Full Color Image This mode is used most often because it gives you a true color representation of the image that is being magnified. When Merlin Plus is first turned on, it displays the image in full color. Black and White Image... -
Page 20: Using Merlin Plus Control Box Viewing Modes
NOTE: The control panel viewing modes are applicable to either a VGA monitor or a 20” TV monitor. b. Using Merlin Plus Control Box Viewing Modes You can choose a viewing mode by pressing the OPTIONS button on the control box. This will change the current viewing mode as follows: •... - Page 21 Changing Viewing Mode • Full Video Magnifier Image This is the default video magnifier mode that comes on when Merlin Plus is turned on (see figure 1). • Full Computer Image This mode displays the full image coming from the computer attached to Merlin Plus.
-
Page 22: Using Merlin Plus Remote Software Viewing Modes
NOTE: A 20” TV monitor with S-Video will only display the full video magnifier image and full image with connected external camera. c. Using Merlin Plus Remote Software Viewing Modes • The software provided on the CD-ROM features identical capabilities as the control box. Please refer to previous section “b”... -
Page 23: Changing Magnification
You can increase or decrease the size of the image by using the SIZE dial at the center of the control panel (see figure 1). There are sixteen levels of magnification available on Merlin Plus. • To increase the size of the image, turn the dial clockwise, or to the right. -
Page 24: Using Line Markers
Using Line Markers Line Markers are used to frame an image between two lines. These lines may be used as a reading guide for long lines of text, or as a guide to help keep your place as you move from one side of the page to the other, or just to make writing easier and neater. -
Page 25: Using Windowing
Using Windowing Windowing is similar to Line Markers, except that it allows you to completely block out portions of the screen so that you display only the portion of the image you want to view. a. With the Control Box You can choose horizontal or vertical windowing by pressing the WINDOW button on the control box (see figure 1). -
Page 26: Using Split Screen
Using Split Screen A Split-Screen picture is one in which both the computer and the video magnified image are displayed simultaneously on the SVGA or VGA monitor. a. With the Control Box You can choose horizontal or vertical split screen by pressing the WINDOW button on the control box (see figure 1). -
Page 27: Setting Magnification Presets
Setting Magnification Presets At the factory, Merlin Plus has been preset at magnification levels 4 and 11. However, you can program Merlin Plus to your two favorite levels, and change those levels at any time. Using the Preset Button Merlin Plus’ Preset button is used for three operations: 1) to switch between two different magnification presets;... -
Page 28: Object Locator
3. Use the X-Y table and move your work or reading material until you have located the desired item within the “target” area. 4. Release the button and Merlin Plus will magnify the item you located within the targeted area. -
Page 29: Intelligent Focus Lock
Intelligent Focus Lock When Merlin Plus is turned on, it is automatically set on auto focus. This is the most convenient setting for everyday activities, such as reading anything from a single page to a thick book, reading a prescription bottle, or working with arts and crafts. -
Page 30: Using Merlin Plus Color Select Options
How to Program a Color Select Option With Merlin Plus turned ON, place a piece of reading material on the X-Y table so that it appears on your monitor at a magnification size that is comfortable for viewing. - Page 31 Using Merlin Plus Color Select Options Step 2: Turn the SIZE dial Clockwise to scroll through the menu options. Choose a COLOR SELECT prompt (1-5) COLOR SELECT 2 and press the PRESET button. Step 3: Turn the SIZE dial to choose your preferred...
-
Page 32: Using The X-Y Table
Using the X-Y Table Locking the X-Y Table To lock the X-Y table, slide the lever all the way to the right until it clicks and locks (A). Unlock the X-Y table by sliding the lever to the right again and release the lever (B). -
Page 33: Tips For Reading And Writing
Writing with Merlin Plus • Beginners should start at smaller magnification sizes, and then increase magnification as they become more comfortable using Merlin Plus for writing. • The smaller the magnification size the bigger you tend to write; the higher the magnification size the smaller you’ll write. -
Page 34: Programming Setup Options
You must first train Merlin Plus (see page 35) to activate voice recognition. Train Me: In this option you can program Merlin Plus to respond to your spoken commands to change magnification size and viewing mode. (See page 35: “Training Merlin for Voice Recognition.”) -
Page 35: Voice Recognition Programming (Unit With Voice Recognition Only)
If there is an unusual noise that occurs while you are recording, such as a cough or a door closing loudly, simply remain silent for approximately 10 seconds and Merlin Plus will exit the training session automatically. To restart, begin with step 2 again. -
Page 36: Using Voice Recognition (Unit With Voice Recognition Only)
Tips for Using Voice Recognition • Merlin Plus has been trained to respond to your voice at its normal volume when facing the microphone on the control panel. • If there is any background noise, such as a radio or television, Merlin Plus may not respond because it is not able to distinguish your voice from the other sounds. -
Page 37: Using A Computer With Merlin Plus Off
Using a Computer with Merlin Plus OFF figure 1 At times, you may want to use your computer without Merlin Plus. Just make sure you turn Merlin Plus OFF by pressing the POWER button (see figure 1). The computer’s display signal will automatically flow through the Merlin Plus even with it turned OFF. -
Page 38: Merlin Plus Specifications
Merlin Plus Specifications General: Up to 32 basic CCTV video modes available plus split screen functionality Up to 5 split screen video modes supported Smooth movable XY table Maximum monitor weight 100lbs (45kg) Voice activated CCTV modes with voice training (Optional) - Page 39 Merlin Plus Specifications Up to 28 Color Select Modes to Choose From (up to 5 enhanced modes storable): Color Select Black text on Green background Color Select Black text on Orange background Color Select Black text on Blue background Color Select Black text on Yellow background...
- Page 40 Merlin Plus Specifications Split Screen Video Modes: Full CCTV video Full computer video (if VGA connected) Split CCTV and VGA split screen (if VGA connected) Full external video (if external camera attached) Split external video and VGA split screen (if external camera and VGA attached)
- Page 41 Merlin Plus Specifications Control Panel: Intelligent focus lock: Auto-focuses upon zoom adjustment then freezes focus for tasks requiring fixed focus Locator/Preset: Quick locator finder that displays an onscreen target to help orientation at high zoom levels Allows 2-user defined zoom levels to be stored for convenience...
- Page 42 Merlin Plus Specifications Viewing Mode Features Available: The following charts illustrate the viewing mode features available on a VGA monitor and TV monitor. VGA Monitor Features Available FEATURES AVAILABLE LINE MARKERS WINDOWING Viewing Mode 1. Full Video Magnifier 2. Full Computer Image 3.
-
Page 43: Merlin Plus Specifications 38
Merlin Plus Specifications Illumination: Two user-replaceable 5-watt fluorescent bulbs (10,000-hr life) Connections: S-Video output for CCTV modes RCA Composite video output for CCTV modes RCA Composite video input for external camera modes 12VDC Power input Computer VGA input (SUB-D15) Split screen VGA output (SUB-D15) -
Page 44: Troubleshooting
• Check the power strip/surge connector if the monitor is plugged into one. • Check that Merlin Plus is ON, a green light should be lit next to the control panel POWER button. If not check FAQ 1. • Check that the VGA monitor cable is properly secured into the port labeled MONITOR in the back of Merlin Plus (see page 10). - Page 45 6. Merlin Plus Lights are Not ON • Check that Merlin Plus is ON. If not, check FAQ 1. • Check that the light switch (item 18 on page 7) under Merlin Plus’ control panel is ON. 7. The Foot Switch Does Not Work •...
- Page 46 10. The Computer Display is Not Available on Merlin Plus Even Though My Computer is ON and Connected Properly • Turn Merlin Plus OFF, you should see the full computer image on the VGA monitor. If not, check that all VGA cable connections are secured.
- Page 47 (see page 32). 14. Using a Non-Enhanced Vision or Additional TV/Monitor • If you choose to use a TV or monitor other than one from Enhanced Vision, it must have an RCA-style VIDEO IN jack, either on the back or the front, to work with Merlin Plus.
-
Page 48: Other Enhanced Vision Products
Other Enhanced Vision Products Jordy – Two Low Vision Systems in One For distance, intermediate and near viewing. Magnification: 1X – 30X Four viewing modes for optimum visibility: Color, Black/White, Enhanced Positive, Enhanced Negative Jordy Docking Stand (optional) Magnification: 4X – 40X... - Page 49 Other Enhanced Vision Products FlipperStand The Flipper Stand is compatible with both the Flipper and FlipperPort products. The Flipper Stand extends the flexibility of these products by elevating Flipper to 15 inches on a platform which allows users to view materials easily in classroom or audience settings.
-
Page 50: Contact Information
Smart Video Connects Enhanced Vision’s low vision devices to a computer monitor. Carrying Cases Convenient cases for storage and transport of all Enhanced Vision products. MaxTrak An essential accessory to keep your Max straight while rolling across a page. Battery Rechargeable batteries for Enhanced Vision’s low vision devices. -
Page 51: Warranty
Merlin Plus against defects in materials and workmanship under normal use for three years from the date of original purchase. Enhanced Vision, at its option, will at no charge either repair the product or replace it during the warranty period. -
Page 52: Warranty
Service Process We don’t expect that you will need to have repairs on the Merlin Plus but if you do, you will need to send the unit to our warranty service center. If warranty service is required, please call Enhanced Vision between 8 a.m. - Page 56 The Merlin Plus video magnifier is designed to enlarge and enhance images to improve the lives of people who have low vision. The extent to which Merlin Plus can improve the ability to see images and text depends on a person’s individual condition and level of visual impairment.
Need help?
Do you have a question about the Merlin Plus and is the answer not in the manual?
Questions and answers