Table of Contents
Advertisement
Quick Links
Advertisement
Table of Contents

Subscribe to Our Youtube Channel
Related Manuals for ENHANCED VISION acrobat HD


Summary of Contents for ENHANCED VISION acrobat HD
- Page 1 ® Users Manual...
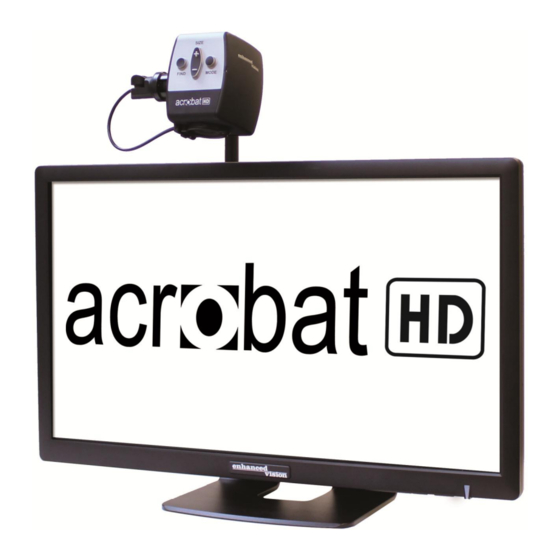
- Page 2 The Acrobat HD product can enable people with low vision to read, write and to see objects at any distance. The unique design of this product provides the ultimate in flexibility and offers a large range of magnification with multiple viewing options that make reading easier than ever.
- Page 3 FCC COMPLIANCE NOTICE This device complies with Part 15 of the FCC Rules. Operation is subject to the following two conditions: (1) This device may not cause harmful interference, and (2) this device must accept any interference received, including interference that may cause undesired operation. This equipment has been tested and found to comply with the limits for a Class B digital device, pursuant to Part 15 of the FCC Rules.
-
Page 4: Table Of Contents
Important Safety Precautions ............... 5 - 8 Acrobat HD Acrobat HD Package Contents ............. 9 -10 Acrobat HD Setup................Using Acrobat HD ................12 - 29 Advanced Programming................30 - 31 Troubleshooting................... Specifications ....................Warranty Statement .................. Other Enhanced Vision Products............ -
Page 5: Important Safety Precautions
Acrobat HD for a patient’s individual condition. Please follow these safety precautions: • Use the Acrobat HD on a stable, level surface such as a solid desk or table, according to its intended design specifications. - Page 6 Make sure you do not pull on any power cords or connector cables. Caring for the Acrobat HD • Always turn the power OFF on the Acrobat HD when the system is not in use. • Always turn the power OFF before cleaning the Acrobat HD.
- Page 7 • Do not use the Acrobat HD near flammable liquids. • At least once per week, clean the Acrobat HD with a soft dry cloth or an electrostatic dusting cloth. DO NOT use liquid cleaners on its plastic surfaces. No additional methods of sterilization or cleaning are recommended or required.
-
Page 8: Important Safety Precautions
Acrobat HD to avoid possible injury to hands and fingers. • To avoid personal injury or damage to the Acrobat HD, do not make any other type of connections to the camera input jacks other than those indicated in the photos below. -
Page 9: Acrobat Hd Package Contents
Rolling Case (optional): Provides protection for the Acrobat HD and makes transportation even easier 10. DVI toggle box (optional): Allows the display of the Acrobat HD to be shared along with a standard DVI output of a computer and permits switching between either source 11. -
Page 10: Acrobat Hd Package Contents
Acrobat HD Package Contents... -
Page 11: Acrobat Hd Setup
4. Turn the power on On the rear, right side of the Acrobat HD, flip the switch from the 0 to l position (See Figure 3). The LCD screen and Acrobat HD Camera will automatically turn ON in a few seconds. -
Page 12: Using Acrobat Hd
USING ACROBAT HD Adjust the camera position The Acrobat HD camera is attached to a specially designed arm that allows the camera to slide left or right, or to pivot in multiple directions. (See Figure 1, 2, 3 and 4) - Page 13 Do NOT force the camera beyond its 340-degree angular range as this may damage the unit. The Acrobat HD may be used to see objects in the distance, viewing oneself and reading or writing. To change the viewing mode, simply turn the position of the Camera by rotating it on the arm.
- Page 14 “Self Viewing” is displayed in the upper-left corner of the screen when changing to this viewing angle. In this position, you can use the Acrobat HD to help you put on make- up, shave or perform other personal hygiene (See Figure 1).
- Page 15 When the camera is rotated downward, “Reading-Mode” is displayed in the upper-left corner of the screen. The Acrobat HD can slide freely, left or right, along the specially designed bracket mechanism. It is best to close the Zoom Lens when objects are placed 12”-19” away from the Camera for optimal viewing clarity.
- Page 16 Adjusting Magnification The Acrobat HD offers a large range of magnification capabilities. The following directions can be used with the Remote or Camera (See Figure 1 & 2). 1. To adjust the magnification press and hold the + or - buttons located on the Remote or Camera until you reach your desired magnification.
- Page 17 Changing the Viewing Mode The Acrobat HD was designed to provide optimum viewing for people with certain visual conditions by offering a range of choices in both text and background colors. Use the Mode key (See Figure 1 & 2) to toggle between full color viewing, Black and White, enhanced positive, enhanced negative, and your 5 favorite color select modes.
- Page 18 In factory default this mode is turned off. Follow the instructions on page 24 to turn this color mode on. Color Select 5 In factory default this mode is turned off. Follow the instructions on page 24 to turn this color mode on. Using Acrobat HD...
- Page 19 "+" or "-". 7. Press the "Mode" button. 8. Press the “+ or -” button to preview each of the 28 available color modes. 9. Press the "Mode" button to select and save the desired favorite color mode. Using Acrobat HD...
- Page 20 2. Scroll with the “+” to “5. Brightness C. Sel” 3. Press the “Mode” button. 4. Press the “+ or -” button to increase or decrease screen brightness. 5. Press the “Mode” button to set and save the color select screen brightness. Using Acrobat HD...
- Page 21 Adjusting the White Balance with the Remote Control The color white is often affected by the lighting used in a room. The Acrobat HD White Balance control allows you to achieve optimum clarity. The following directions can be used to adjust the White Balance with the Remote: 1.
- Page 22 2. Press the + to scroll to “2. White Balance”. 3. Press the Mode button to initiate the White Balance feature. 4. Press the +/- to scroll through the four settings. 5. Press the Mode button to exit this feature. Figure 1 Using Acrobat HD...
- Page 23 2. To move the Upper Line Marker press the “ULM+/-” buttons. 3. To move the Lower Line Marker press the “LLM+/-” buttons. 4. To remove Line Markers press and hold the “LM ON/OFF” button for at least 1 second. Figure 1 Using Acrobat HD...
- Page 24 12. Press the Mode button to set the Lower Line Marker. Figure 1 13. To remove Line Markers repeats steps 1-4. 14. Press the “+” button to return to the “1. Line Markers Off” Menu. 15. Press the Mode button to exit the Menu. Using Acrobat HD...
- Page 25 2. Scroll with the "+" to "4. Brightness" 3. Press the "Mode" button. 4. Press the “+ or -” button to increase or decrease screen brightness. 5. Press the "Mode" button to set and save the screen brightness. Using Acrobat HD...
- Page 26 Using the Object Locator The Acrobat HD Object Locator feature can help you quickly locate something you're looking for on a page, or a specific part of an object you want to view more closely. The following directions can be used to locate a desired object with the Remote and Camera: 1.
- Page 27 Using Intelligent Focus Lock with the Remote Control When The Acrobat HD is turned on, it is automatically set on auto focus. This is the most convenient setting for everyday activities, such as reading from a single page to a book, reading a prescription bottle or working with arts and crafts.
- Page 28 3. The word "Focus Lock" will appear and remain in the upper left corner of the monitor (See Figure 2). 4. To Return to Auto-Focus, simultaneously press the “Find” and “Mode” buttons for at least 1 second on the Camera (See Figure 1). Figure 1 Using Acrobat HD...
- Page 29 Using the Freeze Function Freeze allows you to take a snap shot of what the Acrobat HD is magnifying in order for you to have extended time to view the image. This is particularly helpful when taking notes in a classroom.
-
Page 30: Advanced Programming
ADVANCED PROGRAMING Advanced Programming Options The Acrobat HD has advanced capabilities for modifying the programming of the included remote control (when using multiple units) as well as changing the default language used within the setup menus. These settings are completely optional and should not be changed under normal circumstances. - Page 31 ACROBAT HD FEATURES MENU 4321 Secret code to enter menu using SIZE +: 4 press, mode 3 press, mode 2 press, mode ** Items currently selected appear 1 press, mode in GREEN ** Select different IR codes to avoid multiple remote control conflicts...
-
Page 32: Troubleshooting
TROUBLESHOOTING Q. How should I clean the Acrobat HD? A. At least once per week, clean the Acrobat HD with a soft dry cloth or an electrostatic dusting cloth. DO NOT use liquid cleaners on any of the plastic surfaces. -
Page 33: Specifications
ACROBAT HD SPECIFICATIONS Product Dimensions: 20” LCD: 21”H x 19”W x 8”D (53cm x 48.25cm x 20cm) 22” LCD: 21”H x 20”W x 8”D (53cm x 51cm x 20cm) 24” LCD: 21”H x 22”W x 8”D (53cm x 56cm x 20cm) 27”... -
Page 34: Warranty Statement
Enhanced Vision, at its option, will at no charge either repair the product or replace it during the warranty period. There are no other expressed or implied warranties accompanying this product. -
Page 35: Other Enhanced Vision Products
OTHER ENHANCED VISION PRODUCTS DaVinci DaVinci is a high performance desktop video magnifier (CCTV), featuring HD, text-to-speech (OCR) and a 3-in-1 camera. With HD you will experience high definition color and contrast giving you a beautiful, crystal clear picture and vibrant colors. Experience the joy of reading with our new text- to-speech feature. -
Page 36: Other Enhanced Vision Products
Magnification: 20” LCD: 1.9x (min) to 51.2x (max) 22” LCD: 2.1x (min) to 55.9x (max) 24” LCD: 2.3x (min) to 61.2x (max) Other Enhanced Vision Products... -
Page 37: Contact Information
Accessories DVI Toggle Box Allows you to toggle between either the Acrobat HD or your computer display (DVI connection). Smart Video Connects Enhanced Vision’s low vision devices to a computer monitor. Carrying Cases Convenient cases for storage and transport of all Enhanced Vision products. - Page 38 NOTES Notes...
- Page 39 NOTES Notes...
- Page 40 The Acrobat HD video magnifier is designed to enlarge and enhance images to improve the lives of people who have low vision. The extent to which the Acrobat HD can improve the ability to see images and text depends on a person's individual condition and level of visual impairment.
Need help?
Do you have a question about the acrobat HD and is the answer not in the manual?
Questions and answers