Table of Contents
Advertisement
Quick Links
FOR QUALIFIED INSTALLER ONLY. This basic Installation Sheet is an initial release. If a complete Operations
Manual (for the unit being installed) is required or needed, please refer to the Lancer web site (lancercorp.com) for
immediate access, or for your convenience, scan this QR code with a mobile device (app required) for immediate
access to other Technical Documents and alternative translations (if available) pertaining to this unit. Contact Lancer
Customer Service for assistance as required.
ABOUT THIS MANUAL
This booklet is an integral and essential part of the product and
should be handed over to the operator after the installation and
preserved for any further consultation that may be necessary.
Please read carefully the guidelines and warnings contained
herein as they are intended to provide the user with essential
information for the continued safe use and maintenance of the
product. In addition, it provides GUIDANCE ONLY to the user on
the correct services and site location of the unit.
The installation and relocation, if necessary, of this product must be carried out by qualified personnel with
up-to-date safety and hygiene knowledge and practical experience, in accordance with current regulations.
IMPORTANT SAFETY INSTRUCTIONS
! Intended Use
The dispenser is for indoor use only. This unit is not a toy. Children should not be supervised not to play with appliance. It should
not be used by children or infirm persons without supervision. This appliance is not intended for use by persons (including children)
with reduced physical, sensory or mental capabilities, or lack of experience and knowledge, unless they have been given
supervision or instruction concerning use of the appliance by a person responsible for their safety. Cleaning and user maintenance
shall not be performed by children without supervision. The min/max ambient operating temperature for the dispenser is 40°F to
105°F (4°C to 41°C). Do not operate unit below minimum ambient operation conditions. Should freezing occur, cease operation of
the unit and contact authorized service technician. Service, cleaning and sanitizing should be accomplished only by trained
personnel. Applicable safety precautions must be observed. Instruction warnings on the product being used must be followed.
! Automatic Agitation
Units are equipped with an automatic agitation system and will activate unexpectedly. Do not place hands or foreign objects in the
ice bin. Unplug the dispenser during servicing, cleaning, and sanitizing. To avoid personal injury, do not attempt to lift the dispenser
without assistance. For heavier dispensers, use a mechanical lift.
LANCER INSTALLATION GUIDE
BEFORE GETTING STARTED
Each unit is tested under operating conditions and is thoroughly
inspected before shipment. At the time of shipment, the carrier
accepts responsibility for the unit. Upon receiving the unit,
carefully inspect the carton for visible damage. If damage exists,
have the carrier note the damage on the freight bill and file a
claim with carrier. Responsibility for damage to the dispenser lies
with the carrier.
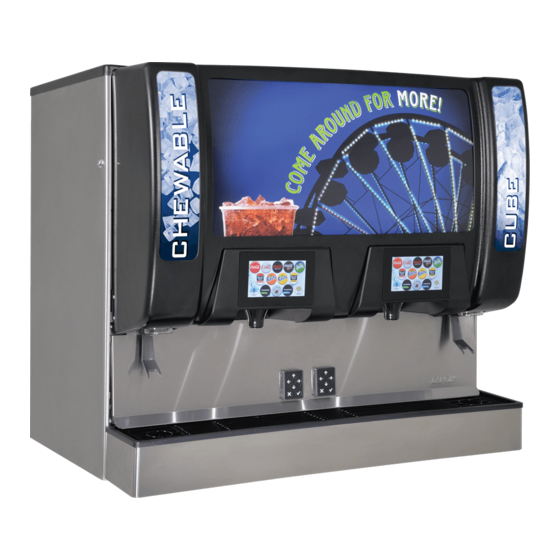
Twin Pour
Lancer PN: 28-3011
Revision: September 2018
Advertisement
Table of Contents

Related Manuals for lancer Twin Pour


Summary of Contents for lancer Twin Pour
- Page 1 FOR QUALIFIED INSTALLER ONLY. This basic Installation Sheet is an initial release. If a complete Operations Manual (for the unit being installed) is required or needed, please refer to the Lancer web site (lancercorp.com) for immediate access, or for your convenience, scan this QR code with a mobile device (app required) for immediate access to other Technical Documents and alternative translations (if available) pertaining to this unit.
-
Page 2: Specifications And Features
READ THIS MANUAL This manual was developed by the Lancer Corporation as a reference for the owner/operator and installer of this dispenser. Please read this guide before installation and operation of this dispenser. If service is required please call your Lancer Service Agent or Lancer Customer Service. -
Page 3: Installation
Total weight (with icemaker) for Contact your icemaker manufacturer for information this unit could exceed 800 pounds (363.6kg). on a suitable bin thermostat. NOTE Lancer does NOT recommend the use of shaved or Install the icemaker per manufacturer specifications. Points flake ice in the dispenser. of consideration include drainage, ventilation, and drop zones. -
Page 4: Dispenser Installation
Route appropriate tubing from the water source to the water inlet at the remote pump deck. Dispenser Installation If necessary, install water booster (Lancer PN MC-163172) NOTE between water supply and the remote pump deck. Using tubing cutters, cut the water line and install U-fitting... - Page 5 12. Route appropriate tubing from the syrup pump location to the ! CAUTION syrup inlets and connect tubing to all syrup inlets. Drain line must be insulated with a closed cell insulation. Insulation must cover the entire length of the drain hose, including fittings. The drain should be installed in such a manner that water does not collect in sags or other low points, as condensation will form.
- Page 6 Installing CO Supply ! ATTENTION Connect high pressure CO regulator assembly to CO A dedicated CO regulator is required to supply the CO cylinder or bulk system. inlet at the unit as well as to all syrup pumps. ! ATTENTION Connect tubing routed from the CO inlet at the unit to one of Before installing regulator, assure that a seal (washer...
-
Page 7: Dispenser Setup
Dispenser Setup Once the screen has booted up, access the service menu by placing your finger at the right side edge of the screen. Turn on water source. 10. In one swift, fluid motion slide your finger along the center Open the pressure relief valve located on the front of the of the screen to the left till you reach the left edge of the unit, by flipping up on the valve cap lever. - Page 8 16. Press the Purge tab on the far left side of the screen. NOTE 17. Scroll down to the water modules and press the Purge To check for CO leaks, close the valve on the CO buttons for both the plain water and the carbonated water cylinder and observe if the pressure to the system modules.
-
Page 9: Calibration And Maintenance
From the Service Menu, press the Maintenance button. NOTE 10. Press the Purge tab on the far left side of the screen. Each brand has a default water type and ratio already 11. Purge any new brand or flavor module until there is a steady set when they are selected. -
Page 10: Calibrating Brand Syrup Modules
While holding the screen housing, press the Calibrate tab on 10. Repeat steps 8 and 9 until the designated volume is the far left side of the screen and press the Calibrate button achieved. for the plain water module. 11. Repeat steps 5 - 10 for the carbonated water module. 12. - Page 11 10. Repeat steps 4 - 9 for the remaining brand syrup modules. 11. To re-attach the screen housing, first align the screen housing with the connection tabs on the unit, then rotate the housing down untill the connection tabs engage. NOTE Make sure both of the connection tabs are disengaged in the open position before attempting to re-connect...
-
Page 12: System Settings
With the graduated cylinder placed in a position below the 10. Repeat steps 8 and 9 if any more bonus flavor flow nozzle, press the Start Purge button. The unit will dispense adjustment is necessary. the volume designated in the previous step. 11. -
Page 13: Time & Delay Features
Time & Delay Features NOTE From the Service Menu, press the Time & Delays button to Ready - signifies there is available product and the access the Time & Delays Menu. valve will dispense when activated Enable or Disable any of the three (3) time & delay functions Out - signifies there is no available product or there is by tapping underneath their designated function names: a problem with the specified brand and will dispense... -
Page 14: Cleaning And Sanitizing
CLEANING AND SANITIZING GENERAL INFORMATION Lancer equipment (new or reconditioned) is shipped from the factory cleaned and sanitized in accordance with NSF guidelines. The operator of the equipment must provide continuous maintenance as required by this manual and/or state and local health department guidelines to ensure proper operation and sanitation requirements are maintained. The cleaning procedures provided herein pertain to the Lancer equipment identified by this manual. If other equipment is being cleaned, follow the guidelines established by the manufacturer for that equipment. -
Page 15: Every Six Months
• Clean the syrup lines as specified by the section “Cleaning and Sanitizing Syrup Lines - Bag in Box” on page 16. Every Six Months • Pull out unit (if applicable) and clean behind and underneath. Check for any loose components or noises. -
Page 16: Cleaning & Sanitizing Syrup Lines - Bag In Box
11. Disconnect the Auger Motor wire harness from junction box. 22. Remove the Agitator bar and Hub from the Ice Bin. 12. Remove the four (4) screws from the bracket holding the 23. Remove the plastic Ice Shroud by”pinching” in the center Auger Motor, flavor injector bracket, and LED light bracket. -
Page 17: Cleaning & Sanitizing Flavor Injector Lines
Cleaning & Sanitizing Flavor Injector Lines Flush out cleaning solution from the flavor injector lines using clean, warm water. Disconnect the each flavor injector line from their bag-in-box Prepare Sanitizing Solution described on page 14. containers. Place flavor lines into sanitizing solution and activate each Place flavor injector lines, with BIB connectors, in a bucket of line to fill with sanitizer. -
Page 18: Wiring Diagrams
WIRING DIAGRAMS Unit Wiring Diagram - 115 Volt 18" LED 30" LED 30" LED 115VAC 24VDC LED DRIVER 30" LED 18" LED Valve A Valve A Valve B Valve B 36 LFCV VALVES 24VDC 24VDC CONTROL CONTROL PCB R PCB L RASP PI RASP PI 3.5a C/B... - Page 19 Power Supply Wiring Diagram - 115 Volt RIGHT LEFT LEFT AGITATION RIGHT AGITATION AUGER TO LEFT SIDE MOTOR AUGER MOTOR MOTOR MOTOR CONTROLLER PCB 24vdc RIGHT LEFT IBD IBD PCB 3.5 LEFT BREAKER Pink 2 to 1 24VDC Supply 3.5 RIGHT adapter BREAKER Pink...
- Page 20 9 SECONDS SW1 SWITCH 1: NOT USED FOR 7 SECONDS MODEL 4900 SW1 SWITCH 2: NOT USED FOR 5 SECONDS MODEL 4900 *= DENOTES DEFAULT LANCER PN: 06-3289/01 NOTE If installing a Scotsman Pellet icemaker, set the auto agitation time to every 60 minutes. ® Lancer Corp. 800-729-1500 Technical Support/Warranty: 800-729-1550 custserv@lancercorp.com...
Need help?
Do you have a question about the Twin Pour and is the answer not in the manual?
Questions and answers