Table of Contents
Advertisement
®
ULTRAVIOLET WATER PURIFIERS
Models S17A, S23A, S37C & S50C
Read and Follow All Safety Instructions. Save These Instructions.
Installation, Operation & Maintenance
Extensive Product Information Available at:
Ultraviolet.com
BuyUltraviolet.com
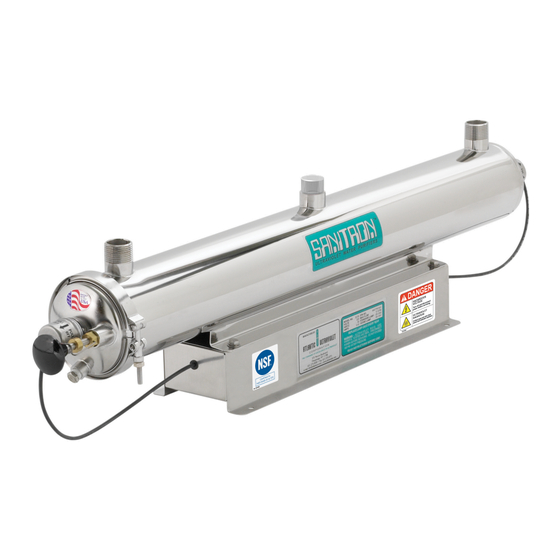
Models S37C and S50C
Document No. 98-1377F5 • May 2019 • ©2019 Atlantic Ultraviolet Corporation
®
Advertisement
Table of Contents

Subscribe to Our Youtube Channel
Related Manuals for Atlantic Ultraviolet SANITRON S50C


Summary of Contents for Atlantic Ultraviolet SANITRON S50C
- Page 1 Models S17A, S23A, S37C & S50C Read and Follow All Safety Instructions. Save These Instructions. Installation, Operation & Maintenance Extensive Product Information Available at: Ultraviolet.com BuyUltraviolet.com Models S37C and S50C Document No. 98-1377F5 • May 2019 • ©2019 Atlantic Ultraviolet Corporation ®...
-
Page 2: Table Of Contents
Models S17A, S23A, S37C and S50C. Questions that are not specifically answerable by these instructions should be directed to the Factory. Atlantic Ultraviolet Corporation takes all possible precautions when packaging equipment to prevent damage. Care- ®... -
Page 3: Safety Warnings
SAFETY WARNINGS • All personnel should be alerted to the potential hazards indicated by the product safety labeling on this purifier. • The following conventions are used to indicate and classify precautions in this manual and on product safety labeling. Failure to observe precautions could result in injury to people or damage to property. -
Page 4: Product Application
PRODUCT APPLICATION onstruCtion • The water purifier is designed to mount horizontally. • The water purifier’s removable chamber head design facilitates ease of maintenance. A drain port on the chamber aids in draining of the purifier. • The water purifier’s chamber and chamber head are passivated and electropolished type 316 Stainless Steel. •... -
Page 5: Installation
INSTALLATION oCation The water purifier is intended for indoor use only. The water purifier is designed to mount horizontally. The water purifier should be protected from the elements and from temperatures below freezing. The ambient temperature, in the area surrounding the water purifier, should be between 35 F and 100 Electrical power supplied to the water purifier MUST match power requirements listed on the water purifier. -
Page 6: Ecommended Nstallation
nstallation IN ORDER TO PERFORM THIS TASK, BE SURE TO WEAR THE FOLLOWING SAFETY EQUIPMENT: SAFETY GLASSES OR A FACE SHIELD, AS WELL AS GLOVES. Remove water purifier from shipping carton. Inspect water purifier, power cord and plug for damage. Do not operate if there is any damage to the purifier, power cord or plug. - Page 7 For Models with lamps packed separately, install lamp following the steps in “Lamp Installation or Replacement” section. Lamp and quartz sleeve are easily damaged. Exercise care when handling. Plug water purifier into approved ground fault circuit interrupt (GFCI) receptacle. Confirm lamp operation indication at sight port.
- Page 8 Figure 3 - Initial Installation of Quartz Sleeve Figure 4 - Initial Installation of Quartz Sleeve TELFON WIPER SEGMENTS GLAND FITTING QUARTZ SLEEVE WIPER ROD ASSEMBLY LARGE RUBBER O-RING CHAMBER HEAD...
-
Page 9: Ecommended Ptions
* Use of this option is recommended by U.S. Public Health Service “Criteria for Acceptability of an Ultraviolet Disinfection Unit.” Originally issued April, 1966. NOTE: The recommended options above are available from Atlantic Ultraviolet Corporation or a distributor of their ®... -
Page 10: Optional Accessories
OPTIONAL ACCESSORIES Table 3 - Optional Accessories Most optional accessories are Optional Accessories Available For: available for operation at 120v 60Hz GUARDIAN™ Ultraviolet Monitor - Analog/Digital S17A through S50C or 220v 50Hz. Please specify. SENTRY™ Safety Sensor S17A through S50C Consult Factory for 12v DC or other STERALERT™... -
Page 11: Isposal Of
isPosal of erCury DDeD amPs Germicidal ultraviolet lamps, like standard fluorescent lamps contain small amounts of mercury. Mercury added lamps should not be placed in the trash. Dispose of properly. For further information regarding the disposal and recycling of lamps containing mercury, along with Federal and State requirements visit LampRecycle.org. For more information on STER-L-RAY Germicidal Ultraviolet Lamps, visit Ultraviolet.com or BuyUltraviolet.com. -
Page 12: Uartz Leeve Leaning Using Iper Echanism
uartz leeve leaning using iPer eChanism Figure 6 - Quartz Sleeve Cleaning Step 1 - Lift wiper clip up Step 2 - Gently pull wiper knob out Step 3 - Push wiper back in Routine cleaning of the quartz sleeve is easily accomplished, using the dual action wiper mechanism. Lift wiper clip up and away from wiper rod. -
Page 13: Eplacement
uartz leeve nstallation or ePlaCement Figure 7 - Quartz Sleeve Installation or Replacement Step 4 - Remove Gland Nuts Step 5 - Remove Washer & O-Ring Step 6 - Remove Quartz Sleeve IN ORDER TO PERFORM THIS TASK, BE SURE TO WEAR THE FOLLOWING SAFETY EQUIPMENT: SAFETY GLASSES OR A FACE SHIELD, AS WELL AS GLOVES. -
Page 14: Q Uartz
ePlaCement of roken uartz leeve Figure 8 - Quartz Sleeve IN ORDER TO PERFORM THIS TASK, BE SURE TO WEAR THE FOLLOWING SAFETY EQUIPMENT: SAFETY GLASSES OR A FACE SHIELD, AS WELL AS GLOVES. Broken Quartz is SHARP. It is recommended that protective glasses and gloves are worn when handling. Disconnect power to water purifier. -
Page 15: Leaning Of Ptional Guardian Ltraviolet Onitor Ensor Robe
10. Replace the head clamp around the flared end of the head and chamber. Install the 1/4” nut and tighten, using a 7/16” wrench, until approximately 3/4” to 7/8” of the bolt protrudes past the nut. 11. Center the quartz sleeve in the chamber, making sure the quartz sleeve protrudes an equal distance past each threaded gland fitting, of the chamber. -
Page 16: Troubleshooting
10. Slowly restore water supply to the water purifier, pressurize, and check for leaks. Once it is determined that there are no leaks, inlet valve can be fully opened. 11. Reposition Ultraviolet Monitor on probe body and tighten set screws. 12. -
Page 17: Technical Specifications
TECHNICAL SPECIFICATIONS Table 5 - Technical Specifications Model: S17A S23A S37C S50C Flow Rate (GPM): Inlet\Outlet Size: 3/4”m NPT 3/4”m NPT 1”m NPT 1-1/2”m NPT Number of Lamps: Lamp Model No.: 05-1098-R 05-1097-R 05-1343-R 05-1334-R Length: 17-3/8” 23-3/8” 37-3/8” 50-3/8” Width: 4-5/16”... -
Page 18: Replacement Parts
REPLACEMENT PARTS sanitron s17a & s23a ® oDels Figure 11 - Exploded View S17A & S23A... - Page 19 Table 6 - Replacement Parts S17A & S23A S17A S23A Item No. Description Quantity Part Number Quantity Part Number EASY-OFF™ End Cap 25-1499A1 25-1499A1 Rubber O-Ring, Static Gland 00-1108B 00-1108B Steadfast™ Lamp Spacer 25-0210A 25-0210A 05-1219B2 05-2223A Steadfast™ Lead Wire & Socket 05-1098-R 05-1097-R ®...
-
Page 20: Sanitron ® M Odels S37C & S50C
sanitron s37C & s50C ® oDels Figure 12 - Exploded View S37C & S50C... - Page 21 Table 7 - Replacement Parts S37C & S50C S37C S50C Item No. Description Quantity Part Number Quantity Part Number EASY-OFF™ End Cap 25-1499A1 25-1499A1 Rubber O-Ring, Static Gland 00-1108B 00-1108B Steadfast™ Lamp Spacer 25-0209A 25-0210A Steadfast™ Lead Wire & Socket 05-1218A2-R 05-1218A2-R ®...
-
Page 22: Maintenance Notes
MAINTENANCE NOTES... -
Page 23: Maintenance Notes
MAINTENANCE NOTES... -
Page 24: User Assistance
WARRANTY & PRODUCT REGISTRATION We warrant this product to the original owner to be free from defects in material and workmanship when installed in accordance with Atlantic Ultraviolet Corporation specifications for a period of time as follows: ®...
Need help?
Do you have a question about the SANITRON S50C and is the answer not in the manual?
Questions and answers