Table of Contents
Advertisement
Quick Links
Advertisement
Table of Contents

Related Manuals for Aseptico AEU-16C TORQUE PLUS+


Summary of Contents for Aseptico AEU-16C TORQUE PLUS+
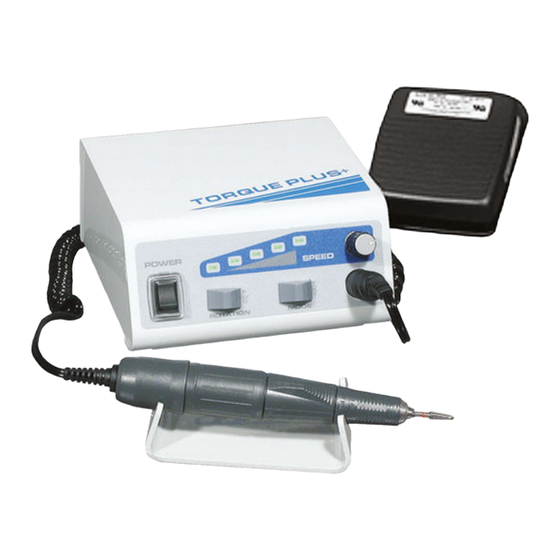
- Page 1 OPERATION and MAINTENANCE INSTRUCTION MANUAL AEU-16C TORQUE PLUS Electric Lab Motor System P.O. Box 1548 • Woodinville, WA 98072 • 8333 216th Street SE, Woodinville WA 98072 International (425) 487-3157 • Toll Free (800) 426-5913 www.aseptico.com • info@aseptico.com...
-
Page 2: Table Of Contents
International (425) 487-3157 Toll Free (800) 426-5913 www.aseptico.com • info@aseptico.com Operation Functions ....3 Operation ..... .4 Sterilization &... -
Page 3: Package Contents
Your new Aseptico AEU-16C TORQUE PLUS+ Electric Lab Motor System is one of the finest motor/handpiece combinations available to the professional. It is Congratulations well suited for many uses in the dental lab, including dental prothesis and other applicable dental laboratory work. -
Page 4: Setting Up The Unit
SETTING UP THE UNIT: 4. Insert a bur or bit into the handpiece 1. Unpack the console and check that the collet. Do not operate the unit without voltage is proper for the country of use. a bur or blank installed in the collet. Use 110V unit for 110-120V 60Hz volt- ages, and 220V unit for 220-250V 5. -
Page 5: Operation Functions
OPERATION FUNCTIONS: 1. Power Switch - Controls power on/off 4. Rotation Switch - Selects clockwise to console. When turned on, console or counter-clockwise rotation of the should light up. bur. Set the rotation to 'FWD' for nor- mal clockwise operation and to 'REV' 2. -
Page 6: Operation
OPERATION After the unit has been set up and you 3. Turn the Speed Control knob until the have made yourself familiar with the oper- desired operating speed is shown on ation functions, you are ready for opera- the Speed Display. tion as follows: 4. -
Page 7: Sterilization & Maintenance
STERILIZATION & MAINTENANCE: CONSOLE- The exterior of the console may be cleaned by wiping with a soft cloth moistened with mild detergent or disinfect- ing solution. MOTOR/HANDPIECE- The included motor/handpiece assembly is NOT auto- clavable. WARNING • Do not attempt to disassemble the motor or motor connector. -
Page 8: Changing Motor Brushes
Changing Motor Brushes: 1. Unscrew the motor end. 2. Pull the plug out of motor end. 3. Unscrew the motor brushes. 4. Replace Brushes and align as shown. 5. Replace plug.and screw on end cap. -
Page 9: Symbol Definitions
SYMBOL DEFINITIONS: Attention, consult accompanying documents Dangerous Voltage Serial Number Speed (revolutions) Increase Protective earth (ground) -
Page 10: Troubleshooting
TROUBLESHOOTING: Problem Correction Console does not light when Check console to power connection. turned on. Check that voltage selector is set for the proper voltage. Check fuse. If blown, replace with 1A/250V slo-blo fuse for 110 volts, & .5 A/250V slo- blo fuse for 220 volts. - Page 11 NOTES...
-
Page 12: Warranty
Aseptico's sole obligation under product warranty is (at its sole option and discretion) to repair or replace any defective component or product in part or whole. Aseptico shall be the sole arbiter of such action.
Need help?
Do you have a question about the AEU-16C TORQUE PLUS+ and is the answer not in the manual?
Questions and answers