
Related Manuals for Robam CXW-220-A828


Summary of Contents for Robam CXW-220-A828
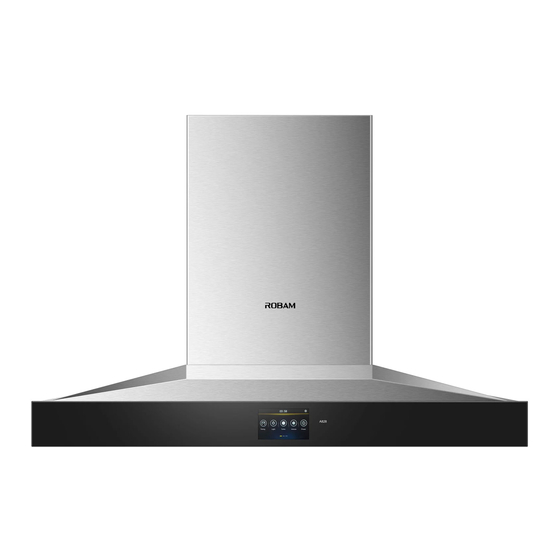
- Page 1 User Manual Before operating this unit, please read the user manual completely and keep it. If the manual is lost, you can send e-mail to overseas@robam.com, request for an electronic manual. CXW-220-A828 Range Hood...
-
Page 2: Table Of Contents
CONTENTS Safety Precaution........................1 Important Information......................4 Product Description .......................5 Packing List..........................5 Installation ..........................6 User Manual..........................Maintenance..........................11 Removal of Components.......................12 Circuit Diagram........................14 Troubleshooting of General faults.................. -
Page 3: Safety Precaution
Touch Disassembly Execution Earthed Electric Shock Please use this product according to manual strictly, or ROBAM shall not take any responsible Warning caused by improper operation. Danger Don't allow children or weakling to use range hood separately, or it may cause electric shock or other accident. - Page 4 Range Hood Danger Unplug before cleaning installing or maintaining avoiding from electric Strict shock Execution Please turn off range hood immediately if pan got fire (range hood shall aggravate fire if it’s working) and extinguish fire by effective action. Strict For example, cover flame by metal cover, turn off gas valve immediately Execution and remove inflammable things.
- Page 5 Range Hood Warning All operation must comply with our safety guidelines as well as local safety regulations. Strict Execution If the range hood will be used with the kitchen range burning gas or other Strict fuels, the room must be well ventilated. Execution This appliance just for household use only.And it’s not allowed to exhaust dangerous or explosive matter or air.
-
Page 6: Important Information
Range Hood Notice The temperature for range hood working can’t exceed 40℃. Strict Execution Because the installation is difficult and hood is heavy, the installation Strict shall be executed by professional person based on manul. Execution Don't break electric wire or other invisible equipment when cutting Strict something or drilling holes on ceiling. -
Page 7: Product Description
Range Hood Product Description Technical Data ≤56dB Model CXW-220-A828 Noise Power Supply Rated Whole Machine Input Power 224W 220-240V~ 50Hz Total Pressure Efficiency Rated Main Motor Input Power ≥23% 220W Max Lighting Power ≤ W Nominal Wind Pressure 340Pa × ×... -
Page 8: Installation
Range Hood Installation Warning 1.The air must not be discharged into a flue that is used for exhausting fumes from appliances burning gas or other fuels, the discharge of air must fulfill the requirements of local regulations 2.Note that when installing the metal expansion pipe, the pipe shall match with the hole in size. Overlarge hole is prohibited, as it will result in loose pipe and accidental drops. - Page 9 Range Hood Installation ● Determine the position: The removable baffle can be adjusted according to the actual situations. The installation pitch of holes is shown in Figure 2. The hood body shall be centered vertically and kept level. Ceiling hole size is shown in Figure 3. The hood shall be installed right above the hob.
- Page 10 Range Hood ●Install drawing panel torsion spring (Note: please take this step before the hood body is fixed) Figure 4-1 Figure 4-2 Torsion spring First put torsion spring a.First insert the drawing panel rubber sleeve torsion spring in the rivet nut; rubber sleeve on drawing b.Then put the torsion spring panel torsion spring, and...
-
Page 11: User Manual
Range Hood ● Link the aluminum exhaust pipe Insert the end of aluminum exhaust pipe without fixed strip to the pipe connection and stick with tapes, then straighten the aluminum exhaust pipe and connect it to the public flue outlet (If there is no public flue, please straighten the aluminum exhaust pipe to the outdoors). - Page 12 Range Hood Click the “Timing” icon, and the icon turns yellow, then enter time setting interface. The user can set alarm time from 1 to 60 minutes. After completing the setting, enter countdown interface, and click the “Home Page” icon on the top-left corner to return to home page. When the alarm time is up, there will be a prompt tone.
-
Page 13: Maintenance
Range Hood Home screen interface (II) In this interface, there are a total of five menus available for user, including classic chinese cooking, western food, creative chinese food, delicious seafood, special chinese food. Click corresponding icon and enter corresponding menu page for details. Home screen interface (III) Click the “Oil Filter Cleaning”... -
Page 14: Removal Of Components
Range Hood ●Please do not use cleaning balls, brushes and other rough objects to clean the hood to prevent the body surface from scratching. ●When cleaning or maintaining the hood, please wear protective gloves to prevent wounding during wiping. ●Please regularly check and clean the oil cup. When the oil reaches above 2/3 of the cup, rotate the cup rightwards by hand for removal and then pour out the waste oil, as shown in right. - Page 15 Range Hood Removal and installation of the whole body In general, the range hood body does not need to remove. Removal steps: The removal needs to be completed by professional maintenance staff. 1. Pull out the plug; 2. Unscrew the four screws from the back of the main hood panel. Tilt the panel forward to a certain angle, and then pull it up forcibly;...
-
Page 16: Circuit Diagram
Range Hood Circuit Diagram Terminal box Control circuit blue blue yellow orange grey black Green/Yellow white blue brown brown blue 220-240V~ Green/Yellow E Troubleshooting of general faults Serial Fault Cause Warning number No response after pressing any icon The power plug is not connected 1. - Page 17 Model: A828 Edition: A/1 Publication Date: June, 20, 2018...
Need help?
Do you have a question about the CXW-220-A828 and is the answer not in the manual?
Questions and answers