Table of Contents

Related Manuals for Festo MS6-SV-*-E-10V24 Series


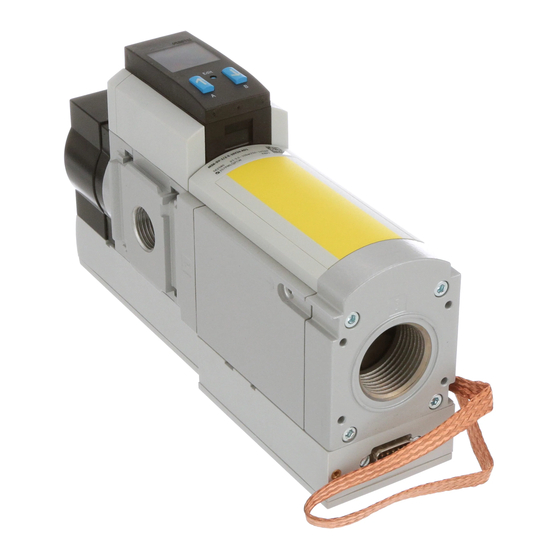
Summary of Contents for Festo MS6-SV-*-E-10V24 Series
- Page 1 Application Note Quick Start Guide for fault clearance and troubleshooting This document is for self-help in case of malfunctions with the MS6-SV product MS6-SV-*-E-10V24. MS6-SV-1/2-E- 10V24-AD1 MS6-SV-1/2-E- 10V24-SO-AG MS6-SV-1/2-E- 10V24-AG 100188...
- Page 2 Festo AG & Co. KG. Festo AG & Co KG reserves the right to make modifications to this document in whole or in part. All brand and product names are trademarks or registered trademarks of their respective owners.
-
Page 3: Table Of Contents
Table of contents Components/Software used ........................5 Introduction ..............................6 Troubleshooting ............................7 Error codes ..............................7 Specified switch-on sequence ........................9 Operating pressure............................9 Operating voltage ............................10 Enable signal ............................. 10 Monitored start ............................10 Installation of MS6-SV ..........................11 Layout ............................... - Page 4 Table of contents...
-
Page 5: Components/Software Used
Components/Software used Components/Software used Type/Name Version Software/Firmware Date of manufacture MS6-SV-1/2-E-10V24-AD1 MS6-SV-1/2-E-10V24-SO-AG MS6-SV-1/2-E-10V24-AG Table 1.1: Components/Software used Application Note – Quick Start Guide for fault clearance and troubleshooting – 1.10 Seite 5 von 16... -
Page 6: Introduction
Introduction Introduction The Quick Start Guide for the soft start/quick exhaust valve MS6-SV is intended as a manual for fast and expert troubleshooting in the event of malfunctions. More detailed information can be found in Operating instructions Mobile access to the operating instructions Figure 2.1: QR-Code Operating Instructions The following pages describe the process of analyzing and remedying faults. -
Page 7: Troubleshooting
Troubleshooting Troubleshooting Error codes In case of malfunction of the MS6-SV check the LED display. Error codes are read by the flashing of the LED. The error code is indicated by four flashes of the green LED (speed 2 hertz). Then the flashes of the red LED display the error code. - Page 8 Troubleshooting Note Other possible errors: possible valve errors that are not or only partly indicated by error codes are listed below. Possible error Possible cause Remedy Valve does not switch Pressure supply insufficient Tighten flow control screw No bridge between contacts 5 Check bridge and 6 or the contact is faulty Continuous outflow to...
-
Page 9: Specified Switch-On Sequence
Specified switch-on sequence Specified switch-on sequence The specified sequence during start-up is essential for fault-free operation and must be followed at all times. Further information Operating pressure 3,5 to 10 bar • Operating pressure • Compressed air quality Check pressure supply Operating voltage 24 V DC +/- 10%... -
Page 10: Operating Voltage
Specified switch-on sequence Operating voltage If the pressure is on, the operating voltage can be switched on. After switching on the operating voltage the valve runs a self-test. The red and green LEDs light for approx. 6 s during the test. If the self-test is completed, the green LED flashes (speed 1 hertz) and displays ready for operation. -
Page 11: Installation Of Ms6-Sv
MS6-SV is maintained and the safe venting of the system is not affected by the service unit. Wall gap The gap between the wall and the MS6-SV must be a minimum of 32 mm. (Note: Festo MS6-WPB and MS6-WPE mounting bracket) Distance from base The distance between the silencer and the base must be a minimum of 15 mm. -
Page 12: Earthing
Multi-pin plug • Only the multi-pin plug specified by Festo may be used on the MS6-SV. The plug connector is an electronic component of the valve. It contributes to the overall function and must not be replaced by other plug connectors. -
Page 13: Requirements For The Ms6-Sv
Requirements for the MS6-SV Requirements for the MS6-SV Which requirements must be fulfilled? Compressed air quality The compressed air quality is very important! Ester oils or moisture in the compressed air may damage the MS6-SV. Particles, rust and similar impurities will also affect the reliability of any compressed air system. -
Page 14: Specifications Of The Enable Signals
Specifications of the enable signals Specifications of the enable signals The MS6-SV is switched by the enable signals. The signal quality, the signal length and the spacing between them are all important. Malfunction of the EN signals Please note that test pulses from the controller that do not have a standardised length may cause a malfunction of the valve. - Page 15 Specifications of the enable signals Fig. 6: Switching characteristic MP3 and MP5 plug The sequence of the enable signals is not relevant. The diagram shows that EN2 is applied before EN1. However, the principle with EN1 before EN2 is the same. Information on the cross-circuit detection can be found in Section 4.
-
Page 16: Operational Principle Of The Neca Multi-Pin Plug Socket
Operational principle of the NECA multi-pin plug socket Operational principle of the NECA multi-pin plug socket Use only the original Festo multi-pin plug. The plugs are electronic components that contribute to the overall function of the system and cannot be replaced by other plug connectors.
Need help?
Do you have a question about the MS6-SV-*-E-10V24 Series and is the answer not in the manual?
Questions and answers