Table of Contents
Advertisement
Quick Links
Advertisement
Table of Contents

Related Manuals for Eliminator Lighting Mini Par UV LED


Summary of Contents for Eliminator Lighting Mini Par UV LED
- Page 1 Mini Par UV LED User Guide...
- Page 2 Eliminator Lighting and all affiliated companies hereby disclaim any and all liabilities for property, equipment, building, and electrical damages, injuries to any persons, and direct or indirect economic loss associated with the use or reliance of any information contained within this document, and/or as a result of the improper, unsafe, insufficient and negligent assembly, installation, rigging, and operation of this product.
-
Page 3: Table Of Contents
C O N T E N T S General Information Limited Warranty (USA Only) Safety Guidelines Maintenance Guidelines Overview Installation Guidelines System Menu Operation DMX Traits Trouble Shooting and Frequently Asked Questions Technical Specifications and Dimensions... -
Page 4: General Information
G E N E R A L I N F O R M A T I O N INTRODUCTION Please read and understand all instructions in this manual carefully and thoroughly before attempting to operate this product. These instructions contain important safety and use information. UNPACKING: This product has been thoroughly tested and has been shipped in perfect condition. -
Page 5: Limited Warranty (Usa Only)
L I M I T E D W A R R A N T Y ( U S A ) A. Eliminator Lighting, an ADJ Products, LLC brand, hereby warrants, to the original purchaser, ADJ Products, LLC products to be free of manufacturing defects in material and workmanship for a prescribed period from the date of purchase (see specific warranty period on reverse). -
Page 6: Safety Guidelines
To guarantee a smooth operation, it is important to follow all instructions and guidelines in this manual. ELIMINATOR LIGHTING is not responsible for injury and/or damages resulting from the misuse of these devices due to the disregard of the information printed in this manual. Only qualified and/or certified personnel should perform installation of these devices and only the original rigging parts included with these devices should be used for installation. - Page 7 S A F E T Y G U I D E L I N E S DO NOT position devices close to any FLAMMABLE MATERIALS while operating. DO NOT attempt installation and/or operation of devices without knowledge how to do so. DO NOT permit operation by persons who are not qualified to operate these types of devices.
-
Page 8: Maintenance Guidelines
Regular inspections are recommended to insure proper function and extended life. There are no user serviceable parts inside these devices, please refer all other service issues to Eliminator Lighting. Should you need any spare parts, please order genuine parts from Eliminator Lighting. -
Page 9: Overview
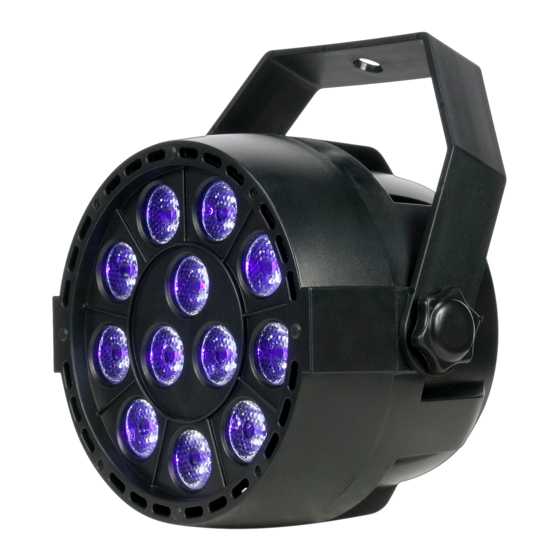
O V E R V I E W INCLUDED ITEMS (1) Mini Par UV LED 1. Mini Par UV LED 5. DMX Out 9. Down Button 2. Yoke 6. DMX In 10. Up Button 3. Star Knob (2) 7. LCD Display 11. -
Page 10: Installation Guidelines
I N S T A L L A T I O N I N S T R U C T I O N S FLAMMABLE MATERIAL WARNING Keep devices minimum 5.0 feet (1.5m) away from flammable materials and/or pyrotechnics. ELECTRICAL CONNECTIONS A qualified electrician should be used for all electrical connections and/or installations. -
Page 11: System Menu
DMX 512 controller. Operating through a DMX controller gives the user the freedom to create their own programs tailored to their own individual needs. The Mini Par UV LED has 3 DMX channel modes; 4/6/8 channels. See the chart below for the DMX traits and values. - Page 12 O P E R A T I O N Pulse Change Mode: 1. Plug the fixture in and press the MENU or UP and DOWN buttons until “ACC -” is displayed. 2. Press the ENTER button to adjust the Pulse speed. Use the UP and DOWN buttons to adjust the speed.
-
Page 13: Dmx Traits
D M X T R A I T S DMX CHANNELS / VALUES / FUNCTIONS Channel Mode (4,6 or 8) / Channel Value Function 4 Channels 6 Channels 8 Channels Channel 1 Channel 1 0-255 Dimmer Channel 1 0-255 Channel 2 Channel 2 Channel 2 0-255... -
Page 14: Trouble Shooting And Frequently Asked Questions
2. Check if circuit breaker that controls the AC outlet that the light is plugged into is not tripped. 3. Confirm the power connection is not loose. 4. If none of these solutions work, please contact Eliminator Lighting Customer Service. The unit is not responding to DMX. -
Page 15: Technical Specifications And Dimensions
T E C H N I C A L S P E C I F I C A T I O N S Model: Mini Par UV LED Voltage: 100V ~ 240V 50/60Hz LEDs: 12 x 1W UV LEDs UV Range: 396-435nm...
Need help?
Do you have a question about the Mini Par UV LED and is the answer not in the manual?
Questions and answers