
Related Manuals for Allied Telesis AT-TQ4600-OF13


Summary of Contents for Allied Telesis AT-TQ4600-OF13
- Page 1 AT-TQ4600-OF13 Enterprise-class AT-TQ4600 Wireless Access Point with IEEE802.11a/b/g/n/ac Dual Radio and OpenFlow Protocol Installation Guide 613-613-002572 Rev. A...
- Page 2 Allied Telesis, Inc. has been advised of, known, or should have known, the...
- Page 3 This product meets the following standards: Federal Communications Commission Interference Statement Declaration of Conformity Manufacturer Name: Allied Telesis, Inc. Declares that the product: Wireless access point with PoE+ powered device function Model Number: AT-TQ4600 This device complies with Part 15 of the FCC Rules. Operation is subject to the following two conditions: (1) This device may not cause harmful interference, and (2) this device must accept any interference received, including interference that may cause undesired operation.
- Page 4 European Union Restriction of the Use of Certain Hazardous Substances (RoHS) in Electrical and Electronic Equipment This Allied Telesis RoHS-compliant product conforms to the European Union Restriction of the Use of Certain Hazardous Substances (RoHS) in Electrical and Electronic Equipment. Allied Telesis ensures RoHS conformance by requiring supplier Declarations of Conformity, monitoring incoming materials, and maintaining manufacturing process controls.
- Page 5 Electromagnetic Compatibility (EMC) EN 301 489-1 EN 301 489-17 EN 55024 EN 55032 EN 61000-3-2 EN 61000-3-3 EN 61000-4-2 EN 61000-4-3 EN 61000-4-4 EN 61000-4-5 EN 61000-4-6 EN 61000-4-8 ...
- Page 6 * Refer to “Installation Requirements per UL 2043 Compliance” on page 34 for installation requirements. Translated Safety Statements Important: The indicates that a translation of the safety statement is available in a PDF document titled Translated Safety Statements on the Allied Telesis website at www.alliedtelesis.com/support.
-
Page 7: Table Of Contents
Unsupported Features............................30 Chapter 2: Installing the Access Point ......................31 Reviewing Safety Precautions.......................... 32 Unpacking the AT-TQ4600-OF13 Access Point....................35 Installing the Access Point on a Wall or Ceiling ....................37 Guidelines ..............................37 Mounting the Base Plate to the Wall or Ceiling..................38 Attaching the Mounting Bracket to the Access Point ................. - Page 8 Contents Environmental Specifications ..........................59 Power Specifications............................60 LAN Port ................................61 Safety and Electromagnetic Emissions Certifications ..................63 Appendix B: Regulatory Statements ......................65 Federal Communication Commission Interference Statement................66 Industry Canada Statement ..........................68 Europe - EU Declaration of Conformity......................70 Taiwan NCC Statement ............................
- Page 9 Figures Figure 1: Hardware Topology .......................... 20 Figure 2: Panel Components........................... 23 Figure 3: Unit Orientation in a Plenum for UL 2043..................34 Figure 4: Contents of the Shipping Box......................35 Figure 5: AT-TQ0091 AC/DC Power Adapters....................36 Figure 6: Ventilation Slots..........................37 Figure 7: Marking the Four Screw Holes in the Base Plate................
- Page 10 List of Figures...
- Page 11 Table 2. Rear Panel Components ........................23 Table 3. Twisted Pair Cable for the LAN Port ....................25 Table 4. LEDs on the AT-TQ4600-OF13 Access Point .................. 27 Table 5. OpenFlow Configuration and Settings Window ................55 Table 6. AT-TQ4600 Physical Specifications ....................59 Table 7.
- Page 12 List of Tables...
-
Page 13: Preface
Preface This guide contains the hardware installation instructions for the AT-TQ4600-OF13 wireless access point. The product consists of the AT-TQ4600 wireless access point and OpenFlow protocol (version 1.3). This preface contains the following sections: “Safety Symbols Used in this Document” on page 14 ... -
Page 14: Safety Symbols Used In This Document
Preface Safety Symbols Used in this Document This document uses the following conventions. Note Notes provide additional information. Caution Cautions inform you that performing or omitting a specific action may result in equipment damage or loss of data. Warning Warnings inform you that performing or omitting a specific action may result in bodily injury. -
Page 15: Contacting Allied Telesis
AT-TQ4600-OF13 Wireless Access Point Installation Guide Contacting Allied Telesis If you need assistance with this product, you may contact Allied Telesis technical support by going to the Support & Services section of the Allied Telesis web site at www.alliedtelesis.com/support. You can find links for the following services on this page: ... - Page 16 Preface...
-
Page 17: Chapter 1: Overview
Chapter 1 Overview This chapter describes the hardware components of the AT-TQ4600-OF13 Wireless Access Point. It contains the following sections: “Features” on page 18 “Secure Enterprise Software Defined Networking Controller” on page 19 “Topology Example” on page 20 ... -
Page 18: Features
Chapter 1: Overview Features The AT-TQ4600-OF13 product consists of the AT-TQ4600 wireless access point with the OpenFlow protocol (version 1.3). The main features of the access point are listed here: Dual 2.4 GHz and 5 GHz radio IEEE 802.11a/b/g/n/ac ... -
Page 19: Secure Enterprise Software Defined Networking Controller
AT-TQ4600-OF13 Wireless Access Point Installation Guide Secure Enterprise Software Defined Networking Controller The AT-TQ4600-OF13 wireless access point is a bundled product of the AT-TQ4600 wireless access point and OpenFlow protocol. It is designed to be used with the Secure Enterprise Software Defined Networking (SES) controller. -
Page 20: Topology Example
Chapter 1: Overview Topology Example Figure 1 is an example of a network topology of the SDN solution, consisting of an SES controller, OpenFlow switch, and AT-TQ4600-OF13 wireless access point. Control Plane Router or Layer 3 Switch Controller Control Plane... - Page 21 AT-TQ4600-OF13 Wireless Access Point Installation Guide Table 1. OpenFlow Protocol Network Components (Continued) Component Description Control plane Network pathway over which the SES controller communicates with OpenFlow switches and AT- TQ4600-OF13 access points, using the OpenFlow protocol. Router or Layer 3 Gateway to the higher level network.
-
Page 22: Management Tools
SNMPv1 and v2c - You can also use SNMP to manage the device. The MIB is available from the Allied Telesis web site. It should be noted that you can use SNMP to configure only a limited number of access point parameters. -
Page 23: Rear Panel Components
AT-TQ4600-OF13 Wireless Access Point Installation Guide Rear Panel Components Figure 2 illustrates the rear panel components on the AT-TQ4600-OF13 wireless access point. Kensington Console Reset LAN Port DC Power Security Slot Port Button Connector Figure 2. Panel Components The components are listed in Table 2. -
Page 24: Lan Port
The port must be connected to a non-OpenFlow device. Do not cascade OpenFlow devices. Power over The AT-TQ4600-OF13 Access Point supports Power over Ethernet (PoE+) on the LAN port. The unit is a PoE+ class 4 powered device with a Ethernet maximum power consumption of 16 watts. -
Page 25: Maximum Distance
AT-TQ4600-OF13 Wireless Access Point Installation Guide Note The LAN port should be connected to a network device that also sets its duplex mode with Auto-Negotiation. If the other device does not support Auto-Negotiation, the port operates at half-duplex mode, possibly resulting in a duplex mode mismatch if the other device is operating at full duplex. -
Page 26: Port Pinouts
Chapter 1: Overview the Ethernet switch. You cannot disable automatic MDIX detection. For automatic MDIX detection to work properly, it must also be present on the Ethernet switch. The port defaults to MDIX if it is connected to a network device that does not support automatic MDIX detection. -
Page 27: Leds
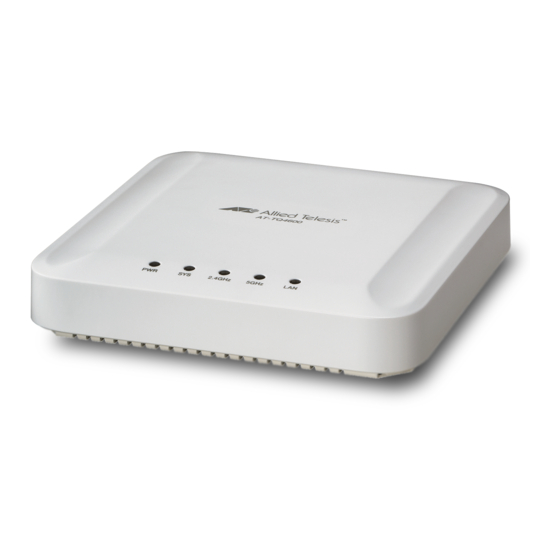
AT-TQ4600-OF13 Wireless Access Point Installation Guide LEDs The LEDs on the AT-TQ4600-OF13 Access Point are described in Table 4. Table 4. LEDs on the AT-TQ4600-OF13 Access Point State Description Solid Green The unit is receiving DC power that is within the normal operating range. -
Page 28: Reset Button
Chapter 1: Overview Reset Button The Reset button on the rear panel is used to return the parameter settings of the unit to their default values. You might use the button if you want to discard the current configuration of the device or because you forgot the password to the manager account and cannot manage the unit. -
Page 29: Planning A Wireless Network
AT-TQ4600-OF13 Wireless Access Point Installation Guide Planning a Wireless Network Instructions on how to plan a wireless network are beyond the scope of this guide. But here are several basic factors to consider: Number of access points: You need to determine the number of access points required to provide wireless coverage to the entire site and to handle the number of wireless hosts. -
Page 30: Unsupported Features
Chapter 1: Overview Unsupported Features The following features in the AT-TQ4600-OF13 wireless access point should not be used with the OpenFlow protocol: Wireless Distribution System (WDS) bridges Access point clustering MAC address filtering Broadcast and multicast rate limiting ... -
Page 31: Chapter 2: Installing The Access Point
Chapter 2 Installing the Access Point This chapter describes how to install the AT-TQ4600-OF13 wireless access point. This chapter contains the following sections: “Reviewing Safety Precautions” on page 32 “Unpacking the AT-TQ4600-OF13 Access Point” on page 35 ... -
Page 32: Reviewing Safety Precautions
indicates that a translation of the safety statement is available in a PDF document titled Translated Safety Statements on the Allied Telesis website at www.alliedtelesis.com/support. Warning To prevent electric shock, do not remove the cover. No user- serviceable parts inside. This unit contains hazardous voltages and should only be opened by a trained and qualified technician. - Page 33 AT-TQ4600-OF13 Wireless Access Point Installation Guide Warning Operating Temperature. This product is designed for a maximum ambient temperature of 40°C Warning To reduce the risk of electric shock, the PoE port on this product must not connect to cabling that is routed outside the building where ...
-
Page 34: Figure 3: Unit Orientation In A Plenum For Ul 2043
Chapter 2: Installing the Access Point Note Suitable for use in environmental air space in accordance with Section 300.22.C of the National Electrical Code, and Sections 2- 128, 12-010(3) and 12-100 of the Canadian Electrical Code, Part 1, C22.1. Refer to “Installation Requirements per UL 2043 Compliance”... -
Page 35: Unpacking The At-Tq4600-Of13 Access Point
One M3 0.5 bracket screw Figure 4. Contents of the Shipping Box If any item is missing or damaged, contact your Allied Telesis sales representative for assistance. If you are not using the PoE feature on the LAN port to power the access point, you must separately order the AT-TQ0091 AC/DC Power Adapter. -
Page 36: Figure 5: At-Tq0091 Ac/Dc Power Adapters
Chapter 2: Installing the Access Point Figure 5. AT-TQ0091 AC/DC Power Adapters Go to “Installing the Access Point on a Wall or Ceiling” on page 37. -
Page 37: Installing The Access Point On A Wall Or Ceiling
AT-TQ4600-OF13 Wireless Access Point Installation Guide Installing the Access Point on a Wall or Ceiling This procedure contains the following sections. “Guidelines” “Mounting the Base Plate to the Wall or Ceiling” on page 38 “Attaching the Mounting Bracket to the Access Point” on page 39 ... -
Page 38: Mounting The Base Plate To The Wall Or Ceiling
Chapter 2: Installing the Access Point Mounting the To mount the base plate to the wall or ceiling, perform the following: Base Plate to the 1. Position the base plate at the desired location on the wall or ceiling for Wall or Ceiling the access point and mark the four screw holes. -
Page 39: Attaching The Mounting Bracket To The Access Point
AT-TQ4600-OF13 Wireless Access Point Installation Guide 3. Install wall anchors, if required. 4. Attach the base plate to the wall or ceiling using self-tapping screws. Refer to Figure 9. Figure 9. Mounting the Base Plate to the Wall Attaching the... -
Page 40: Figure 10: Bottom Of Access Point
Chapter 2: Installing the Access Point Screw Hole Hooks Stopper Nub Figure 10. Bottom of Access Point 3. Turn the bracket in the direction of the arrows shown in Figure 11 until the two hooks hold the bracket: The stopper nub pops up, and the bracket locks in place. -
Page 41: Attaching The Access Point To The Base Plate
AT-TQ4600-OF13 Wireless Access Point Installation Guide Screw Stopper Nub Up Figure 12. Securing the Mounting-Bracket Attaching the To attach the access point and mounting bracket to the base plate on the wall or ceiling, perform the following: Access Point to the Base Plate 1. -
Page 42: Figure 13: Attaching The Access Point To The Base Plate
Chapter 2: Installing the Access Point Key Holes Keys Captive Screw Figure 13. Attaching the Access Point to the Base Plate 3. Slide the access point downward to lock the necks of the pins on the base plate in the slots on the mounting bracket. Refer to Figure 13. 4. -
Page 43: Cabling The Access Point
AT-TQ4600-OF13 Wireless Access Point Installation Guide Cabling the Access Point To cable the access point, perform the following procedure: 1. Connect a network cable to the LAN port on the rear panel of the access point. Refer to Figure 14. The specifications of the cable are listed in Table 3 on page 25. -
Page 44: Connecting The At-Tq0091 Ac/Dc Power Adapter
Chapter 2: Installing the Access Point Connecting the AT-TQ0091 AC/DC Power Adapter To power the access point with the AT-TQ0091 AC/DC Power Adapter, perform the following procedure: 1. Connect the DC power cable from the AT-TQ0091 AC/DC Power Adapter to the DC 12V connector on the rear panel of the access point. -
Page 45: Figure 16: Removing An Ac Plug From The At-Tq0091 Ac/Dc Power Adapter
AT-TQ4600-OF13 Wireless Access Point Installation Guide Release Tab Release Tab Figure 16. Removing an AC Plug from the AT-TQ0091 AC/DC Power Adapter 3. Slide the correct AC plug for your region into the slot on the adapter until it clicks into place. -
Page 46: Securing The Access Point
The access point has a Kensington security slot for a lock to secure the device. Refer to Figure 2 on page 230. You should install a lock if the access point is installed in a non-secure location. For installation directions, refer to the manufacturer’s instructions. Anti-theft devices are not available from Allied Telesis. -
Page 47: Chapter 3: Performing The Initial Configuration
Chapter 3 Performing the Initial Configuration This chapter explains how to start the initial management session on the AT-TQ4600-OF13 wireless access point and configure the unit for the SES controller and optional AT-UWC management program. This chapter contains the following sections: ... -
Page 48: Starting The Initial Management Session
Chapter 3: Performing the Initial Configuration Starting the Initial Management Session There are a several ways to start your initial management session on the access point. If your network has a DHCP server, you can connect the LAN port on the access point to your network and let the DHCP server automatically assign an IP address to the device. -
Page 49: Starting The Initial Management Session With A Direct Connection
AT-TQ4600-OF13 Wireless Access Point Installation Guide 1. If the LAN port is not connected to a network device, such an Ethernet switch or a router, connect it now. 2. Do one of the following: If the unit is powered with PoE, go to the next step. -
Page 50: Starting The Initial Management Session Without A Dhcp Server
Chapter 3: Performing the Initial Configuration 2. Connect the AT-TQ0091 AC/DC power adapter to power on the access point. For instructions, refer to “Connecting the AT-TQ0091 AC/DC Power Adapter” on page 44. 3. Wait one minute for the unit to initialize its firmware. 4. - Page 51 AT-TQ4600-OF13 Wireless Access Point Installation Guide 6. Enter the IP address 192.168.1.230 in the URL field of the browser. You should now see the logon window, shown in Figure 17 on page 49. 7. Enter “manager” for the username and “friend” for the password. The username and password are case-sensitive.
-
Page 52: Setting The Country Code
Chapter 3: Performing the Initial Configuration Setting the Country Code You should set the country code during the initial management session of the access point to ensure that the device operates in compliance with the codes and regulations of your region or country. Note The non-US model of this product has a country code setting that must be set during the initial management session of the unit. - Page 53 7. To resume managing the unit, wait for it to complete initializing its management software and then start a new management session. 8. Go to “Configuring the Access Point for the SES Controller” on page 54 or AT-TQ4600-OF13 Wireless Access Point User Guide for additional management instructions.
-
Page 54: Configuring The Access Point For The Ses Controller
Chapter 3: Performing the Initial Configuration Configuring the Access Point for the SES Controller This procedure explains how to configure the wireless access point for the SES controller. This involves designating the IP address of the SES controller and providing other information. The wireless access point immediately begins to communicate with the SES controller after you enter the IP address, In response, the SES controller adds the wireless access point to its database. -
Page 55: Table 5. Openflow Configuration And Settings Window
AT-TQ4600-OF13 Wireless Access Point Installation Guide 2. Configure the settings in the window. Refer to Table 5. Table 5. OpenFlow Configuration and Settings Window Parameter Description Datapath ID Enter a unique identifier of 16 hexadecimal digits for the wireless access point. The controller identifies the device by this number. - Page 56 Chapter 3: Performing the Initial Configuration Table 5. OpenFlow Configuration and Settings Window (Continued) Parameter Description Critical Mode - Disabled: The wireless access point continues (continued) forwarding traffic from known hosts using the OpenFlow flow rules it has already learned from the controller.
- Page 57 AT-TQ4600-OF13 Wireless Access Point Installation Guide If it can communicate with the controller, it begins forwarding traffic from wireless hosts to the controller to learn their network, location, or schedule policies. After learning the flow rules for the hosts from the controller, it begins forwarding their traffic.
- Page 58 Chapter 3: Performing the Initial Configuration...
-
Page 59: Appendix A: Technical Specifications
Appendix A Technical Specifications This appendix contains the following sections: “Physical Specifications” “Environmental Specifications” “Power Specifications” on page 60 “LAN Port” on page 61 “Safety and Electromagnetic Emissions Certifications” on page 63 Physical Specifications Table 6. AT-TQ4600 Physical Specifications Dimensions (W x D x H) 170.0 mm x 170.0 mm x 35.0 mm (6.7 in. -
Page 60: Power Specifications
Appendix A: Technical Specifications Power Specifications Table 8. AT-TQ4600-OF13 Maximum Power Consumption AT-TQ4600 16 watts (A124-11202050) Table 9. AT-TQ0091 Power Adapter Input Range 240 VAC Input Frequency 50 - 60 Hz Input Current 0.6 A Output Voltage +12 VDC Output Current... -
Page 61: Lan Port
AT-TQ4600-OF13 Wireless Access Point Installation Guide LAN Port Table 10. LAN Port Specifications Connector RJ45 Standards IEEE 802.3 (10Base-T) IEEE 802.3u (100Base-TX) IEEE 802.3ab (1000Base-T) PoE standard IEEE 802.3at (class 4) Figure 20 illustrates the pin layout of the LAN port. -
Page 62: Table 13. 1000Base-T Connector Pinouts
Appendix A: Technical Specifications Table 12. MDI-X Pin Signals (10Base-T or 100Base-TX) (Continued) Signal Table 13 lists the pin signals when the LAN port is operating at 1000 Mbps. Table 13. 1000Base-T Connector Pinouts Pair Signal TX and RX TX and RX- TX and RX+ TX and RX+ TX and RX-... -
Page 63: Safety And Electromagnetic Emissions Certifications
AT-TQ4600-OF13 Wireless Access Point Installation Guide Safety and Electromagnetic Emissions Certifications Table 14. Safety and Electromagnetic Emissions Certificates Standard RoHS compliant Compliance European Union RoHS (Directive 2011/65/EU of the European Parliament and of the Council of 8 June 2011 on the restriction of the use of certain hazardous substances in electrical and electronic equipment.) - Page 64 Appendix A: Technical Specifications Table 14. Safety and Electromagnetic Emissions Certificates (Continued) Safety EN 60950-1 IEC 60950-1 TUV-T UL 60950-1 UL 2043* * Refer to “Installation Requirements per UL 2043 Compliance” on page 34 for installation requirements.
-
Page 65: Appendix B: Regulatory Statements
Appendix B Regulatory Statements This appendix contains the following regulatory statements: “Federal Communication Commission Interference Statement” on page 66 “Industry Canada Statement” on page 68 “Europe - EU Declaration of Conformity” on page 70 “Taiwan NCC Statement” on page 71... -
Page 66: Federal Communication Commission Interference Statement
Appendix B: Regulatory Statements Federal Communication Commission Interference Statement This device complies with Part 15 of the FCC Rules. Operation is subject to the following two conditions: (1) This device may not cause harmful interference, and (2) this device must accept any interference received, including interference that may cause undesired operation. - Page 67 AT-TQ4600-OF13 Wireless Access Point Installation Guide Country Code Selection (WiFi Devices) Note The non-US model of this product has a country code setting that must be set during the initial management session of the unit. The setting ensures that the unit operates in compliance with the laws and regulations of your country or region.
-
Page 68: Industry Canada Statement
Appendix B: Regulatory Statements Industry Canada Statement This device complies with RSS-210 of the Industry Canada Rules. Operation is subject to the following two conditions: (1) This device may not cause harmful interference, and (2) this device must accept any interference received, including interference that may cause undesired operation. - Page 69 AT-TQ4600-OF13 Wireless Access Point Installation Guide (ii) le gain maximal d’antenne permis pour les dispositifs utilisant les bandes 5 250-5 350 MHz et 5 470-5 725 MHz doit se conformer à la limite de p.i.r.e.; (iii) le gain maximal d’antenne permis (pour les dispositifs utilisant la bande 5 725-5 825 MHz) doit se conformer à...
-
Page 70: Europe - Eu Declaration Of Conformity
20cm between the radiator and your body. Importer: Allied Telesis International BV Incheonweg 7, 1437 EK Rozenburg Note Contact Allied Telesis for the EU conformity statement. To contact Allied Telesis, visit our web site at www.alliedtelesis.com/contact. -
Page 71: Taiwan Ncc Statement
AT-TQ4600-OF13 Wireless Access Point Installation Guide Taiwan NCC Statement 低功率電波輻射性電機管理辦法 • 第十二條 經型式認證合格之低功率射頻電機,非經許可,公司、商號或使用者均不 得擅自變更頻率、加大功率或變更原設計之特性及功能。 ‧ 第十四條 低功率射頻電機之使用不得影響飛航安全及干擾合法通信;經發現有干擾 現象時,應立即停用,並改善至無干擾時方得繼續使用。 前項合法通信,指依電信法規定作業之無線電通信。 低功率射頻電機須忍受合法通信或工業、科學及醫療用電波輻射性電機設 備之干擾。 MPE 警語 20cm 評估超過標準值 Warning 電磁波曝露量 MPE 標準值 0.4023mW/cm ,本產品使用時建議應距 離人體 20 cm... - Page 72 Appendix B: Regulatory Statements...
Need help?
Do you have a question about the AT-TQ4600-OF13 and is the answer not in the manual?
Questions and answers