Table of Contents
Advertisement
Advertisement
Table of Contents

Summary of Contents for Axell Wireless MBF-40 Series
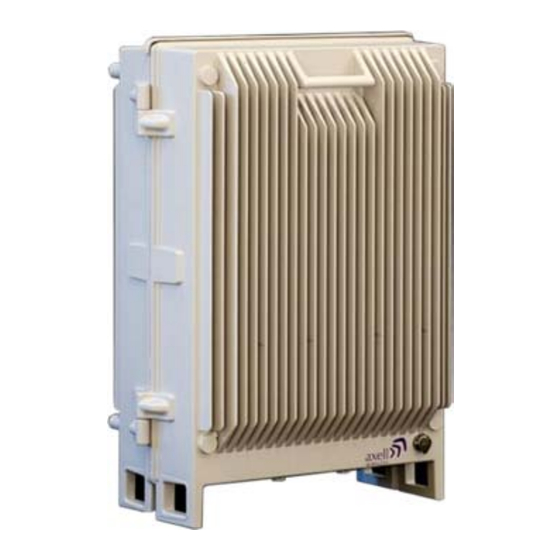
- Page 1 AXELL MBF-40 AMERICAS REPEATERS PRODUCT DESCRIPTION AND USER’S MANUAL Axell MBF-40 Multi Band Repeater-Americas PRODUCT DESCRIPTION AND USER’S MANUAL Doc No. 00071UM Rev. 3.2 Single/Dual-Band Tri/Quad-Band Quad-Band with Fan Hood Repeater Repeater Repeater...
- Page 2 Dual Band MBF-3708-3719; MBF-3707-3917; MBF-3707-3719; MBF-3707-4317; MBF-4317-3919; MBF-4317-4319; Tri-Band MBF-3708-3917-3719; MBF-3707-3708-3917; MBF-3707-3708-3719; Quad-Band MBF-3707-3708-3917-3719; MIMO MBF-3917-3917M-3719 MBF-40 Canada Repeaters Single Band MBF-4307-AO; MBF-3707S-AO; Dual Band MBF-3708S-3709S-M; MBF-4317-4326-M; Quad-Band MBF-4308-4317-4319-4326-M-F MIMO MBF-4307-4307-M-AO Doc. No. 00071UM Rev. 3.2 © Axell Wireless Ltd...
- Page 3 No part of this document may be copied, distributed, transmitted, transcribed, stored in a retrieval system, or translated into any human or computer language without the prior written permission of Axell Wireless Ltd. The manufacturer has made every effort to ensure that the instructions contained in this document are adequate and free of errors and omissions.
- Page 4 Wireless in this document is believed to be accurate and reliable. However, Axell Wireless assumes no responsibility for its use. In no event shall Axell Wireless be liable for any damage resulting from loss of data, loss of use, or loss of profits and Axell Wireless further disclaims any and all liability for indirect, incidental, special, consequential or other similes damages.
-
Page 5: Unauthorized Changes To Equipment
Compliance with IC Under Industry Canada regulations, this radio transmitter may only operate using an antenna of a type and maximum (or lesser) gain approved for the transmitter by Industry Canada. © Axell Wireless Ltd Doc. No. 00071UM Rev. 3.2... - Page 6 Une telle réduction doit porter sur la puissance d'entrée ou sur le gain, et ne doit pas se faire au moyen d'un atténuateur raccordé à la sortie du dispositif. Doc. No. 00071UM Rev. 3.2 © Axell Wireless Ltd...
- Page 7 Where the equipment is used near power lines or in association with temporary masts not having lightning protection, the use of a safety earth connected to the case- earthing bolt is strongly advised. © Axell Wireless Ltd Doc. No. 00071UM Rev. 3.2...
- Page 8 Axell Wireless assumes no liability for the customer's failure to comply with these precautions. This entire manual should be read and understood before operating or maintaining the repeater.
-
Page 9: Table Of Contents
Required Items for a Master Slave System ..............31 3.4.2 Mounting the Master and Slave Units ................31 3.4.3 Connecting Master and Slave Units ................32 3.4.4 Master/Slave Connections for External Alarms ............34 © Axell Wireless Ltd Doc. No. 00071UM Rev. 3.2... - Page 10 Default User Accounts ...................... 67 6.4.2 User Access Levels ......................67 6.4.3 Change Password ......................68 6.5 Reboot ............................. 68 6.6 Axell Shell (Command Line Interface) ..................69 6.7 Attribute Reference ........................70 Doc. No. 00071UM Rev. 3.2 © Axell Wireless Ltd...
- Page 11 Appendix B - Canada Specifications ..................81 Appendix C – F/O Cleaning Procedure ..................82 Tools ................................. 82 F/O Cleaning Procedure ........................83 Dry Cleaning ............................ 83 Wet Cleaning ........................... 85 © Axell Wireless Ltd Doc. No. 00071UM Rev. 3.2...
-
Page 13: Introduction
A distributed antenna system (DAS) can be used to distribute the signal throughout the area to be covered. Axell Wireless can provide a complete solution including design, site surveys and equipment related to the POI (Point Of Interface) such as combiners, filters, cross band couplers, etc. -
Page 14: Features And Capabilities
Backup battery for ‘last gasp’ indication (sending fault error before power failure) • Optional - two internal power supplies provided for some models ensure robust unit • operation Power source: 115VAC or -48V power (model dependent) • Doc. No. 00071UM Rev. 3.2 © Axell Wireless Ltd... -
Page 15: Alc
MBF-40 MIMO topology requires an OMU II unit that supports at least two sectors. Two dedicated optic Fibers are routed from the OMU II towards the MBF-40. Where relevant, MIMO specific installation instructions are provided in the manual. Figure 1-3: MIMO OMU II-MBF-40 Remote Application © Axell Wireless Ltd Doc. No. 00071UM Rev. 3.2... -
Page 16: Five-Band Configuration
The following figure shows a Master/Slave configuration. The figure below shows a five band configuration implemented using a quad-band Master and single-band Slave. The example shows connections for a configuration WITHOUT external alarms. Figure 1-4: Example of Five-band Configuration Doc. No. 00071UM Rev. 3.2 © Axell Wireless Ltd... -
Page 17: Operating Temperature
External service antenna and GND connections • Internal connections for power, Fiber optics and alarm cables routed via openings in • the screen. Internal USB and Ethernet connections for local setup via Web GUI • © Axell Wireless Ltd Doc. No. 00071UM Rev. 3.2... -
Page 18: Securing The Unit
NOTE: The two screws must be fully tightened. Failure to do so may affect the IP65 compliancy and therefore any warranty. Screws Screws Lock Lock Connections Connections Figure 1-6: Securing Tri/Quad Band Figure 1-5: Securing Single/Dual Band Doc. No. 00071UM Rev. 3.2 © Axell Wireless Ltd... -
Page 19: External Interfaces
Power Plinth connection for routing power for internal connection (section 3.9) Plinth connector for routing external alarms and relay wiring cable Alarms for internal connections (section 3.8). Grounding lug (section 3.5) © Axell Wireless Ltd Doc. No. 00071UM Rev. 3.2... -
Page 20: Internal Interfaces
F/O Converter LEDs and optic connector to which routed optic fiber is connected (section 3.7) Alarms and relay connections ( section 3.8) Power connections (section 3.9) Figure 1-9: Single Band Repeater with Door Open Doc. No. 00071UM Rev. 3.2 © Axell Wireless Ltd... - Page 21 F/O Converter LEDs and optic connector to which routed optic fiber is connected (section 3.7) Alarms and relay connections (section 3.8) Power connections (section 3.9) Figure 1-10: Dual band Dual Service Antenna Model © Axell Wireless Ltd Doc. No. 00071UM Rev. 3.2...
- Page 22 The MIMO model includes two Service Antenna ports and two Optic Converter modules (shown below). All other connections and interfaces are similar to the above models. Dual Fiber optic connectors to which routed optic Fibers are connected (section 3.7) Figure 1-12: MIMO Model Doc. No. 00071UM Rev. 3.2 © Axell Wireless Ltd...
-
Page 23: Installation Requirements
Follow Electro-Static Discharge (ESD) precautions. • • Install the Repeater close to the service area to monitor the output power. Use low loss cables to connect the antennas to the Repeater. • © Axell Wireless Ltd Doc. No. 00071UM Rev. 3.2... -
Page 24: Rf Cable Installation Guidelines
Cable length - determined by the Remote installation plan. When calculating the • cable length, take into account excess cable slack so as not to limit the insertion paths. Recommended Fiber-optic cable: Single mode 9/125 • Doc. No. 00071UM Rev. 3.2 © Axell Wireless Ltd... -
Page 25: Service Antenna Requirements (English)
• cable and splitting losses Typical antenna types: Indoor Dome 2.1 dBi; beam width 360° • Indoor Panel 4.2 dBi; beam width 106° • • Radiating Cable Typically < -50 dBi © Axell Wireless Ltd Doc. No. 00071UM Rev. 3.2... -
Page 26: Recommended Splitters And Couplers
Type de zone de service et la taille • Type et les caractéristiques de l'antenne • Hauteur • La longueur et le type de câble coaxial requis pour relier l'antenne au répéteur et • l'atténuation. Doc. No. 00071UM Rev. 3.2 © Axell Wireless Ltd... -
Page 27: Fcc Et Ic Conformité De L'installation Intérieure
(single-pole or horizontal installation). In addition, isolation between the donor and service antennas must be taken into account when selecting the location of the antennas. © Axell Wireless Ltd Doc. No. 00071UM Rev. 3.2... -
Page 28: Repeater Installation
If possible, use a wall in the shade to minimize the overall sun loading. If sufficient shielding cannot be obtained, an additional sun shield should be mounted. Figure 3-1: Example of a sun shield Doc. No. 00071UM Rev. 3.2 © Axell Wireless Ltd... -
Page 29: Standard Repeater Installation
Fiber Conduit inlet hose fitter (may be pre- assembled) AC Cable [30 ft.] – Long cable for AC power Optional equipment Alarm Cable [30 ft.] – Long cable for External Alarms Input © Axell Wireless Ltd Doc. No. 00071UM Rev. 3.2... -
Page 30: Bracket Assembly
Figure 3-2: Wall mount bracket position Figure 3-3: Rack-mount bracket position Fix mounting brackets to MBF – use the supplied four M8 bolts and spring • washers. Figure 3-4: Fix mounting brackets to MBF Doc. No. 00071UM Rev. 3.2 © Axell Wireless Ltd... -
Page 31: Wall Marking And Drilling
Care must be taken to ensure the alignment of the four fixings. A spirit level or • plumb line should be used to ensure horizontal/vertical alignment. Figure 3-6: M6 Rawlbolt – recommended for wallmount. © Axell Wireless Ltd Doc. No. 00071UM Rev. 3.2... - Page 32 The wall should be drilled to a depth which is sufficient to accommodate the full length of the fixing. 4. Insert the fixings so that the top of the sleeve/anchor section is level with the wall surface. Doc. No. 00071UM Rev. 3.2 © Axell Wireless Ltd...
- Page 33 6. As the bolt pulls its way in, the sides of the anchor section are forced outwards, gripping the surrounding surface. Figure 3-9: Anchor Sides Pushed Outwards. 7. Once all four fixings are in place, carefully withdraw the four bolts. Figure 3-10: Withdraw Bolts. © Axell Wireless Ltd Doc. No. 00071UM Rev. 3.2...
-
Page 34: Mount The Repeater
Repeater and into the sleeve/anchor sections of the fixing in the wall and tighten the bolts. The repeater needs to be mounted tightly to eliminate vibration. • Align Repeater and Secure Bolts Figure 3-11: Mount Repeater Doc. No. 00071UM Rev. 3.2 © Axell Wireless Ltd... -
Page 35: Repeater With Fan Hood Installation
The dimensions, parts list and assembly instructions are provided in the following sections. Fan Hood Power Interfaces (2) Rear Fan Hood 2x Mounting Brackets (one on Front Fan each side) Hood Figure 3-12: MBF-40 including Fan Hood © Axell Wireless Ltd Doc. No. 00071UM Rev. 3.2... -
Page 36: Dimensions
AXELL MBF -40 AMERICAS REPEATERS PRODUCT DESCRIPTION AND USER’S MANUAL 3.3.1 Dimensions Figure 3-13: MBF-40 including Fan Hood – Assembly Dimensions Doc. No. 00071UM Rev. 3.2 © Axell Wireless Ltd... -
Page 37: Parts List
Fiber Conduit inlet hose fitter (may be pre- assembled) AC Cable [30 ft.] – Long cable for AC power Optional equipment Alarm Cable [30 ft.] – Long cable for External Alarms Input © Axell Wireless Ltd Doc. No. 00071UM Rev. 3.2... -
Page 38: Fan Hood And Bracket Assembly
• Align innermost bracket holes to repeater mounting holes. • Loosely insert bolts and washers. Align brackets and loosely insert x4 bolts and washers Repeater front door panel facing down Figure 14: Place Brackets on top the MBF Doc. No. 00071UM Rev. 3.2 © Axell Wireless Ltd... - Page 39 • Position the Rear Fan Hood under the (inserted) bolts and washers. • Tighten the four bolts. Fan Hood panel on top Position under bolts and tighten bolts Figure 3-15: Assemble Rear Fan Hood © Axell Wireless Ltd Doc. No. 00071UM Rev. 3.2...
- Page 40 4. Referring to the MBF-40 User’s Manual, prepare the mounting area and hang the repeater on the wall: • Drill the holes in the wall. • Mount the Repeater. Prepare mounting area and mount repeater Figure 3-17: Mount the Repeater Doc. No. 00071UM Rev. 3.2 © Axell Wireless Ltd...
- Page 41 • Hang the Front Fan Hood on the repeater and tighten the bolts. Hang the Front Fan Hood Loosely insert x4 on the bolts and tighten bolts and washers Figure 3-18: Insert the Two M8x12 Bolts © Axell Wireless Ltd Doc. No. 00071UM Rev. 3.2...
-
Page 42: Five-Band System Installation
Master MBF-40 and Slave MBF-40. All the services are routed to the Master unit via the optic fiber, where the Master and Slave are managed as a single unit via the Master connections. Doc. No. 00071UM Rev. 3.2 © Axell Wireless Ltd... -
Page 43: Required Items For A Master Slave System
• For Master units provided WITH a Fan Hood assembly kit, mount according to section 3.3. • For Master units WITHOUT a Fan Hood assembly kit, mount according to section 3.2. 3. Mount the Slave unit according to section 3.2. © Axell Wireless Ltd Doc. No. 00071UM Rev. 3.2... -
Page 44: Connecting Master And Slave Units
Master and single-band Slave. The connections vary depending on whether external alarms are connected. The figure below shows the connections WITHOUT external alarms. Figure 3-20: Connections WITHOUT External Alarms Doc. No. 00071UM Rev. 3.2 © Axell Wireless Ltd... - Page 45 5. Connect the Server antenna to the SLAVE unit Server antenna port as illustrated. 6. Connect power, power-up, close and secure both units according to sections 3.9, 3.10 and 3.11. © Axell Wireless Ltd Doc. No. 00071UM Rev. 3.2...
-
Page 46: Master/Slave Connections For External Alarms
Route and connect ALARMS according to section 3.8 IntrComm Interconnect RS-485 internal bus of MASTER and of SLAVE according to the following figure. (Master to Slave) Figure 3-21: Connections WITH External Alarms Doc. No. 00071UM Rev. 3.2 © Axell Wireless Ltd... -
Page 47: Grounding
Make sure the grounding product used is suitable for the kind and size of cable being • used. Connect the repeater box bolt to the same ground. • NOTE: For Dual Unit assemblies (five frequency band support), ground both units. Figure 3-22: Grounding the MBF-40 © Axell Wireless Ltd Doc. No. 00071UM Rev. 3.2... -
Page 48: Ensure Good Emv Protection
Pulse), including radio transmitters. They define proper planning, installation and inspection of effective lightning protection systems. The Axell Wireless repeaters comply with the EN standard ETS 301 498-8 which stipulates demands on lightning/surge protection for typical infrastructure telecom equipment installations. - Page 49 Wireless. Coaxial lightning protection is normally one of these three types: Gas capsule, High-pass and Bandpass. There also need to be a protective device installed on the power supply cord. Figure 3-24: Protective device installed in connection with the power supply © Axell Wireless Ltd Doc. No. 00071UM Rev. 3.2...
-
Page 50: Fiber Optic Connection
3. Insert the optic Fiber hose fitter (may be pre-assembled) and route the Fiber cable(s) via the Fiber input (see front Fiber hose fitter panel interfaces in section 1.7.2). Figure 3-26: Route Optic Fiber(s) via the Fiber Input Doc. No. 00071UM Rev. 3.2 © Axell Wireless Ltd... - Page 51 Figure 3-29: Run Fiber in the Rubber Seal (for MIMO, Run Both Fibers in the Same Rubber Seal) NOTE: The sleeve (not supplied), together with the rubber seal, meets the protection standard IP65/NEMA4. © Axell Wireless Ltd Doc. No. 00071UM Rev. 3.2...
- Page 52 7. Attach the sleeve to the Fiber optic inlet. This completes the procedure. Note: Clean the Fiber connector before connecting it to the system. See instruction in Appendix C – F/O Cleaning Procedure. Figure 3-31: Connect Sleeve Doc. No. 00071UM Rev. 3.2 © Axell Wireless Ltd...
-
Page 53: External Alarm And Relay Connections
Relay (pin 11 and 12) can be connected to an external device to indicate an alarm. • • Can be configured to trigger on any number of internal and external alarms. The maximum current that can be supplied is 100mA. © Axell Wireless Ltd Doc. No. 00071UM Rev. 3.2... -
Page 54: Power And Backup Battery
Circuit-breaker minimum requirements • 10AT, 250VAC Needs to be SAFETY approved • Requires minimum contact separation of 3mm. • Install on the wall near the unit • Doc. No. 00071UM Rev. 3.2 © Axell Wireless Ltd... -
Page 55: Connecting The Power Source
Neutral linked to the White • Ground to the Green where for SAFETY, the GND cable must be 10mm longer • than the Phase and Neutral cables. Figure 3-34: 115VAC Power Connections © Axell Wireless Ltd Doc. No. 00071UM Rev. 3.2... -
Page 56: 48V Power Source Connection
10 – 50 meters between 4 mm² repeater and power supply Over meters between Recommendation repeater and power supply reconfigure the installation, or to make special arrangements to increase cable area Doc. No. 00071UM Rev. 3.2 © Axell Wireless Ltd... -
Page 57: Backup Battery
At delivery the back-up battery is connected. • The battery is replaced by lifting the battery pack out of the crate and disconnecting • the cable. Connector Figure 3-36: Backup Battery © Axell Wireless Ltd Doc. No. 00071UM Rev. 3.2... -
Page 58: Power On
Close lid, tighten the screws and lock repeater. Continue with the following section to setup the repeater. NOTE: The two screws must be fully tightened. Failure to do so may affect the IP65 compliancy and therefore any warranty. Doc. No. 00071UM Rev. 3.2 © Axell Wireless Ltd... -
Page 59: Opening A Session And Navigating Gui
(if a network connection is available). • Run a browser and login according to the following section. Figure 4-1: MBF-40 Controller Module Connection © Axell Wireless Ltd Doc. No. 00071UM Rev. 3.2... -
Page 60: Remote Connection And Login
The Web GUI Main Window appears. This is the same window is also viewed via the OMU II. 4.1.2 Remote Connection and Login This type of Web session requires connecting the Repeater to the network. Doc. No. 00071UM Rev. 3.2 © Axell Wireless Ltd... -
Page 61: Open A Session To The Mbf-40 Via The Omu Ii
• After accessing an OMU II session, commission the MBF-40 according to the following section. Connect to EITHER the USB port OR Ethernet port Ethernet Figure 4-3: Connection to OMU II © Axell Wireless Ltd Doc. No. 00071UM Rev. 3.2... -
Page 62: Navigating The Web Interface
Several tabs (and sub-tabs) are available: Home, Nodes, Logs, etc., while the Home tab (illustrated below), is displayed on login. NOTE: for 5-Band MBF-40 home screen, see Figure 4-5. Menu options buttons Home screen Figure 4-4: MBF-40 Home Screen Doc. No. 00071UM Rev. 3.2 © Axell Wireless Ltd... -
Page 63: Management Options Buttons
Lists the remote nodes – corresponding OMU and units connected the specific OMU. List of recent operations. Section 7.3. Provides range MBF-40 configuration procedures such communication, RF, Date and Time, Password, etc. Section 6.1. Logout of the system. © Axell Wireless Ltd Doc. No. 00071UM Rev. 3.2... -
Page 64: Home Screen Overview
Sub-systems – overall status of all sub-systems such as power supplies, battery, • communication etc. General External Alarms UL and DL output control options Fiber Optic options Power monitoring options Doc. No. 00071UM Rev. 3.2 © Axell Wireless Ltd... -
Page 65: Configuration Screen Overview
Help. See section 6.6 Attribute CLI commands and attributes directory. See section 6.7 Reference Reboot Soft restarts the MBF-40 device. See section 6.5. controller SNMP Agent SNMP Agent configuration. See section 6.3 © Axell Wireless Ltd Doc. No. 00071UM Rev. 3.2... -
Page 66: Five Service System Gui
5-band unit with same configurations and options. The Home screen displays all the 5 bands in a time (same as in a tri-band/ quad-band), as shown in Figure 4-5. Figure 4-5: 5-Band MBF-40 Home Screen Doc. No. 00071UM Rev. 3.2 © Axell Wireless Ltd... - Page 67 AXELL MBF-40 AMERICAS REPEATER PRODUCT DESCRIPTION AND USER’S MANUAL Figure 4-6: 5-Band MBF-40 Site Information © Axell Wireless Ltd Doc. No. 00071UM Rev. 3.2...
-
Page 68: Mbf-40 Commissioning
To perform MBF-40 OLA (via OMU II) 1. From the OMU II main window, click the Opto Adjust button. Click to access OLA screen OMUII Main window Figure 5-1: OMU II Main window Doc. No. 00071UM Rev. 3.2 © Axell Wireless Ltd... - Page 69 Adjust. To easily mark all checkboxes mark the checkbox named OLA. NOTE: The process may take several minutes depending on the size of the system and remote distance. © Axell Wireless Ltd Doc. No. 00071UM Rev. 3.2...
-
Page 70: Rf Balancing
2. The resulting pane can be displayed in two views: • Basic – default view (Basic button) • Advanced – provides more information (Advanced button) The dialog below shows an example of the Basic (default) view. Doc. No. 00071UM Rev. 3.2 © Axell Wireless Ltd... - Page 71 • Set Attenuation equal to the value set in the DL (above). • Verify the Amplifier Saturation is GREEN. NOTE: If noise is detected on the link, reduce only the Uplink for optimal signal. © Axell Wireless Ltd Doc. No. 00071UM Rev. 3.2...
-
Page 72: Automatic Mbf-40 Rf Balancing
4. Adjust the following for each band: • Nominal Level (dBm) • Uplink Delta (dB) 5. Click Adjust. The procedure may take several minutes depending on the number of units selected. Doc. No. 00071UM Rev. 3.2 © Axell Wireless Ltd... -
Page 73: Integration Into The Aem
OMU II Main window and if the node is faulty (red LED), access the dedicated configuration screen in Basic or Advanced view for more information. NOTE: Consult the OMU II User Manual for additional information on RF and Optical adjustments. © Axell Wireless Ltd Doc. No. 00071UM Rev. 3.2... -
Page 74: Mbf-40 Full Gui Description
Click the Config button and click on the Site Information icon. Two areas are displayed: Control Module – provides hardware and software version information. • Site Information – provides MBF-40 identification information. • NOTE: for 5-band MBF-40 Site Information, see Figure 4-6. Doc. No. 00071UM Rev. 3.2 © Axell Wireless Ltd... -
Page 75: Date & Time
(high or low) and it is recommended to assign the alarms recognizable names (such as Door Open, High Temperature, etc.) To configure the external alarms 1. In the Main menu, click the Config button. 2. Click on the External Alarms icon. © Axell Wireless Ltd Doc. No. 00071UM Rev. 3.2... -
Page 76: Ip Address
4. For DHCP IP address configuration: • Select Automatically Obtain IP Address (DHCP). • No other settings are required. • Click Apply. The Manual configuration settings are illustrated below. Figure 6-5: Configure Local Network Parameters Doc. No. 00071UM Rev. 3.2 © Axell Wireless Ltd... -
Page 77: Remote Communication Setup
NOTE: The configuration of each option is saved and active. It is not relevant which option is currently selected (ETH:TCP or ETH:SNMP). 6.2.1 TCP/IP and Ethernet 1. Click on the Config button. 2. From Device:Method select ETH:TCP (Ethernet:TCP/IP). 3. Click Apply. Figure 6-6: Remote ETH Configuration © Axell Wireless Ltd Doc. No. 00071UM Rev. 3.2... -
Page 78: Snmp Support
To allow SNMP queries of the OMU II – the SNMP agent must be enabled on the OMU • To allow SNMP queries of the remote devices via OMU II – the SNMP agent must be • enabled on the OMU II and on the remote devices. Doc. No. 00071UM Rev. 3.2 © Axell Wireless Ltd... -
Page 79: User Accounts
Administration section in Common Commands and Attributes document for detailed syntax. 6.4.2 User Access Levels In this generation of the system, standard users can be promoted to login via the Web Interface, inheriting the Read-Write or Read-Only access to this interface. © Axell Wireless Ltd Doc. No. 00071UM Rev. 3.2... -
Page 80: Change Password
NOTE: The password is not encrypted during transmission. Use this screen only if the connection to the repeater is safe. Use the CLI commands using an encrypted connection, if possible (i.e. SSH). 6.5 Reboot CAUTION!! Use this function in Emergency Cases ONLY Doc. No. 00071UM Rev. 3.2 © Axell Wireless Ltd... -
Page 81: Axell Shell (Command Line Interface)
Please refer to the Attribute Reference section (by clicking the Cofing button on the top right and selecting Attribute Reference – see 6.7) for detailed syntax and available commands. You may also consider viewing the MBF-40 Commands and Attributes document. © Axell Wireless Ltd Doc. No. 00071UM Rev. 3.2... -
Page 82: Attribute Reference
The Attribute Reference lists all available CLI commands and includes details and examples on how to use the commands. Additional information may be found in the MBF-40 Commands and Attributes document. Doc. No. 00071UM Rev. 3.2 © Axell Wireless Ltd... -
Page 83: Monitoring, Fault Sourcing And Maintenance
In the event of a failure Axell Wireless’s support service should be contacted for advice on a possible module replacement or other action to be taken. If a shipment of a repeater back to Axell Wireless is made within the period of •... -
Page 84: Monitoring Via The Mbf-40 Home Screen
Control button. The MBF-40 Home window appears in Basic View. To view more details, click Advanced. General (Same as Basic view) Detailed Repeater Status view Detailed fiber optic status Power measurements status Figure 7-1: MBF-40 Main Screen Advanced Doc. No. 00071UM Rev. 3.2 © Axell Wireless Ltd... -
Page 85: General
7.2.1 General Page Area Figure 7-2: MBF-40 General Indicator Description Temperature Current ambient temperature Name of Repeater, user customizable Door Status Green if closed Received Data Quality Check data for consistencies © Axell Wireless Ltd Doc. No. 00071UM Rev. 3.2... -
Page 86: Detailed View Of The Mbf-40
Saturation level status Power Level Power supply status Input/Output Input/output power levels Comm Communication status Temperature Temperature level and status indicator Condition Signal conditioning status Fatal Condition Critical condition indicator (RED = fault) Doc. No. 00071UM Rev. 3.2 © Axell Wireless Ltd... -
Page 87: Detailed View Of Fiber Optic Unit
Pilot tone level received in optic module Adjustment Perform UL OLA (on repeater side) Compensation Compensation performed on the optic link 7.2.4 Subsystems Temp Batt. Reference Pwr. Status Comm. Generator modules Pwr. status input © Axell Wireless Ltd Doc. No. 00071UM Rev. 3.2... -
Page 88: Logs Screen
Alarm status: OK Alarm status: Error Acknowledge alarm – Green = Acknowledged. Click to change acknowledgement. Use the Ack All button to acknowledge all alarm logs. Doc. No. 00071UM Rev. 3.2 © Axell Wireless Ltd... -
Page 89: Module Leds
F/O converter module LEDs, see 7.4.2 Figure 7-7: Dual band Dual Service Antenna Model NOTE: MIMO models include two optic converter modules with separate LED indicators. Both modules’ LED status should be checked. © Axell Wireless Ltd Doc. No. 00071UM Rev. 3.2... -
Page 90: Control Module Leds
Received RF signal on Fiber channel is above threshold Input level below threshold LED 6, Opto Tx, Green Transmitted RF signal on Fiber channel is above threshold Output level below threshold Doc. No. 00071UM Rev. 3.2 © Axell Wireless Ltd... -
Page 91: Power Supply Leds
Power LED 1 is flashing slowly, all of the red LEDs are flashing quickly => Input power is out and unit is operating on backup battery Input +15V +28V Power © Axell Wireless Ltd Doc. No. 00071UM Rev. 3.2... -
Page 92: Appendix A - Us Specifications
ETSI compliance. ** The composite output power is model dependent. *** Power consumption of all dual-band models except for MBF-4317-4319, is 220W. Power consumption for MBF-4317-4319 is 350 W. Doc. No. 00071UM Rev. 3.2 © Axell Wireless Ltd... -
Page 93: Appendix B - Canada Specifications
76lbs (34kg) 83lbs (38kg) Enclosure Aluminum (IP65) Environmental Operating Temperature -77 to +121ºF (-25 to +50ºC) Storage Temperature -86 to +158ºF (-30 to +70ºC) Humidity ETSI EN 300 019-2-4 (see compliance below) © Axell Wireless Ltd Doc. No. 00071UM Rev. 3.2... -
Page 94: Appendix C - F/O Cleaning Procedure
Lint-free swabs (box), Axell P/N 99-000127 Lint-free wipes (pack) Axell P/N 99-000125 Fujikura “One Click” cleaner Axell P/N 98-900004. 99% isopropyl alcohol (can), Axell P/N 99- 000126 Cletop type S Cassette Cleaner, Axell P/N 98- 900001 Doc. No. 00071UM Rev. 3.2 © Axell Wireless Ltd... -
Page 95: F/O Cleaning Procedure
3. Remove the protective cap from the cleaning-head end of the “One Click” cleaner, lift the protective end-cap on the Fiber connector and offer-up the end to the Fiber connector © Axell Wireless Ltd Doc. No. 00071UM Rev. 3.2... - Page 96 8. If the connector is dirty, clean it with a wet cleaning technique followed immediately by dry cleaning. This is to remove any remaining residue from the wet clean (the following steps demonstrate a wet cleaning technique). Doc. No. 00071UM Rev. 3.2 © Axell Wireless Ltd...
-
Page 97: Wet Cleaning
NOTE: The entire wet/dry cleaning cycle should only be used twice, if the Fiber is still dirty after two cycles of wet/dry cleaning seek advice from the Axell Wireless Support Desk. © Axell Wireless Ltd Doc. No. 00071UM Rev. 3.2...
Need help?
Do you have a question about the MBF-40 Series and is the answer not in the manual?
Questions and answers