Autotrol Logix 740 Operation Manual

Autotrol Logix 740 Operation Manual

Control autotrol 255 and autotrol performa series valves (268, 268fa)

Advertisement

Produced with a Trial Version of PDF Annotator - www.PDFAnnotator.com
Operation Manual
740/760 Control
255 and Performa Series Valves
(268, 268FA)
For Sales & Service questions please
contact your dealer:
Your local dealer is:

Advertisement

Table of Contents
loading
Need help?

Need help?

Do you have a question about the Logix 740 and is the answer not in the manual?

Questions and answers

Summary of Contents for Autotrol Logix 740

  • Page 1 Produced with a Trial Version of PDF Annotator - www.PDFAnnotator.com Operation Manual 740/760 Control 255 and Performa Series Valves (268, 268FA) For Sales & Service questions please contact your dealer: Your local dealer is:...
  • Page 2: Table Of Contents

    TABLE OF CONTENTS LOGIX™ SERIES INSTALLER QUICK-START SHEET MANUAL OVERVIEW How To Use This Manual EQUIPMENT INSTALLATION General Warnings And Safety Information Valve Features Location Selection Water Line Connection Drain Line Connection Overflow Line Connection Regenerant Line Connection Electrical Connection Valve Camshaft SYSTEM DISINFECTION Disinfection Of Water Conditioners...
  • Page 3: Logix™ Series Installer Quick-Start Sheet

    LOGIX™ SERIES INSTALLER QUICK-START SHEET Logix Series Controllers See Determining If You Have a 740 or 760 Control on page 26 to identify your controller. 740 Controller - Electronic time clock control capable of doing 7-day (day of week) regeneration, or up to a 99 interval day regeneration. This control will operate both in a conditioner (softener) or 3-cycle filter mode with the same controller.
  • Page 4 Initial Start-up Step-by-step Instructions Step 1: Program System Size SU MO TU WE TH FR SA DAYS Time & Day Regen Time & Day This step may have been performed by your system’s OEM manufacturer. In this Salt case, proceed to step 2. Capacity •...
  • Page 5 • Use the UP or DOWN buttons to change to the number of days desired. Standard Setting • Press SET to accept the regen frequency, and advance to the next cycle. SU MO TU WE TH FR SA DAYS Step 6: Amount of Regenerant used per Regeneration Time &...
  • Page 6 Manual Regeneration Procedures To Initiate a Manual Regeneration: • Press REGEN once for delayed regeneration. System will regenerate at next set regen time (2:00 AM). A flashing regen (recycle) symbol will be displayed. • Press and hold REGEN for 5 seconds to initiate immediate manual regeneration.
  • Page 7 Resetting The Control To reset the control: SU MO TU WE TH FR SA DAYS Time & Day Regen Time & Day Press and hold SET and DOWN simultaneously for 5 seconds. Salt H0 and the system’s set resin volume (or "F" mode) will be displayed. Capacity Hardness Resetting the Logix Controller...
  • Page 8: Manual Overview

    MANUAL OVERVIEW How To Use This Manual This installation manual is designed to guide the installer through the process of installing and starting conditioners featuring the 700 Logix series controllers. This manual is a reference and will not include every system installation situation.
  • Page 9: Equipment Installation

    EQUIPMENT INSTALLATION General Warnings And Safety Information Electrical There are no user-serviceable parts in the AC adapter, motor, or controller. In the event of a failure, these should be replaced. • All electrical connections must be completed according to local codes. •...
  • Page 10 General • Observe all warnings that appear in this manual. • Keep the media tank in the upright position. Do not turn on side, upside down, or drop. Turning the tank upside down will cause media to enter the valve. •...
  • Page 11 Fast Rinse (Downflow) — Cycles C5, C7: The control directs water down through the resin bed and up through the riser tube to the drain. Any remaining brine residual is rinsed from the resin bed. Brine Refill — Cycle C8: Brine refill occurs during a portion of the fast rinse cycle.
  • Page 12: Valve Features

    Valve Features Figure 2 255 Valve Identification One Piece Valve Disc Spring Optical Sensor Control Module Mount Refill Controller Right Side Injector and Cap Manifold Connection Air Check Check Ball Regenerant Tank Tube Connection Valve Discs Camshaft Motor Left Side Outlet Injector Drain...
  • Page 13 Figure 3 Performa Valve Identification One Piece Valve Disc Spring Valve Discs Optical Sensor Control Module Mount Right Side Injector and cap Refill Controller Regenerant Tube Connection Camshaft Motor Outlet Left Side Drain Injector Screen Filter Inlet Backwash Drain Control EQUIPMENT INSTALLATION Rev A...
  • Page 14: Location Selection

    Figure 4 700 Series Controller Identification LCD Display SU MO TU WE TH FR SA DAYS Time & Day Regen Time & Day Salt Capacity x100 Hardness Front Manual Regen Button Down Button Up Button Set Button AC Adapter (low voltage) No Salt Detector Input Connection...
  • Page 15: Water Line Connection

    Outdoor Locations When the water conditioning system is installed outdoors, several items must be considered. • Moisture — The valve and 700 controller are rated for NEMA 3 locations. Falling water should not affect performance. The system is not designed to withstand extreme humidity or water spray from below.
  • Page 16 Figure 5 Series 256 bypass for use with 255 valve body Normal Operation In Bypass Figure 6 Series 1265 bypass for use with Performa valve bodies Normal Operation In Bypass Water Water Conditioner Conditioner Figure 7 Typical Globe Valve Bypass System Normal Operation In Bypass Water...
  • Page 17: Drain Line Connection

    WARNING: The inlet water must be connected to the inlet port of the valve. When replacing non-Autotrol valves, the inlet and outlet may be reversed. It is also possible for the plumbing to be installed in an opposite order. Do not solder pipes with lead-based solder.
  • Page 18: Overflow Line Connection

    Secure the end of the drain line to prevent it from moving. Figure 8 Drain Line Connection Right Way Air Gap Drain NOTE: Waste connections or drain outlet shall be designed and constructed to provide for connection to the sanitary waste system through an air-gap of 2 pipe diameters or 1 inch (22 mm) whichever is larger.
  • Page 19: Regenerant Line Connection

    Figure 9 Overflow Line Connection Overflow Fitting Drain Tubing Secure hose in place Air Gap Drain Regenerant Line Connection (not used with 3-cycle filter system) The regenerant line from the tank connects to the valve. Make the connections and hand tighten. Be sure that the regenerant line is secure and free from air leaks.
  • Page 20 Figure 11 Regenerant Connection for Performa Valve Regenerant Line Connection NOTE: Be sure to use plumbing connection tube when attaching regenerant line connections to the Performa valve. NOTE: When installing a 3-cycle filter (253 or 263 valve) use a cap on the regenerant line connection to prevent water seepage from the port.
  • Page 21: Electrical Connection

    Figure 12 Regenerant Tank Check Valve (not provided)* * Furnished as an option from conditioner system manufacturer. Electrical Connection All 700 Series controllers operate on 12-volt alternating current power supply. This requires use of the supplied AC adapter. A variety of AC adapters are available for different applications.
  • Page 22: Valve Camshaft

    100 VAC, 120 VAC and 230 VAC AC Adapters: Make sure power source matches the rating printed on the AC adapter. NOTE: The power source should be constant. Be certain the AC adapter is not on a switched outlet. Power interruptions longer than 8 hours may cause the controller to lose the time and day settings.
  • Page 23 Regeneration Cycle Indicators C0 = Treated Water - normal operation mode C1 = Backwash Cycle C2 = Regenerant Draw Cycle (not used in filter mode) C3 = Slow Rinse Cycle (not used in filter mode) C4 = System Pause C5 = Fast Rinse Cycle 1 C6 = Backwash Cycle 2 (not used in filter mode) C7 = Fast Rinse Cycle 2 (not used in filter mode) C8 = Regenerant Refill (not used in filter mode)
  • Page 24: System Disinfection

    SYSTEM DISINFECTION Disinfection Of Water Conditioners The materials of construction of the modern water conditioner will not support bacterial growth, nor will these materials contaminate a water supply. During normal use, a conditioner may become fouled with organic matter, or in some cases with bacteria from the water supply. This may result in an off-taste or odor in the water.
  • Page 25 Calcium Hypochlorite Calcium hypochlorite, 70% available chlorine, is available in several forms including tablets and granules. These solid materials may be used directly without dissolving before use. 1. Dosage A. Two grains (approximately 0.1 ounce [3 ml]) per cubic foot. 2.
  • Page 26: Determining If You Have A 740 Or 760 Control

    Figure 16 Model number: either 740, 740C or 760, 760C GE Infrastructure Milwaukee, WI USA Autotrol Brand Model 12 V/ 60 Hz/ VERSION 1.02 WO#4340000 Ser. No:...
  • Page 27 Power 700 Series controllers are available in two power configurations: 1. The North American model requires 60 Hz input. The controller will display USA units when power is first applied. 2. The World model accepts either 60 or 50 Hz input and will automatically adjust measurement units when power is first applied.
  • Page 28: 
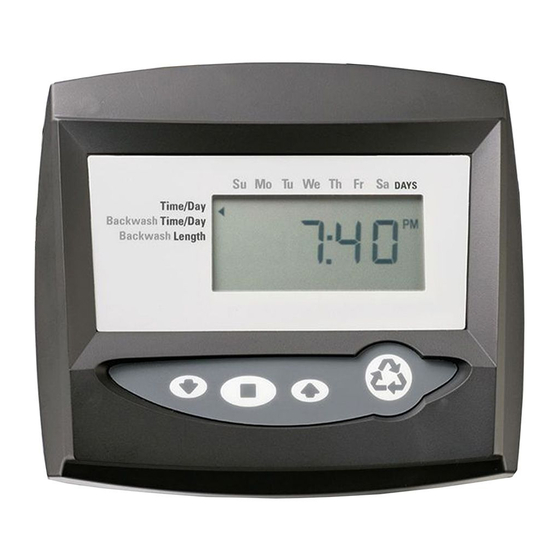
Display Icons 700 Controller

    DISPLAY ICONS 700 CONTROLLER Figure 17 SU MO TU WE TH FR SA DAYS Time & Day Regen Time & Day Salt Capacity x100 Hardness NOTE: In normal operation and during programming, only a few of the icons will actually be displayed. 1.
  • Page 29 13. The display cursor is next to "SALT" when programming the amount of regenerant. If the controller is on a 3-cycle filter then backwash time is programmed. 14. The display cursor is next to "REGEN TIME & DAY" when programming the time of regeneration and the days of regeneration.
  • Page 30: Keypad - Buttons

    KEYPAD — Buttons 1. DOWN arrow. Generally used to scroll down or increment through a group of choices. 2. SET. Used to accept a setting that normally becomes stored in memory. Also used together with the arrow buttons. 3. UP arrow. Generally used to scroll up or increment through a group of choices.
  • Page 31: Regeneration Modes

    "Duration" describes how long a button is held down: P/R for press and release HOLD for press and hold X sec for a number of seconds to press the button and hold it down "Display" calls out the display icons that are visible. Regeneration Modes The 700 Series controllers can be regenerated either automatically or manually.
  • Page 32: 740/760 Series Initial Power-Up

    Regeneration Cycles: • C1 – Backwash • C2 – Regeneration Draw/Slow Rinse (not used in filter mode) • C3 – Slow Rinse (not used in filter mode) • C4 – System Pause (to repressurize tank) • C5 – Fast Rinse cycle 1 •...
  • Page 33: Initial Start-Up Step-By-Step Instructions

    Initial Start-up Step-By-Step Instructions For FA filter applications, please program as normal below. See section Programming the 700 for 5-Cycle Filter Applications. Step 1: Program System Size SU MO TU WE TH FR SA DAYS Time & Day This step may have been performed by your system’s OEM manufacturer. Regen Time &...
  • Page 34 After steps 1-4, the controller will operate most systems. Proceed to step 4 if further adjustments to your system’s programming is needed. SU MO TU WE TH FR SA DAYS Time & Day Regen Time & Day Step 4: Set Regen Time Salt •...
  • Page 35 • To change salt setting, press the SET button and use the UP and DOWN buttons to change to the desired setting. • Press SET to accept the setting and advance to the next parameter. • See Dealer Installation Manual for more complete information on salt settings for different system sizes, capacities and expected efficiencies.
  • Page 36: Placing Conditioner Into Operation (Turning On The Water)

    After you have performed the previous initial power-up steps, you will need to place the conditioner into operation. Follow these steps carefully, as they differ from previous Autotrol valve instructions. WARNING: Do not rotate the camshaft by hand or damage to the unit may occur.
  • Page 37 3. Hold the REGEN button on the controller down for 5 seconds. This will SU MO TU WE TH FR SA DAYS initiate a manual regeneration. Time & Day Regen Time & Day The controller will indicate that the motor is turning the camshaft to Salt the cycle C1 (Backwash) position by flashing an hourglass.
  • Page 38 (Backwash), press and hold the SET button. This will display the current cycle. While pressing the SET button, press UP to advance to the next cycle. Continue to advance through each cycle until you have reached cycle C8 (Refill). NOTE: As you advance through each cycle there will be a slight delay before you can advance to the next cycle.
  • Page 39 Things You Might Need to Know • When the controller is first plugged in, it may display a flashing hourglass and the message Err 3, this means that the controller is rotating to the home position. If the Err 2 is displayed, check that the incoming power frequency matches the controller.
  • Page 40: Programming The 700 For 5-Cycle Filter Applications

    PROGRAMMING THE 700 FOR 5-CYCLE FILTER APPLICATIONS Manganese Greensand Systems Sizing FA Filters Potassium permanganate regenerating iron filters should be sized for the appropriate backwash and injector sizes. Backwash Controller Be sure to choose the appropriate backwash flow rate control (see Parts section) as recommended by your media manufacturer.
  • Page 41 For example, an average person uses 75 gallons of water per day. Four people living in a home use 300 gallons of water (75 gallons x 4 people) per day. Assume the incoming water has 10 ppm of iron. Now calculate the daily demand: multiply the gallons of water used per day (300) by the ppm of iron content (10) = 3000 ppm of daily capacity usage.
  • Page 42: 700 Series Advanced Programming

    700 Series Advanced Programming The 700 Series controllers are designed to operate by only setting the time of day and the day of the week. The remaining settings have been set at UP arrow the factory. These default settings will work for most applications. To change a setting: Action Duration...
  • Page 43: Resetting The Logix Control

    Accessing History Values The Logix control features a review level that displays the operation history of the system. This is a great troubleshooting tool for the control valve. To access history values, press and hold SET and DOWN for five seconds to view the "H"...
  • Page 44: 740/760 Level Ii Professional Programming

    740/760 LEVEL II PROFESSIONAL PROGRAMMING The 740/760 features a special programming level that allows the installing dealer to make changes to the control for more demanding SU MO TU WE TH FR SA DAYS applications. The home owner/end user should never have to access this Time / Day Regen Time / Day level.
  • Page 45: Valve Service

    VALVE SERVICE Cover The cover provides protection for the controller, wiring, and other components. This cover will be removed for most service and maintenance. When installed, the cover provides NEMA 3 water protection. This protects from falling water up to 30 degrees from vertical. To remove cover: Slots 1.
  • Page 46: Drive Motor

    To install control module: 1. Be sure the power is disconnected. 2. Check model. 3. Check routing of wires and plug them into the controller. Connectors will snap in place. Be sure that wires are properly managed through the clips on top plate. This will prevent the wires from being caught in Wire Clips the camshaft.
  • Page 47: Optical Sensor

    3. Reconnect wires. NOTE: It is not necessary to pre-position the camshaft or the motor. When the controller is powered up the camshaft will be rotated to the "home" position. Optical Sensor The optical sensor is mounted to the top plate. The camshaft cup rotates through the sensor and the slots are detected.
  • Page 48: Camshaft

    Camshaft The camshaft has several lobes that push open the valve discs as the camshaft rotates. Rotation is controlled by a drive motor that drives a gear at the rear of the camshaft. The front end has a cup with markings and slots.
  • Page 49 To remove camshaft: 1. Disconnect power to the unit. 2. Remove cover. 3. Remove motor. 4. Camshaft should be in the treated water position. Rotate counterclockwise as needed. 5. Use a screwdriver to hold open the #1 valve disc. NOTE: When replacing/removing camshaft, make sure not to damage or mis- align the optical sensor.
  • Page 50: Wiring Harnesses

    Wiring Harnesses The wiring harnesses are designed to fit one way. The connectors are unique to the port they plug into. The wires are held in place by clips and the connectors latch in place. Figure 18 - Wire Harness Routing Do not run wires through holes in topplate.
  • Page 51: Microswitch (Optional Under The Cover)

    To install a wiring harness: NOTE: Start at the back of the valve and work toward the controller. This will place any slack behind the controller. Slack or loose wires can become tangled in the camshaft. 1. Depending on which harness is being installed, plug the connector Slot for motor and transformer into the motor or turbine.
  • Page 52: Microswitch (Optional - Front Of Camshaft)

    WARNING: The Autotrol valve is rated for low voltage (less than 48 volts) microswitch components only. Using a high voltage switch may result in damaged valves or fire and may interfere with electronic control function. To remove microswitch: 1. Disconnect power to the switch.
  • Page 53: Spring (Valve Discs)

    NOTE: The cam for this switch is adjustable. To have the microswitch activate at a different point in the cycle, rotate the cam as needed. To rotate the cam loosen the center screw, tighten when the cam is in the new position. Spring (Valve Discs) This spring is a one-piece metal spring that applies pressure to the valve discs holding them closed.
  • Page 54: Relay (Optional)

    Relay (Optional) WARNING: The Autotrol valve is rated for low voltage (less than 48 volts) microswitch components only. Using a high voltage switch may result in damaged valves or fire and may interfere with electronic control function.
  • Page 55: Terminal Block (Optional)

    6. Clip wires with plastic tie-wrap to ensure that the wires do not tangle in camshaft. Terminal Block (Optional) WARNING: The Autotrol valve is rated for low voltage microswitch components only. Using a high voltage switch may result in damaged valves or fire and may interfere with electronic control function.
  • Page 56: Top Plate

    NOTE: The Autotrol valve discs are made from a chloramine resistant severe service rubber. The valve discs will usually not need to be changed. Before removing the top plate for valve disc service be certain that one of the discs is not operating correctly.
  • Page 57 To install the top plate: NOTE: All valve discs should be in position. Use the same screws that were removed to reassemble the top plate. WARNING: Follow the procedure to engage the screws with the existing threads. If the same threads are not used, the holding power of the screw is lost.
  • Page 58: Parts And Accessories

    PARTS AND ACCESSORIES 255 Valve Exploded View 18A* *Warning: Do not use flow control ball with #18A. PARTS AND ACCESSORIES Rev A...
  • Page 59: 255 Valve Parts List

    255 Valve Parts List Part Part Code Description Qty. Code Description Qty. 1244650 255 Valve Assembly, w/o Flow Controls 1000269 Injector Cap with O-Ring 1033784 255 Tank Adapter New Style Drain Control Assembly with O-Ring 1010429 O-Ring BN 1000209 No. 7 (1.3 gpm; 4.9 Lpm) 1010428 O-Ring EP 1000210...
  • Page 60 255 Valve Parts List (Continued) Part Part Code Description Qty. Code Description Qty. Piping Boss Tube Adapter Kits Piping Boss Kit (includes hardware): 1001606 3/4-inch Copper Tube Adapter Kit 1040277 3/4-inch NPT, Brass 3/8-inch NPT Drain 1001670 1-inch Copper Tube Adapter Kit 1040278 1-inch NPT, Brass 1/2-inch NPT Drain 1001608...
  • Page 61: Performa Exploded View

    Performa Exploded View 10A* *Warning: Do not use the flow control ball with #10A. PARTS AND ACCESSORIES Rev A...
  • Page 62: Performa Parts List

    Performa Parts List Part Part Code Description Qty. Code Description Qty. 1035807 Valve Assembly w/o Flow Controls 1035735 “K” Injector (High Efficiency) - Pink 1235338 Top Plate, 268/700 Series Valves (12-inch tank) 1235339 Valve Disc Spring, One Piece, Performa 1035736 “L” Injector (High Efficiency) - Orange Valve (13 &...
  • Page 63: Logix 700 Series Controllers Parts List

    Salt Amount 700 Control Overlays Part Part Code Description Qty. Code Description Qty. Electronics Modules/Controllers AC Adapter 1242146 Logix 740 Controller 1000810 Japanese 1242148 Logix 740F Controller 1000811 North American 1242163 Logix 760 Controller 1000812 Australian 1242166 Logix 760F Controller...
  • Page 64: Troubleshooting

    TROUBLESHOOTING 700 Series Controller Troubleshooting Problem Possible Cause Solution ERR 1 is displayed Controller power has been connected Press the UP arrow and the control and the control is not sure of the state of should reset. the operation. ERR 2 is displayed Controller power does not match 50 or 60 Disconnect and reconnect the power.
  • Page 65 Troubleshooting Problem Possible Cause Solution 1. Brine tank a. Uncontrolled brine refill flow rate. a. Remove brine control to clean ball and seat. overflow. b. Air leak in brine line to air check. b. Check all connections in brine line for leaks. Refer to instructions.
  • Page 66 9. Intermittent or a. Low water pressure. a. Set pump to maintain 20 psi at conditioner. irregular b. Defective injector. b. Replace injector. (Contact dealer.) regenerant draw. 10. No conditioned a. No regenerant in regenerant a. Add regenerant to regenerant tank. water after tank.
  • Page 67 © Copyright 2006 General Electric Company Printed in USA P/N 3003714 Rev. A...

This manual is also suitable for:

Logix 760

Table of Contents

Save PDF