Table of Contents

Related Manuals for KAM Simple Precision OWD


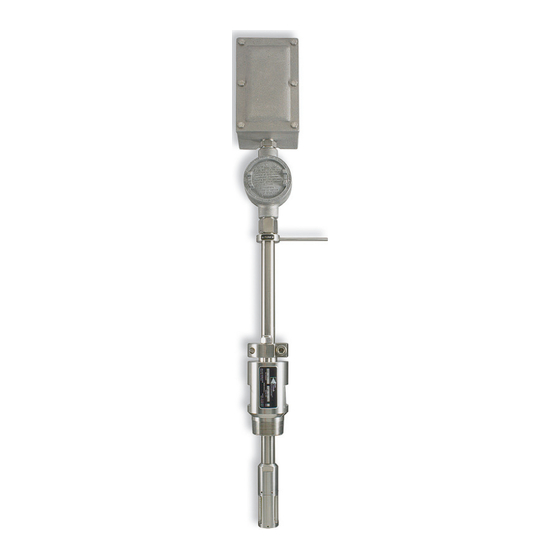
Summary of Contents for KAM Simple Precision OWD
- Page 1 WATER CUT METER PTB 08 ATEX 1026 TEL +1 713 784 0000 User Manual FAX +1 713 784 0001 Email Sales@Kam.com OWDMANUAL 1114 KAM CONTROLS, INC. 3939 Ann Arbor Drive Houston, Texas 77063 USA www.KAM.com An ISO 9001 certified company...
-
Page 2: Table Of Contents
•Available Models and Mounting Options •Theory of Operation •Features •Applications Specifications •Specifications •Dimensional Drawings Installation •Installation Flow Requirements •LACT unit installation •General Do's and Don't's •Main Line •Fast Loop •Wiring OWD Operation •Hyperterminal Software •Calibration •Changing the Range •Modbus Interface Maintenance •Cleaning/Inspection •Troubleshooting •Antenna Replacement APPENDIX A: Modbus Registers CAUTION: When installing the OWD sensor in a pipeline containing petroleum products, ® petrochemicals, waste waters with the presence of pressure & temperature, and high-pressure steam refer to the Pipeline Operators’ "Health, Safety and Environmental Policy Procedures" to ensure safe installation. KAM CONTROLS, INC. reserves the right to make changes to this document without notice. KAM CONTROLS, INC. OWDMANUAL 1114... -
Page 3: Introduction
Option 2: Retractable OWD ® ® on a main pipe with on a main pipe 2", 3", or 4" flanged seal housing with 2" MNPT seal housing FIG. 1-3 FIG. 1-4 Included Recommended SMS™ ® SMS™ ® Static Mixing Static Mixing Spool Spool Option 3: Fixed-mount OWD Option 4: 2" OWD flow through ® ® on a densitometer loop, with sensor with integrated 1/2", 3/4", 1", or 2" FNPT SMS™ Static Mixing Spool ® KAM CONTROLS, INC. OWDMANUAL 1114... -
Page 4: Theory Of Operation
To ensure the highest degree of accuracy, the flow must be homogenous. Installed upstream of your OWD ® sensor, the patented KAM SMP™ Static Mixing Plate or KAM SMS™ Static Mixing Spool create a fully ® ® homogenous mixture in your pipeline. In low velocity situations, the use of a KAM ML Measurement Loop may be required in order to create a homogenous flow for measurement. Proper calibration, also key to complete accuracy, can be achieved in the field with the KAM PKF Portable Karl Fischer Moisture Analyzer. ® Because it can be inserted into your pipe or tank through a 2", 3", or 4" hot tap, the OWD sensor helps you avoid ® costly drainage, the need for a bypass loop, or having to cut a section in the pipe. All wetted parts are machined from 316 stainless steel. Shaft lengths from 1 to 3 feet are available with off-the-shelf lengths coming in 12", 24", and 36". Metric and custom lengths are available. TABLE 1-5 MEASUREMENT CAPABILITIES: CALIBRATED RANGE AND ACCURACIES Range (water in oil) 0-1% 0–5% 0–10% 0–20% 0–40% 0–100% Accuracy (at listed range) 0.01% 0.05% 0.10% 0.20% 0.40% 1.00% NOTE: The KAM OWD can be calibrated to any range between 0-1% and 0-100%. KAM CONTROLS, INC. OWDMANUAL 1114... -
Page 5: Specifications
Alarm relay RS232/RS485 HART Mounting: ½", ¾", 1" or 2" FNPT flow through (Other sizes, including metric, are available) 2" MNPT seal housing 2", 3", or 4" flanged seal housing Pressure ratings: ANSI 150, 300, 600, 900, 1500 Flow conditions: Well mixed in accordance with API MPMS Chapter 8, Section 2, Table 1 Sensor dimensions: Ø1.5" x 4.5" to 14.5" (38mmh x 114mm to 368mm) depending on range EX enclosures: Sensor electronics - 3" x 6" x 3" (76mm x 152mm x 76mm) Shaft length: 12" to 36" (305mm to 914.4mm) Off-the-shelf lengths are 12", 24", and 36" (609.6mm, 762mm, 914.4mm,) Pipe Size: ½" to 48" (15mm to 1200mm) Weight: from 20 lbs. (9kg) * The KAM must be installed in accordance with API MPMS Chapter 8, Section 2, Table 1. ® ® **If entrained gas is constant, its effect is factored out. If entrained gas is introduced or removed after OWD ® calibration it will shift water cut measurement by approximately 1-2% for every 1% change in gas levels. KAM CONTROLS, INC. OWDMANUAL 1114... - Page 6 ® INCHES Shaft Lengths are available in .5" (12.7mm) increments. 1.48 Standard sizes are 24", 30", 36", 48", and 60" (609.6mm, 762mm, 914.4mm, 4.62 1219mm, 1524mm). max 11.65 *Seal housing dimensions vary according to flange size and pressure rating. 11.65" is the maximum length required in calculating shaft length. CALCULATING SHAFT LENGTH 0-100% MODELS Determine minimum shaft length for proper insertion in the pipeline. Off-the-shelf lengths are 12", 24", and 36". Valve Length Valve Length: Pipe OD x .5: Seal housing length 13" – 1" Probe factor Pipe OD Total / minimum shaft length for proper insertion distance Main Pipe KAM CONTROLS, INC. OWDMANUAL 1114...
-
Page 7: Dimensional Drawings
INCHES Shaft Lengths are available in .5" (12.7mm) increments. 1.48 Standard sizes are 24", 30", 36", 48", and 60" (609.6mm, 762mm, 914.4mm, 6.62 1219mm, 1524mm). max 13 *Seal housing dimensions vary according to flange size and pressure rating. 13" is the maximum length required in calculating shaft length. CALCULATING SHAFT LENGTH 0-20% MODELS Determine minimum shaft length for proper insertion in the pipeline. Off-the-shelf lengths are 12", 24", and 36". Valve Length Valve Length: Pipe OD x .5: Seal housing length 13" – 2" Probe factor Pipe OD Total / minimum shaft length for proper insertion distance Main Pipe KAM CONTROLS, INC. OWDMANUAL 1114... - Page 8 INCHES Shaft Lengths are available in .5" (12.7mm) increments. 1.48 Standard sizes are 24", 30", 36", 48", and 60" (609.6mm, 762mm, 914.4mm, 8.62 1219mm, 1524mm). max 13 *Seal housing dimensions vary according to flange size and pressure rating. 13" is the maximum length required in calculating shaft length. CALCULATING SHAFT LENGTH 0-5% MODELS Determine minimum shaft length for proper insertion in the pipeline. Off-the-shelf lengths are 12", 24", and 36". Valve Length Valve Length: Pipe OD x .5: Seal housing length 13" – 3" Probe factor Pipe OD Total / minimum shaft length for proper insertion distance Main Pipe KAM CONTROLS, INC. OWDMANUAL 1114...
- Page 9 S P E C I F I C AT I O N S C O N T I N U E D FIG 2-7 2" OWD FLOW THROUGH SENSOR WITH INTEGRATED KAM SMS™ STATIC MIXING SPOOL ® ® 2" 150#, 300#, or 600# weld- neck flanges SS316 both ends 2" sch. seamless pipe SS316...
- Page 10 S P E C I F I C AT I O N S C O N T I N U E D FIG 2-10 1" OWD 0-1% FLOW THROUGH ® 1" WNRF Flanges TABLE 2-11 DIMENSIONS INCHES 11.1 Min. 6" Min. 152 Min. 10" Min 254 Min. 16" 27 .2 KAM CONTROLS, INC. OWDMANUAL 1114...
-
Page 11: Installation
KAM SMS Static Mixing Spool is required if the flow velocity is between 4 and 7 feet per second. FIG. 3-1. For KAM OWD's operating in the Water Continuous Phase, the sensor must be installed in the vertical up flow. A KAM SMS Static Mixing Spool is required if the flow velocity is between 4 and 7 feet per second. FIG. 3-2. In situations where the flow velocity is less that 4 feet per second, KAM CONTROLS recommends the installation of a KAM ML Measurement Loop, incorporating suction and injection nozzles, a pump, and the OWD on a separate loop, ensuring a homogenous, high-velocity flow across the measurement sensor. FIG. 3-3. The KAM OWD may be installed horizontally when the minimum flow velocity is above 10 feet per second. FIG. 3-1 INSTALLATION VERTICAL FLOW DOWN FIG. 3-3 INSTALLED ON A KAM ML MEASUREMENT LOOP SUCTION KAM SMS STATIC MIXING SPOOL INJECTION LOW RANGE AND OIL CONTINUOUS PHASE OPERATION FIG. 3-2 INSTALLATION VERTICAL FLOW UP... -
Page 12: Lact Unit Installation
I N S TA L L AT I O N C O N T I N U E D LACT UNIT INSTALLATION The KAM OWD should be installed on a T with the flow perpendicular to FIG. 3-4 LACT UNIT the shaft. A KAM SMP Static Mixing Plate should be installed 3 to 5 pipe- line diameters before the sensor. For all other installations, please consult with factory. CAUTION: Never install the OWD on a T with the top of the sensor facing KAM SMP Static Mixing Plate into the flow. This will minimize flow installed 3 to 5 pipeline across the antennas and result in diameters prior to sensor inaccurate measurement. 0-5% models require a corrected density input in order to achieve stated accuracy. Flow KAM CONTROLS, INC. OWDMANUAL 1114... -
Page 13: General Do's And Don't's
I N S TA L L AT I O N C O N T I N U E D GENERAL INSTALLATION DO'S AND DON'TS Always install OWD ® sensors with the electronics enclosure shaded from direct sunlight. DO NOT use Teflon tape on threads con- necting to the OWD ® flow through sensor. DO use liquid thread sealant. KAM CONTROLS, INC. OWDMANUAL 1114... -
Page 14: Main Line
If the pipeline is not going to flow for extended amount of time and the pipe is not heated then OWD should be taken out to avoid damage to the sensor probe by freezing water. INITIAL CALIBRATION Though the OWD has been calibrated in the factory, operators should conduct an initial calibration in process conditions. This can be done in two ways: Off-line: Prior to installation, operators can go through the procedures for off-line calibration outlined on page 25 of this manual. This method requires samples of 100% produced water and dry oil or oil with a known percentage of water. On-line: After installation, operators can follow calibration procedures for in-line calibration outlined on page 25 of this manual. This method requires accurate sampling and sample processing. MAIN LINE INSTALLATION The KAM sensor should be installed ® ® according to FIG. 3-13. A full-opening ball valve is FIG. 3-5 KAM INSTALLED ON A MAIN PIPE ® ® used to isolate the OWD sensor from the pipeline ® during installation or removal. The seal housing of the OWD sensor allows the probe to be inserted ® and removed from the pipe under pressure and flow conditions. It is the user’s responsibility to ensure that the OWD sensor be placed at the most ®... - Page 15 FIG. 3-7 Measure the distance (D1) from the outside diameter of main pipe to the end of the connection where the OWD sensor is going to be installed. FIG. 3-16. ® FIG. 3-8 TABLE 3-9 Calculate the minimum insertion distance for the OWD ® Minimum insertion distance (MID) = A / INCHES RANGE ® D1 + 7" 0-5% SENSOR Pipe Wall Thickness (WT) + 5" 0-20% SENSOR Gasket Thickness + A (See TABLE 3-16) 3" 0-100% SENSOR Example for D1=16", WT =1/4", Gasket Thickness=1/8" and a 0-100% OWD sensor: ® MID = 16 + 1/4 + 1/8 + 3 MID = 19 3/8" KAM CONTROLS, INC. OWDMANUAL 1114...
- Page 16 ® ® aligned with pipeline flow direction. FIG. 3-19. FIG. 3-11 Mark Hex Nuts Re-tighten the Socket Cap Screws. Tighten the hex nuts holding down the Locking Collar one half turn. (Fig. 3-19) These should never be over-tight- ened. Their major function is to apply light pressure on the chevron packing to ensure a seal between the seal housing body and the insertion shaft. REMOVING THE OWD SENSOR ® To remove the OWD sensor, first shut off power to the instrument. Loosen the Socket Cap Screw on the Lock Down ® Collar. Slide the OWD sensor upward until the probe rests inside the seal housing. Next, close the Full-opening Ball ® Valve tightly. Drain oil from valve if possible. The OWD sensor may now be unbolted from the system. ® Note: If line pressure exceeds 100 psi, use a KAM IT Insertion Tool when installing/removing ® the KAM sensor. ® ® Removal should be conducted in accordance with all regional and Class requirements. KAM CONTROLS, INC. OWDMANUAL 1114...
- Page 17 I N S TA L L AT I O N C O N T I N U E D REMOVING THE OWD SENSOR FROM FLOW THROUGH SPOOLS WITH FIXED INSERTION ® To remove the OWD sensor, first shut off power to the ® instrument. Discontinue flow in loop from the main line FIG. 3-12 and drain fluid from loop. The probe can removed from the housing by removing screws on collar. Fig. 3-23. The probe can then be lifted from the cell for testing/inspection/cali- bration purposes. Removal should be conducted in accordance with all re- Hex screws gional and Class requirements. KAM CONTROLS, INC. OWDMANUAL 1114...
-
Page 18: Wiring
DIG IN (-) DIG OUT (-) DIG IN (+) DIG OUT (+) ANA OUT (-) RS232 RX ANA OUT (+) RS232 TX 4-20mA (-) 4-20mA (+) RS485 (-) 24V (-) in RS485 (+) 24V (+) in KAM CONTROLS, INC. OWDMANUAL 1114... - Page 19 INPUTS 24V (–) IN 24V (+) IN 24-30 VDC DIG IN (–) Pulse input, discrete input for different modes of operation (0 or 5 volt) DIG IN (+) AIN2 Density In – Not required on 0-100% models OUTPUTS 4-20 mA (–) Current output, source powered. Set to requisite percent water at factory. 4-20 mA (+) AN OUT (–) Can be 4-20 mA or analog voltage (used for local display or to pass density to PLC) AN OUT (+) DIG OUT (–) Alarm or relay (digital contact closure) DIG OUT (+) INPUT/OUTPUT RS232 Console port – communication interface for calibration, connection to PLC RS485 Modbus interface LED INDICATORS Power SERIAL PORT CONNECTIONS DB9 (female) RS232RX RS232TX KAM CONTROLS, INC. OWDMANUAL 1114...
- Page 20 V (-) in Factory Use 24-30 VDC Power V (+) in 3939 Ann Arbor Drive Houston, TX 77063 USA Tel + 1 713 784 0000 Main power Fax + 1 713 784 0001 indicator E-mail askanengineer@Kam.com www.Kam.com Made in USA KAM CONTROLS, INC. OWDMANUAL 1114...
- Page 21 I N S TA L L AT I O N C O N T I N U E D All wiring and maintenance on the KAM OWD must be done in accordance with regional and classification re- quirements. It is the user's responsibility to understand these requirements. It is also recommended that the OWD be wired with flexible wiring/conduit with additional slack/length in the wire to accommodate insertion, removal, and testing. Operator's should take all possible precautions to avoid any moisture from entering the electronics enclosure. The enclosure should not be left open in inclement weather or for long periods of time, especially during opera- tion as condensation will accumulate. Lid should be tightly screwed shut, all conduits should be sealed and secured in accordance with regional and classification requirements, and unused 3/4" NPT openings should be seal with provided plug. Do not power wash the unit. INPUTS V (–) IN V (+) IN 24-30 VDC Power (external 110/220 adapters available) DIG IN (–) Pulse input, discrete input for different modes of operation (0 or 5 volt) DIG IN (+) DENSITY For corrected density signal on all 0-5% or less models OUTPUTS AOUT0 Current output, source powered. Set to requisite percent water range at factory. AOUT1 Can be 4-20 mA or analog voltage (used for local display, or to pass density or temperature to PLC) DOUT Alarm or relay (digital contact closure). Optional–can sink up to 40V and 200mA. INPUT/OUTPUT RS232 Console port – communication interface for calibration, connection to PLC RS485 Modbus interface KAM CONTROLS, INC. OWDMANUAL 1114...
-
Page 22: Hyperterminal Software
K A M O W D O P E R AT I O N HYPERTERMINAL SOFTWARE Hyperterminal software is used during testing and calibration of the OWD. Prior to beginning make sure Hyperterminal software has been installed on your PC. The software is included with your instrument, and is also available as a free download from numerous websites. An RS232 cable for connect- ing your PC to the OWD has been supplied with the OWD as well as an adaptor If your computer does not have an RS232 serial port. Connect the RS232 cable to the OWD RS232 port. To launch Hyperterminal, click on OWD icon on your desktop. Name the connection "OWD" and hit return. Fig. 4-1. FIG. 4-1 You will be promted to select a COM port. If the computer has an RS232 port, most likely it will be COM1. If you are using an adapter like a USB to RS232 Converter the COM port will be whatever port is assigned to the adapter. Click "OK." Fig. 4-2. FIG. 4-2 KAM CONTROLS, INC. OWDMANUAL 1114... - Page 23 K A M O W D O P E R AT I O N C O N T I N U E D Use the settings shown in Fig. 4-3 and click OK. FIG. 4-3 Click on the properties icon. FIG. 4-4 FIG. 4-4 Click on the settings tab. FIG. 4-5 FIG. 4-5 Click on the ASCII setup button. KAM CONTROLS, INC. OWDMANUAL 1114...
- Page 24 K A M O W D O P E R AT I O N C O N T I N U E D Check the window for Echo Typed Characters Locally and click OK. Hyperterminal is now setup for FIG. 4-6 operation with the OWD. 8. You will see a blank screen. Hit enter to see OWD prompts. FIG. 4-7 . FIG. 4-7 KAM CONTROLS, INC. OWDMANUAL 1114...
- Page 25 K A M O W D O P E R AT I O N C O N T I N U E D OWD PROMPTS d: Dump Calibrations–displays calibration curves c: Enter Calibration–this is NOT used to calibrate the OWD and is for factory use only o: Enter offset–allows users to enter offsets manually. These should be determined by a trained technician or KAM CON- TROLS representative. R: 4-20mA Range–sets the 4-20mA range. See page 29 for instructions on how to change the range. s: Save calibrations/inputs Z: Displays all sensor values L: Calibrate–for calibration instructions, see page 28 M: Change Modbus Address: Factory default is "1" T/u/v/W/i: These are factory settings and should NOT be input by users CAPTURING HYPERTERMINAL DATA Hyperterminal data can be captured in multiple ways. Users can simply "select all" and then cut and paste the data into a word document. Or from the OWD data screen, click on "Transfer." Fig. 4-8. Select "Capture Text" from the drop- down menu. Select and name and location for the data file, and click "Start." When you are done capturing data, click on "Transfer" again and select "Stop." FIG. 4-8 KAM CONTROLS, INC. OWDMANUAL 1114...
-
Page 26: Calibration
K A M O W D O P E R AT I O N C O N T I N U E D HOW TO CALIBRATE THE KAM USING BRINE AND DRY OIL ® ® Though the OWD has been calibrated in the factory, it should be calibrated in process conditions prior to use. This can be done using 100% brine (produced water) and 100% dry oil in buckets as outlined below, or it can be done with online sampling. For the brine/dry oil method, in addition to fluid samples, operators will need appropriate tools for the extraction of the OWD, an RS232 cable (supplied) or an RS232/USB adapter, and a PC equipped with Hyperterminal software. -
Page 27: Modbus Interface
® ® This process can be repeated if the sample taken was a bad sample or the percent of water obtained from the sample taken was not accurate. HOW TO CHANGE THE HIGH/LOW (4-20 mA) RANGE To enter or change the desired range for the OWD sensor, type “R” and hit ENTER. Prompts will appear for the low and then the high ends of the range. After entering both, type “S” to save. The range has been set and the Hyperterminal will return to the OWD Optimizer prompt menu. SETTING UP A MODBUS INTERFACE To set Modbus variables, type "M" and hit ENTER. The prompt is for an ID for the slave device. This ID MUST BE UNIQUE from any other Modbus device connected and a value between 1-255. SYSTEM SETTINGS: Modbus Baudrate: 9600. Protocol is RTU Modbus. See APPENDIX A for designated MODBUS Registers. KAM CONTROLS, INC. OWDMANUAL 1114... -
Page 28: Maintenance
M A I N T E N A N C E CLEANING AND INSPECTION If probe is removed from the line for inspection NEVER use sharp or metallic objects such as a knife or screw driver to clean the antenna, especially the Teflon coated antenna. Do NOT power wash the unit. Instead, to remove any oil residues for visual inspection use a clean cloth with oil solvent or part washer. Preferred solvents include, any petroleum solvent such as mineral spirits, xylene, toluene, gasoline, or diesel. Do not use WD40 or other chemicals. If you have a question regarding cleaning solvents, please contact KAM CONTROLS directly at +1 713 784 0000, or email: AskAnEngineer@Kam.com During inspection, ensure that there are no foreign objects stuck in the probe or attached to the antennas. TROUBLESHOOTING If OWD data begins to differ slightly or gradually from sampling data and falls outside of acceptable accuracies, this is most likely caused by drift. The OWD should be recalibrated using the on-line recalibration procedure outlined on page If OWD data suddenly veers from historical norms or sampling data, it needs to be removed from the line and inspect- ed using the steps outlined below. Remove the OWD from the line according to the instructions on page 16 for insertable models and page 18 for models installed on fast loops and ML Measurement Loops. Clean the OWD sensor according the guidelines above, and check for any debris in the probe or on the antennas that could affect measurement. Check the condi- tion of both antennas. If there is debris clogging the sensor or coating the antennas in any way, this is most likely the cause of any mea- surement anomalies. Once the OWD has been cleaned, it can be reinstalled. It does not need recalibration. If there is no evidence of debris, the OWD must be tested in order to determine the cause of the measurement error. This requires samples of 100% brine (produced water) and dry oil or oil with a known, low percentage of water, an RS232 cable (supplied) or an RS232/USB adapter, and a PC equipped with Hyperterminal software. Connect the OWD to a PC via RS232 or RS232/USB adapter, and turn the power on. Initiate Hyperterminal setup. For information on setting up Hyperterminal software, see page 22. Let the OWD sensor warm up for 20 minutes. Insert the sensor in a bucket with brine (produced water). Probe should remain in brine until a stabilized tempera- ture is observed. As all water in crude oil has salt, the OWD sensor has already been calibrated for salt water. You will not get an accurate reading if you use fresh water for testing. Capture and save screen data according to instructions outlined on page 24. KAM CONTROLS, INC. OWDMANUAL 1114... - Page 29 M A I N T E N A N C E C O N T I N U E D Thoroughly clean and dry the probe. Insert the OWD sensor into a bucket or a jar filled with a sample of dry oil. In order to accurately test the OWD sensor, you must use oil that does not have any water in it or which has a known, low percentage of water. Capture and save screen data according to instructions outlined on page 24. Captured data should be sent to the KAM CONTROLS factory for analysis or analyzed by a KAM CONTROLS trained technician. The technician will then advise the operator on the next steps. KAM CONTROLS, INC. OWDMANUAL 1114...
-
Page 30: Antenna Replacement
M A I N T E N A N C E C O N T I N U E D ANTENNA REPLACEMENT TOOLS REQUIRED 1. Phillips Screwdriver Size 0 2. 1/16" Allen Wrench 3. 5/64" Allen Wrench 4. 5/16" Allen Wrench MATERIALS REQUIRED 1. Stainless Antenna Contact KAM CONTROLS 2. Titanium Antenna at +1 713 784 0000, 3. (2) 2-004 O-rings Fax to +1 713 784 0001, 4. (2) 2-009 O-rings or email Sales@Kam.com. 5. Medium Strength Loctite Ask for Part Number: OWD ANT DISASSEMBLY Remove all (6) 8-32 Set Screws using the 5/64" Allen Wrench. Make sure that the wrench in fully inserted or the... - Page 31 M A I N T E N A N C E C O N T I N U E D Make a note of which color cable goes to which antenna. For example: Red cable goes to green antenna. Loosen and unscrew completely the SMA Connectors using the 5/16" Allen Wrench. Pull to remove the RTD. DO NOT pull from the wires. FIG. 5-2 Unscrew the (4) 4-40 Screws on the top of the sensor using FIG. 5-3 4-40 Screws the Phillips Screwdriver Size 0. FIG. 5-3 Remove the Cover from the Sensor. FIG. 5-4 FIG. 5-4 Remove the (4) Set Screws at the bottom of the Sensor using the 1/16" Allen Wrench. Be sure to insert wrench fully or screws will strip. FIG. 5-5 Push the Bottom Cover from the inside of the Sensor until it is completely free. FIG. 5-5 FIG. 5-5 6-32 x ¼" Set Screw KAM CONTROLS, INC. OWDMANUAL 1114...
- Page 32 M A I N T E N A N C E C O N T I N U E D Pushing from the bottom, remove the Antennas. FIG. 5-6 FIG. 5-6 Remove the Antennas from the PEEK Seal Holders by turning them counterclockwise. FIG. 5-7 Slide the Seal Holder Covers off the Antennas. FIG. 5-7 NOTE: The Seal Holder Cover for the stainless and titanium antennas are different. The cover for the titanium has a larger hole. Remove the 2-009 and 2-004 O-rings from the Seal Holder. FIG. 5-7 FIG. 5-7 Seal Holder Seal Holder Cover 2-004 O-ring 2-009 O-ring Clean Sensor Body with parts washer and let it dry. KAM CONTROLS, INC. OWDMANUAL 1114...
- Page 33 M A I N T E N A N C E C O N T I N U E D REASSEMBLY Install the new 2-009 O-rings on the Seal Holder. FIG. 5-8A Screw the new Antennas into the Seal Holder. The Antennas need to extend .175–.180" from the top of the Seal Holder. FIG. 5-8A Slide the new 2-004 O-rings on the Antennas. FIG. 5-8B Slide Seal Holder Covers behind the 2-004 O-rings. Make sure the use the Seal Holder Cover with the larger center hole with the Coated Antenna. FIG. 5-8B Add a small amount of grease to the 2-004 O-rings. Push the 2-004 O-rings inside the Seal Holder using the Seal Holder Covers. FIG. 5-8C FIG. 5-8 .175–.180" 2-009 O-ring 2-004 O-ring Seal Holder Cover Add a small amount of grease to the 2-009 O-rings. Insert Seal Holder/Antenna assembly into the Sensor Body. FIG. 5-9 FIG. 5-9 KAM CONTROLS, INC. OWDMANUAL 1114...
- Page 34 M A I N T E N A N C E C O N T I N U E D Place Sensor Cover onto the Sensor Body. Be careful to ensure that the holes for the RTD are in alignment. Add a small amount of Loctite to the (4) 4-40 Screws and install them into the Sensor Body, holding the Cover in place. FIG. 5-10 FIG. 5-10 4-40 Screws Push Bottom Cover back into place. Make sure holes align with the Antennas. Add Loctite to all (4) 6-32 Screws and install them into the Sensor Body, securing the Bottom Cover. FIG. 5-11 FIG. 5-11 6-32 Screw KAM CONTROLS, INC. OWDMANUAL 1114...
- Page 35 M A I N T E N A N C E C O N T I N U E D Connect the Cables to the Sensor with the SMA connectors. NOTE: Do not add Loctite to the SMA Connectors. They should be finger tight and then turned 1/16 of a turn with the 5/16" Wrench. Ensure that the proper Cable colors are connected to the proper Antennas: red to titanium and black to stainless. Insert the RTD into Sensor Body. FIG. 5-12 FIG. 5-12 SMA Connectors Push Sensor back into place. FIG. 5-13 Align the window so that it will directly face the direction of the flow. FIG. 5-13 Add Loctite to all (6) 8-32 Set Screws and install them back in Sensor. FIG. 5-14 Flow FIG. 5-14 8-32 Set Screws KAM CONTROLS, INC. OWDMANUAL 1114...
-
Page 36: Modbus Registers
41002: Alarm dead–band inter-value timer 41003: Alarm dead–band start time 41004: Alarm dead–band current time 41005: Alarm inter-value timer 41006: Alarm start time 41007: Alarm current time 41008: Array of time of alarms 41009: Array of time of alarms 41010: Array of time of alarms 41011: Value at time of alarm 41012: Value at time of alarm 41013: Value at time of alarm. Reset when value below alarm value for dead-band time. 41014: Amount of measured material 41015: Material less water 41016: Average water 41017: Transaction intervalue timer 41018: Transaction start time 41019: Sample period in second KAM CONTROLS, INC. OWDMANUAL 1114... - Page 37 42024: Water content oil continuous sensor 1 42025: Water content oil continuous sensor 2 42026: Water content water continuous sensor 1 42027: Water content water continuous sensor 2 42028: Water content float 42029: Sensor 1 offset input by user 42030: Sensor 1 offset input by user 42031: Sensor 2 offset input by user 42032: Sensor 2 offset input by user 42033: Storage register for Modbus table index water value 42034 Storage register for Modbus table sensor 1 value 42035 Storage register for Modbus table sensor 2 value 42036: AD3 temperature voltage input 42037: Temperature value input KAM CONTROLS, INC. OWDMANUAL 1114...
- Page 38 42083: Sensor 1 temperature correction 0–10v 42084: Sensor 1 temperature correction 10v 42085: Sensor 1 temperature correction 0–10v 42086: Sensor 1 temperature correction 10v 42087: Sensor 1 temperature correction 0–10v 42088: Sensor 1 temperature correction 10v 42089: Sensor 1 temperature correction 0–10v 42090: Sensor 1 temperature correction 10v 42091: Sensor 1 temperature correction 0–10v 42092: Sensor 1 temperature correction 10v KAM CONTROLS, INC. OWDMANUAL 1114...
- Page 39 41018: Transaction start time 41019: Sample period in second 41020: Sample start time 41021: Sample current time 41022: Mode: oil continuous/water continuous 41023: Modify Table: 0=oil continuous 1=water continuous 41024: Set to 1 to signal table modification ready. Reset to –1 to indicate not ready. 41025: Set to 1 to signal write UB 41026: Modify sensor 1 TempCorf: 1 Modify sensor 2 TempCorf: 2 41027: Set to 0–19 to indicate temperature curve modification ready. Reset to –1 to indicate not ready. 41028: Temperature value input by user 41030 – 41049: Temperature table temperatures 42000: Trend 0 KAM CONTROLS, INC. OWDMANUAL 1114...
- Page 40 42031: Sensor 2 offset input by user 42032: Sensor 2 offset input by user 42033: Storage register for Modbus table index water value 42034 Storage register for Modbus table sensor 1 value 42035 Storage Register for Modbus table sensor 2 value 42036: Temperature voltage input 42037: Temperature value 42038: Temperature input low voltage 42039: Temperature input low value 42040: Temperature input high voltage 42041: Temperature input high value 42042: Sensor 1 temperature correction 42043: Sensor 2 temperature correction 42044: Water factor 0.00 – 9.99 41023: Modify Table: 0:oil continuous 1:water continuous 41024: Set to 1 to signal table modification ready 42031: Storage register for Modbus table index water value 42032: Storage register for Modbus table sensor 1 value 42033: Storage register for Modbus table sensor 2 value KAM CONTROLS, INC. OWDMANUAL 1114...
- Page 41 A P P E N D I X A C O N T I N U E D MODBUS FUNCTION USE REGISTERS 04 Input Register Reads individual 0x30001–0x30002: Float value of ADC 0 calibrated values of 0x30003–0x30004: Float value of ADC 1 each ADC input 0x30005–0x30006: Float value of ADC 2 0x30007–0x30008: Float value of ADC 3 0x30009–0x30010: Float value of ADC 4 0x30011–0x30012: Float value of ADC 5 0x30013–0x30014: Float value of ADC 6 0x30015–0x30016: Float value of ADC 7 0x30017–0x30018: Float value of ADC 8 0x30019–0x30020: Float value of ADC 9 0x30021–0x30022: Float value of ADC 10 KAM CONTROLS, INC. OWDMANUAL 1114...
Need help?
Do you have a question about the Simple Precision OWD and is the answer not in the manual?
Questions and answers