
Related Manuals for Kalor Ada 28B


Summary of Contents for Kalor Ada 28B
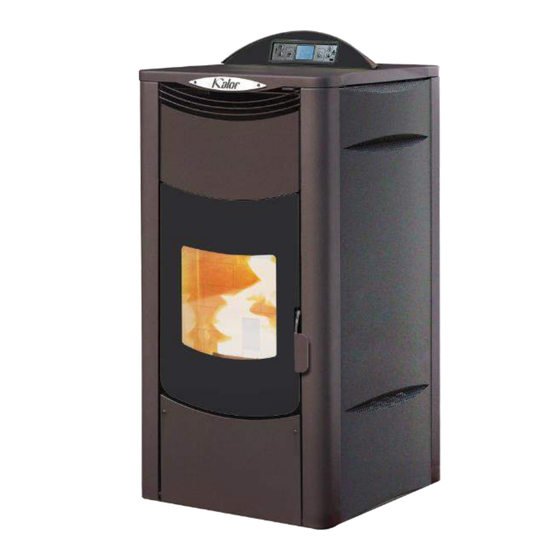
- Page 1 USER MANUAL Ada/Sonia 28B – Boiler Stove Instructions for the correct use and maintenance of your Kalor wood pellet boiler stove Distribution and warranty in Ireland by:...
- Page 2 Please refer to the notes on the inner back cover of this manual for further details regarding the installation, commissioning and warranty for your stove/boiler. We wish you all the best with your new Kalor stove/boiler and hope it serves you well for many, many years.
- Page 3 Thermostove 20/24/28/32 Dear Customer, Cod. 001117 We thank you for having chosen one of our products, the fruit of technological experience and of continual research for a superior quality product in terms of safety, dependability, and service. In this manual you will find all the information and useful suggestions to use your product with the maximum safety and efficiency.
- Page 4 Norms and declarations of conformity Our company declares that the stove conforms improper use of the stove, from incorrect use by to the following norms for the EC European the user, from unauthorized modifications and/ Directive labelling: or repairs, from the use of replacement parts •...
- Page 5 Charge pellet Fuel is loaded from the upper part of the stove by Never remove the protection grille in the opening a door. hopper. When fi lling, do not let the sack Pour the pellets in the hopper. of pellets touch any hot surfaces. This is easier if performed in two steps: •...
-
Page 6: Configurazione Standard
Technical Specification Thermostove 20/24 1/2" M 3/4" M 3/4" M 3/4" M 1/2" CONFIGURAZIONE STANDARD CONFIGURAZ N.B. 1 - Measures with a tolerance of about 10 mm 2 - Measures and images are indicative and can Attenzione vary depending on the aesthetic of the Le posizioni dei tubi quotate nella vista superiore sono pellet thermostove. - Page 7 PARAMETER M. UNITS NSAT200 NSAT240 Heat input 19,03 23,12 Nominal heat output 18,22 21,96 Reduced heat output 5,08 5,08 Water heat output 13,98 17,86 Reduced water heat output 4,20 4,20 CO concentration at nominal reference (13% O mg/m 54,9 55,9 CO concentration at reduced reference (13% O mg/m 356,6...
- Page 8 Technical Specification Thermostove 28/32 3/4" M 3/4" M 1/2" M 3/4" M 1/2" M 721,50 721,50 Attenzione Attenzione Le posizioni dei tubi quotate Le posizioni dei tubi quotate nella vista superiore sono puramente indicative e con tolleranza di +/- 10mm puramente indicative e con t N.B.
- Page 9 PARAMETER M. UNITS NSAT280 NSAT320 Heat input 27,34 32,41 Nominal heat output 25,86 30,48 Reduced heat output 8,57 8,57 Water heat output 20,35 24,38 Reduced water heat output 6,51 6,51 CO concentration at nominal reference (13% O mg/m 19,1 18,4 CO concentration at reduced reference (13% O mg/m 330,9...
-
Page 10: Operating Area
Operating area For proper functioning and a good temperature distribution, the stove shoul be positioned in a location where it is able to take in the air necessary for combustion of the pellet (about 40 m /h must be available), as laid down in the standard governing the installation and in accordance with local national standards. - Page 11 Connection to the flue pipe periodic checking and cleaning, which must be done annually. Make a gas-tight connection The flue pipe must have internal dimensions not to the flue pipe, using pipes and connectors as larger than 20x20 cm, or diameter 20 cm. In the recommended by us.
- Page 12 Fireplace flue gas Avoid contact with combustible materials (example: wooden beams) and in any case provide for their insulation with flame retardant material. In case of pipe penetrations through roofs or walls is recommended to use special kits crossing, certificates, are available commercially. In the event of a chimney fire, turn off the stove, disconnect from the network and never open the door.
-
Page 13: Remote Control
REMARKS: - the appliance must be installed by a qualifi ed technician in possession of the technical and professional requirements according to the DM37/2008 that, under its responsibility, to ensure compliance with the rules of good technique. - the thermostove must be connected to a heating system and/or to a network of production of sanitary hot water, consistent with its performance and its power - you need to keep in mind all laws and national, regional, provincial and municipal laws of the country in which you installed the device... -
Page 14: Plumbing System Connection
In order to achieve the test report results, please load the performance parameters retained by the manufacturer and the qualifi ed technician. They will use these parameters once verifi ed that, during the installation, it is possibile to reproduce the laboratory conditions. Plumbing system connection Connection diagram... - Page 15 system, and to allow slight movement. These are as helpful as the supply and return piping system if the heating system is on a higher floor than the stove. The exhaust pipe pressure is connected temporarily to a carafe or a funnel to avoid, in case of overpressure, that the water gush bathrooms and the structure and the floor.
- Page 16 mustn’t be lower than 0,3 bar; • the water used to fill up the heating system STOPPER BLOCKED must be decontaminate and without air. LOOSE STOPPER You must not mix water of the heating ONE TURN system with antifreeze or anticorrosion substances in wrong concentrations.
- Page 17 Water Characteristics The characteristics of the water used to fi ll the system are very important to prevent the build-up of mineral salts and the formation of incrustations along the pipes, in the thermostove and in the heat exchangers. Therefore, please get your plumber’s advice concering: •...
- Page 18 Confi guration of the hydraulic diagram of the thermostove BY A SPECIALIZED TECHNICIAN Before starting the thermostove, it is necessary to confi gure the hydraulic scheme on which we want to work. The thermostove is set up to receive the clean contact of an external thermostat (open / closed, the thermostat must not give tension to the back.
- Page 19 Following the principles of operation of the various hydraulic diagrams. Important considerations: • healthcare will always have priority • There are three types of stand-by: Type 01: the ambient temperature detected by the probe on the board has reached the SET AIR set Type 02: the water temperature in the thermostove has reached the SET H2O set Type 03: the external thermostat has detected that the desired temperature has been reached and therefore the contact is open.
- Page 32 Thermostove ignition Remove any components which might burn from the fi rebox and from the glass (various instructions and adhesive labels) Charge pellet Fuel is loaded from the upper part of the thermostove by opening a door. Pour the pellets in the hopper. When empty, this is easier if performed in two steps: •...
-
Page 33: Information On The Display
Preliminary checks Before switching on the pellet thermostove, make sure that the pellet hopper is full, the combustion chamber is clean, the glass door is closed, the power supply plug is connected and the switch on the back is set to “1.” Information on the display TURNED OFF 21 : 10... -
Page 34: Alarm Signals
Alarm signals In the event of a working defect, the system informs the user about the type of failure occurred. The following table summarises the alarms, kind of problem and possible solution: Display Kind of problem Solution As soon as the power supply is back, the Thermostove starts ALAR 1 BLACK OUT There is no power supply... -
Page 35: Programming Menu
Programming menu Menu 02 SET CLOCK To access the set clock option, press the “SET” button (3), with the button - (5) scroll through the submenus until MENU 02 - SET CLOCK and with buttons 1 and 2 select the current day. Press the “SET” button (3) to confi rm. Then use buttons 1 and 2 to set the time and press “SET”... - Page 36 level 1 level 2 level 3 level 4 value 03 - set thermostat 01 - activate thermos. 01 - activate thermos. on/off 02 - day programme 01 - daily thermostat on/off 02 - start 1 day hour 03 - stop 1 day hour 04 - start 2 day hour...
- Page 37 35 - friday prog. 4 on/off 36 - saturday prog. 4 on/off 37 - sunday prog. 4 on/off 04 - week-end program. 01 - therm. week-end 02 - start 1 03 - stop 1 04 - start 2 05 - stop 2 input menu level Menu 03 SET CHRONO...
- Page 38 PROGRAMME 1 PROGRAMME 2 menu level selection meaning possible values menu level selection meaning possible values 02-03-02 START PROGRAM 1 activation time time - OFF 03-03-11 START PROGRAM 2 activation time time - OFF 02-03-03 STOP PROGRAM 1 shut-off time time - OFF 03-03-12 STOP PROGRAM 2...
- Page 39 Failure on electrical devices Mancata accensione If the fl ame does not light up during the switching on or if the smokes temperature does not reach a suitable value in the “A la r N o Acc ”. foreseen time gap, the thermostove switches off and you will read the words on the display.
-
Page 40: Safety Devices
Safety devices Pressure switch: monitors Reduction motor: Flue temperature Electrical safety: sensor: thermocouple that depression in the smoke if the motor stops, the stove is protected against duct. It is designed to shut thermostove continues to measures the temperature violent surges of current down the pellet feed screw function until the fl ame goes of the fumes while keeping... -
Page 41: Maintenance And Cleaning
Maintenance and cleaning All cleaning of all parts must be carried out with the Thermostove completely cold and unplugged to avoid burns and thermal shock. The Thermostove does not need much maintenance if used with certifi ed quality pellet. The need for maintenance varies depending on the conditions of use (switching on and off repeatedly) and depending on the performance required. - Page 42 Cleaning exchanger - stove off Fouling act as insulation and the thicker they are, the lower the heat that is transmitted to the water and to the structure generally. Therefore very important to perform the cleaning of the tube bundle, said exchanger also, to prevent the fouling of the same and prevent clogging and jamming of the cleaning device.
- Page 43 Check every 7 days Lower ash drawer cleaning Clean bottom ash from the fallen debris during operation. You can access the ash pan by loosening the two wing nuts that hold the drawer inspection. Remove the tray, empty and clean the wall and only the corners with a suction device or with dedicated tooling.
- Page 44 Maintenance and cleaning for all models Cleaning the steel flame-shell Every 2-3 days it is important to remove the steel flame- shell in order to clean it and remove the dirty that may fall during the cleaning of the exchange pipes. Shutting the Thermostove down In the period when the Thermostove is out of use it must be disconnected from the electricity mains.
- Page 45 To do this, the horizontal pin can be pulled through a hole in the wall of the Thermostove body. Now the upper section to the heat exchanger is free from any encumbrance so as to allow a perfect cleaning. Once a year is also recommended to clean the upper compartment of the exchanger.
- Page 46 In case of failure or inadequate cleaning of the heater may have function problems such as: • poor combustion • blackening of the glass • clogging of grate with accumulation of ash and pellets • ash deposit and excessive deposits on the heat exchanger resulting in poor performance. The check of electromechanical components must be performed only by qualified personnel with technical knowledge of electricity and combustion.
-
Page 47: Problems And Solutions
Problems and solutions All repairs must be carried out exclusively by a specialised technician, with the stove completely cold and the electric plug pulled out. Is prohibited from any unauthorized modification to the device and the replacement of parts with other non-original. The operations marked in bold type must be carried out by specialised personnel. - Page 48 1. Refill pellet hopper If it is first ignition the fuel, having to go the route that goes from the tank to the brazier, may not be able to arrive on time and in the right amount programmed 2. If after repeated ignitions did not appear in the 1.
- Page 49 Room thermostat In the automatic 1. Reset the thermostat temperature maximum 2. Check the operation of the sensor and replace position the 2. Temperature sensor defective if necessary thermostove always 3. Control panel defective or 3. Check the panel and replace if necessary runs at full power broken The thermostove...
- Page 50 1. Set the stove to a higher temperature. The maximum water temperature in the thermostove is 65 ° C and can not be set below 40 ° C or above 80 1. Incorrect setting maximum ° C. It is advisable to never adjust the temperature Condensation water temperature in the below 50/55 °...
- Page 51 GENERAL GUARANTEE GUARANTEE LIMITATIONS All products are subject to accurate testing and are covered Limited Warranty covers manufacturing defects, provided that by warranty for 24 months from the date of purchase, the product has not been damaged by improper use, impro- documented by invoice or purchase receipt that will be per handling, incorrect connection, tampering, and installation presented to authorized technicians.
- Page 52 NOTES...
-
Page 53: Installation
Authorised Technicians. See below for further details. Your first point of contact for warranty issues is your Authorised Kalor Dealer (where you purchased your stove). They can assist you with any issue that you may have. - Page 54 Wood Pellet Stoves.ie Newport, Co. Mayo, Ireland Tel: 086 012 7744 Email: info@woodpelletstoves.ie Web: www.woodpelletstoves.ie...
Need help?
Do you have a question about the Ada 28B and is the answer not in the manual?
Questions and answers