
Subscribe to Our Youtube Channel
Related Manuals for Kalor Francesca 17B


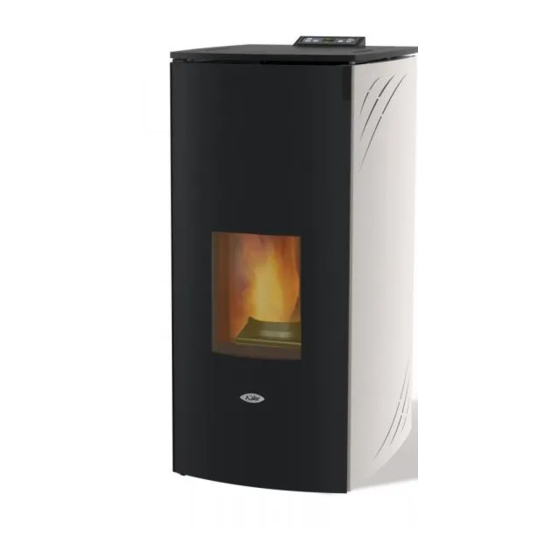
Summary of Contents for Kalor Francesca 17B
- Page 1 USER MANUAL Francesca 17B/17B DD Boiler Stoves Instructions for the correct use and maintenance of your Kalor wood pellet boiler stove Distribution and warranty in Ireland by:...
- Page 2 Please refer to the notes on the inner back cover of this manual for further details regarding the installation, commissioning and warranty for your stove/boiler. We wish you all the best with your new Kalor stove/boiler and hope it serves you well for many, many years.
-
Page 3: Dear Customer
Dear Customer, We thank you for having chosen one of our products, the fruit of technological experience and of continual research for a superior quality product in terms of safety, dependability, and service. In this manual you will find all the information and useful suggestions to use your product with the maximum safety and efficiency. - Page 4 ATTENTION: This warning sign indicates that the message to which it refers should be carefully read and understood, because failure to comply with what these notices say can cause serious damage to the thermostove and put the user’s safety at risk. INFORMATION: This symbol is used to highlight information which is important for proper thermostove operation.
- Page 5 Charge pellet Fuel is loaded from the upper part of the • Do not dump the ashes; thermostove by opening a door. • Do not open the ash tray; Pour the pellets in the hopper. This is easier if • Be careful that children do not come near; performed in two steps: •...
- Page 6 Instructions for safe and effi cient use • The device can be used by children that are not • Pay attention that the power cord (and any other less than 8 years old and people with reduced cables external to the appliance) do not touch hot physical, sensory or mental capabilities, or lack parts.
-
Page 7: Operating Area
Operating area For proper functioning and a good temperature Installation studio fl ats, distribution, the thermostove shoul be positioned bedrooms and bathrooms in only in a location where it is able to take in the air permitted for airtight or closed necessary for combustion of the pellet (about chamber equipment with an adequate 40 m... -
Page 8: Technical Specification
Technical Specification RITORNO RETURN 3/4" M RITORNO RITORNO MANDATA RETURN ASPIRAZIONE ARIA RETURN DELIVERY AIR INLET 3/4" M 3/4" M 3/4" M 80 mm Ø ASPIRAZIONE ARIA ASPIRAZIONE ARIA ESPULSIONE FUMI AIR INLET AIR INLET EXHAUST SMOKE 80 mm 80 mm Ø... - Page 9 G 3/4" G 3/4" G 3/4" Attenzione Attenzione Le posizioni dei tubi quotate nella vista posteriore sono Le posizioni dei tubi quotate n puramente indicative e con tolleranza di +/- 10mm puramente indicative e con to TOLLERANZE GENERALI DI LAVORAZIONE Materiale TOLLERANZE GEN DIMENSIONI LINEARI...
- Page 10 IDRO17 -DD-AU PARAMETER TH17 UNIT OF MEASURE XSAT170-DD-AU REDONDAGLTH17-AU Heat input 18,03 17,6 Nominal heat output 17,14 16,5 Reduced nominal heat output 4,00 CO concentration at nominal reference (13% O2) 13,70 15,0 CO concentration at reduced reference (13% O2) 3,10 Nominal efficiency mg/m 48,23...
- Page 11 Flue The following instructions have the purpose of The minimum distances to comply with from any giving instructions on installation of a good flue, chimneys or reflux zones are outlined below. however they do not replace in any way the standards in force of which a qualified builder must Check the negative pressure between the flue be aware.
-
Page 12: Remote Control
Flue connection The joint between the Thermostove and the fl ue must be installed using suitable tubes (min. T200). Use is forbidden of fl exible metal tubes, in cement fi bre or aluminium. The slope of the smoke duct must not have horizontal sections over 2 metres and must have a minimum 3% inclination. - Page 13 Directions for use Replenishment of the System If the installation of the thermostove provides The replenishment has to be slowly carried out in interaction with another existing system complete order to let the air bubbles fl ow out through the with a heater (gas thermostove, gas thermostove, right oulets that are placed on the heating system.
- Page 14 The loading valve is required and must be • Close the vent’s valves of the radiators as soon as provided in the hydraulic system. the air fl ows out; • check through the pressure gauge placed in the This operation must be carried out with caution system that the pressure is reaching 1 bar (this is following these steps: required only for systems with closed vase, you...
- Page 15 Confi guration of the hydraulic diagram of the thermostove BY A SPECIALIZED TECHNICIAN Before starting the thermostove, it is necessary to confi gure the hydraulic scheme on which we want to work. The thermostove is set up to receive the clean contact of an external thermostat (open / closed, the thermostat must not give tension to the back.
- Page 16 By a specialized technician To confi gure the hydraulic diagram, press the SET key and then scroll to the “Technical settings” menu with the power key. PPress the SET key again to enter the menu and enter the access key in possession of only with the power key.
- Page 19 17 17...
- Page 21 19 19...
- Page 29 Ignition Remove any components which might burn from the firebox and from the glass (various instructions and adhesive labels) Charge pellet Fuel is loaded from the upper part by opening a door. Pour the pellets in the hopper. When empty, this is easier if performed in two steps: •...
- Page 30 Preliminary checks Before switching on the machine, make sure that the pellet hopper is full, the combustion chamber is clean, the glass door is closed, the power supply plug is connected and the switch on the back is set to “1.” Information on the display TURNED OFF BRAZIER CLEANING...
-
Page 31: Programming Menu
Programming menu Menu 02 SET CLOCK To access the set clock option, press the “SET” button (3), with the button (5) scroll through the submenus until MENU 02 - SET CLOCK and with buttons 1 and 2 select the current day. Press the “SET”... - Page 32 level 1 level 2 level 3 level 4 value 03 - set thermostat 01 - activate thermos. 01 - activate thermos. on/off 02 - day programme 01 - daily thermostat on/off 02 - start 1 day hour 03 - stop 1 day hour 04 - start 2 day hour...
- Page 33 Menù 03 SET CHRONO Sous menù 03 - 01 - activation chrono M-3-1-01 PERMETT Il permet d’activer et de désactiver toutes les CHRONO fonctions de chrono-thermostat. Sous menu 03 - 02 - programme quotidien 08:15 M-3-2-02 Il permet d’activer, de désactiver et de régler les START 1 fonctions de chrono-thermostat journalier.
- Page 34 PROGRAMME 1 PROGRAMME 2 niveau menu sélection signification valeurs possibles niveau menu sélection signification valeurs possibles 03-03-02 START PROGRAM 1 heure d’activation heure - OFF 03-03-11 START PROGRAM 2 heure d’activation heure - OFF 03-03-03 STOP PROGRAM 1 heure désactivation heure - OFF 03-03-12 STOP PROGRAM 2...
- Page 35 Menu 05 - stand-by mode menù level Menu 05 - stand-by mode menù level Press the SET key. Using the key (2), go to Press the SET key. Using the key (2), go to menu 05 and confirm with the SET key. Using the menu 05 and confirm with the SET key.
-
Page 36: Alarm Signals
Alarm signals In the event of a working defect, the system informs the user about the type of failure occurred. The following table summarises the alarms, kind of problem and possible solution: Display Kind of problem Solution As soon as the power supply is back, the Thermostove starts a ALAR 1 BLACK OUT There is no power supply... - Page 37 Failure on electrical devices Mancata accensione If the flame does not light up during the switching on or if the smokes temperature does not reach a suitable value in the foreseen time gap, the thermostove switches off and you will read the words “ L I G H T I N L I G H T I N ”.
-
Page 38: Safety Devices
Safety devices Pressure switch: monitors Reduction motor: Flue temperature Electrical safety: sensor: thermocouple that depression in the smoke if the motor stops, the thermostove protected duct. It is designed to shut thermostove continues to measures the temperature against violent surges of down the pellet feed screw function until the flame goes of the fumes while keeping... -
Page 39: Maintenance And Cleaning
Maintenance and cleaning All cleaning of all parts must be carried out with the Thermostove completely cold and unplugged to avoid burns and thermal shock. The Thermostove does not need much maintenance if used with certifi ed quality pellet. The need for maintenance varies depending on the conditions of use (switching on and off repeatedly) and depending on the performance required. -
Page 40: Cleaning Of Stainless Steel And Satin-Finish Surfaces
The decreased or absent cleaning can Avoid contact with skin cleanser cause misfire and cause damage to the and eyes. In case this happens, thermostove and the environment sprinkle with plenty of water and (possible emissions of soot and contact the nearest medial center. unburned). - Page 41 Cleaning the interior baffle / smoke fan compartment. Inside the compartment where there is the ash tray, there is a second cover, fixed by the cockerels, which gives access to the compartment at the base of the duct dedicated to the flue and the wall of the fume extractor fan.
- Page 42 Self-cleaning brazier cleaning Check every 2/3 days Clean the brazier from the ash and any rest with the Cleaning the ash collection compartment appropriate tool. They could obstruct the air passages. Clean and empty the ash tray being careful with If the pellet in the tank is exhausted, there might be hot ash.
-
Page 43: Problems And Solutions
Check every 7 days Cleaning the interior baffle / smoke fan compartment. Lower ash drawer cleaning Remove the side of the thermostove. Now the tube Clean bottom ash from the fallen debris during for the air aspiration is visible. In the lower part there operation. - Page 44 Anomalies related to the scope mechanical or electronic PROBLEM POSSIBLE CAUSE REMEDY 1. Refill pellet hopper 1. Pellet hopper empty 2. Empty the hopper and manually free the 2. Feeder screw blocked by sawdust feeder screw of sawdust Pellet not being fed 3.
- Page 45 PROBLEM POSSIBLE CAUSE REMEDY 1. Check that the room air intake is present and free. Check that the pipe Ø 5 cm for air inlet is not obstructed. 1. Insufficient combustion air Clean the grate and check that all the airways are clear. Pellet build up in grate, 2.
- Page 46 Anomalies related to the plumbing circuit PROBLEM POSSIBLE CAUSE REMEDY 1. Free up the circulator by removing the plug and Radiators cold in winter 1. Circulator does not run because turning the shaft with a screwdriver. but the thermostove blocked Check the electrical connections of the same, boils 2.
- Page 47 GENERAL GUARANTEE - Any damage caused by inadequate installation and / or shortages of the consumer. All products are subject to accurate testing and are covered by warranty for 24 months from the date of The images are purely indicative and may not match purchase, documented by invoice or purchase receipt the reality of the product.
- Page 48 NOTES...
-
Page 49: Installation
Authorised Technicians. See below for further details. Your first point of contact for warranty issues is your Authorised Kalor Dealer (where you purchased your stove). They can assist you with any issue that you may have. - Page 50 Wood Pellet Stoves.ie Newport, Co. Mayo, Ireland Tel: 086 012 7744 Email: info@woodpelletstoves.ie Web: www.woodpelletstoves.ie...
Need help?
Do you have a question about the Francesca 17B and is the answer not in the manual?
Questions and answers