Table of Contents
Advertisement
Quick Links
CREATING POSITIVE CUSTOMER EXPERIENCES
INSTALLATION INSTRUCTIONS
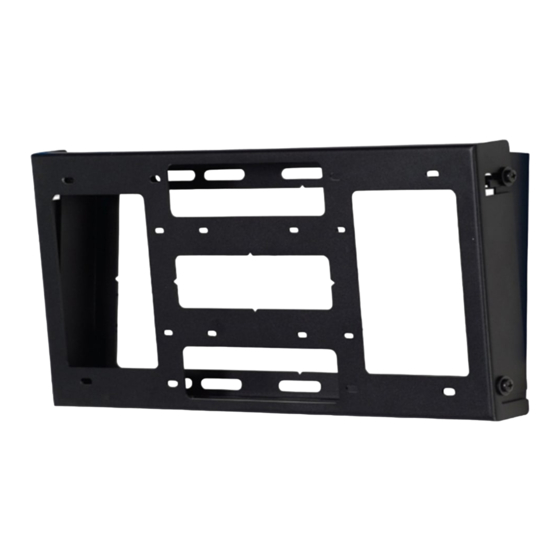
VESA Tilting GearBox Mount
NORTH AMERICA
3130 East Miraloma Avenue
Anaheim, CA 92806 USA
USA and Canada
Phone: 1-800-368-9700
Fax: 1-800-832-4888
Other Locations
Phone: (001)-714-632-7100
Fax: (001)-714-632-1044
GB-VESA42
Swallow House,
Shilton Industrial Estate,
Shilton, Coventry, England CV79JY
Phone: +44 (0) 2476 614700
Fax: +44 (0) 2476 614710
9533-009-011-00
EUROPE
Advertisement
Table of Contents

Summary of Contents for Premier Mounts GB-VESA42
- Page 1 CREATING POSITIVE CUSTOMER EXPERIENCES INSTALLATION INSTRUCTIONS GB-VESA42 VESA Tilting GearBox Mount NORTH AMERICA EUROPE 3130 East Miraloma Avenue Swallow House, Anaheim, CA 92806 USA Shilton Industrial Estate, USA and Canada Shilton, Coventry, England CV79JY Phone: 1-800-368-9700 Phone: +44 (0) 2476 614700...
-
Page 2: Table Of Contents
PROPER SAFETY EQUIPMENT AND TOOLS FOR THE ASSEMBLY PROCEDURE TO PREVENT PERSONAL INJURY. PREMIER MOUNTS DOES NOT WARRANT AGAINST DAMAGE CAUSED BY THE USE OF ANY PREMIER MOUNTS PRODUCT FOR PURPOSES OTHER THAN THOSE FOR WHICH IT WAS DESIGNED OR DAMAGE CAUSED BY... -
Page 3: Installation Tools
** Optional tools for concrete installations. Parts List Your Premier Mounts product is shipped with all proper installation hardware and components. Make sure that none of these parts are missing and/or damaged before beginning installation. If there are parts missing and/or damaged, please stop the installation and contact Premier Mounts (800) 368-9700. -
Page 4: Mounting Hardware
M6 x 30mm Phillips Head Screw (Qty 4) (Qty 4) M6 x 45mm Phillips Head Screw M5 x 30mm Phillips Head Screw (Qty 4) (Qty 4) M5 x 45mm Phillips Head Screw (Qty 4) Page 4 Installation Instructions Visit the Premier Mounts website at http://www.premiermounts.com... -
Page 5: Features
100mm, 200 x 100mm, 200 x 200mm, 400 x 200mm mounting configurations. Universal Spacers Premier Mount’s uniquely designed spacers that fit multiple screw sizes work with the GB-VESA42 Installation Instructions Page 5 Visit the Premier Mounts website at http://www.premiermounts.com... -
Page 6: Installing The Wall Plate
Determining the Mounting Surface If you will be installing your GB-VESA42 mount to wood studs, proceed to the “Wood Stud Installation” section. If you will be installing your GB-VESA42 mount to a concrete wall, proceed to the “Concrete Installation” section. - Page 7 Drill a “pilot hole” in the center of each of the marks with a power drill and a ¼″ drill bit. Only use ¼″ drill bit when drilling the pilot holes. Installation Instructions Page 7 Visit the Premier Mounts website at http://www.premiermounts.com...
-
Page 8: Concrete Installation
4) Set the wall plate to one side in a safe location. Step 2 Use a power drill and ″ concrete drill bit to drill a hole at each of the marks. Page 8 Installation Instructions Visit the Premier Mounts website at http://www.premiermounts.com... -
Page 9: Mounting Hardware
Toothpick or Toothpick Mark Mark If Yes, you must install Universal Spacers. Proceed to the “Universal Spacer Installation” section. If No, skip to the “Flat Panel Plate Installation” section. Installation Instructions Page 9 Visit the Premier Mounts website at http://www.premiermounts.com... -
Page 10: Universal Spacer Installation
Make sure the brackets are safely resting on the hinge pins before letting go of the display. Proceed to the “Securing the GB-VESA42 Mount” section. Page 10 Installation Instructions Visit the Premier Mounts website at http://www.premiermounts.com... -
Page 11: Securing The Gb-Vesa42 Mount
19.250 15.748 7.874 8° 3.937 229.64 7.874 3.937 9.041 406.40 53.38 16.000 2.102 SECTION d-d 292.10 11.500 177.80 7.000 165.10 200.03 234.95 6.500 7.875 9.250 58.69 2.311 425.45 16.750 Installation Instructions Page 11 Visit the Premier Mounts website at http://www.premiermounts.com... -
Page 12: Warranty
What Premier Mounts Will Do At the sole option of Premier Mounts, Premier Mounts will repair or replace any product or product part that is defective. If Premier Mounts chooses to replace a defective product or part, a replacement product or part will be shipped to you at no charge, but you must pay any labor costs.


Need help?
Do you have a question about the GB-VESA42 and is the answer not in the manual?
Questions and answers