
Related Manuals for Premier Mounts P2642T


Summary of Contents for Premier Mounts P2642T
- Page 1 P2642T Installation Guide Tilting Low-Profile Mount for Flat-Panels www.mounts.com | North America 800.368.9700 | International +1-714-632-7100 1321 S. State College Blvd., Fullerton, CA 92831 USA...
- Page 2 LES SUPPORTS PREMIER MOUNTS NE GARANTISSENT PAS CONTRE LES DOMMAGES CAUSÉS PAR L’USAGE DU PRODUIT DE MONTAGE PREMIER MOUNTS À D’AUTRES FINS QUE CELLES POUR LESQUELLES IL A ÉTÉ CONÇU OU DES DOMMAGES CAUSÉS PAR DES ACCESSOIRES OU DES MODIFICATIONS NON AUTORISÉS, ET NOUS NE POUVONS PAS ÊTRE TENUS RESPONSABLES DES DOMMAGES, PLAINTES, RÉCLAMATIONS, POURSUITES, ACTIONS OU CAUSES D’ACTION DE N’IMPORTE...
-
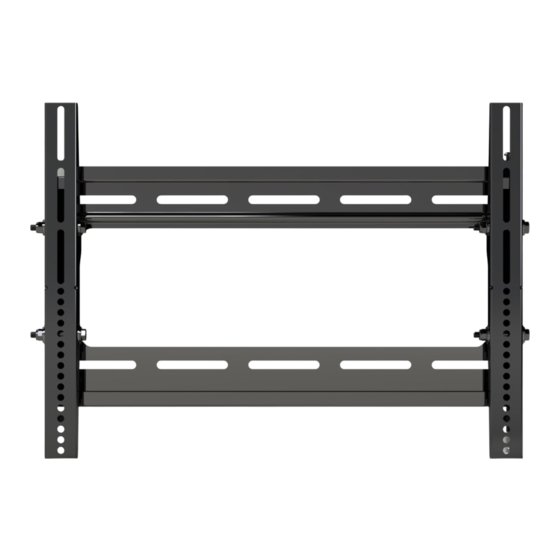
Page 3: Included Components
P2642T Installation Guide Included Components Wall Mount Bracket (Qty 1) (Qty 2) 5/16” Flat Washers Universal Spacers Lock-it Barrel Thread Depth Indicator Universal Washers (Qty 4) (Qty 8) (Qty 1) (Qty 1) (Qty 4) Finned Anchor 5/16” x 3” Lag Bolts... -
Page 4: Wood Stud Installation
P2642T Installation Guide Introduction Directional Mounting Arrow The Directional Mounting Arrow stamped into the top of the P2642T wall mount indicates which edge is the top. Wood Stud Installation Minimum of 2 by 4 wood stud to be used Minimum de 2 par 4 bois goujon pour être utilisé... - Page 5 P2642T Installation Guide Place the wall plate against the wall and align it with the pilot hole. Insert one (1) 5/16″ x 3″ lag bolt and one (1) 5/16″ washer into the up per right mounting hole and tighten using a socket wrench and 1/2” socket.
- Page 6 P2642T Installation Guide Concrete Installation Two people are recommended for this step: one person to level the wall plate and another person to mark the mounting locations. Il est recommandé deux personnes pour cette étape : une personne pour niveler la sablière et une autre personne pour marquer les emplacements de montage.
-
Page 7: Selecting The Mounting Hardware
P2642T Installation Guide Selecting the Mounting Hardware Insert a small straw or toothpick into the threaded inserts found on the back of the flat-panel. Use a pencil to mark the depth of the threaded insert on the small straw or toothpick. -
Page 8: Universal Washer Installation
Universal Spacer Installation Premier Mounts’ Universal Spacers allow you to attach the mounting bracket to flat panels which have recessed or uneven mount points. Each Universal Spacer adds ¼˝ to the distance between the mounting bracket and your flat panel. - Page 9 P2642T Installation Guide Attaching the Mounting Bracket to the Flat Panel This section presumes that you have read and understood these sections: ● Selecting the Proper Mounting Hardware ● Universal Washer Installation ● Universal Spacer Installation 1) Place your flat panel screen-side down on a soft, flat surface.
-
Page 10: Attaching The Flat Panel To The Wall Plate
P2642T Installation Guide Attaching the Flat Panel to the Wall Plate This section requires two people. Cette section exige deux personnes. Do not release your flat panel until you are certain that top and bottom hooks of both mounting brackets are securely seated on the upper and lower mounting rails of the wall panel. -
Page 11: Tilt Adjustment
Utilizing the Security Barrel Your P2642T Mount includes one (1) Security Barrel which can provide additional theft deterrence for your flat panel. PCB-CSL1 Security Cable 1) Thread the cable through the hole on the security barrel. - Page 12 Premier Mounts intends to make this manual accurate and complete. However, Premier Mounts makes no claim that the information contained herein covers all details, conditions or variations, nor does it provide for every possible contingency in connection with the installation or use of this product.
Need help?
Do you have a question about the P2642T and is the answer not in the manual?
Questions and answers