
Subscribe to Our Youtube Channel
Related Manuals for Wexiodisk WD-PRM6


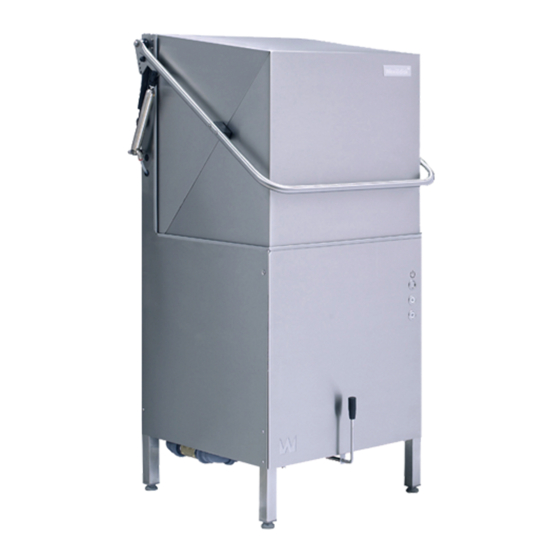
Summary of Contents for Wexiodisk WD-PRM6
- Page 1 PRE-RINSE MACHINE WD-PRM6 and WD-PRM7 (Translation of the original documentation) Read the manual before using the machine! Installation and user manual S/N: (En) Valid from: 201902 Rev.: 5.0...
-
Page 3: Table Of Contents
WD-PRM6 & WD-PRM7 Rev. 5.0 (201902) 1. General instructions ................ 1 1.1 Symbols used ....................2 1.2 Machine rating ....................3 1.3 Checking that the machine and manual correspond ........3 1.4 EU Declaration of Conformity ................4 2. Safety instructions ................5 2.1 General information .................. - Page 4 WD-PRM6 & WD-PRM7 Rev. 5.0 (201902) 3.6 Installation and connection of auxiliary equipment and options ..... 16 3.6.1 Sinks ....................... 16 3.6.2 Booster pump, shared with dishwasher connected (option) ....17 3.6.3 Drain pump, shared with dishwasher connected (option) ....... 18 3.7 Trial operation ....................
-
Page 5: General Instructions
Keep this manual in a safe place so that it can and should be used by other op- erators of the machine. • The WD-PRM6/7 can only replace manual pre-rinsing of items. In future, the items must still be washed and rinsed out in a dishwasher. •... -
Page 6: Symbols Used
WD-PRM6 & WD-PRM7 Rev. 5.0 (201902) General instructions 1.1 Symbols used This symbol warns of situations where a safety risk may arise. The instructions given should be followed in order to prevent injury and dangerous situations. This symbol on a machine part warns of electrical equipment. The machine must be entirely non-live during servicing, turn off the power at the power switch and if required, the switch should be locked to prevent unintentional operation. -
Page 7: Machine Rating
WD-PRM6 & WD-PRM7 Rev. 5.0 (201902) General instructions 1.2 Machine rating The machine has two rating plates, one of which is placed at the bottom of one side of the machine and the other in the electrical cabinet. The technical informa- tion on the plates is also included on the machine's wiring diagram. -
Page 8: Eu Declaration Of Conformity
WD-PRM6 & WD-PRM7 Rev. 5.0 (201902) General instructions 1.4 EU Declaration of Conformity A so-called EU Declaration of Conformity is provided on delivery of the machine. CE_16_2 Contact details of the manufacturer (Wexiödisk AB, Mårdvägen 4, SE- 35245 Växjö, SWEDEN, Tel.: +46 470 771200, Fax: +46 470 23752, E- mail: wexiodisk@wexiodisk.com). -
Page 9: Safety Instructions
Warranty repairs must be performed by an authorised company. Contact an authorised service company to draw up a programme of preventive care and maintenance. For authorised service companies, please see www.wexiodisk.com or contact Wexiödisk AB. • The regular checks described in the manual must be carried out in accord-... -
Page 10: Transport
WD-PRM6 & WD-PRM7 Rev. 5.0 (201902) Safety instructions 2.2 Transport Handle the machine with care during unloading and transport; there is a risk of it tipping over. Never lift or move the machine without using the wooden packaging to support the stand. -
Page 11: Installation Instructions
The instructions should be used together with the machine’s wiring dia- gram. These can be found in the machine’s electrical cabinet. • The WD-PRM6/7 cannot be combined with a WD 6/7 that is fitted with a heat recovery package through the wastewater. •... -
Page 12: Requirements For The Installation Site
WD-PRM6 & WD-PRM7 Rev. 5.0 (201902) Installation instructions 3.2 Requirements for the installation site 3.2.1 Lighting In order to ensure the best possible working conditions during installation, opera- tion, servicing and maintenance, make sure that the machine is installed in a well- lit room. -
Page 13: Transport And Storage
WD-PRM6 & WD-PRM7 Rev. 5.0 (201902) Installation instructions 3.3 Transport and storage Always transport the machine in an upright position. Take care during transport, as there is a risk of tipping. NB: The machine must not be transported without a pallet or other support. Some form of support beam must always be used along the sides of the machine during transport. -
Page 14: Installation
WD-PRM6 & WD-PRM7 Rev. 5.0 (201902) Installation instructions 3.4 Installation 3.4.1 Preparing for the installation Check that there is sufficient room for the machine at the installation location. • Check that correct connections are available for water, electricity, drainage and possibly steam at the installation location. See TECHNICAL SPECIFI- CATIONS. -
Page 15: Connections
WD-PRM6 & WD-PRM7 Rev. 5.0 (201902) Installation instructions 3.5 Connections MIN.20 PRM_67_04_R3 Bleed for lifting cylinder (on machines with an automatic hood) (option) Electrical connection Water connection in the bottom of the washing tank for incoming water from the dishwasher. -
Page 16: Electrical Connection
Ensure that the drain connection is kept in place by using e.g. cable ties in the designated areas. Connecting the dishwasher The length of level pipe that is firmly fitted on WD-PRM6/7 varies depending on which dishwasher it should be connected with. WD-6x and WD-7x: WD400031.01 WD-12x: WD400031.03... - Page 17 B=Connecting pipe. Cut to a suitable length. • C=Connection for connecting pipe. • A=Water connection in the bottom of WD-PRM6/7's washing tank. The connection must be fitted with a bottom filter. (NB: No level pipe) • E=Drain connection in the bottom of WD-PRM6/7's washing tank. (Position and length of level pipe.)
- Page 18 B=Connecting pipe. Cut to a suitable length. • C=Connection for connecting pipe. • A=Water connection in the bottom of WD-PRM6/7's washing tank. The connection must be fitted with a bottom filter. (NB: No level pipe) • E=Drain connection in the bottom of WD-PRM6/7's washing tank. (Position and length of level pipe.)
-
Page 19: Adjustment Of Hinged Basket Conveyor
WD-PRM6 & WD-PRM7 Rev. 5.0 (201902) Installation instructions 3.5.5 Adjustment of hinged basket conveyor PRM_47747 • Adjust the machine so that it is level by adjusting all four feet so that they are in full contact with the floor. Use a spirit level. -
Page 20: Installation And Connection Of Auxiliary Equipment And Options
WD-PRM6 & WD-PRM7 Rev. 5.0 (201902) Installation instructions 3.6 Installation and connection of auxiliary equipment and options • Once the machine is in place and has been adjusted horizontally and ver- tically, the auxiliary equipment can be fitted. • The machine can be equipped with a number of options. Check what your machine is equipped with, which depends on the model, machine type and country. -
Page 21: Booster Pump, Shared With Dishwasher Connected (Option)
Because the dishwasher connected is fitted with a booster pump (possible op- tion), the WD-PRM6/7 can also use this. (47856) A: connect to water connection (5) on WD-PRM6/7 B: connect to the dishwasher's water connection See the wiring diagram for electrical connections. -
Page 22: Drain Pump, Shared With Dishwasher Connected (Option)
25mm gemensam_dp • A is connected to drain (4) on WD-PRM6/7. • B is connected to the inlet on the dishwasher's drain pump. • The drain hose (C) consists of a coiled hose and is connected to the floor drain (D) according to one of the alternatives in the image and to the drain of the dishwasher (3). -
Page 23: Trial Operation
WD-PRM6 & WD-PRM7 Rev. 5.0 (201902) Installation instructions 3.7 Trial operation Prepare the machine for trial operation with the help of OPERATING INSTRUC- TIONS. The instructions describe the measures that must be taken to prepare the machine for operation. 3.7.1 Start-up schedule This should be completed when the machine is started up and used. -
Page 24: Documentation
WD-PRM6 & WD-PRM7 Rev. 5.0 (201902) Installation instructions 6. Train and inform personnel concerning: • Pre-rinse • Care (daily, weekly and other frequencies) • Recommendation for annual service 3.8 Documentation For correct use and servicing, it is essential that the documentation accompany- ing the machine is made available to personnel who will be using the machine. -
Page 25: Operating Instructions
WD-PRM6 & WD-PRM7 Rev. 5.0 (201902) Operating instructions 4. Operating instructions Read the chapters GENERAL INSTRUCTIONS and SAFETY INSTRUCTIONS carefully before starting work. This chapter describes what must be done with the machine: • Before pre-rinsing • The way in which the pre-rinsing should be completed •... -
Page 26: Before Pre-Rinsing
WD-PRM6 & WD-PRM7 Rev. 5.0 (201902) Operating instructions 4.1 Before pre-rinsing 4.1.1 Machine design PRM_67_07_R3 “Autostart” (if the machine has this option, the hood is closed automatically when a basket is loaded in the machine.) (option) Tank filter Level pipe... -
Page 27: Preparations Before Filling
WD-PRM6 & WD-PRM7 Rev. 5.0 (201902) Operating instructions 4.1.2 Preparations before filling Check: • That the machine and removable parts have been cleaned. If not – clean them! • That there is no dirt in the nozzles of the wash arms (6) •... -
Page 28: Positioning Of Dishware In Baskets
WD-PRM6 & WD-PRM7 Rev. 5.0 (201902) Operating instructions 4.2.1 Positioning of dishware in baskets The machine is supplied with washing baskets depending on the equipment level. The washing baskets are used according to the following: The yellow basket is used for side plates, trays, plates, etc. -
Page 29: Machines With Manual Hood Lift
Middle position (downwards): Both the machine’s tanks are now open to the drain. The water in the machine does not normally need changing but this can be done. If you nevertheless want to change the water in WD-PRM6/7, this is what you should do: •... -
Page 30: Emergency Stop Function
WD-PRM6 & WD-PRM7 Rev. 5.0 (201902) Operating instructions 4.2.5 Emergency stop function If the machine needs to be stopped when it is in operation, use the buttons on the control panel. Press the 0/1 button (8) to turn off the power. Press the 0/1 button (8) to restart the machine. -
Page 31: Emptying
Machines without a drain pump • Press the 0/1 button (8). • Empty the tanks in WD-PRM6/7 and the connected dishwasher by turning the drain lever (10) to the middle position (downwards). Machines with a drain pump • Press the 0/1 button (8). -
Page 32: Cleaning Each Week Or As Required
WD-PRM6 & WD-PRM7 Rev. 5.0 (201902) Operating instructions 4.3.4 Cleaning each week or as required In addition to the daily cleaning measures, clean the machine as per these in- structions: • Remove the wash arms. Loosen the lock nut (A) in the centre of the wash arm and remove the wash arm. -
Page 33: Operating Problems
WD-PRM6 & WD-PRM7 Rev. 5.0 (201902) Operating instructions 4.3.5 Operating problems Troubleshooting The following errors can be dealt with by the operator. If the problem persists, contact authorised service personnel. PROBLEMS CAUSE ACTION The machine will not start. The main switch is off. -
Page 34: Technical Specifications
The manufacturer reserves the right to make changes to the technical data. TECHNICAL DATA Pump motor (kW) Booster pump (kW) * Tank volume (litres) Weight, machine in operation (kg), (WD-PRM6) Weight, machine in operation (kg), (WD-PRM7) Enclosure protection class (IP) * Option CAPACITY AND OPERATING DATA Total pre-rinse time (sec.) - Page 35 Technical specifications WATER, DRAIN AND VENTILATION CONNECTIONS Drain connection, PP pipe (ø mm) Water capacity, hood lift, pressure (kPa) (WD-PRM6) * Water capacity, hood lift, pressure (kPa) (WD-PRM7) * Water capacity, hood lift, flow (litres/minute) * Floor drain, capacity (litres/sec.) Heat load room, latent / sensitive / total (kW) 0.1 / 0.2 / 0.3...
Need help?
Do you have a question about the WD-PRM6 and is the answer not in the manual?
Questions and answers